How to Use a Web Cache Viewer: Everything You Need to Know

Pages on the internet don’t last forever.

Some disappear overnight without warning. Other times, servers go down, or maybe you’re simply curious what your website or someone else’s looked like ten years ago.

So how do you re-access this information?

You need a web cache viewer.

It’s a tool that helps you recover backups or snapshots of websites.

In this guide, we’ll go through some of the best web cache viewer tools to help you turn back time to find missing information or even spy on your competitors.

What Is a Web Cache Viewer?

A web cache viewer lets you see the older version or snapshot of any website, called a cache page. A cached page is a snapshot of the raw HTML and content of a page.

For example, when Google indexes your website, it takes a screenshot of what it looks like at the time and indexes it.

There are several tools to view an archived page, such as Google’s cache feature on search results and websites like the Wayback Machine dedicated to saving the internet’s history.

When to Use a Web Cache Viewer

A web cache viewer is a valuable tool to have in your back pocket. Here are a few times you might want to use this handy tool.

A Website Is No Longer Available

Need to get information from a page with a pesky 404 error? A web cache viewer can help you see the last archived version before it went offline.

A Page You Want to View Has Changed

If a website went through a major makeover, you could use the cached version to revert the site to what it used to look like. This is particularly helpful for doing competitor analysis. For example, if a competitor suddenly overtook your site in the search results, you can look at older versions of their site to see what they changed.

Improve Your SEO

Not seeing the SEO results you want? Did you know page caching can improve your site speed by reducing server load time by up to 80 percent? Viewing the cached version shows you what Google sees when it crawls your page. If your website is not cached, it can increase your page load times and drastically affect your bounce rate.

View a Page Faster

If the web page is slow or unresponsive, you can use the cached version to see a snapshot of the site the last time Google indexed the page. Although a cached page won’t always have up-to-date information, it can help you save time.

Check When Google Last Indexed a Page

It’s helpful to know when the last time Google bots successfully visited your page, especially if you’re making changes to your site.

By viewing the cached version, you can see if a page is unresponsive, how it is being cached, and if there is anything you need to un-do.

Web Cache Viewer Tools and Tricks

While viewing cached versions sounds like an admin nightmare, several tools make the process easy, simple, and fast.

1. Use a Chrome Extension

Not using Chrome extensions? You’re missing out.

Google’s Chrome extensions are programs you can install to your browser to change its functionality.

For example, you can add extensions that:

  • Block ads from displaying on any site you visit.
  • Pin any image to your Pinterest boards.
  • View the DA of any website.
  • Quickly access any of your passwords with a password manager.

The Web Cache Viewer Chrome extension makes it easy for you to view a snapshot of the page you’re visiting. This is useful if you come across a 404 error and want to revert to the older version to see the information.

Wayback Machine Vs. Google Cache on the Chrome Extension

The Web Cache Viewer extension will:

  • Let you view the Google Cache or Wayback Machine versions.
  • Intelligently redirect you to the archived page instead of taking you to the archive selection screen on the Wayback Machine website.

Which option should you use? The Wayback Machine or Google Cache?

It comes down to what result you want from the tool.

For example, if you want to check Google is caching your site, or you need to view the last cached page of a site, Google Cache is the best option for you.

However, if you want to turn back the wheels of time and dig through a website’s past, you’ll want to use the Wayback Machine.

How to Use the Chrome Extension’s Web Cache Viewer With Wayback Machine or Google Cache

Got five minutes? That’s all you need to set up the extension and start using its caching functionalities.

Here’s what you need to do.

Step 1: Install the Web Cache Viewer onto your Chrome and activate the extension.

Web Cache Viewer - Chrome extension

Step 2: Go to the target URL of your choice, right-click on the page, and scroll down to “View Cached Version.”
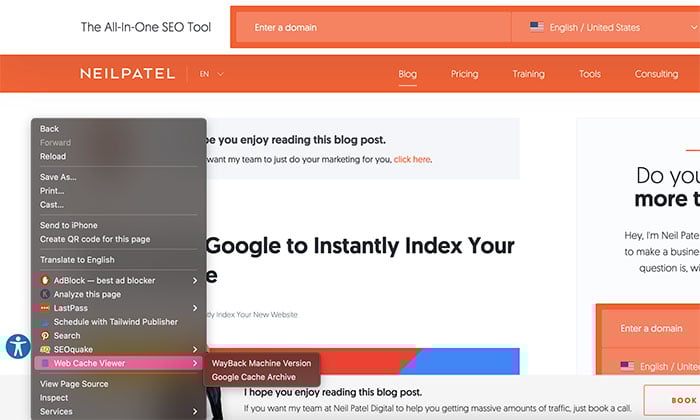
How to Use the Chrome Extension's Web Cache Viewer With Wayback Machine or Google Cache

Step 3: Select either the Google Cache or Wayback Machine option.

After choosing, the extension will show you the Wayback Machine URL for the page or show you the last Google cached version.
Web Cache Viewer Tools and Tricks - How to Use the Chrome Extension

2. Use Google Search to Find Cached Pages

Each time Google crawls a web page, it creates a backup, which becomes part of Google’s cache.

How to Get a Cached Link With Google Search

Step 1: Do a Google search on your computer for the page you want to find.
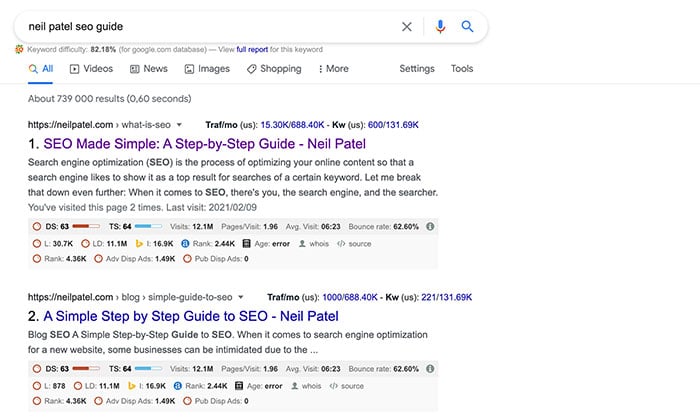
Web Cache Viewer - How to Get a Cached Link With Google Search

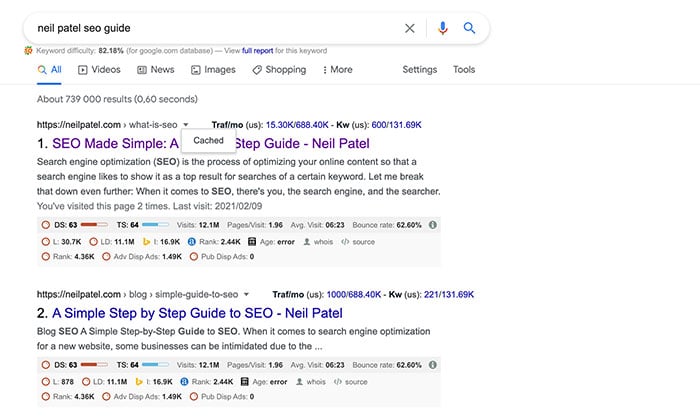
Step 2: When the search results load, click on the down arrow next to the site’s URL and select “Cached.”
Web Cache Viewer Tools - Use Google Search to Find Cached Pages

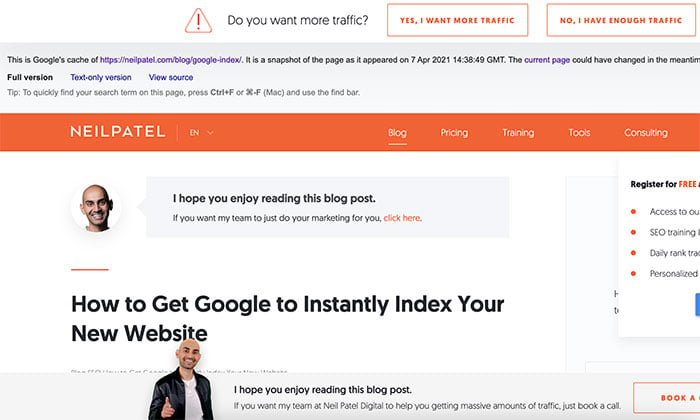
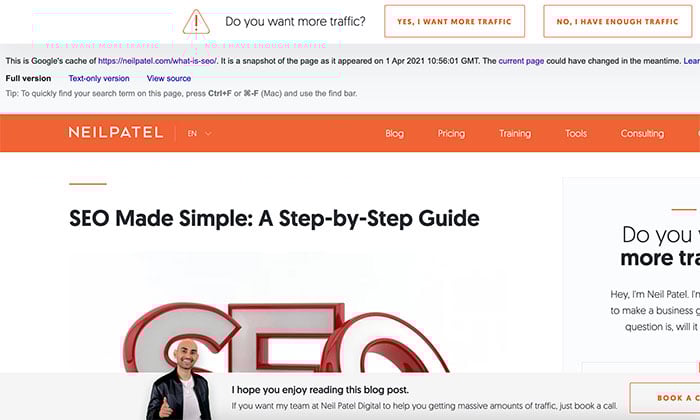
Step 3: The cached version of the page will load. You can view the “Full Version,” “Text-Only Version,” or “View Source.”
Web Cache Viewer Tools - Use Google Search to Find Cached Pages (NeilPatel Example)

Keep in mind that you won’t be able to navigate to other pages on the site. If you do, it will take you to the live version. You can also access the live page by clicking on the “Current Page” link at the top of the page.

3. Use the Address Bar in Chrome to Find Cached Pages

Struggling to find the page you want via search results? If you have the Chrome browser, you can use the address bar to get the cached version of any URL.

How to Get a Cached Link With The Address Bar in Chrome

Step 1: Open the Chrome browser.

Step 2: Type “cache” in the address bar followed by the URL. For example, “cache:https://neilpatel.com”
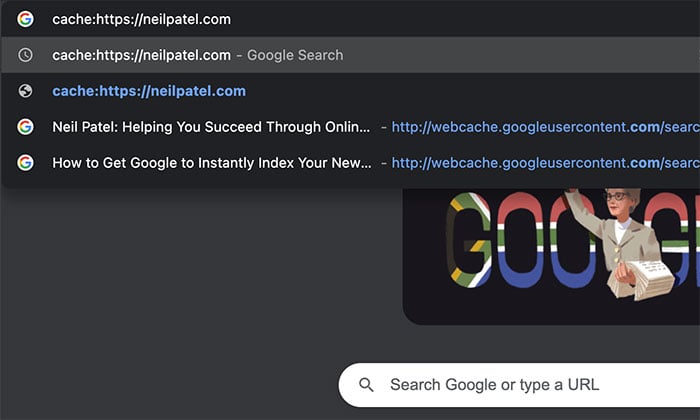
Web Cache Viewer Tools - Use the Address Bar in Chrome to Find Cached Pages

Step 3: The cached version will load, and you’ll have the same three version formats to choose from with the Google search method.
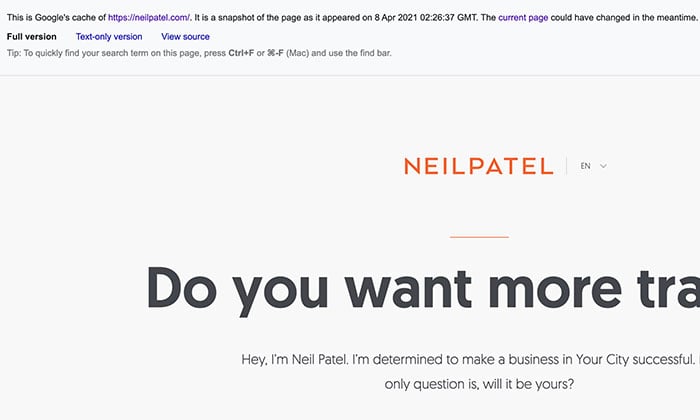
Web Cache Viewer - How to Get a Cached Link With The Address Bar in Chrome

4. Use the Archive Today Web Cache Viewer

Wish you could travel back in time? Well, you can with Archive.Today.

The website is a time capsule for the internet. It takes a snapshot of a page and stores it forever, even if the original disappears.

The site saves text and graphics and will give you a link to the unalterable record of the web page.

The only catch?

You need to manually submit web pages and can only view entries that have previously been saved.

How to Get a Cached Page With Archive.Today

Step 1: Go to Archive.Today and scroll down to “I want to search the archive for saved snapshots.”

Step 2: Enter the URL you want to search.
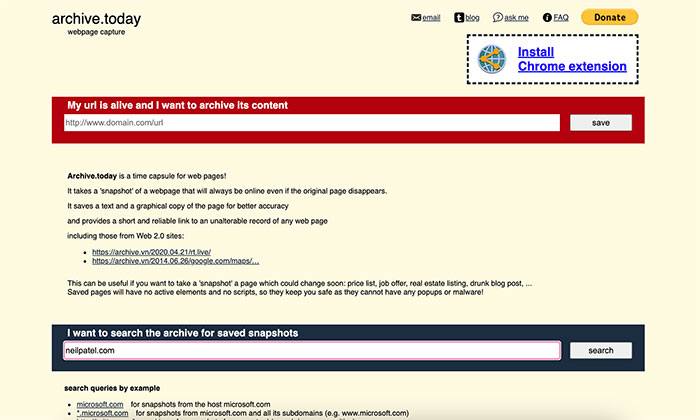
Web Cache Viewer Tools - Use the Archive Today Web Cache Viewer

Step 3: A new page will load, and you’ll see snapshots listed from oldest to newest. Click on the one you want to view.
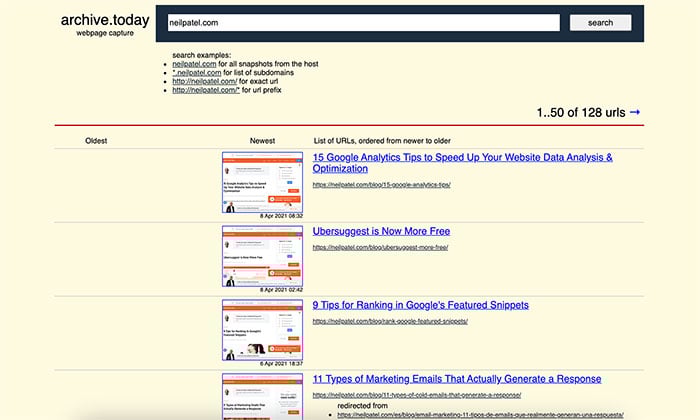
Web Cache Viewer Tools - Archive Today Example

A secure, non-editable version of the page will load. You have the option to download the zip file, share the link, and view the webpage or screenshot.

Web Cache Viewer Tools - Example of Cached Page with Archive Today

5. Use Wayback Machine’s Desktop Web Cache Viewer

The Internet Archives runs the Wayback Machine. It’s a non-profit building a digital library of the internet’s history.

You can explore more than 553 billion cached web pages, and the site hosts an archive of text, video, audio, software, and images.

How to View a Cached Page With The Wayback Machine

Step 1: Go to Archive.org and enter the URL or keyword you want to view in the Wayback Machine search bar.
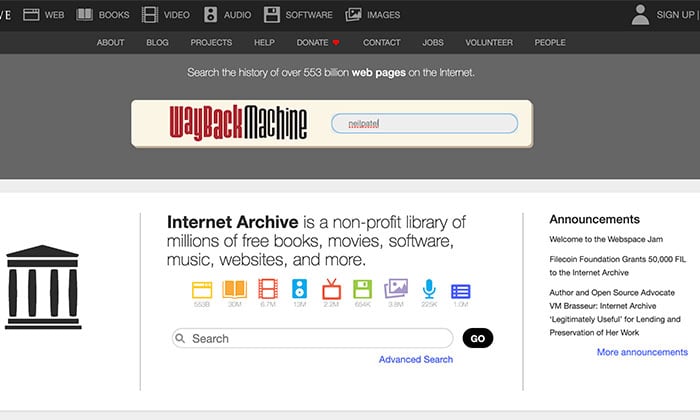
Web Cache Viewer Tools - Use Wayback Machine's Desktop Web Cache Viewer

Step 2: A search results page will load. Click on the URL of the page you want to view.
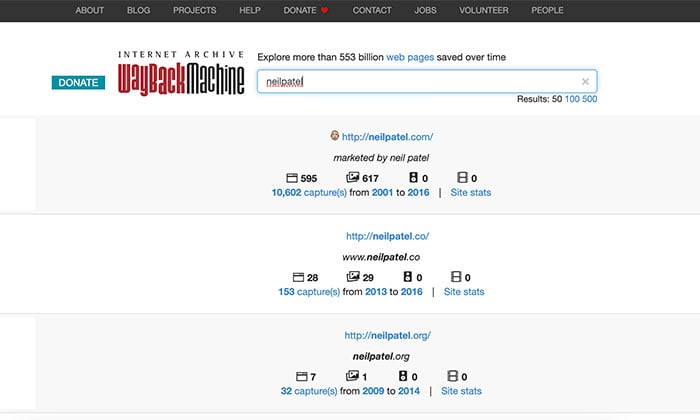
Wayback Machine's Desktop Web Cache Viewer

Step 3: Use the calendar at the top of the page to see what the website looked like during a specific time period.
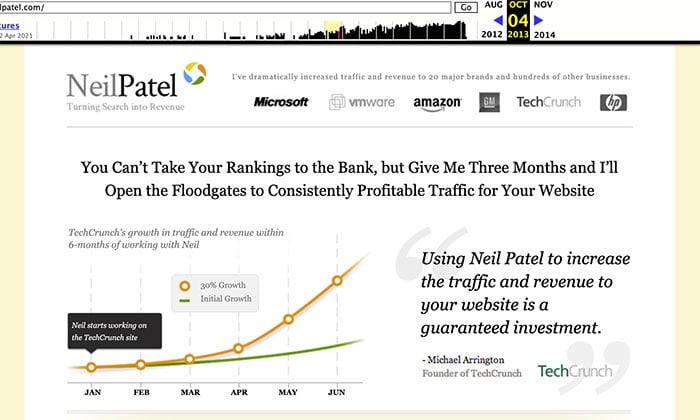
Web Cache Viewer Tools - How to View a Cached Page With The Wayback Machine

For example, if you search neilpatel.com, you can see what my blog was like in 2013!

Don’t want to log onto the Wayback Machine every time you want to view a cached page? Download the Chrome extension.

If your site is not on the Wayback Machine, you can manually submit your URL, and it will automatically create a snapshot for you. This is useful if you want to track how your site evolves through the years.

6. Use Cached Page Web Cache Viewer

Cachedpage.co is a website that consolidates a few of the tools I’ve mentioned already.

Once you type the URL of the page you want to view, you have three options to choose from:

  • Google Web Cache
  • Internet Archive
  • Website

Select the one you want to use, and Cached Page will redirect you to those respective sites.

It doesn’t do any caching itself, so this site is only useful if you want to save time hopping between caching tools.
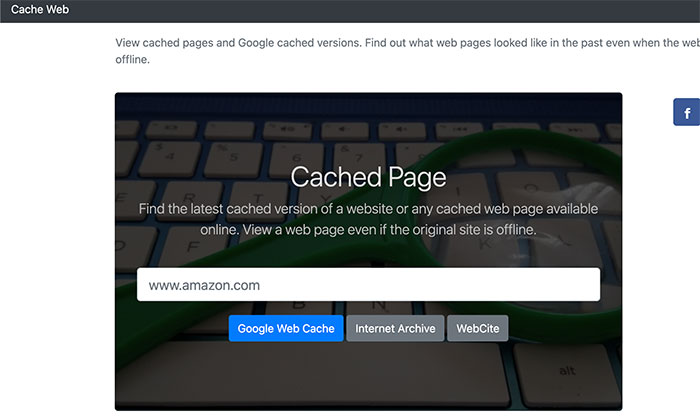
Use Cached Page Web Cache Viewer

Conclusion

As you can see, a web cache viewer is an important SEO and marketing tool to have in your online arsenal.

It can quickly help you find information removed from the internet, see how your site has changed over the years, and tell you if Google isn’t indexing your site correctly.

While there are many tools available, remember to keep intent in mind. Do you only want to view the last cached version of a page, or do you need to go further back into time?

Your answer will help you find the right solution to your caching problem.

What’s your favorite web cache viewer tool, and how to use it?

Best WordPress Cache Plugin

Disclosure: This content is reader-supported, which means if you click on some of our links that we may earn a commission.

Three seconds. 

That’s all your visitors give you when they come to your website. If your website takes any longer to upload, 40% of people will abandon it. 

What’s worse, a one-second delay in page response can cause a 7% reduction in conversions. You’ll end up losing 40% of your website traffic, out of which 80% of these people won’t return—ever.

I could continue talking about these scary loading time statistics, but the bottom line is your website needs to be fast if you want to boost your traffic and conversions. If you don’t work on improving loading times, you’ll end up losing hundreds of thousands of dollars every single year.

Luckily, there is a solution: Installing a WordPress cache plugin.

These plugins are designed to improve your website’s speed by instructing the server to store some files to disk or RAM, depending on the configuration. After that, the plugin remembers and duplicates the content it’s served in the past.

The result? Faster web page loading.

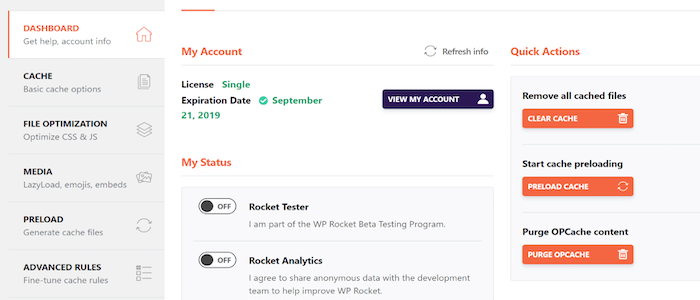
#1 – WP Rocket – The Best for Speed Optimization 

WP Rocket is a premium WordPress caching plugin that many agree is the best in the market. 

It’s simple and beginner-friendly, which helps users who aren’t familiar with the typical jargon associated with different caching options. It has been specially designed to boost your website’s speed and performance.

Instead of waiting for someone to request a page to save it to cache, WP Rocket builds the website cache automatically. It also turns on recommended WordPress caching settings like cache pre-loading, page cache, and gzip compression by itself.

Precisely why you see an instant boost in your website’s performance after installing this plugin.

You can also activate other features offered by WP Rocket, such as DNS prefetching, lazy loading images, minification, and CDN support. They can help improve your web page’s loading time while simultaneously reducing bounce rates.

Plugin Features 

  • Cache preloading (two methods)
  • Browser caching
  • GZIP compression
  • Database optimization
  • Minification and concatenation
  • Defer JavaScript loading
  • DNS prefetching
  • Lazy loading

Pricing 

WP Rocket offers three subscription plans:

  • Single – $49 annually for one website
  • Plus – $99 annually for three websites 
  • Infinite – $249 annually for unlimited websites

Learn more and get WP Rocket today.

#2 – Swift Performance – The Best for Multi-Site Compatibility

Swift Performance is a WordPress caching plugin with excellent performance-optimizing capabilities that transforms caching as you know it. Although it’s a relatively new WordPress plugin, it has gained tremendous popularity among users in a short span of time.

It has all the necessary features to take your website performance and speed to the next level without breaking a sweat. The plugin has a unique database optimizer that cleans duplicated metadata, expired transients, and spam comments.

Additionally, you can optimize the delivery of static resources via its minification feature that lets you combine or minify CSS and JavaScript—all with a single click. It’s compatible with bbPress, Cloudflare, WooCommerce, and Varnish, among several other platforms too. 

I also like its Async Execute feature that allows users to run scripts individually as they upload. It’s super helpful to improve speed sites, deliver a better user experience, and boost SEO scores. 

Swift Performance’s schedule database optimization is another time-saving feature—provided you use the pro version. Lastly, you can also enable/disable plugins on certain pages thanks to its plugin organizer.

Plugin Features

  • Page caching
  • Pre-set optimization templates that you can quickly apply
  • Code optimization, including minification and combination.
  • Browser caching
  • Database optimization
  • Plugin organizer to disable plugins on certain pages

Pricing

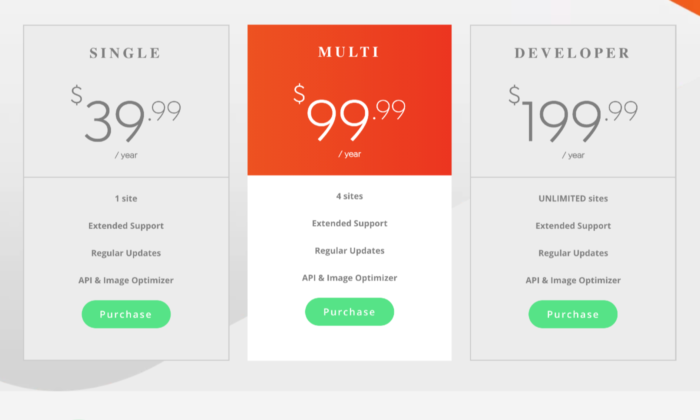
Swift Performance offers three subscription plans:

  • Single – $39.99 per year for one site
  • Multi – $99.99 per year for four sites
  • Developer – $199.99 per year for unlimited sites

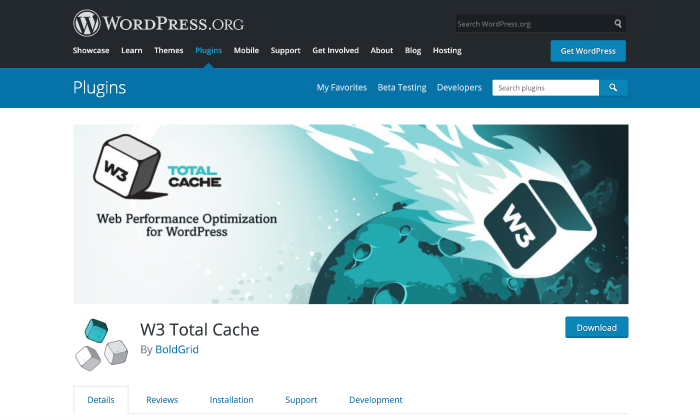
#3 – W3 Total Cache – The Best for Experienced Developers

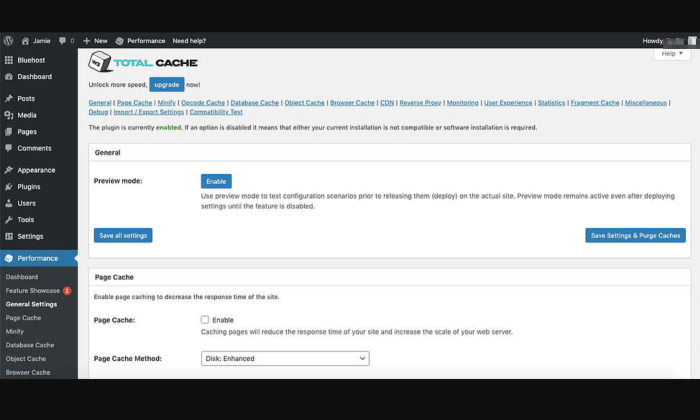
W3 Total Cache is hands down one of the best open-source WordPress caching plugins that offers an out-of-the-box and advanced caching mechanism. While it’s packed with features, it’s also slightly complicated, especially for users who lack technical skills.

The plugin is compatible with most hosting plans, including shared, dedicated, and VPS server hosting. Since it’s free, you can use all of its features after installing the plugin—no upsells for you to worry about. 

It can improve your server performance by caching every aspect of your site and integrating with several content delivery networks. 

Developers, in particular, like this plugin as it can offer up to 80% bandwidth savings thanks to its minification feature that reduces the size of your HTML, JavaScript, CSS, and feeds without compromising other website elements. 

What’s more, this cache plugin works for both mobile and desktop versions of your website. I‘d recommend W3 Total Cache for WordPress ecommerce sites as it has tons of features that make it useful for sites with SSL certificates—something that most ecommerce sites have.

Plugin Features

  • Minification
  • Opcode cache
  • Database cache
  • Object cache
  • Browser cache
  • CDN integration
  • Fragment cache

Pricing

W3 Total Cache is an open-source plugin, and it’s available free of charge.

#4 – WP Super Cache – The Best for Customization

When a plugin has more than two million active installations, you know the developers are doing something right. 

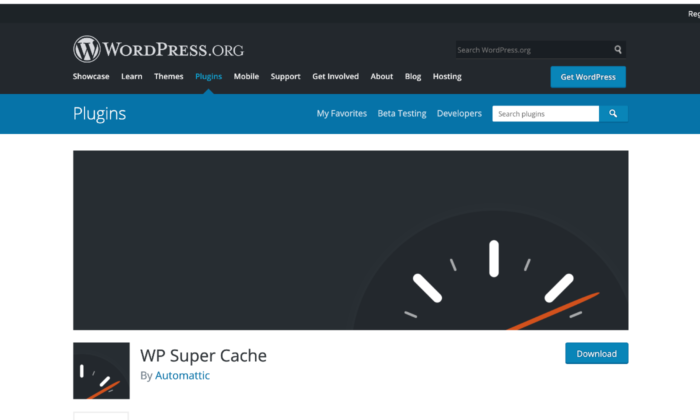
Developed by Automattic, the same people who gave you Jetpack, Akismet, and WordPress.com, WP Super Cache is as popular as a plugin can get, and not without reason. 

The plugin generates static HTML files from your dynamic WordPress content. Plus, it saves you a ton of bandwidth and decreases page load times since it makes the web server serve the lighter HTML files instead of the heavy PHP scripts.

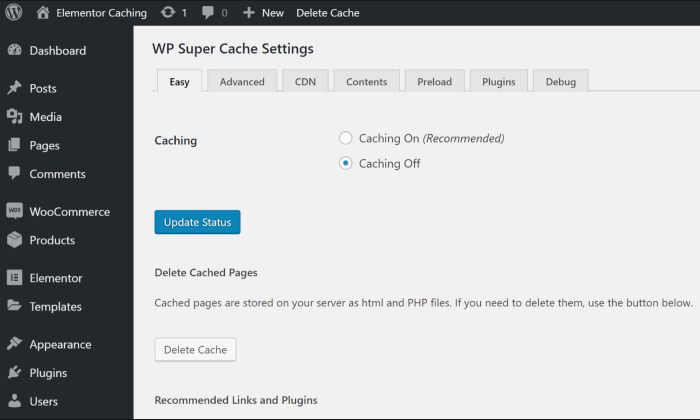
You also get three caching modes with WP Super Cache: Simple, Expert, and WP-cache caching. 

Out of the three, the Expert mode is the fastest, but you have to modify the .htaccess file, which requires coding and web development experience. But if you do have the technical know-how, you can customize the plugin settings to make it more functional.

You can use the WP-cache caching mode to cache content for known website visitors. Due to this, the caching mode is ideal for websites whose users are typically logged in, can leave comments, or see customized content.

Don’t have web development experience? No worries, you can use the Simple mode, where all you need is a custom permalink. As the setting is easier to configure, you won’t have to change your .htaccess file.

Plugin Features

  • Page caching
  • Support for content delivery networks (CDN)
  • Caching for visitors using a mobile device
  • Browser caching
  • Scheduler to manage deletion and re-caching at given intervals
  • GZIP compression

Pricing

WP Super Cache is available free of cost.

#5 – WP Fastest Cache – The Best for Access to a Wide Range of Tools

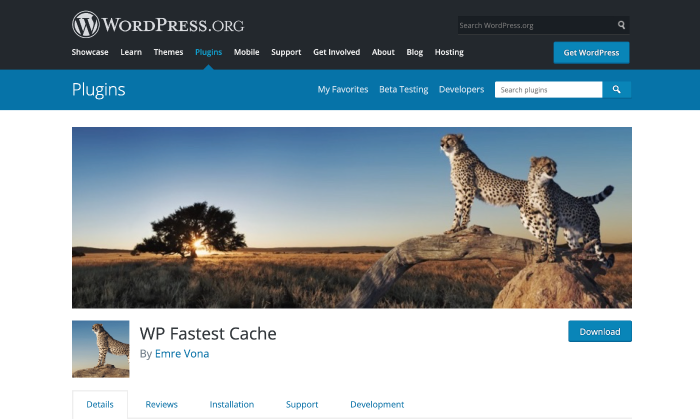
According to the official WordPress directory, WP Fastest Cache is the highest-rated cache plugin. It has limited configuration settings, which makes it user-friendly and appropriate for beginners.

This plugin can create static HTML files from your dynamic WordPress site and also minify HTML and CSS files, which, in turn, reduces file sizes. What’s more, it combines these files to make your code cleaner and web pages leaner.

You can schedule to delete the CSS and JS files at a specific time later.

WP Fastest Cache implements WordPress broader caching effectively to reduce page load time for repeat visitors. It also combines several CSS files into one in a bid to reduce the number of HTTP round-trips. If needed, you can also disable emojis on your website.

The premium version of this WordPress cache plugin offers tons of unique features that boost your page speed by optimizing images, cleaning up databases, caching mobile devices, among several other features. You can purchase the premium version directly from your WordPress dashboard after installing the free plugin.

Plugin Features

  • Auto-deletion of cache files whenever a post or page is published
  • Supports CDN
  • Enable/Disable cache option for mobile devices and logged-in users
  • Block cache for specific page or post
  • Code minification
  • GZIP compression

Pricing

While there is a freemium version available, you can upgrade to the premium packages too. There are four subscription options:

  • Freemium 
  • Bronze – $49.99 per license
  • Silver – $125 per three licenses
  • Gold – $175 per five licenses 

What I Looked at to Find the Best WordPress Cache Plugin

I’m not going to sugarcoat it: Choosing the best WordPress caching plugin won’t be the most straightforward task on your list. 

In addition to similar-sounding names, you’ll find most of them offer similar features in different ways, which is why they may end up conflicting if you use two or more at once. The fact that caching is technical also means you practically need to be an expert to make the right choice.

I’ve already listed my top five picks for the best WordPress caching plugins, but I want you to know how I reached this decision. 

Let’s take a look at the factors worth considering when researching caching plugins for WordPress.

CDN Support

CDN stands for content delivery network, a network of data servers that renders cache data to web users from a server nearest to them.

Whenever there is an increase in traffic on your website, there is also a simultaneous increase in your web hosting server’s processing activity. This causes a decrease in your website’s page loading speed.

This is the exact point where CDN comes into the picture.

Hold on. Things are about to get a bit technical here.

If you’re using a CDN, then static data from your website will get cached on every server in the CDN. As a result, whenever a user requests a page on your website, they’ll receive a cached copy from a server nearest to the user, preventing any delay.

This is why you should ensure your prospective caching plugin supports the CDN you use. If not, you might end up losing visitors.

Browser Caching Ability 

Browser caching means saving your CSS, logo, and other resources that would typically download whenever a visitor opens your webpage. This feature lets you decide how much of your webpage would be cached on the user‘s device, which, in turn, makes you independent of the user’s browser cache settings.

Look for options that allow you to set the time period for which you want the downloaded content to be saved on the user‘s system. 

That said, I wouldn’t recommend setting the time for the content to be cached for more than six months as it may result in the user getting web pages that aren’t updated. 

Asset and Page Exclusion

While many WordPress websites are purely static content, some also include dynamic content. This can include a membership website, an ecommerce site with WooCommerce, a website selling courses, and so on.

The catch is that dynamic content doesn’t play well with browser caching and page caching. Therefore, it’s wiser to look for a caching plugin that enables you to exclude specific pages and assets from being cached to prevent glitches.

Customer Support

If you’re new to the world of caching, chances are you might be hearing most of the terms we explained above for the first time. 

That’s why you should make sure the plugin developers offer efficient customer support that can help you whenever you get stuck with the daunting caching setup. If you find that a premium caching plugin offers better support, I‘d recommend choosing that over a free option.

After all, your peace of mind should always have top priority.

Conclusion 

Site speed is incredibly important for your website’s success. So if you aren’t using a caching plugin now, you’re already a step behind your competitors.

Go over customer reviews and do thorough research before choosing a plugin for your website. I’ve done my best to include options that come packed with features and ensure optimal results, but you can always opt for other caching plugins that you think will deliver better results.

In the end, the aim is to get those loading times short and your website super fast.

The post Best WordPress Cache Plugin appeared first on Neil Patel.