5 Resources to Build Your App Idea

Considering building an app? You’re in good company. 

The mobile app industry is expected to be worth more than $407 billion (yes, with a B) by 2026. 

Meanwhile, the average person has more than 80 apps on their phone. That represents a ton of opportunities for app builders. 

However, if you think creating an app is an easy way to get rich, you are setting yourself up for failure. Building an app requires research, hard work, and a willingness to dive in and learn. 

Luckily, there are tons of resources to get you started—including this guide. Below, I’ll walk you through how to build out your app idea and then share five resources to help you launch your app.

How to Build Out Your App Idea

Like any business, creating an app requires laying the groundwork before launch. Here’s a five-step guide for getting ready to launch your app, including how to do your research, ways to monetize your app, and what to include in your business plan. 

Build an App Step 1: Do Market Research

Before you dive into creating your app, you first need to get a lay of the land. Who is your target audience? What other apps offer similar features or functionality? How does your app stand apart?

Start by creating a buyer persona map, which will help you understand who your audience is and what they want. Use this information to create a detailed sales plan, decide what features to include, and choose where to market your app.

Then, perform a competitive analysis to understand your competitors. The information you gain from this will be critical as you build and grow your app. Focus on what current apps do well and what they don’t. The areas where they fail can present opportunities for you to improve and take over part of their market. 

For example, if your goal is to build an app that offers workout and diet recommendations, take the time to download similar apps and read their reviews. What features do people ask for, and what features do they dislike? Who is using these apps? How are they monetized? 

Be thorough—you’ll use this information in the next few steps. 

Build an App Step 2: Decide How to Monetize Your App

There are several ways to make money from an app. The right choice for your app likely depends on your industry, target audience, and the type of app you create. For example, games are often monetized by ads and in-app purchases, while dating apps generally charge a monthly subscription fee.

Consider each of the following monetization methods to decide which is right for your app:

  • Ads: Create a free app and earn money by selling ads in your app. Duolingo uses this model, though they also offer a paid plan. 
  • In-app purchase: Provide a free app and then allow users to purchase add-ons, like Pokemon Go does. 
  • Freemium: Give users access to a limited plan for free and then charge them to access all the features, like the meditation app Mindfulness does. 
  • One-time payment: Charge a one-time fee to access the app. Just keep in mind you won’t have a continuing income stream for updates, redesigns, and marketing. 
  • Monthly subscription: Charge a small fee every month for access to the app. This helps you maintain a steady stream of income, making it easier to pay salaries and invest in marketing. 

Many apps use multiple monetization methods. For example, you might offer a limited free plan and then charge a monthly subscription fee to access all features. You might even use ads to monetize the free plan and offer a paid plan that is ad-free. 

There are pros and cons to each monetization method. Some users might be annoyed by too many ads or hate paying for subscription services. See what other apps in your industry do, but don’t be afraid to break the mold by trying out a different method. 

Build an App Step 3: Create a Business Plan

Most people assume building an app is all about coding, but the real work actually starts long before you create your first line of code (or before you begin building it if you use an app builder).

After you get to know your audience and decide how to monetize your app, take the time to create a business plan. This plan should guide your first few years in business and keep you committed to your app’s core purpose. 

According to the Small Business Administration, your business plan should include: 

  • Executive summary: A brief outline of your company, what you will offer, and basic information about your leadership team, location, and plans for growth.
  • Company description: A detailed guide covering what problem your business will solve, who your app will serve, and what competitive advantages your app offers. 
  • Market analysis: A summary of your market research that covers what your app’s strengths are, trends you take advantage of, and how your app stacks up against others in the same industry. 
  • Structure and management: An explanation of who’s in charge of your business and how your company is structured. Are you creating a C corp or an LLC, or are you a sole proprietor? Include a list of key leaders, their CVs and resumes, and even an outline of the benefits each person brings to the table. 
  • Offering: A description of what your app does and how it benefits customers. Include plans for patent filings or copyright, if applicable. 
  • Market and sales plans: An outline of your marketing strategy and how it will adjust over time. Cover how you plan to attract and keep customers, the sales process, and where you’ll focus your marketing efforts. 
  • Financial projections: Information about your costs, where that money will come from, and prospective profits. Costs of creating an app may be low (especially using the app tools we’ll cover in the next section), but you’ll still need money for things like web hosting, paid ads, etc. Forecast sales for the first year, five years, and ten years, and make sure to explain how you reached those numbers and outline where funding will come from. 

Build an App Step 4: Create the App

Now that you’ve laid the groundwork, it’s time to actually create your app. This might feel a little overwhelming, but it doesn’t have to be. You have three main options for building your app. Let’s explore the pros and cons of each one. 

Code the App Yourself 

If you are technologically savvy, you may be able to code the app yourself. Make sure you have a deep understanding of coding or the patience to learn

Pros: 

  • cheap (it only costs your own time) 
  • full control over features, coding platforms, etc. 

Cons: 

  • requires a deep understanding of coding
  • time-consuming 

Hire an App Builder 

Hiring an app builder might be costly, but it could help you get the app to market faster than coding it yourself.

Pros: 

  • launch faster 
  • no need to learn coding languages 

Cons: 

  • can be expensive 
  • less control over features 

Use an App Building Tool 

Remember when building a website required expensive programs and in-depth coding skills? Now you can build a website with just a few clicks. App building tools offer the same functionality for apps. 

Pros: 

  • faster and easier than coding or hiring an app builder
  • likely cheaper than hiring someone to build your app 
  • get to market faster

Cons: 

  • limited by the app builder’s functionality 
  • have to pay to use most (though they are typically affordable) 

Build an App Step 5: Launch & Submit to App Stores

Once your app is built, you’ll need to test it before launch. Ask a few friends to download the app and tell you what you think. Consider using a mobile UX testing tool to see how users navigate your app and make adjustments before you launch. 

Then, you’ll need to submit your app to app stores, which is where users will download it. The most popular app stores are Apple’s App Store and Google Play. Follow this guide to submit your app to the App Store and this one to submit to Google Play

Don’t forget to optimize for app SEO! This will help you rank higher so people actually find your app. 

5 Resources to Help You Build Your App 

Creating an app is easier than ever, thanks in part to the variety of app tools that help you build and launch a mobile app. However, with so many options, it can be challenging to figure out which one to use.

Let’s review a few of the top app tools so you can find the right one for you.

iBuildApp

iBuildApp is a full-featured app builder that provides all the tools you need to build an app using its drag-and-drop functionality. Start with any one of their 1000+ templates, then drag and drop features to add video, images, text, and more. 

This tool is ideal for building apps for e-commerce stores, education, healthcare, business, media, retail, and financial services. Brands such as the U.S. Navy, Whole Foods, SEGA, and Emory University have used this tool.
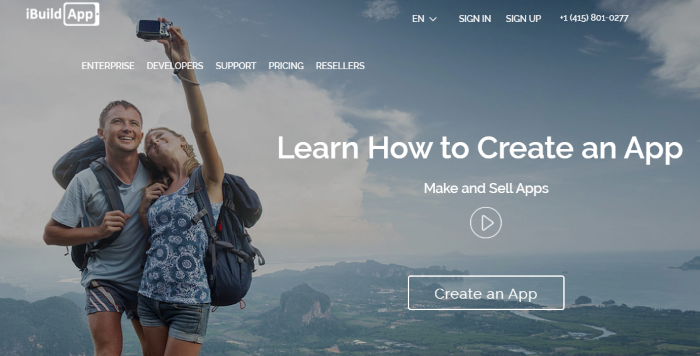
Resources to Help You Build Your App - iBuildApp

Price: Starts at $59.40 per month for one app. 

Appy Pie AppMakr 

Want to build an app but don’t have any coding experience? Appy Pie helps you build an app in just three steps. Choose from over 100 features, including GPS, in-app shopping, offline capabilities, and push notifications. They also offer analytics so you can measure app performance. 

You can use it to create apps for dating sites, customer reward programs, chatbots, retail, restaurants, and more. They’ll even help you submit the app to app stores. 

Appy Pie is used by brands like The Home Depot, Southwest, and Nike. 
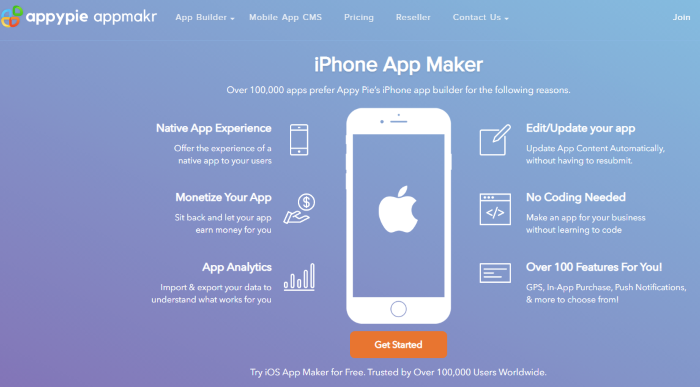
Resources to Help You Build Your App - Appy Pie AppMakr

Price: Options start at $18 per month for an ad-free experience, and they also offer a free trial. 

BuildFire

BuildFire is a full-featured app development tool that allows you to build an app with no coding. Use their templates and then customize your app with hundreds of features like push notifications, clocks, private portals, loyalty programs, checklists, forms, or media. 

They also offer a white-label feature, which allows you to build and sell apps to clients. 

Though pricier than other options, this app build tool offers a lot more tools and features, so it’s an ideal choice for building more detailed apps. 
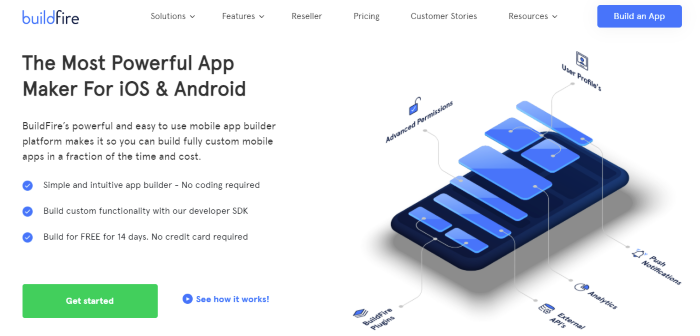
Resources to Help You Build Your App - BuildFire

Price: Plans start at $159 per month, billed annually. 

Usability Geek

Creating an app is just the first step—you also need to test the user experience. Usability Geek provides tools, resources, and UX testing guides to help your app succeed. Explore their UX courses and blog posts about usability to learn the skills you need to help your app succeed. 

Offered courses cover a range of topics, including the Psychology of E-Commerce, How to Create a UX Portfolio, and Quantitative Research for UX. Some courses even offer certification. 
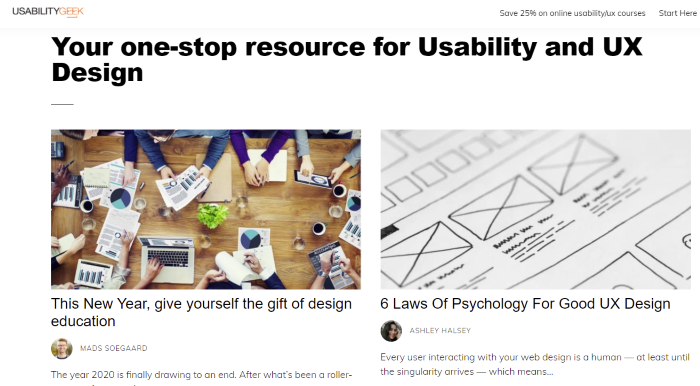
Resources to Help You Build Your App - Usability Geek

Price: Usability Geek offers free blogs about usability testing as well as paid training courses that start at $16 per month. 

GoodBarber

GoodBarber is an easy-to-use app build tool designed for both e-commerce and standard app building. Like many other app tools, it doesn’t require any coding knowledge. 

This tool is ideal for building apps for local delivery, retail, grocery, e-commerce, news, business, and community. Features include adding payment options, push notifications, user authentication, geofencing marketing, videos, maps, calendars, and forms. 
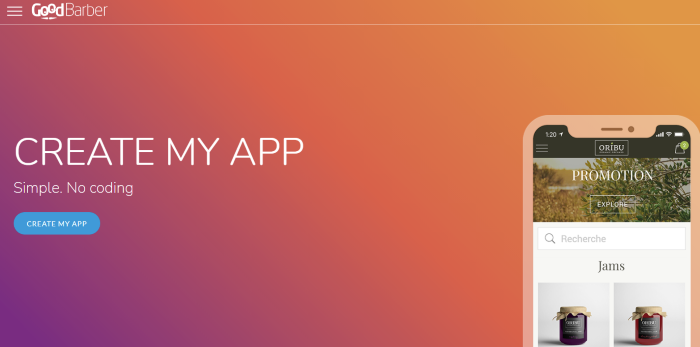
Resources to Help You Build Your App - GoodBarber

Price: Pricing starts at $25 per month for one app and includes SEO optimization, domain name, SSL security, 200 GB of storage, and unlimited pages. 

They also offer reseller plans, which start at $200 per month. 

Conclusion

With the help of app build tools, launching an app is easier than ever. With little to no coding knowledge, you can create, launch, and optimize your new app in just a few days. 

However, building a successful app is about more than just dragging and dropping features. To be successful, take the time to create a business and marketing plan, research your target audience, and make a plan for funding your venture.

Have you built an app before? What app build tools were most helpful to you?

The post 5 Resources to Build Your App Idea appeared first on Neil Patel.

How to Create a Customer Journey Map (Even if You Have No Idea Who Your Customers Really Are)

Creating a customer journey map is enough to make even the best marketer freeze in their tracks and realize how little they really know about their prospects.

If this sounds like you, don’t worry.

Even if you’ve never created a buyer persona before, I’ll help you make sense of the process by giving you a sort of “map” to help you better understand who your customers are and what they want.

Let’s take a closer look.

Starting Fresh: The Basics of the Customer Journey Map 

A customer journey map is a diagram that illustrates each step in the buyer journey, including who the customer is, what their needs are, and what objections they face.

This map makes it easier for sales, marketing, and executives to make more informed decisions and humanize your audience.

The very first step in a customer journey map is the core demographic information about your customers, such as:

  • Gender
  • Age range
  • Job title
  • Job responsibilities
  • Salary
  • Region
  • Company size

You’ll likely find most of this data in your CRM. If not, a survey can give you a clear picture of who your audience is and what they do.

I also recommend “humanizing” the persona by giving them a name and image. This brings out more of our emotional, empathetic side, versus looking at the potential customer as a number to slot somewhere in a sales funnel like a puzzle piece.

Now that you have the basics let’s look at an example of a customer journey.

A Customer Journey Map Example 

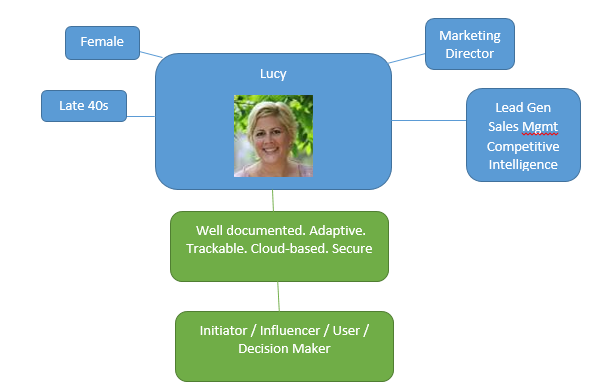
For our example here, we’ve chosen to work with Lucy, a marketing director in her late 40s.

Her job primarily entails lead generation, sales management, and gathering competitive intelligence.

She organizes and prioritizes campaigns. She’s a pro at gathering competitive intelligence and uses it wisely to reinforce the brand while cementing customer loyalty in a very competitive marketplace.

Because of the huge growth in social media, Lucy’s looking to streamline the interaction process on social media without losing the “personability” of the brand.

She’s in the market for a solution and wants to make a confident decision quickly.

So with this in mind, our persona map is going to look something like this so far:

customer journey map

To stick with the map concept, this is our starting point. Next, it’s time to look at the journey.

Our first stop along the map is the buyer’s needs.

She has the basic research to know what’s out there. If we were looking at this from a traditional sales funnel point of view, she’s at the “comparison shopping” stage.

She’ll be looking to make a decision soon.

Understanding the Buyer’s Needs

Buyers are eager to tell you what they need. All you have to do is ask.

Basic lead follow-up and nurturing questions can reveal quite a bit. Simple polls and surveys can often reveal a great deal about where the buyer actually is in the process (and whether they have an urgent need for your product or service versus basic curiosity).

Even if we don’t know specifically what they need, we can make a few general statements that apply them to our persona.

What would someone in this job typically need from our solution?

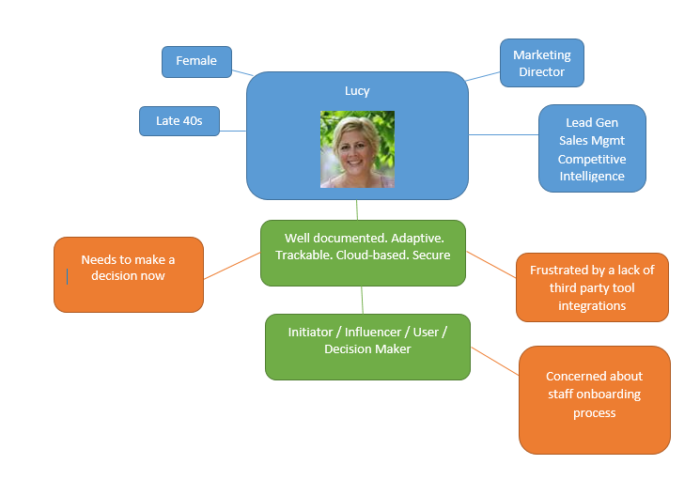
For starters, the buyer likely needs the product to be well documented. She’ll be managing dozens, perhaps hundreds of staff members – some of whom (based on age) may be more technically savvy than she is.

Some of the staff may pick it up quickly; others may need more time.  We’ll add the needs and the persona’s place in the decision-making process (one persona can have multiple roles in the decision process — they can be a user and initiator, for example)

customer journey map example lucy

There’s also the fact that whatever solution needs to be adaptive and flexible to accommodate existing platforms and tools.

The company likely has certain procedures and requirements that will be added to the mix, like cloud-based access and specific security protocols.

These factors can influence and even conflict with what the primary buyer wants. The committee often makes decisions like these, which lengthens the time needed and the requested features.

Dealing with Common Objections in Customer Journey Maps 

Like all maps, there will be roadblocks that prevent your customer from taking action. You’ll want to outline those in your customer journey map.

There are constraints and concerns, frustrations, and issues that will affect their decision. You can brainstorm these obstacles and add them to your customer journey map to ensure that sales know how to address the most common objections before becoming major pain points.

You also have to decide where this buyer falls on the scale of decision-making.

Will they be using the product? Influencing the decision-maker? Initiating contact with the company? A mix of all of these?

Make a note of these objections and the buyer persona’s place in the decision-making cycle on your map.

Following our example, we end up with something like this:

customer journey map example

Here, we’ve managed to discover (and brainstorm) the buyer’s potential:

  • Needs
  • Concerns
  • Frustrations
  • Urgency/Timeframe to Buy
  • Place in the buying cycle
  • Requirements

All the kinds of sales-propelling information needed to acknowledge objections, concerns, and frustrations while concentrating on needs, requirements, and urgency.

We’ve learned core demographics about our buyer and key information that may be preventing them from taking action or details that could move a sale into the next stage.

Our customer journey map is less of a neatly-organized, bulleted list, and more like a mind-map that’s always being adjusted and revised. It may not be as tidy, but our customer journey map is closer to the actual customer experience — and therefore far more useful.

Think about the last time your company made a major purchase. It’s seldom a “beginning to end” one-time shot, right?

There are many details to hammer out, presentations to sit through, and suggestions and sign-offs to gather.

It’s a big process, and a fancy list of bullets just doesn’t cut it anymore – not in today’s two-way communication world.

Create a Customer Journey Map for Each Type of Customer 

Now, you need to go through this entire process with every type of buyer your company encounters. Each type of customer will have a different buyer path, objections, and challenges.

For example, if retail, you’ve got suppliers, wholesalers, resellers, and a whole avalanche of personas out there. Each buyer you have must be addressed individually.

Conclusion 

Don’t panic, prioritize. Focus on your most profitable customers first and find the unifying threads that tie them together, then build on that persona. Once you have those down, start working down the list until you have all your customer journies mapped.

And remember that buyers are multi-faceted human beings.

Sometimes they make decisions that go against the grain of even the most well-developed persona. It happens.

Remember, the journey is just as important as the destination, and the easier you make that journey, the more receptive the buyer will be to taking the action you want them to take.

Are you planning to create a customer journey map? What is holding you back? 

The post How to Create a Customer Journey Map (Even if You Have No Idea Who Your Customers Really Are) appeared first on Neil Patel.

How a big idea persuades a jury, and you can persuade your prospect

I know this isn’t you, right? But the biggest problem most marketers face is they just don’t invest the time to flesh out a clear, compelling big idea.

They throw together a lousy idea, then think the way to improve it is to load it up with hype-y copy or false scarcity or a lot of countdown timers and widgets.

If you look at a company like Agora, a half-a-billion-dollars-a-year behemoth, you will notice that they don’t have that. They don’t rely on false scarcity.

Not that you should never use scarcity in your marketing. But scarcity can’t be the only thing you rely on to make a sale. We are in the idea business, not the scarcity business.

As Mark Masterson drilled into me, “Until you have a rock solid single idea that you can explain to someone in 15 seconds, and have them say immediately, ‘Wow! I’d love to hear more about that!’, then you don’t have a good idea.”

When your prospect says, “Tell me more!” to you, it means they are intellectually and emotionally interested, and they are excited about the payoff.

Lousy headlines come from lousy ideas

How often have you seen a headline like, “How to get rich with stocks!” It’s a boring headline because it’s a very weak idea!

So then the marketer tries to spruce it up and writes: “How to get filthy rich with stocks! How to get wealthy!” It just doesn’t help because at the root, it’s still a lousy idea.

It could take you YEARS to mine a gold nugget worth $100,000

Setting up a marketing funnel that generates 6-figures can be done in less than 30 days…

SEE HOW with the FREE 4-part video masterclass NOW!

Establish beliefs

Here’s the right way to do it.

Develop a big idea that gets attention and creates engagement. Then share your message by bringing your prospect through an EBM sequence. This sequence must be designed to get them to believe what they need to believe in order to make a buying decision. That is persuasion. It’s not selling.

Selling is when you’re talking about you, the product, the product’s features, the benefits, the advantages, and the price point. All of that information should be the last 20 to 25% of the funnel. But you can’t even go there – to the selling part – until you know they have the right beliefs that have prepared them to buy.

Be like a prosecutor

That’s why I love the analogy of the prosecutor.

When a prosecutor presents a case to a jury, at the end, he wants the jury to find the defendant guilty. So he has to lead them to a point where they have developed certain beliefs. And the end result of holding those beliefs is to say, “Yes, this guy is guilty.”

If you lead them through that process effectively, when you get to your closing argument – your call to action – they are ready to pronounce the defendant guilty.

For you, as a marketer, the prosecutor’s closing argument is the equivalent of the sales portion of the funnel, as I said, the last quarter of the EBM content.

The first three-quarters of the content is when you establish beliefs in the mind of your prospect, in the same way the prosecutor establishes beliefs in the minds of the jury. Only then do you present YOUR closing argument, the sales portion of your content.

To do this well, you have to go deep. Don’t just ask, generically, “What do my prospects believe?” Instead, ask, “What do they need to believe about ME? What do they need to believe about the INDUSTRY? What do they need to believe about THEMSELVES?” Create content that educates them while instilling these core beliefs.

Do some research in forums and in Amazon and in social media groups, and identify as many as six or seven different beliefs.

THEN develop your big idea. Make it something intellectually and emotionally interesting. Something compelling. Something that catches their attention immediately because it speaks to their core beliefs.

Only then are they ready to buy.

The post How a big idea persuades a jury, and you can persuade your prospect appeared first on Marketing Funnel Automation.