How to Create, Optimize, and Test Meta Ads (Formerly Facebook Ads)

As a savvy internet user, you might think no one clicks on Facebook and Instagram ads.

You’d be wrong.

In 2021, Meta made over $114 billion in revenue from advertising.

Someone’s clicking.

But who, and how do you get them to click on your ads? I’ll show you.

Many marketers who tried Facebook ads, especially in their early days, decided Facebook advertising didn’t work.

Don’t believe them.

I will share everything you need to know about how to create Facebook ads, now known as Meta for Businesses.

If you’re totally new to Facebook, you’ll need to set up Meta Business Suite, then come back to this post for a deep dive into Meta advertising best practices.

In this advanced Meta advertising guide, you’ll learn which businesses are the best fit for the platform and how to run successful campaigns.

We’ll cover the most common mistakes marketers make and the biggest factor in your ads’ success.

How Do Meta Ads Work?

Meta ads work by allowing advertisers to reach users on Facebook and Instagram from one platform.

We can’t talk about Meta ads without also mentioning Facebook ads. In October 2021, Facebook renamed itself Meta. They are working to become a social technology company, not just a social media giant.

When you create ads in Meta Business Suite, you can advertise to both Facebook and Instagram users through boosted posts, videos, photos, Stories, messenger, carousel, slideshows, playable ads, and instant experiences.

Meta ads target users based on their location, demographic, and profile information.

Many of these options are only available from Meta. After creating an ad, you set a budget and bid for each click or thousand impressions that your ad will receive.

If that sounds overwhelming, don’t worry. I’ll explain what all that means.

Who Should Advertise on Facebook (now Meta)?

Many businesses fail at Meta advertising because it’s not a good fit for their audience. So before investing time and money on Meta ads, consider whether your business model is a good fit for Facebook or Instagram.

In the past, Meta ads were more like display ads than search ads — though new versions of ads, like product ads, allow advertisers to sell products directly to users.

Here are a few types of businesses that are likely to succeed with advertising through Meta..

How To Create Meta Ads For Businesses with Low-Friction Conversions

The businesses that are most likely to succeed with Meta ads ask users to sign up, not to buy. You must use a low-friction conversion to be successful.

A visitor to your website wasn’t looking for your product. They clicked your ad on a whim. You will fail if you rely on them to immediately buy something to make your ad ROI positive.

Meta users are fickle and likely to click back to Facebook or Instagram if you ask for a big commitment (purchase) upfront. Instead, stick to simple conversions like signing up for your service, filling out a short lead form, submitting an email address, or converting inside the platform using Instagram shopping or similar.

Even if you sell products, not services, you should consider focusing on an intermediate conversion like a newsletter signup. Then you can upsell later through email marketing or retargeting ads.

Daily deal sites like Groupon, AppSumo, and Fab are good examples of businesses that can succeed with Facebook advertising. After you click one of their ads, they just ask for your email address. They’ll sell you on a deal later.

Business Model with Long Sales Cycle or Small Purchases

Even if you only ask for an email address initially, you’ll need to eventually make money from these users to be profitable.

The best business model that fits Facebook ads earn revenue from its users over time, not all at once. A user may have given you their email, but you’ll need to build more trust before they are likely to buy anything.

You shouldn’t depend on one big purchase. Several smaller purchases are ideal.

Daily deals and subscription sites are great examples of business models that can thrive on Meta. Both have customers whose lifetime value is spread out over six months or more.

At Udemy, they focus on getting users to sign up on their first visit. By aiming to be profitable on ad spend in six months (not one day), they turn Facebook users into long-term customers.

They target a 20 percent payback on ad spend on day one and 100 percent payback in six months. These numbers can serve as a rough guide for your business.

Businesses in fashion, books, and other small purchases also do well on Meta, especially Instagram.

How to Target Meta Ads

The number one mistake most marketers make with Facebook ads is not targeting them correctly.

Facebook’s ad targeting options are unparalleled. You can target by demographics and create custom or lookalike audiences to target users similar to your best customers. You can also use retargeting ads to target users who have interacted with your page, or visited your website.

On Meta, you can directly target users by:

  • location
  • age
  • gender
  • interests
  • connections
  • relationship status
  • languages
  • education
  • workplaces

Each option can be useful, depending on your audience. Most marketers should focus on location, age, gender, and interests.

Location allows you to target users in the country, state, city, or zip code that you service.

Age and gender targeting should be based on your existing customers. If women 25-44 are the bulk of your customers, start targeting them. If they prove to be profitable, you can then expand your targeting.

Interest targeting is the most powerful but misused feature of Facebook ads. When creating an ad, you have two options: broad categories or detailed interests.

Maximizing Investment with Broad Category Targeting

Broad categories include topics like Gardening, Horror Movies, and Consumer Electronics.

Meta also added targets like Engaged (1 year), Expecting Parents, Away from Hometown, and Has Birthday in 1 Week.

Broad interests may seem like an efficient way to reach a large audience. However, these users often cost more and spend less. You’ll also need to install the Meta pixel.

This used to be an ineffective way to reach audiences because it targeted too large of an audience; however, adding the Meta pixel and dynamic ads makes this far more effective.

It is worth testing, but detailed interest targeting is often more effective.

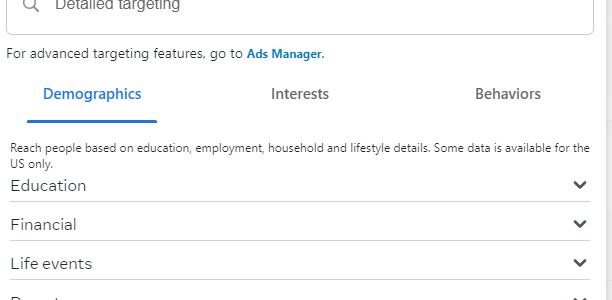
Detailed Targeting: A Powerful Meta Ad Targeting Strategy

Detailed targeting allows you to target Meta users based on more detailed interests and onsite behaviors.

For example, you can target users based on the following:

  • Ads they’ve clicked on.
  • Facebook or Instagram pages they interact with.
  • Activities across Meta, including things like which device they use or travel preferences.
  • More detailed demographics.
  • Speed of their internet connection.

Detailed targeting also allows Meta advertisers to include or exclude specific people using the “or”/”and” targeting.

For example, if you can target users who “are ” college graduates, you can then focus on those that “are ” interested in travel “or” interested in food. This lets you get a lot more detailed about your target audience.

Meta Ads Lookalike Audiences

In addition to targeting users directly, Meta allows you to target a group called Lookalike Audiences.

What are Meta Lookalike Audiences? These are Meta users that are similar to your current users. You’ll need to have Meta Pixel or other custom audience data, like an email list. Then, you can ask Facebook to find similar users.

They are highly customizable — for example, you could create a “new customer” ad, then exclude current customers from seeing your ads.

This page on Meta walks you through how to create Lookalike audiences.

Retargeting with Facebook Ads

Retargeting ads allow you to reach customers already familiar with your brand. You can double down by creating dynamic ads that show people items they are likely to be interested in.

For example, you could retarget users who have visited your site, left items in their cart, or clicked on an ad.

To create a retargeting ad, the first step is to install the Meta Pixel. Follow this guide in Meta’s Business Help Center to get started.
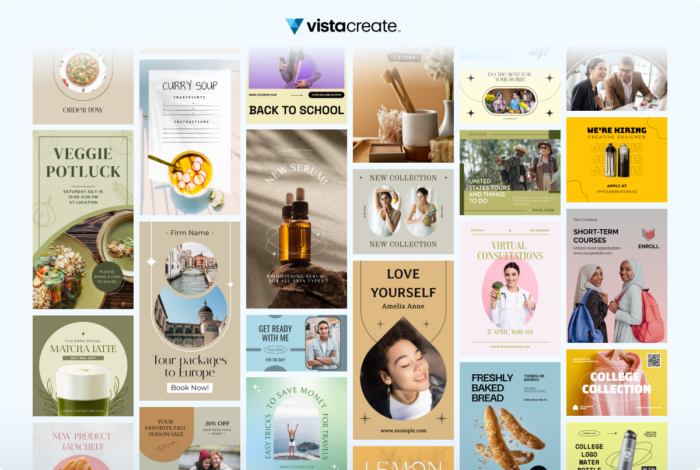
Images for Meta Ads

The most important part of your Meta ad is the image. You can write the most brilliant copy in the world, but if your image doesn’t catch a user’s eye, you won’t get any clicks.

Don’t use:

low-quality images

generic stock photography

any images you don’t have the rights to use

Also, don’t steal anything from Google Images. Unless you’re a famous brand, don’t use your logo.

Now that we have the no’s out of the way, how should advertisers find images to use? Buy them, create them yourself, or use ones with a Creative Commons license.

Below you’ll learn which types of images work best and where specifically to find them.

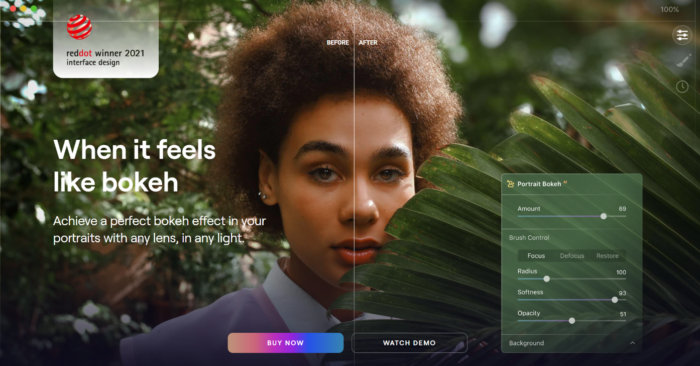
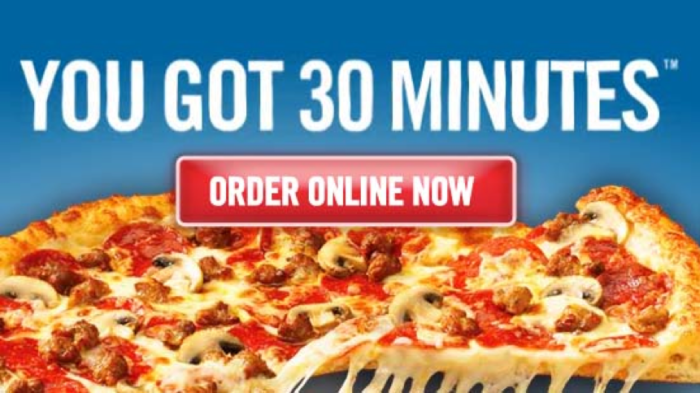
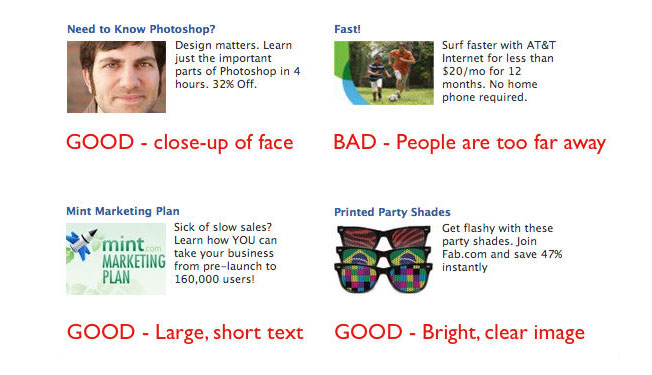
Use Images of People on Your Ads

Images of people work best, preferably their faces. Use close-ups of attractive faces that resemble your target audience.

Younger isn’t always better. If you’re targeting retirees, test pictures of people over 60. Using a 25-year-old woman wouldn’t make sense.

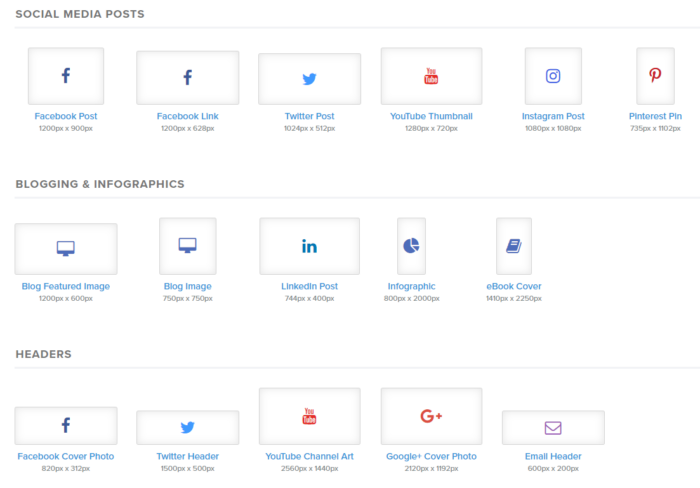
Facebook sidebar ad images are small (254 by 133 pixels), while Instagram feed ads should be no wider than 500 pixels. You can check out the specs for other Meta ads here.

Make sure to focus on a person’s face and crop it if necessary. Don’t use a blurry or dark picture.

Use this ad image guide on Facebook to see the size requirements for other ads, like a desktop news feed, a mobile news feed, instant articles, stories, etc.

Advanced tip: Use images of people facing to the right. Users will follow the subject’s line of sight and be more likely to read your ad text.

Aside from models, you can also feature the people behind your business and showcase some of your customers (with their permission, of course.)

The Importance of Typography in Advertising

Clear, readable type can also attract clicks. Bright colors will help your ad stand out.

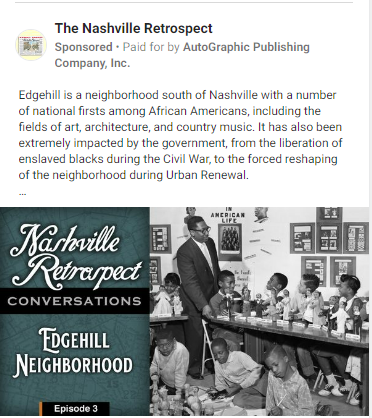
Just like with text copy, use a question or express a benefit to the user. Treat the text in the image as an extension of your copy.

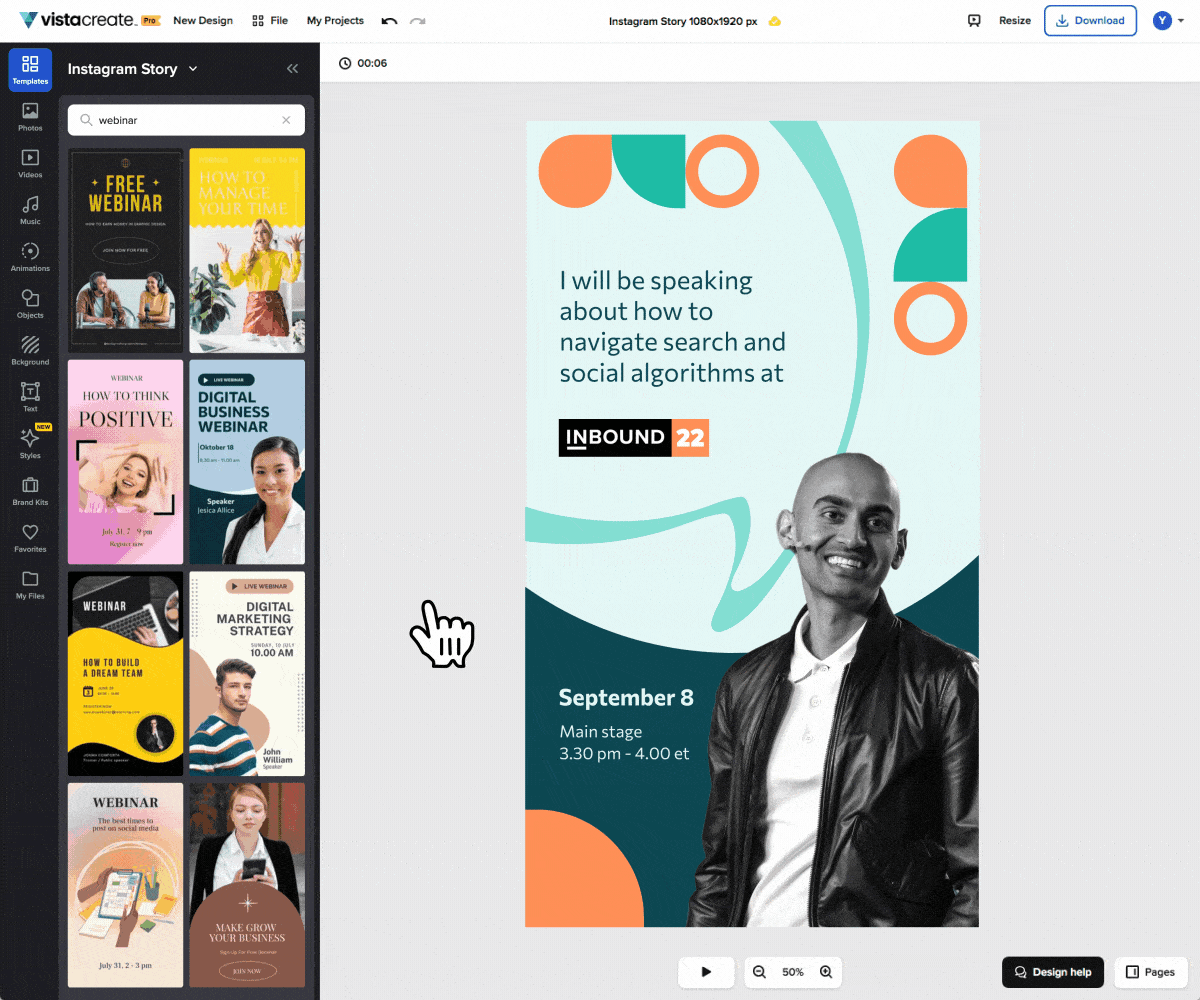
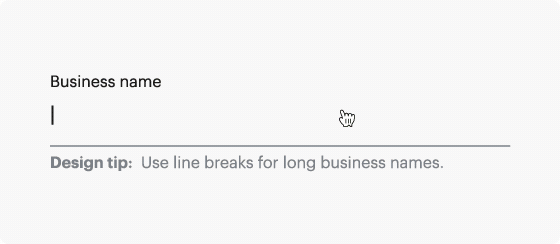
You can also combine text and images, like this ad for a podcast about Nashville:

A screenshot of an ad by The Nashville Retrospect, a podcast about Nashville.

Add Humor and Fun Into Your Ads

Crazy or funny pictures definitely attract clicks. See I Can Has Cheezburger, 9GAG, or any popular meme page.

Unfortunately, even with descriptive ad text, these ads don’t always convert well. If you use this type of ad, set a low budget and track the performance closely. You’ll often attract lots of curiosity clicks that won’t convert.

An example of advertisement humor and fun.

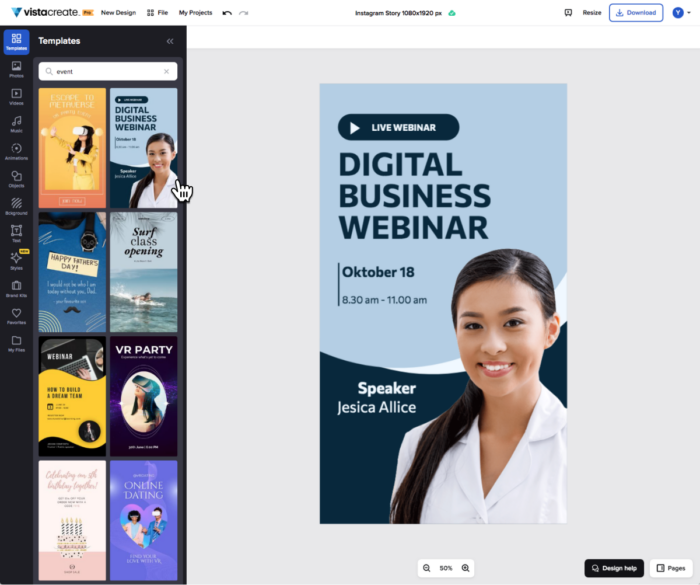
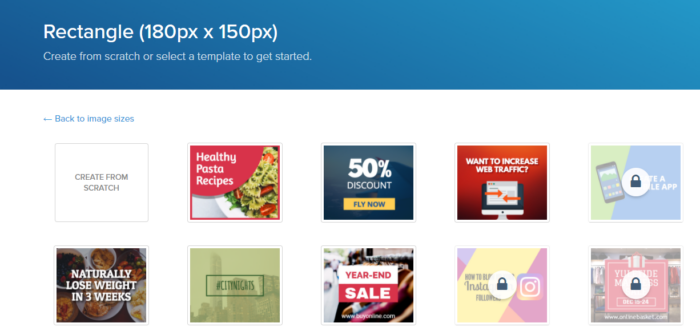
How to Create Images for Meta Ads

You have three options for images to use in your Meta ads: buy them, find ones that are already licensed, or create them yourself.

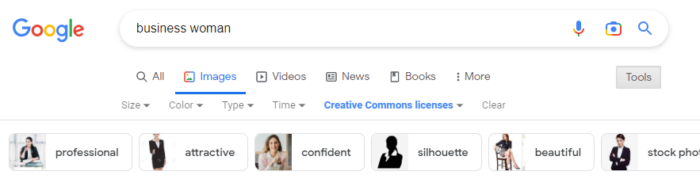
You can buy stock photography at many sites, including iStockPhoto. There are also sites with free stock photos like Pixabay. Don’t use stock photos that look like stock photos. No generic businessmen or stark white backgrounds, please.

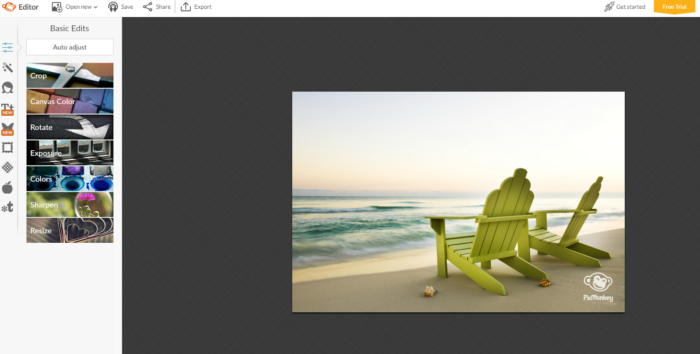
Users recognize stock photos and will ignore them. Instead, find unique photos and give them personality by cropping or editing them and applying filters. You can use Pixlr, an online image editor, for both.

If you don’t have the money to buy photos, search for Creative Commons licensed images using Google Images:

A screenshot of the Google search bar that has "business woman" typed in.

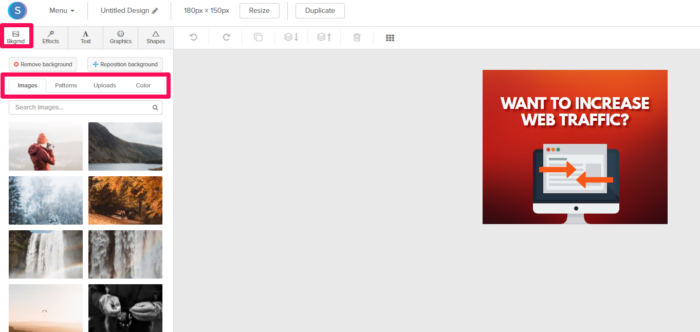
The third option is to create the images yourself. If you’re a graphic designer, this is easy. If you aren’t, you can still create typographic images or use basic image editing to create something original from existing pictures.

Rotate Ads

Each campaign should have at least three ads with the same interest targets. Using a small number of ads will allow you to gather data on each one. For a given campaign, only one to two ads will get a lot of impressions, so don’t bother running too many at once.

After a few days, delete the ads with the lowest click-through rates (CTRs) and keep iterating on the winners to continually increase your CTR.

Aim for 0.1% as a benchmark. You’ll likely start out closer to the average of 0.04%.

Writing Successful Facebook (Now Meta) Ad Copy

After seeing your image, users will (hopefully) read your ad text. Here you can sell them on your product or service and earn their click.

Despite the 40-character headline and 125-character body text limits, we can still use the famous copywriting formula AIDA.

  • (A)ttention: Draw users into the ad with an attention-grabbing headline.
  • (I)nterest: Get the user interested in your product by briefly describing the most important benefit of using it.
  • (D)esire: Create immediate desire for your product with a discount, free trial, or limited-time offer.
  • (A)ction: End the ad with a call to action.

AIDA is a lot to fit into 165 characters, but it can be done. Write five or ten ads until you’re able to fit a succinct sales pitch into the ad.

Here’s an example for an online programming course:

Become a Web Developer

Learn everything you need to become a web developer from scratch.

Save 65%. Enroll now!

This tells users what they’ll get, why it matters, and why they should care in just a few lines.

Bidding on Meta Ads

Like on any ad network, strategic bidding can mean the difference between profit and a failed test on Meta.

After you create your ad, Meta provides a suggested bid range. When you’re just starting out, set your bid near the low end of this range, so you don’t waste ad spend on an untested ad.

Your CTR will quickly start to dictate the price you’ll need to pay for traffic. If your CTR is high, your suggested bids will decrease.

You’ll need to bid more for each click if your CTR is low. Optimize your ads and targets to continually increase your CTR.

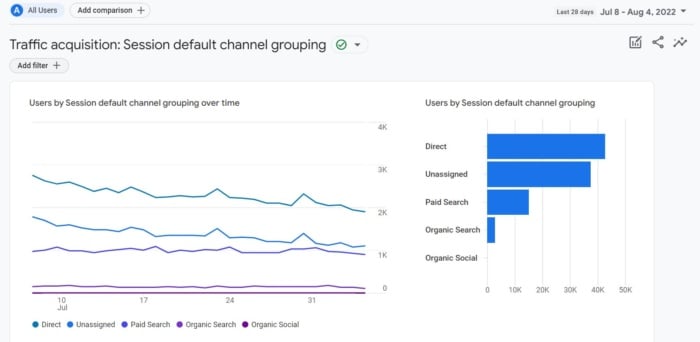
In addition to click volume, your bid will also dictate how much of your target audience you can reach.

Meta provides a great chart for every campaign showing the size of your target audience and how much of that audience you’ve reached.

An audience chart that showcases percentage targeted, reached, and social reached.

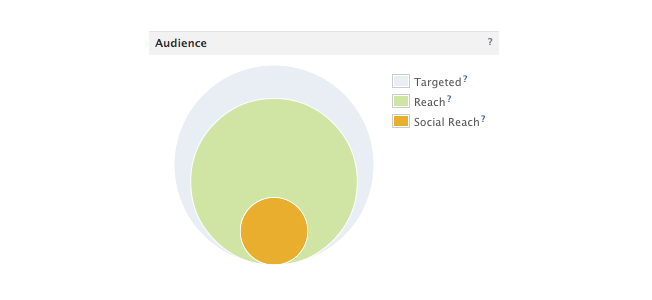
Increasing your bid will help your ad reach more of your target audience. If your ad is performing well but reaches less than 75 percent of your target audience, you can increase your bid to get more clicks.

If your audience penetration is high, increasing your budget will increase your ad’s frequency: how many times a targeted user will see it.

Meta also offers automated bidding that uses AI to determine what bids to make. If you use this strategy, make sure to keep a close eye on your budget so you don’t overspend.

Landing Pages for Meta Ads

Getting a click on your Meta ad is only the beginning. You still need the visitor to convert.

Make sure to send traffic to a targeted, high-converting landing page. You know their age, gender, and interests, so deliver a page that solves their problems.

The landing page should also contain the registration form or email submit box that you’ll track as a conversion.

Focus the landing page on this action, not the later sale. If you want visitors to sign up for your newsletter, show them the benefits or offer a free gift for their email.

How to Track Meta Ad Performance

Like PPC ads, you’ll want to track your meta ad performance. The exact metrics that are important to you will vary by goal. For example, ad impressions and clicks are important if your goal is to increase brand awareness. If your goal is to increase your email list, then you’d want more actual form fills.

Here are a few things to keep in mind when tracking Meta ad performance.
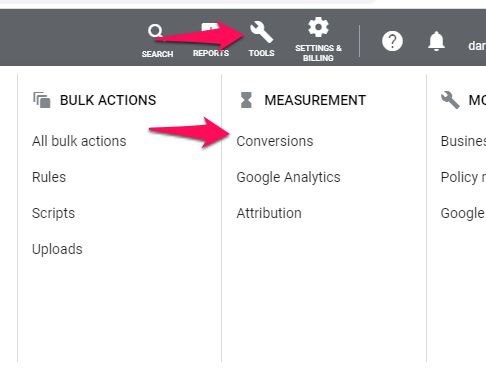
Conversion Tracking

To track conversions, you’ll need to install Meta’s pixel. Make sure to track conversions for both specific ads and ad campaigns to get a deeper understanding of what ads are converting. Pay attention to both your ads and your audience—targeting the right audience often makes all the difference.

Performance Tracking

You also need to monitor your performance within Meta Business Suite. The most important metric to track is the click-through rate. Your CTR affects both the number of clicks you’ll receive and the amount you will pay per click.

Ads with a low CTR will stop serving or become more expensive. Ads with a high CTR will generate as many clicks as will fit within your budget. They will also cost less. Keep a close eye on CTR by interests and ads to learn which audiences work best and which ads resonate with them.

Keep in mind: Even the best ad’s performance will decline over time. The smaller your target audience is, the faster this will happen. Usually, you’ll see your traffic start to drop off in 3-10 days.

When this happens, refresh the ads with new images and copy. Duplicate your existing ads, then change the image and ad text.

Do not edit the existing ad. Delete any existing ads not getting clicks. You’ll see the new ads accruing impressions and clicks the next day.

Monitor the images’ performance over time to see which generates the best CTR and maintains their traffic the longest. You can rotate high-performing images back every few weeks until they stop getting clicked at all.

Use A/B Testing in Meta

A/B testing allows you to change variables in your ads, such as the ad copy, images, or audience, to see which strategy performs best. Meta allows you to create A/B tests in Ads Manager, so you won’t even need to use a third-party tool.

Meta Ads FAQs

Does Facebook still have ads since becoming Meta?

Yes, Facebook ads still exist. Using Meta Business Suite (formerly Facebook Business Suite), you can create ads for just Facebook or Facebook and Instagram.

How does Meta (formerly Facebook) target ads?

Meta allows advertisers to target ads based on demographic information, interests, location, and past behaviors. This makes it an ideal platform for advertisers, whether they want to reach very niche audiences or very broad audiences.

What is the Meta Ads Manager?

Meta Ads Manager is a stripped-down version of Meta Business Suite that allows you to create new ads fast. It doesn’t offer as many features, but it may be easier for some users to navigate.

What is the difference between Facebook and Meta ads?

Facebook ads are only on Facebook, while Meta Ads can currently appear on Facebook or Instagram. In 2021, Facebook changed its parent company name to Meta, and changed Facebook Business Suite to Meta Business Suite, where advertisers can manage ads on both platforms.

What are some of the available Meta Ad options?

Posts, images, carousels, boosted posts, Reels, Stories, and more.

{
“@context”: “https://schema.org”,
“@type”: “FAQPage”,
“mainEntity”: [
{
“@type”: “Question”,
“name”: “Does Facebook still have ads since becoming Meta? “,
“acceptedAnswer”: {
“@type”: “Answer”,
“text”: ”

Yes, Facebook ads still exist. Using Meta Business Suite (formerly Facebook Business Suite), you can create ads for just Facebook or Facebook and Instagram.


}
}
, {
“@type”: “Question”,
“name”: “How does Meta (formerly Facebook) target ads?”,
“acceptedAnswer”: {
“@type”: “Answer”,
“text”: ”

Meta allows advertisers to target ads based on demographic information, interests, location, and past behaviors. This makes it an ideal platform for advertisers, whether they want to reach very niche audiences or very broad audiences.


}
}
, {
“@type”: “Question”,
“name”: “What is the Meta Ads Manager?”,
“acceptedAnswer”: {
“@type”: “Answer”,
“text”: ”

Meta Ads Manager is a stripped-down version of Meta Business Suite that allows you to create new ads fast. It doesn’t offer as many features, but it may be easier for some users to navigate.


}
}
, {
“@type”: “Question”,
“name”: “What is the difference between Facebook and Meta ads?”,
“acceptedAnswer”: {
“@type”: “Answer”,
“text”: ”

Facebook ads are only on Facebook, while Meta Ads can currently appear on Facebook or Instagram. In 2021, Facebook changed its parent company name to Meta, and changed Facebook Business Suite to Meta Business Suite, where advertisers can manage ads on both platforms.


}
}
, {
“@type”: “Question”,
“name”: “What are some of the available Meta Ad options?”,
“acceptedAnswer”: {
“@type”: “Answer”,
“text”: ”

Posts, images, carousels, boosted posts, Reels, Stories, and more.


}
}
]
}

Conclusion

Despite the learning curve, Meta advertising can be a great marketing channel for the right business. The most important things to remember are: target specific interests, use eye-catching images, give users a low-friction conversion, and track everything.

After a week or two of learning what works for your business, you’ll be able to generate a steady source of Meta conversions.

What are your best Meta advertising tips? Share them in the comments.

Best Image Editing Tools to Create Killer Rich Media

I’m just going to say it: Visual marketing is the wave of the future.

There’s no denying the power images have on gaining traffic, shares, and rankings.

In fact, if you have at least one image on your blog post, you are much more likely to rank on the top page of Google.

Images should be the lifeblood of your content marketing strategy.

Great content without any images likely won’t get many shares, much buzz, or any viral promotion.

But that’s easier said than done, right?

Making images that are visually pleasing can be time-consuming.

We don’t all have the creativity or design skills to do it, either.

Heck, I surely don’t have the creativity to produce diverse designs from scratch.

But I know I need the visuals if I want my content to be viewed and shared.

Without visuals, I’d probably drive 50% less traffic.

So I make it a priority.

In every blog post I write, I try to include a visual with every 100 words.

That number can be tough to hit when I can’t think of creative designs, but thankfully, there are a ton of free (or crazy cheap) image editing tools that make you look like a professional.

And that means you can shave time off your day with just a few minutes of image editing.

Thankfully, almost all of them are easy to use even if you have little-to-no experience with graphic design.

Here are six image editing tools that make you look like a pro and will drive your social shares through the roof.

1. VistaCreate

VistaCreate is an all-in-one online platform for designing literally anything a marketer or small business owner may need — no design skills necessary.

vista create home page

You can use it to create posts and stories for socials, make email designs, ads, presentations, and even print materials.

The editor offers thousands of premade templates that already look great, so you can just quickly customize a design and use it right away.

vistacreate templates screen

And unlike other graphic design platforms, ALL their templates are free.

In addition to templates, you access a huge library of royalty-free stock photos, videos, vectors, objects, animations, fonts, and music tracks.

With all these tools, you can make videos and animated visuals in addition to static designs.

If you want to publish your design right away, you can post it directly from VistaCreate to your Facebook and Instagram business accounts, and Pinterest. Handy, right?

I like that most of their tools are free, so that you can create a cool design on a budget.

To start creating, log in or sign up to VistaCreate.

So I’ve talked a bit about what VistaCreate can do for you, but let’s show it in action. Here’s a real-life look at me putting this great tool to use.

To begin, I decided to create an Instagram video story for an event I’ll be speaking at.

So, I chose a template first.

vistacreate choosing a template screen

I changed the colors, added objects and my photo, and used the Background Remover to erase the background in one click.

screenshot of vistacreate background remover

Next, I applied a black-and-white filter to make my photo match the style of the conference.

screenshot of vistacreate image filter

It’s pretty cool!

Next, I animated my photo and objects.

Gif of Vistacreate being used to create an instagram story.

I added all the information about the event and tried different styles to see which color scheme worked best.

Graphic of instagram stories in VistaCreate.

After that, I’m ready to post!

VistaCreate also has a resize feature that allows you to make one design and resize it for different platforms in just a few clicks:

Resizing Instagram stories in Vistacreate.

Speaking of branded designs, you can build a brand kit in VistaCreate and use it to create a cohesive look for your branding.

Add your business’s colors, fonts, and a logo to your brand kit — and apply it to a template to create your on-brand design.

Having a brand kit is very convenient, especially if you work with many different companies and want to simplify your workflow.

vistacreate brand kit screenshot

If you work for a new company that doesn’t have a logo, you can create one right from the Brand Kit page using the Logomaker tool.

Click on “Create a logo from scratch”, select an industry, type in your company name — and the Logomaker will offer tons of logo designs.

vistacreate logo maker in action

On top of that, I like that VistaCreate works for both digital and print, so that you can make business cards, flyers, posters, postcards, and other printables in one place.

If you live in the US, you can even use VistaPrint (both companies are part of the Vista family) to have your designs printed and delivered to your door.

For now, you can use them to print posters, flyers, and business cards, with more formats coming soon.

In short, VistaCreate covers all the needs marketers might have — creating branded content for social media and ads, making a brand kit with a logo, and designing print collateral.

You can access it on both desktop and mobile, with the app available for Android and iOS.

2. PicMonkey

PicMonkey is another helpful tool to use for image editing.

If you aren’t a graphic designer but want crystal clear images with high production value, PicMonkey is one of your best bets.

Use PicMonkey as an image editing tool.

PicMonkey has a slew of diverse features.

For example, you can edit existing images that you have on Facebook, your computer, or anywhere else:

PicMonkey is an image editing tool that allows you to edit existing images.

You can also touch up specific photos with new effects.

Also, you can easily start a new design from scratch or with a preset template.

To get started, click “Start a free trial” and create your free account:

Start a free trial with PicMonkey, an image editing tool.

You can set up your new account with an email or by signing up directly with Facebook:

Sign up with the image editing tool, PicMonkey, using your Facebook account.

Once you’ve created a free trial account, you should be directed back to the dashboard to edit content:

Edit content using the image editing tool, PicMonkey.

One of the best benefits of PicMonkey is the actual photo editing ability.

For example, other platforms focus more on social media and content marketing images.

But PicMonkey allows you to use diverse filters that you’d find in an expensive application like Photoshop.

For example, you can edit things like filters, sharpening, and blurring:

Edit filters, sharpening, and blurring with the image editing tool, PicMonkey.

You can even tap into more advanced photo editing tools like curves and levels:

Use advanced editing tools in PicMonkey, an image editing tool, to edit curves and levels.

On top of that, you can touch up real-life photos of yourself or your company—if stock photos are not ideal—using awesome image editing tools:

Touch up real photos of yourself or your company using PicMonkey.

Want to add a spray tan? Who doesn’t?

The portrait photo editing tools are great and allow you to perfect any headshot for your social media or team photo for your website.

On top of that, you can add tons of cool overlays to your content.

Add overlays to your content using the image editing tool PicMonkey.

For example, if you wanted to add emojis in your picture, simply click the “PicMoji” option and click any emoji to instantly add it:

Add emojis to your pictures using PicMonkey.

You can also pick from a bunch of different existing themes and templates if you are lacking inspiration or creativity:

Use different themes or templates on the image editing tool PicMonkey.

PicMonkey is similar to other tools but lacks the diverse template and preset options some offer.

What it lacks in templates, though, it makes up for in diverse image editing capabilities.

The ability to edit things like curves and levels or touch up portrait-style photos really stands out.

PicMonkey is a great tool for the everyday person who needs detailed image editing but doesn’t want to get bogged down by advanced, technical programs.

If you want to create a beautiful photo in just a few minutes that is less focused on text and templates, this is your go-to tool.

3. Snappa

I’m also a big fan of Snappa for image editing.

See Snappa's homepage to learn more about them as an image editing tool.

Snappa is similar to other tools in that it has countless high-quality templates to start from.

But my favorite features are the countless free stock photos and high-quality icons:

Snapp has high quality stock photos and icons that they offer for free.

They are some of the best free icons I have ever seen.

One of the best features Snappa has to offer is the social media scheduling tool:

Snappa has its own social media scheduling tool.

You can share your graphics directly from Snappa in seconds, saving you the time it takes to download and schedule on a different tool.

You can even use the tool to resize existing images, which is a lifesaver when it comes to repurposing content for different platforms:

Use the image editing tool, Snappa, to resize images.

To start creating your graphics in just a few minutes, click “Create My Graphic Now” on the homepage:

Create your own graphics on the image editing tool, Snappa.

Sign up for a free account and head to your dashboard to get started.

Here, you can start to create an image based on custom dimensions:

Use custom dimensions to create your own graphic on Snappa.

Or simply choose from common template sizes meant for various platforms:

Snappa has common dimension templates that match different social media platforms.

One of my favorite uses for Snappa is the diverse selection they have for social media and PPC ads:

The image editing tool, Snappa, has a diverse selection of social media and pay per click ads.

It’s probably the one of the best image editing tools with the most options when it comes to creating high-quality ads in just minutes.

You don’t need to pay a designer outrageous prices for a few banner ads anymore.

Snappa allows you to do it in minutes.

Got a new idea for an ad on Facebook? Don’t wait 48 hours for your designer to make it.

Once you’ve picked out your desired template size, you can choose from a bunch of free options:

Choose from free options on Snappa's website to edit your images.

These templates are awesome and easy to work with.

After selecting your template, you can customize just about everything on it.

You can add high-quality background images or icons for free:

Edit background images with the image editing tool Snappa.

But the best part about Snappa’s editing tool is the free, high-quality icons.

These icons are what you’d expect from a professional graphic designer and they are all available for your use:

Snappa has the essential icons needed to edit images.

They have just about anything you can think of, from social media to emoji-style icons.

If you have a particular icon graphic in mind, you can simply search in the bar above to narrow down your results:

Use the search tool to look for specific icons you have in mind with Snappa.

And the free, professional-quality stock photos are endless:

Use the image editing tool Snappa for high quality stock images.

Snappa is an awesome tool if you love to use icons or stock photos in your work.

If you like instant social scheduling, Snappa has that, too.

Simply hit “Share” in the top-right corner and you can connect social media accounts and even send content to Buffer for scheduling:

Share your images with Snappa, an image editing tool.

Take advantage of the diverse, free offerings from Snappa if you want images that make you look like a professional designer.

4. Piktochart

Beyond just basic image editing tools for social media, Google Ads, or Facebook Ads, Piktochart is centered around infographics.

The image editing tool Piktochart is great for creating infographics.

Piktochart is one of my favorite free tools for making infographics.

Usually, infographics take quite a bit of time to create.

They are a laborious process that can require professional designers and lots of money.

But you don’t need any of that.

Piktochart is extremely simple and easy to use, and I’ve used it countless times to make infographics on QuickSprout.

To get started, click the “Start For Free” button on the homepage:

Start a free trial with Piktochart.

Once you’ve created an account, it should instantly direct you to the dashboard.

From here, you can choose between three types of graphics:

Choose between three types of graphics when editing images on Piktochart.

You can create printable graphics, presentations, and infographics.

My personal favorite use of Piktochart is for the infographic templates.

There are tons of totally free templates to take advantage of:

Choose from free templates on Piktochart.

If you want to inspect one and get a preview, simply click on the template to get a sneak peek:

Preview an infographic template that you are considering using.

If you like the design, click “Use Template” at the top:

Select "use template" when you've decided which template you want on Piktochart.

From here, you can select between multiple color schemes to fit your company branding:

Choose between Piktochart's different color themes when editing your image.

On top of that, Piktochart offers really high-quality graphics just like Snappa:

Piktochart offers high quality graphics for image editing.

You can pick from thousands of icons related to almost anything you can think of.

They also have a diverse stock photo library:

Choose between quality stock photos when editing your image on Piktochart.

Piktochart is one of my favorite infographic tools because they have some of the best free options on the market.

And they don’t try to trick you into buying anything.

What you see is what you get.

If you want a high-quality infographic editing tool, this is your best bet.

5. Pixlr

Now that we’ve covered some of the best image editing tools on the market, it’s time for one of my all-time favorites.

This tool isn’t for the faint of heart, though.

It’s meant for more experienced users who want deep customization options and who have a basic background in graphic design.

If you don’t have experience developing graphics out of a blank canvas, you might find this tool a bit frustrating.

Pixlr’s photo editor resembles Photoshop almost exactly. It has just about every editing feature you’d find in a paid tool.

Pixlr is a free image editing tool that resembles other high quality, expensive applications.

It’s a completely free tool with incredible customization options you’d expect in a high-quality, expensive application.

To get started, head to Pixlr and create a new image from scratch or open an existing one from a URL or your computer.

If you aren’t comfortable with creating designs from scratch, then Pixlr probably won’t be your go-to tool.

It requires some design elements and skills that are above the level of Snappa.

If you create a new image, you can select the dimensions to your liking:

Select your image dimensions when creating a new image on Pixlr.

From here, you start to edit a blank canvas just like you would in Adobe’s Photoshop:

Edit on a blank canvas with Pixlr.

The greatest strengths of this tool come in the form of detailed filters, layers, and adjustments.

For example, you can use it to edit an awesome image or create a new blog graphic with various options:

Create custom graphics using Pixlr.

It’s definitely not the easiest tool on the market to use, but if you are looking for a completely free tool with more customization options, Pixlr is a great one.

You can build graphics from the ground up or simply stitch them together like you would in Photoshop.

Go ahead and give it a try today!

6. Luminar AI

From Skylum, we have the first photo editor powered solely by artificial intelligence: Luminar AI.

Its goal is to take some of the stress out of photo editing by automating the process.

Bridging the gap between basic image editing tools and pro software like Photoshop, this software offers the right in-between gear. Best of all, you need no experience to use it.

Luminar AI is a great image editing tool that fits in between basic image editing tools and pro software like Photoshop.

Once you choose an image to work on, you can start making additions and enhancements.

Navigate through the templates and editing features. The specialty features of Luminar are Face AI, Landscape, and Portrait Bokeh. The software will even walk you through the process with editing suggestions it curates.

The AI portrait, or Face AI, is meant to make enhancements from shine removal to face slimming to color correcting. Highlight your muse’s smile and give them flawless skin for that “wow” level Luminar helps you strive towards.

Luminar AI offers AI portrait, or Face AI, to enhance photos.
An image of a woman smiling is being edited with skin, lip, and slim face enhancement on Luminar AI.

This is the creative influence that makes Luminar stand out from other AI editing software.

In the section that has more advanced tools, you will see options that help you replace a background or get the perfect bokeh effect. The cool thing is: This can all be done on the same photo.

With Landscape EnhanceAI, a custom brightness map is used to intelligently balance both light and color across the entire image to make it shine.

A portrait image of a dock, boat, water, and mountains and trees in the background is being enhanced using Landscape Enhance AI on Luminar AI.

Lighting is everything with photo editing. The Bokeh Effect is tough to master, getting the proper balance of light just right. Luminar AI puts you in control and makes suggestions for proper focus and blur for an aesthetically pleasing edit.

Acheive the perfect bokeh effect when editing images on Luminar AI.

When you first start using the software, it can be a bit of a chore to learn. After some time, though, you’ll remember which features are your favorite.

No matter your experience with editing, Luminar allows you to make quick edits at the push of a button. This is especially great for those of you who don’t like sitting in front of your computer too long.

One other thing about this software I like besides its ease of use: While it may be a Photoshop competitor, Luminar can be used as a Photoshop plugin.

That’s right. You can have the best of both worlds with all the aspects of each tool.

So, all around, I say it’s a tool most of you will be a fan of.

Frequently Asked Questions

What is image editing?

Image editing is the process of enhancing digital or analog photographs using various methods, devices, or programs. Photo and image editing might be different when creating graphics versus editing a picture. Scanners, digital cameras, and other image-capturing tools may produce good yet imperfect images that need further editing attention.

What are image editing tools?

An image editing tool is software that enables the editing and conversion of images to varying graphic formats. Everyone knows Photoshop as one of the most popular image editing tools, but there are many others with similar capabilities. Some specialize in removing backgrounds or are a beginner-friendly version of capabilities found within Photoshop. If you want to make an infographic, try Piktochart. Maybe you want some AI guidance when editing, try Luminar AI instead. Think of your needs or what you want to learn and let that drive your starting point for your editing journey.

How should I choose an image editing tool?

Think about the functionality you need to perform the task at hand. Maybe you need to crop, rotate, or straighten an image. Perhaps you need to correct a smile or the shading of colors of an image. You might need to create an infographic. Read up on the handy tools I mentioned in this post and choose the one that’s best to get your job done.

What are some features I need to have when editing images?

Some standard features of a basic image editor include:

  • Crop and rotation
  • Lighting adjustment (exposure, brightness, contrast, saturation, etc.)
  • Focus and sharpness correction
  • Blemish corrections
  • Red-eye adjustment

Along with some of these basic features, items you want to have especially for editing images include adding layers to create different amounts of transparency and adding elements like blur or vignette to create specific appearances.

What is photo editing?

This post-production technique of digital photography involves using photo editing tools to alter images to your desired outcome. It is the digital photography equivalent of a darkroom, where photographs are edited after they’re taken.

How to learn photo editing?

Start with photo editing tutorials to learn your style. YouTube is always a great place to start, but the software you use likely offers a tour of its features – use them to your advantage. You can avoid the need for a lot of editing by adjusting your camera’s settings as well. A higher-quality camera helps, too. With many of the tools like I’ve mentioned, the software provides step-by-step instructions telling you how to use the product in real time of your editing process. If you’re still unsure how to get started, read our complete guide on designing stunning visuals as a beginner.

How to calibrate monitor for photo editing?

This will depend on whether you have a Mac or PC

For PC: Go to Start > Control Panel > Appearance and Personalization > Display > Calibrate Display Color. Then open the software that will walk you through and give you a general screen calibration. You can also find it by searching for “Calibrate Display Color” in your Windows search box.

For Mac: With the glossy glass, it’s a bit more difficult, but setting your white point to 5500 will give your screen a warm and fairly accurate display.

What’s the difference between a photo editing tool and image editing tool?

Photo editing tools are exclusively used for manipulating images captured with a camera. Image editing tools can do this as well, but also have the capacity to work on static graphics, or potentially combine the two.

{
“@context”: “https://schema.org”,
“@type”: “FAQPage”,
“mainEntity”: [
{
“@type”: “Question”,
“name”: “What is image editing? “,
“acceptedAnswer”: {
“@type”: “Answer”,
“text”: ”

Image editing is the process of enhancing digital or analog photographs using various methods, devices, or programs. Photo and image editing might be different when creating graphics versus editing a picture. Scanners, digital cameras, and other image-capturing tools may produce good yet imperfect images that need further editing attention.


}
}
, {
“@type”: “Question”,
“name”: “What are image editing tools? “,
“acceptedAnswer”: {
“@type”: “Answer”,
“text”: ”

An image editing tool is software that enables the editing and conversion of images to varying graphic formats. Everyone knows Photoshop as one of the most popular image editing tools, but there are many others with similar capabilities. Some specialize in removing backgrounds or are a beginner-friendly version of capabilities found within Photoshop. If you want to make an infographic, try Piktochart. Maybe you want some AI guidance when editing, try Luminar AI instead. Think of your needs or what you want to learn and let that drive your starting point for your editing journey.


}
}
, {
“@type”: “Question”,
“name”: “How should I choose an image editing tool? “,
“acceptedAnswer”: {
“@type”: “Answer”,
“text”: ”

Think about the functionality you need to perform the task at hand. Maybe you need to crop, rotate, or straighten an image. Perhaps you need to correct a smile or the shading of colors of an image. You might need to create an infographic. Read up on the handy tools I mentioned in this post and choose the one that’s best to get your job done.


}
}
, {
“@type”: “Question”,
“name”: “What are some features I need to have when editing images? “,
“acceptedAnswer”: {
“@type”: “Answer”,
“text”: ”

Some standard features of a basic image editor include:

  • Crop and rotation
  • Lighting adjustment (exposure, brightness, contrast, saturation, etc.)
  • Focus and sharpness correction
  • Blemish corrections
  • Red-eye adjustment

Along with some of these basic features, items you want to have especially for editing images include adding layers to create different amounts of transparency and adding elements like blur or vignette to create specific appearances.


}
}
, {
“@type”: “Question”,
“name”: “What is photo editing? “,
“acceptedAnswer”: {
“@type”: “Answer”,
“text”: ”

This post-production technique of digital photography involves using photo editing tools to alter images to your desired outcome. It is the digital photography equivalent of a darkroom, where photographs are edited after they’re taken.


}
}
, {
“@type”: “Question”,
“name”: “How to learn photo editing? “,
“acceptedAnswer”: {
“@type”: “Answer”,
“text”: ”

Start with photo editing tutorials to learn your style. YouTube is always a great place to start, but the software you use likely offers a tour of its features – use them to your advantage. You can avoid the need for a lot of editing by adjusting your camera’s settings as well. A higher-quality camera helps, too. With many of the tools like I’ve mentioned, the software provides step-by-step instructions telling you how to use the product in real time of your editing process. If you’re still unsure how to get started, read our complete guide on designing stunning visuals as a beginner.


}
}
, {
“@type”: “Question”,
“name”: “How to calibrate monitor for photo editing? “,
“acceptedAnswer”: {
“@type”: “Answer”,
“text”: ”

This will depend on whether you have a Mac or PC

For PC: Go to Start > Control Panel > Appearance and Personalization > Display > Calibrate Display Color. Then open the software that will walk you through and give you a general screen calibration. You can also find it by searching for “Calibrate Display Color” in your Windows search box.

For Mac: With the glossy glass, it’s a bit more difficult, but setting your white point to 5500 will give your screen a warm and fairly accurate display.


}
}
, {
“@type”: “Question”,
“name”: “What’s the difference between a photo editing tool and image editing tool?”,
“acceptedAnswer”: {
“@type”: “Answer”,
“text”: ”

Photo editing tools are exclusively used for manipulating images captured with a camera. Image editing tools can do this as well, but also have the capacity to work on static graphics, or potentially combine the two.


}
}
]
}

Conclusion

Content marketing should always include visuals.

You can’t just stick a bunch of text up on a page and expect your audience to read and digest every word.

It’s just not going to happen.

Videos and images are a great way to grab their attention and get your message across.

And, like I said, Google likes them, too. A recent study on Google rankings found that images can even help you rank better.

Images should always be a focus in your content marketing and social media strategies.

They are great for driving shares and clicks that plain text just can’t make happen.

But how do you create images when you have no graphic design experience?

Thankfully for us, there are tons of free tools online that have templates and drag-and-drop style design.

These tools are amazing for creating designs in a fraction of the time without the need to learn graphic design skills.

Most of these tools have thousands of free themes, icons, and tools for you to use!

Start by using VistaCreate.

It’s one of the most popular image editing tools on the market. It’s great for fast, easy designs for almost anything you can think of.

Try PicMonkey for diverse portrait editing and more advanced tools with an easy interface.

Snappa is excellent if you want high-quality icons and integrated social publishing.

Pixlr is the most advanced of the tools, but offers incredible Photoshop-quality features for free.

Luminar brings a new concept to photo editing tools with AI capabilities.

Even a beginning designer will look like a pro with these tools.

What are your favorite image editing tools to use for content marketing and social media?

How to Create an In-Depth Content Hub

Competition for search engine ranking is fierce, with the top three search results owning 55% of all traffic.

And the first result? They take almost 29% of those clicks.

So how do you get your website to that coveted first spot? By understanding how Google works and how to give them exactly what they’re looking for.

A content hub is a great way to show search engines that your site is an authority on a certain topic. Hubs are a collection of all your content on a specific subject, and they’re designed to be a comprehensive resource on that topic.

In this post, I’ll provide answers to questions like “what is a content hub?’ showcase how important content hubs are for SEO, and discuss how to create a content hub for your blog information.

What is a Content Hub?

A content hub is a section of your website that contains all the information related to a specific topic.

The goal of a content hub is twofold:

1) To be an authoritative resource on the chosen topic.

2) To increase traffic and conversions by ranking highly in search engines.

A content hub is different from a blog in that the goal is not to produce new content regularly. Instead, the focus is on curating and organizing all your existing content on a topic in one place. Content hubs are also sometimes called “resource centers” or “information hubs.” In addition, when net new pieces come out after your content hub is created, they can also fall into that space.

What Are the Different Parts of a Content Hub?

When learning how to build a content hub, it’s important to understand that there are three different types of content that should be included in a content hub:

  • Blog Posts
  • Videos
  • Infographics

Blog posts are the bread and butter of a content hub. They provide in-depth information on the chosen topic and can be easily repurposed into other types of content, like infographics or videos.

Videos are a great way to break up long blocks of text and add some visual interest to a content hub. They can be used to introduce the topic, provide step-by-step instructions or give a behind-the-scenes look at your company.

Infographics are a great way to visualize data and complex concepts. They’re also easy to share on social media and are often repinned or shared by other blogs and websites.

Why Are Content Hubs Useful for SEO?

Content hubs are useful for SEO because they show search engines that your website is an authority on a certain topic. When you have a content hub, all of your content on that topic is in one place. This makes it easy for search engines to find and index your content.

Along with this, content hubs provide an easy way for people to navigate your website and find the information they’re looking for. When everything is organized in one place, users are less likely to get frustrated and leave your site.

They also help you prioritize your SEO efforts by giving you the opportunity to include more keywords and phrases related to your topic. This helps you rank higher in search engine results pages (SERPs) for those keywords.

How to Create a Content Hub

Now that you know what a content hub is and how to use a content hub for SEO, let’s talk about how to build one.

There are two different ways you can build a content hub:

  1. You can create a new website or section on your existing website specifically for your content hub.
  2. You can create a content hub using an existing piece of content, like a blog post or video.

If you have an existing website, I recommend adjusting your website structure to create a new section for your content hub. This will make it easier for search engines to find and index your content.

Creating a new website or section on your existing website specifically for your content hub has a few benefits:

  • It keeps your content organized and easy to find.
  • It helps you rank for long-tail keywords related to your content hub topic.
  • It establishes you as an authority on that topic.

If you want to use an existing piece of content as your content hub, that’s fine, too. Just be sure to include links to other related content on your website so search engines can find it.

Follow these steps on how to create a content hub:

  1. Plan where your hub will sit on your site
  2. Choose a central topic
  3. Choose subtopics
  4. Audit your existing content
  5. Start ideating your content pieces and strategy
  6. Create and implement your content
  7. Implement a measurement strategy and track your success

Let’s take a closer look at these steps.

Plan Where Your Content Hub For SEO Will Sit on Your Site

Your content hub should be easy to find and navigate. I recommend putting it in the main navigation of your website. This will make it easy for both users and search engines to find.

If you have a lot of content on your website, you may want to create multiple content hubs. This is especially useful if you have different products or services that you want to promote.

For example, if you sell both men’s and women’s clothing, you could create a separate content hub for each. This would be a good way to target different keywords and appeal to different audiences.

Choose a Central Topic

Before you start creating content for your hub, you need to choose a central topic. This will be the main focus of your content hub.

To choose a central topic, start by brainstorming a list of potential topics. Then, narrow down your list by choosing a topic that:

  • Is relevant to your business
  • Has a lot of search volume
  • Is something you can write about in-depth

Choose Subtopics

Once you’ve chosen a central topic, it’s time to choose some subtopics. Subtopics are related to your central topic but are narrower in scope. For example, if your central topic is “SEO,” a subtopic could be “link building.”

Your subtopics should be relevant to your central topic, but they should also be something you can write about in-depth. This is important because you want your content hub to be a comprehensive resource on your chosen topic.

To choose subtopics, start by brainstorming a list of potential topics. Then, narrow down your list by choosing topics that:

  • Are relevant to your central topic
  • Have a lot of search volume
  • Are something you can add it naturally

If you’re struggling to get started with topic creation, my tool Ubersuggest is a great way to get a data-backed list of starter topics to start working with for your content hub.

Audit Your Existing Content

Before you start creating new content for your hub, take a look at the content you already have on your website. You may have some articles or blog posts that would be a good fit for your content hub and fit into your topics and overall strategy.

To audit your existing content, start by doing a search on your website for relevant keywords. Then, go through each piece of content and decide if it’s relevant to your content hub.

If it is, add it to your list of potential content for your hub. Even if the piece needs some editing, it will save you the time you would be spending on creating a net-new piece.

Start Ideating Your Content Pieces and Strategy

Once you’ve got a good idea of the content you already have, it’s time to start creating content for your content hub. When you’re planning your content, there are a few things to keep in mind:

  • Your content should be comprehensive and cover all aspects of your topic.
  • Your content should be well-researched and accurate.
  • Your content should be well-written and engaging.
  • Your content should be visually appealing and easy to read.
  • You should include calls-to-action (CTAs) throughout your content.

When you’re planning your content, it can be helpful to create a content strategy. This will help you map out what content you need to create and how it will all fit together.

To create a content strategy, start by making a list of all the content you want to include in your hub. Then, categorize your content by topic. This will help you see how everything fits together and what topics you need to write about. Keyword research, to an extent, can guide you on some topics to cover, but you want to be careful. Reusing the same keywords across multiple pages can lead to cannibalization, where they start competing with each other for SERP dominance.

Another important thing to consider when creating your content hub is internal linking. For SEO purposes, it’s key to make sure that your related content is interlinking with each other, using strong anchor text.

Create and Implement Your Content Hub For SEO

With your plan in place, it’s time to create the content to add to the hub. Once written, get ready to implement your plan. Your content hub will live on your website, but how you implement it will depend on your website’s structure. It could live on a separate page under a resources section, or it could be directly linked on your homepage.

Once you’ve decided how you want to implement your content hub, it’s time to start publishing your content. When publishing, it’s important to think about your cadence. How often would you like to publish your content and what’s your bandwidth to do so? Ideally, the more content you have, the better. Giving yourself a schedule — whether it’s every Thursday or once a month — will ensure you are growing your content hub and enhancing your website visibility within search pages.

As you add each piece of content, make sure to link to it from your landing page using relevant anchor text. This will help users navigate through your content and find what they’re looking for.

When you have all your content added, it’s time to start promoting it. Share your content on social media, in email newsletters and on other websites. The more people that see your content, the more traffic you’ll get to your site.

Implement a Measuring Strategy and Track Your Success

To measure the success of your content hub, track how much traffic it’s getting and how long users are spending on each page. You can also track how many people are subscribing to your email list or following you on social media.

By tracking these metrics, you’ll be able to see how successful your content hub is and how it’s impacting your business.

Some helpful metrics to track include:

  • Pageviews: Track how many people are viewing your content hub.
  • Average time on page: Track how long users are spending on each page of your content hub.
  • Bounce rate: Track how many people are leaving your site after viewing only one page.
  • Social media followers: Track how many people are following you on social media.
  • Email subscribers: Track how many people are subscribing to your email list.
  • Conversion rate: Track how many people are taking the desired action on your site, such as subscribing to your email list or buying a product—converting your blog readers to leads.

If you’re not seeing the results you want, you can make changes to your content or promotion strategy and track how those changes impact your metrics.

To measure your results, consider using an analytics tool like Google Analytics or HubSpot. These tools will help you track your traffic and understand how users are interacting with your content.

How To Create A Content Hub FAQs

How do I internally link in a content hub?

When you’re adding content to your hub, make sure to link to other articles and blog posts on your site. This will help users navigate through your content and find what they’re looking for.

Why should I invest in a content hub?

Content hubs are a great way to improve your SEO and drive traffic to your website. By creating a comprehensive resource, you’ll be able to rank for more keywords and attract more visitors. A content hub can also help you generate leads and build relationships with potential customers. By providing valuable information, you’ll be able to build trust with your audience and position yourself as an expert in your industry.

What are the different types of content hubs?

There are three types of content hubs:

  1. A collection of blog posts on a specific topic
  2. A library of resources such as ebooks, guides, and templates
  3. A directory of businesses or service providers

How often should I update my content hub?

You should aim to update your content hub at least once a month. This will help you keep your content fresh and relevant. If you have any breaking news or new product launches, be sure to update your content hub as soon as possible.

Do I need a content strategy for my content hub?

Yes, it’s important to have a content strategy when creating a content hub. This will help you map out what content you need to create and how it will all fit together. Without a plan, it will be difficult to create a comprehensive resource that covers all aspects of your chosen topic.

{
“@context”: “https://schema.org”,
“@type”: “FAQPage”,
“mainEntity”: [
{
“@type”: “Question”,
“name”: “How do I internally link in a content hub?”,
“acceptedAnswer”: {
“@type”: “Answer”,
“text”: ”

When you’re adding content to your hub, make sure to link to other articles and blog posts on your site. This will help users navigate through your content and find what they’re looking for.


}
}
, {
“@type”: “Question”,
“name”: “Why should I invest in a content hub?”,
“acceptedAnswer”: {
“@type”: “Answer”,
“text”: ”

Content hubs are a great way to improve your SEO and drive traffic to your website. By creating a comprehensive resource, you’ll be able to rank for more keywords and attract more visitors. A content hub can also help you generate leads and build relationships with potential customers. By providing valuable information, you’ll be able to build trust with your audience and position yourself as an expert in your industry.


}
}
, {
“@type”: “Question”,
“name”: “What are the different types of content hubs?”,
“acceptedAnswer”: {
“@type”: “Answer”,
“text”: ”

There are three types of content hubs:

  1. A collection of blog posts on a specific topic
  2. A library of resources such as ebooks, guides, and templates
  3. A directory of businesses or service providers


}
}
, {
“@type”: “Question”,
“name”: “How often should I update my content hub?”,
“acceptedAnswer”: {
“@type”: “Answer”,
“text”: ”

You should aim to update your content hub at least once a month. This will help you keep your content fresh and relevant. If you have any breaking news or new product launches, be sure to update your content hub as soon as possible.


}
}
, {
“@type”: “Question”,
“name”: “Do I need a content strategy for my content hub?”,
“acceptedAnswer”: {
“@type”: “Answer”,
“text”: ”

Yes, it’s important to have a content strategy when creating a content hub. This will help you map out what content you need to create and how it will all fit together. Without a plan, it will be difficult to create a comprehensive resource that covers all aspects of your chosen topic.


}
}
]
}

How To Create A Content Hub Conclusion

Now that you understand how to create a content hub, it’s time to get started.

Remember those first result clicks I mentioned earlier? You want those clicks to be for your site. And a content hub will help you move up the rankings to do just that.

I don’t expect you to get this done immediately. SEO is a long-game strategy that yields big results.

But with a little effort, you can create a valuable resource, aka a content hub, to establish your brand and attract more visitors.

Continue experimenting with content ideas and adding new pieces to your content hub, and you’ll quickly establish an audience that values your content, helping you move up those search result pages.

Do you have any tips for creating a content hub? Share them in the comments below!

The post How to Create an In-Depth Content Hub appeared first on #1 SEO FOR SMALL BUSINESSES.

The post How to Create an In-Depth Content Hub appeared first on Buy It At A Bargain – Deals And Reviews.

How to Create an In-Depth Content Hub

Competition for search engine ranking is fierce, with the top three search results owning 55% of all traffic.

And the first result? They take almost 29% of those clicks.

So how do you get your website to that coveted first spot? By understanding how Google works and how to give them exactly what they’re looking for.

A content hub is a great way to show search engines that your site is an authority on a certain topic. Hubs are a collection of all your content on a specific subject, and they’re designed to be a comprehensive resource on that topic.

In this post, I’ll provide answers to questions like “what is a content hub?’ showcase how important content hubs are for SEO, and discuss how to create a content hub for your blog information.

What is a Content Hub?

A content hub is a section of your website that contains all the information related to a specific topic.

The goal of a content hub is twofold:

1) To be an authoritative resource on the chosen topic.

2) To increase traffic and conversions by ranking highly in search engines.

A content hub is different from a blog in that the goal is not to produce new content regularly. Instead, the focus is on curating and organizing all your existing content on a topic in one place. Content hubs are also sometimes called “resource centers” or “information hubs.” In addition, when net new pieces come out after your content hub is created, they can also fall into that space.

What Are the Different Parts of a Content Hub?

When learning how to build a content hub, it’s important to understand that there are three different types of content that should be included in a content hub:

  • Blog Posts
  • Videos
  • Infographics

Blog posts are the bread and butter of a content hub. They provide in-depth information on the chosen topic and can be easily repurposed into other types of content, like infographics or videos.

Videos are a great way to break up long blocks of text and add some visual interest to a content hub. They can be used to introduce the topic, provide step-by-step instructions or give a behind-the-scenes look at your company.

Infographics are a great way to visualize data and complex concepts. They’re also easy to share on social media and are often repinned or shared by other blogs and websites.

A example of an explanatory infographic.

Why Are Content Hubs Useful for SEO?

Content hubs are useful for SEO because they show search engines that your website is an authority on a certain topic. When you have a content hub, all of your content on that topic is in one place. This makes it easy for search engines to find and index your content.

Along with this, content hubs provide an easy way for people to navigate your website and find the information they’re looking for. When everything is organized in one place, users are less likely to get frustrated and leave your site.

They also help you prioritize your SEO efforts by giving you the opportunity to include more keywords and phrases related to your topic. This helps you rank higher in search engine results pages (SERPs) for those keywords.

How to Create a Content Hub

Now that you know what a content hub is and how to use a content hub for SEO, let’s talk about how to build one.

There are two different ways you can build a content hub:

  1. You can create a new website or section on your existing website specifically for your content hub.
  2. You can create a content hub using an existing piece of content, like a blog post or video.

If you have an existing website, I recommend adjusting your website structure to create a new section for your content hub. This will make it easier for search engines to find and index your content.

Creating a new website or section on your existing website specifically for your content hub has a few benefits:

  • It keeps your content organized and easy to find.
  • It helps you rank for long-tail keywords related to your content hub topic.
  • It establishes you as an authority on that topic.

If you want to use an existing piece of content as your content hub, that’s fine, too. Just be sure to include links to other related content on your website so search engines can find it.

Follow these steps on how to create a content hub:

  1. Plan where your hub will sit on your site
  2. Choose a central topic
  3. Choose subtopics
  4. Audit your existing content
  5. Start ideating your content pieces and strategy
  6. Create and implement your content
  7. Implement a measurement strategy and track your success

Let’s take a closer look at these steps.

Plan Where Your Content Hub For SEO Will Sit on Your Site

Your content hub should be easy to find and navigate. I recommend putting it in the main navigation of your website. This will make it easy for both users and search engines to find.

If you have a lot of content on your website, you may want to create multiple content hubs. This is especially useful if you have different products or services that you want to promote.

For example, if you sell both men’s and women’s clothing, you could create a separate content hub for each. This would be a good way to target different keywords and appeal to different audiences.

Choose a Central Topic

Before you start creating content for your hub, you need to choose a central topic. This will be the main focus of your content hub.

To choose a central topic, start by brainstorming a list of potential topics. Then, narrow down your list by choosing a topic that:

  • Is relevant to your business
  • Has a lot of search volume
  • Is something you can write about in-depth

Choose Subtopics

Once you’ve chosen a central topic, it’s time to choose some subtopics. Subtopics are related to your central topic but are narrower in scope. For example, if your central topic is “SEO,” a subtopic could be “link building.”

Your subtopics should be relevant to your central topic, but they should also be something you can write about in-depth. This is important because you want your content hub to be a comprehensive resource on your chosen topic.

To choose subtopics, start by brainstorming a list of potential topics. Then, narrow down your list by choosing topics that:

  • Are relevant to your central topic
  • Have a lot of search volume
  • Are something you can add it naturally

If you’re struggling to get started with topic creation, my tool Ubersuggest is a great way to get a data-backed list of starter topics to start working with for your content hub.

Audit Your Existing Content

Before you start creating new content for your hub, take a look at the content you already have on your website. You may have some articles or blog posts that would be a good fit for your content hub and fit into your topics and overall strategy.

To audit your existing content, start by doing a search on your website for relevant keywords. Then, go through each piece of content and decide if it’s relevant to your content hub.

If it is, add it to your list of potential content for your hub. Even if the piece needs some editing, it will save you the time you would be spending on creating a net-new piece.

Start Ideating Your Content Pieces and Strategy

Once you’ve got a good idea of the content you already have, it’s time to start creating content for your content hub. When you’re planning your content, there are a few things to keep in mind:

  • Your content should be comprehensive and cover all aspects of your topic.
  • Your content should be well-researched and accurate.
  • Your content should be well-written and engaging.
  • Your content should be visually appealing and easy to read.
  • You should include calls-to-action (CTAs) throughout your content.

When you’re planning your content, it can be helpful to create a content strategy. This will help you map out what content you need to create and how it will all fit together.

To create a content strategy, start by making a list of all the content you want to include in your hub. Then, categorize your content by topic. This will help you see how everything fits together and what topics you need to write about. Keyword research, to an extent, can guide you on some topics to cover, but you want to be careful. Reusing the same keywords across multiple pages can lead to cannibalization, where they start competing with each other for SERP dominance.

Another important thing to consider when creating your content hub is internal linking. For SEO purposes, it’s key to make sure that your related content is interlinking with each other, using strong anchor text.

Create and Implement Your Content Hub For SEO

With your plan in place, it’s time to create the content to add to the hub. Once written, get ready to implement your plan. Your content hub will live on your website, but how you implement it will depend on your website’s structure. It could live on a separate page under a resources section, or it could be directly linked on your homepage.

Once you’ve decided how you want to implement your content hub, it’s time to start publishing your content. When publishing, it’s important to think about your cadence. How often would you like to publish your content and what’s your bandwidth to do so? Ideally, the more content you have, the better. Giving yourself a schedule — whether it’s every Thursday or once a month — will ensure you are growing your content hub and enhancing your website visibility within search pages.

As you add each piece of content, make sure to link to it from your landing page using relevant anchor text. This will help users navigate through your content and find what they’re looking for.

When you have all your content added, it’s time to start promoting it. Share your content on social media, in email newsletters and on other websites. The more people that see your content, the more traffic you’ll get to your site.

Implement a Measuring Strategy and Track Your Success

To measure the success of your content hub, track how much traffic it’s getting and how long users are spending on each page. You can also track how many people are subscribing to your email list or following you on social media.

By tracking these metrics, you’ll be able to see how successful your content hub is and how it’s impacting your business.

Some helpful metrics to track include:

  • Pageviews: Track how many people are viewing your content hub.
  • Average time on page: Track how long users are spending on each page of your content hub.
  • Bounce rate: Track how many people are leaving your site after viewing only one page.
  • Social media followers: Track how many people are following you on social media.
  • Email subscribers: Track how many people are subscribing to your email list.
  • Conversion rate: Track how many people are taking the desired action on your site, such as subscribing to your email list or buying a product—converting your blog readers to leads.

If you’re not seeing the results you want, you can make changes to your content or promotion strategy and track how those changes impact your metrics.

To measure your results, consider using an analytics tool like Google Analytics or HubSpot. These tools will help you track your traffic and understand how users are interacting with your content.

Include analytics tools when you create a content hub.

How To Create A Content Hub FAQs

How do I internally link in a content hub?

When you’re adding content to your hub, make sure to link to other articles and blog posts on your site. This will help users navigate through your content and find what they’re looking for.

Why should I invest in a content hub?

Content hubs are a great way to improve your SEO and drive traffic to your website. By creating a comprehensive resource, you’ll be able to rank for more keywords and attract more visitors. A content hub can also help you generate leads and build relationships with potential customers. By providing valuable information, you’ll be able to build trust with your audience and position yourself as an expert in your industry.

What are the different types of content hubs?

There are three types of content hubs:

  1. A collection of blog posts on a specific topic
  2. A library of resources such as ebooks, guides, and templates
  3. A directory of businesses or service providers

How often should I update my content hub?

You should aim to update your content hub at least once a month. This will help you keep your content fresh and relevant. If you have any breaking news or new product launches, be sure to update your content hub as soon as possible.

Do I need a content strategy for my content hub?

Yes, it’s important to have a content strategy when creating a content hub. This will help you map out what content you need to create and how it will all fit together. Without a plan, it will be difficult to create a comprehensive resource that covers all aspects of your chosen topic.

{
“@context”: “https://schema.org”,
“@type”: “FAQPage”,
“mainEntity”: [
{
“@type”: “Question”,
“name”: “How do I internally link in a content hub?”,
“acceptedAnswer”: {
“@type”: “Answer”,
“text”: ”

When you’re adding content to your hub, make sure to link to other articles and blog posts on your site. This will help users navigate through your content and find what they’re looking for.


}
}
, {
“@type”: “Question”,
“name”: “Why should I invest in a content hub?”,
“acceptedAnswer”: {
“@type”: “Answer”,
“text”: ”

Content hubs are a great way to improve your SEO and drive traffic to your website. By creating a comprehensive resource, you’ll be able to rank for more keywords and attract more visitors. A content hub can also help you generate leads and build relationships with potential customers. By providing valuable information, you’ll be able to build trust with your audience and position yourself as an expert in your industry.


}
}
, {
“@type”: “Question”,
“name”: “What are the different types of content hubs?”,
“acceptedAnswer”: {
“@type”: “Answer”,
“text”: ”

There are three types of content hubs:

  1. A collection of blog posts on a specific topic
  2. A library of resources such as ebooks, guides, and templates
  3. A directory of businesses or service providers


}
}
, {
“@type”: “Question”,
“name”: “How often should I update my content hub?”,
“acceptedAnswer”: {
“@type”: “Answer”,
“text”: ”

You should aim to update your content hub at least once a month. This will help you keep your content fresh and relevant. If you have any breaking news or new product launches, be sure to update your content hub as soon as possible.


}
}
, {
“@type”: “Question”,
“name”: “Do I need a content strategy for my content hub?”,
“acceptedAnswer”: {
“@type”: “Answer”,
“text”: ”

Yes, it’s important to have a content strategy when creating a content hub. This will help you map out what content you need to create and how it will all fit together. Without a plan, it will be difficult to create a comprehensive resource that covers all aspects of your chosen topic.


}
}
]
}

How To Create A Content Hub Conclusion

Now that you understand how to create a content hub, it’s time to get started.

Remember those first result clicks I mentioned earlier? You want those clicks to be for your site. And a content hub will help you move up the rankings to do just that.

I don’t expect you to get this done immediately. SEO is a long-game strategy that yields big results.

But with a little effort, you can create a valuable resource, aka a content hub, to establish your brand and attract more visitors.

Continue experimenting with content ideas and adding new pieces to your content hub, and you’ll quickly establish an audience that values your content, helping you move up those search result pages.

Do you have any tips for creating a content hub? Share them in the comments below!

How to Create and Launch a Google Ads Campaign [2022 Update]

I don’t get it. I have a ton of friends who own companies. As soon as they start making some money, they start talking to me about all kinds of investments.

“Real estate’s supposed to be good.”

“I wanna be an angel investor, any tips?”

My usual response?

“Google Ads, dude!”

They run these big companies, selling great products, and what do they do? Run off and try to put their money in anything, EXCEPT their own business.

Why not just sell more of their products? Double down on what’s already working, instead of starting to play in a field you know nothing about?

In my experience, Google Ads is usually the easiest way to do it. If my friend wants to increase his investment money, say $50,000, he can spend 1000 hours trying to become good at angel investing, learn everything about it, and hopefully land an investment in the next Facebook. A friend of mine could do the same for real estate, trying to snag a cheap apartment or condo, and flip it (easier, but still hard).

Instead, you can spend 100 hours learning Google Ads (or just hire someone who knows it) and invest $50,000 in Google Ads campaigns to make $500,000 in sales. Which one do you think is the most likely to pan out?

In my opinion, option three is a no-brainer.

In light of that, today, I want to open a black box most people are unfamiliar with: Google Ads.

Google Ads is a way to get your money’s worth, often boasting an ROI in the hundreds of percentage points. However, the steps I cover here ensure you’re depositing more money into your own bank account rather than just funding Google’s empire.

Now, let’s get down to it. Tie on your Google Ads apron, grab a pen to write down the key steps of a successful campaign, and follow along as I walk you through how to create a profitable Google Ads campaign from scratch.

Neil Patel pointing to the camera.

See How My Agency Can Drive Massive Amounts of Traffic to Your Website

  • SEO – unlock massive amounts of SEO traffic. See real results.
  • Content Marketing – our team creates epic content that will get shared, get links, and attract traffic.
  • Paid Media – effective paid strategies with clear ROI.

BOOK A CALL

Google Ad Step #1: Is There Customer Demand?

If your customers are not searching for your product or service online, then obviously, Google Ads won’t work for you.

With that in mind, before you get too excited about creating your first Google Ads campaign, you need to verify there is a search volume for what you’re offering.

I recommend using Ubersuggest, which is my free keyword research tool. The keyword tool acts much like a thesaurus. You enter in phrases you think your prospects are searching for, and it tells you other similar, relevant phrases.

The homepage of Ubersuggest.

Additionally, Ubersuggest tells you how:

  • often people search these phrases.
  • competitive the keywords are.
  • much it costs to advertise on each keyword.

When put together, all this information helps you determine which keywords to use in your first Google Ads campaign.

The keyword overview page of Ubersuggest.

I also recommend you use the keyword “Suggestions” provided under the main chart. This gives you an idea of related keywords and how much search volume those keywords have.

In addition, you can use Google’s Keyword Planner tool to help you find the best keywords to target. It provides you with bid estimates and total searches, so you can make a plan.

Next, there are three questions to ask to determine whether to advertise on a particular keyword:

  1. Are people looking for the keyword on Google? If there is no search volume, then that tells you no one is typing that phrase into Google.
  2. Is the person searching this keyword likely to buy my product or service? Or is the person more likely just doing research with no intention of buying? In other words, what is the intent of the keyword? When starting out, you need to build your advertising around “buying intent” keywords where the person is clearly looking to buy.
  3. Finally, ask yourself, can I afford to advertise on the keyword? This question is important, but it requires a bit of math to calculate. Let’s take a look at that now.

Google Ads Step #2: Can You Afford to Advertise on Top Keywords?

Before finalizing your keyword list, you must ensure it makes sense to target that term. This prevents you from going after unprofitable keywords. I find it’s better to run these numbers before you start sinking time and money into a campaign destined to fail.

To answer the question “Can I afford to advertise on this keyword?” you need to calculate your maximum cost per click (Max CPC). To do this, you compare your business’s Max CPC to the estimated keyword CPC in the Keyword Tool to see if you can afford to advertise.

For example, if your Max CPC is $5 and the estimated CPC is $4, then you know there’s a good chance you can profitably advertise on that particular keyword.

You determine your Max CPC by your website’s conversion rate, profit per customer, and target advertising profit margin. If you don’t know these numbers, you need to guesstimate or set up tracking to calculate them more accurately.

Use the formula below to calculate your Max CPC and then compare it to the estimated CPC you found above:

Max CPC = (profit per customer) x (1 – profit margin) x (website conversion rate)

For example, let’s say your average profit per customer is $500, and out of 1,000 website visitors, you convert 10 into customers. That means you have a 1 percent website conversion rate.

If you are comfortable with a 30 percent profit margin, then here’s how you would calculate your Max CPC:

Max CPC = $500 x (1 – 0.30) x 1% = $3.50

Again, your Max CPC must be in the neighborhood of the estimated CPC in Google’s Keyword Planner tool, or else you’re in trouble.

Suppose your Max CPC is $3.50 and the estimated CPC for a keyword is $10. In that case, you need to first increase either your profit per customer or your conversion rate before you can profitably advertise on that particular keyword.

Google Ads Step #3: Perform Competitor Analysis

At this point, you now have a list of “buying intent” keywords that you’re confident you can afford. The next step is to reduce your risk by leveraging competitor intelligence.

In most industries, you find competitors who know far more than you do about optimizing and testing their Google Ads campaigns. That means they understand which keywords, ads, and landing pages work in your niche. Peeking into your competitor’s business helps you to determine if it’s easy to outrank a competitor.

Here’s how to get started.

Go to Spyfu.com and enter your keyword. In this case, it’s “cheap bricks.”

Spyfu.com's competitor analysis page.

It shows you the average CTR and the number of companies that have advertised for this keyword in the past three months.

In this case, there are just 41, which is nothing, considering there are over 1 million companies advertising on Google Ads.

It also shows you other keywords that are performing well on Google Ads.

If you click on “Advertiser history,” you even see the actual ads that your competitors use.

Spyfu.com's advertiser history page.

Pro tip: One determinant of relevancy, for Google’s quality score, is whether the keyword shows up in your actual ad.

In this case, Brickit doesn’t even mention bricks in its ad. That means they shouldn’t be too hard to beat.

Keyword overview of "chelsea apartments nyc" using Spyfu.

However, here’s an even better tip.

You can look up an individual competitor. Maybe start with the 800-pound gorilla who’s dominating the SERPs.

Then you can go in and look up all the keywords they’re currently bidding on (along with their estimated volume and costs, of course).

A list of keywords.

See, combining these approaches helps you uncover your competition’s entire PPC playbook, and then you can reverse engineer it to outperform them.

Sneaky, right?!

Don’t compete. Dominate.

Google Ads Step #4: Leverage a Powerful USP

Your USP, or unique selling proposition, differentiates your business from your competitors and gives your prospects a compelling reason to choose you.

In other words, your USP answers the question, “Why should I, your prospect, choose to do business with you, versus every other option.”

When it comes to Google Ads, there are three important reasons to create a powerful USP. It:

  1. generates more traffic from qualified prospects (encourage clicks on your ads) and repels unwanted leads (prevent clicks on your ads).=
  2. skyrockets your sales conversion rates. Not only do you generate more traffic because you get more clicks on your ads, but you also convert more of your traffic into paying customers.=
  3. reduces price comparison shopping. This can be a game-changer because buyers don’t view you as a commodity. If you give your prospects a compelling reason to do business with you, then price becomes a secondary issue

OK, a USP is a key ingredient. Makes sense, but how do you create one?

Well, first, you focus on your core strengths. What are you better at than your competitors?

Second, talk to your customers, and more importantly, listen to them. The best companies built their USP on customer insight, so ask your customers why they do business with you.

Also, ask questions to determine what your customers dislike about your industry and what your customers wish you could provide in addition to your core products or services.

Third, analyze your competitors, and look for an opening. The most important word in unique selling proposition is unique.

To create a solid USP, you need to study your competitors’ ads, websites, and marketing materials, and find your opportunity to stand out. To find the commonalities in your competitors’ ads and websites, I recommend you use a spreadsheet. As you’re doing this, look for an opening to say something unique and superior.

For example, remember the old Domino’s slogan?

“You get fresh, hot pizza, delivered to you in under 30 minutes – or it’s free!”

An example of an old Domino's ad with their slogan.

(Image source: ConversionXL)

What more could you want when ordering pizza? Fast delivery and it’s still hot when you get it.

Domino’s Pizza doesn’t claim to be all things to everybody, though. In fact, it doesn’t even mention quality ingredients, price, or taste. It focuses its entire business on the one thing its customers care about most – fast, on-time delivery.

Picture some college students late Saturday night, and you’re looking at Domino’s Pizza’s ideal customer profile!

Now, spend some time thinking about how you’re different from everyone else. What can you bring to the table that your competitors don’t?

Capitalize on that.

Google Ad Step #5: Have an Irresistible Offer

What can you offer in your Google Ads campaign that is so compelling your prospect would be a fool to not take action? How can you stand out from the other ads your prospect sees in the search results?

The answer is your irresistible offer, which consists of the following four components:

1. Valuable

Your product or service must be more valuable than the price. That’s marketing 101. This doesn’t mean your offer has to be cheap. You just need to clearly define all the value your product or service provides to your customer and ensure it outweighs your price tag.

2. Believable

When you make an offer that appears to be too good to be true, then your prospect may be a little skeptical. That’s why you must provide a believable reason for your offer.

For example, if you’re running a special sale, explain why you’re offering such a steep discount. The reason could be anything: clearing out inventory, end-of-the-year sale, celebrating an anniversary, opening a new store, your birthday, and so on.

3. Reduce or Reverse Risk

Everyone is scared of getting ripped off online. One of the best tactics to minimize the risk to your customer is with a money-back guarantee. A money-back guarantee puts the risk on your business to deliver excellent service, or else you have to give the money back to the customer.

Whenever possible, I always recommend you include some kind of guarantee in your offer. It improves your response rates, and it’s a great way to differentiate yourself from your competitors.

4. Call to Action

One of my elementary school art teachers once gave me fantastic advice when he was teaching a class. He told me to always “Use the KISS method… Keep it simple, stupid.” I didn’t realize it at the time, but those truly are words to live by, especially when you’re creating an irresistible offer.

If you want your prospect to call you, then make it crystal clear and simple to pick up the phone. Don’t expect your prospect to connect the dots or search around your website to figure out the next step. Use a strong call to action and keep it simple.

At this point, you’re probably wondering when you actually create your Google Ads campaign. After all, we’re already halfway through the steps, and you don’t have any ads to show for it!

Trust me, the first five steps are absolutely critical, and you’ll thank me later once your ads are live and you’re generating profit.

However, since you’re so keen, let’s dive in and talk about creating your ads.

Google Ads Step #6: Create Compelling Ads

With a Google Ads campaign, you pay only when people click on your ads. Therefore, your ads have two crucial jobs:

  1. Attract qualified prospects so they click on your ad instead of competitors’ ads.
  2. Repel unqualified prospects so they do not click and waste your Google Ads budget.

That means more traffic, more sales, and less wasted money on unqualified leads, which all leads to higher profits for you.

There’s one more important job for your ads. Compelling ads with a high click-through rate (CTR) boosts your Quality Score, which in turn lowers the cost per click of your keywords.

Don’t forget that your ads directly affect how much you pay per click for each keyword. Great Google Ads lower your costs, while lousy ones raise your costs.

Do you see why step #6 is so important? This is also why you must complete the previous steps, because we use them all to make the ads more compelling.

There are four key components to your Google Ads text ads:

  1. Headline
  2. Description line 1
  3. Description line 2
  4. Display URL

Headline

The headline is the most critical component because it’s the first thing your prospect will read. Try to include your keyword in your ads’ headline because Google will bold the text, which makes it stand out from other ads.

This also is the easiest way to ensure your ad is 100 percent relevant for the prospect that is searching.

Another great strategy is to ask a question in the headline. For example, if the keyword is “new york city dentist,” a compelling headline is “Need a New York Dentist?”

Not only is part of the keyword in the headline, but the question will get the prospect nodding their head yes. As all great salespeople know, just one yes is sometimes all it takes to start a chain reaction leading to the sale.

Now, let’s look at character length.

Google Ads allows 30 characters for your headline, so make every letter count and use abbreviations whenever possible.

Description Line 1 and 2

In your two description lines, reiterate the benefits of your service, state your USP, provide social proof, and/or describe your offer. And, of course, include your call to action. Google’s description fields allow 90 words each.

Display URL

The display URL is an easily overlooked area of your ads. Don’t just copy and paste your domain name. Instead, use your display URL to include your offer, your call to action, your USP, or anything else that makes your ads stand out.

Here are three examples for a dentist to give you an idea of what you can do:

  • www.domain.com/Whiter_Smile
  • www.domain.com/NYC_Dentist
  • www.domain.com/Free_Whitening

Before we move on, I want to show you an example of a good ad and a bad ad, so you can see the difference.

Example of a Good Ad for the Keyword “appliance repair”:

Same Day Sub-Zero Repair

24 Hour Service…Within 1 Hour

$25 Off Coupon. Call Us Now.

As you can see, the advertiser is clearly targeting a specific niche – people with Sub-Zero appliances. They offer compelling benefits, including same-day 24-hour service within one hour. They have an offer of a $25-off coupon. And they have a clear call to action to call now.

Note that I would try to improve this ad by including the keyword in the title to make it more relevant to the search phrase.

Example of a Weak Ad for the Keyword “appliance repair”:

[Name of Company]

family-owned since 1939 for all

your appliance needs call now

The headline of this ad was the name of the company, which is not relevant to the keyword “appliance repair.” Unless you’re a big-name brand, no one will recognize or even care about your name. It’s not compelling and there’s no congruence from the keyword to the ad.

Also, “family-owned since 1939” is not a specific benefit. There’s implied benefit if the prospect puts two and two together and believes longevity equals good service. However, that’s a lot to ask and clearly does not follow the KISS principle. Stick to explicit benefits rather than implied benefits in your ads.

Finally, the phrase “for all your appliance needs,” is too vague. This is an example of trying to be all things to all people, rather than solving a very specific problem for a very specific target customer.

Google Ads Step #7: Use Relevant Landing Pages

At this point, your prospect is actively searching for your product or service. They found your ad to be compelling versus all of the other options, clicked to learn more, and landed on your website.

Now what?

Well, if you’re like a lot of first-time advertisers, then your prospect is now on your homepage scratching their head trying to figure out what just happened. The ad made a promise the homepage couldn’t keep.

That’s because your homepage is not an advertising landing page!

Homepages explain everything your business does, all of your products and services, and all the different customers you serve. In other words, your homepage is not 100 percent relevant to the keyword searched and the ad clicked. Do not make this mistake.

Instead, create a dedicated landing page that matches the keyword and the ad. The goal is to make the entire sales process congruent so your prospect is continually reassured they are going down the right path.

The most important component on your landing page is your headline, which is the first thing your prospect will read. Your headline must grab attention, reiterate the offer made in the ad, and compel your prospect to keep reading the rest of the page.

Ensure the copy of high-converting landing pages is relevant both to the keyword searched and the ad clicked on. In addition, include:

  • your USP
  • The benefits of your product or service
  • details about your irresistible offer
  • social proof, like reviews
  • credibility that you’re a legitimate business
  • a strong call to action.

Google Ads Step #8: Conversion Tracking

We’re almost ready to set up your campaign in Google Ads, but there is one final ingredient: conversion tracking.

If you skip this step, you never know which keywords and ads generate sales and which are losing money. In other words, you can’t optimize your Google Ads campaign once it’s up and running.

Conversion tracking measures the sales generated by your Google Ads campaign. More specifically, you want to know which keywords and which ads are generating sales.

If some or all of your sales occur online with an e-commerce shopping cart, then conversion tracking is pretty straightforward. Just use the built-in Google Ads conversion tracking.

The Google Ads conversion tracking code can be found in your Google Ads account under the tool icon, then “Measurements > Conversions.”

The google ads homepage, used to find the conversion section.

To create a new conversion, simply click on the [+ Conversion] button and follow the steps to define your conversion. Then add the small snippet of code to your order form’s thank-you page or receipt page.

This code is similar to Google Analytics code, if you have that installed on your website, but it should be on only the final page after a customer completes their order.

Then, when a customer lands on your receipt page or thank you page, Google tracks the conversions in your Google Ads account automatically. That’s really all there is to it, and there’s no reason not to install this before you turn on your ads.

Google can also track app installs, web conversions, phone calls, and offline conversions.

What if you generate leads online, but you ultimately close the sale “offline” – over the phone or in-person – rather than online? Clearly, you can’t add a conversion code to your cash register, so what can you do?

The three tactics I recommend for tracking offline sales are:

  1. Create a conversion page in your sales process. For example, send all of your customers to a special page to get their receipt, create an account online, or download an important document. Think of a way to get your customers to that webpage and add the Google Ads code to that page. Now you can track the sales.
  2. Use unique coupon codes in your ads and landing pages. If you use unique coupon codes in your ads and landing pages, then you can match the codes back to the ad and keyword that generated the sale.
  3. Use tracking phone numbers in your ads and landing pages. If you use unique tracking phone numbers, you can match the calls and subsequent sales to the ads and keywords that generated the sale.

Once conversion tracking is in place, then the time has finally come to log into Google Ads and set up your first campaign.

The Google Ads interface makes campaign setup a breeze, but don’t blindly accept the default settings as one of them can get you into trouble.

Google Ads Step #9: Settings for Success

As I mentioned, Google Ads does a great job of making it fairly easy to set up your Google Ads campaign. Simply click on the blue plus symbol, then the New Campaign button, as shown below, and follow the steps to add in your ads and keywords.

The google ads campaign homepage, with the "new campaign" button highlighted.

The process is pretty simple; however, many of the default settings are not in your best interest. That’s why step #9 is to use the correct Ads settings for success.

Here are the most important settings to watch out for:

  • Search vs. Display
  • Device Bids
  • Keyword Match Types
  • Negative Keywords

Search vs. Display

Select Search Network Only for your campaign type, so you’re targeting only the Google Search Network and not the Display Network.

The campaign type selector page in Google Ads.

The display network is a completely different animal than search advertising and it requires a different set of keywords, ads, and landing pages. So always set up separate campaigns to target each network.

Keyword Match Types

Many first-time advertisers have no idea there are different match types. As a result, they waste money on irrelevant search phrases that are not part of the keywords listed in the account.

There are three main keyword match types:

  • broad
  • phrase
  • exact

Broad match, as you now know, is the default match type. If you leave your keywords as a Broad match, then Google will show your ads to any search phrase Google thinks is relevant to your keyword.

This means your ads will get more impressions, but you’ll likely show ads to irrelevant search phrases that will just waste your budget. So I do not recommend Broad match.

Phrase match keywords will trigger ads when the exact phrase is part of the keyword typed into Google. For example, if your Phrase match keyword is “office space,” then your ad will display for “New York office space” and “office space in New York.” However, your ad would not display for “office in space” because the phrase “office space” is broken up by the word “in.”

Phrase match gives you much more control over your ads than Broad match. To change your keyword to Phrase match, simply add quotes around the keyword (see image below).

Exact match simply tells Google to display your ad only when the exact keyword is typed into Google. You get the most control with Exact match, but you limit your exposure. To set your match type to Exact match, add square brackets around your keywords (see image below).

The campaign settings page within Google Ads.

I recommend starting with Phrase match because you get the best of both worlds with regard to targeting and reach. However, when you use Phrase match, you need to make sure you include negative keywords.

Negative Keywords

Negative keywords give you the ability to block phrases from triggering your ads. For example, if you’re an office space rental company advertising on the Phrase match keyword, “office space,” then you will want to block the keyword “movie.”

That way, Google won’t display your ads for an office space rental for folks searching for the Office Space movie.

To add negative keywords, go to the Keywords tab in your account, scroll down, and click on the Negative keyword link (see image below).

The negative keywords page within Google Ads.

Next, click the Add button to add in the keywords you want to block.

Once you’ve completed the setup process, then you’re ready to enable the ads and start optimizing your campaign!

Google Ads Step #10: Optimization

As soon as you set your bidding, enable your campaign, and Google approves your ads, you can take a nice deep breath. Congratulations, your ads are live!

Unfortunately, you can’t relax yet. Most campaigns are not profitable from the start and they always require continual optimization to stay profitable.

There are three main areas to improve your Google Ads campaign performance:

  1. Your keyword bids. For getting started, I recommend using Smart Bidding but once you start to generate clicks and sales, you might want to adjust your bids accordingly. If your keywords are generating sales profitably and you’re not ranked #1, then continue to raise your bids. If your keywords are not generating sales profitably, then obviously, you need to lower your bids or pause the keyword entirely.
  2. Your ad click-through rate (CTR). As I mentioned earlier, your ad CTR directly affects your quality score, which in turn determines how much you pay per click. To optimize your CTR, A/B test different ads to see which version gets the most clicks.
  3. Your landing page conversion rate. The final area to optimize is your landing page. There are many tools to help you test different landing page versions, but if you’re just starting out, I recommend you use Google Optimize. It’s easy and free to get started. Create an experiment to test two different versions of your landing page and measure to see which one generates the most conversions.

Conclusion

You’ve set up your Google Ads. What do you do now? Don’t sit back and wait. I’m serious.

Turn on your second ad and once everything is running, do something else.

Don’t sit at the computer waiting for things to happen.

Remember the third promise that you made before we began? Google Ads takes patience.

Check back in a day. Then, create more ads and start building your first ad groups. Read the data. Start tweaking.

Finally, remember that nothing matters without conversions.

It’s great if you can tell which Google Ads get a better CTR, but, if they don’t get conversions, that also doesn’t help you make money.

It might take you a month or more to get results.

Just follow your ads and analyze the data, as it comes in over the next 10 days.

Then, review, turn off ads that don’t work, add more keywords, and double down on what’s performing well.

Once you start going deeper, be sure to check out the great videos we have on Google Ads, over at Quicksprout University. You can also try to join the Google Partner program.

Have you launched a successful Google Ads campaign? What tips do you have to share?

Create an Integrated Marketing Communications Plan That Highlights the Best of Your Brand

When a customer interacts with your brand on your website, on social media channels, or in person, they should have a cohesive experience.

From brand voice to visual identity, everything should be aligned with your company’s mission, values, and goals.

This approach is called integrated marketing communications (IMC).

As more and more customers use three or more channels to research a brand, integrated marketing communications are becoming more and more important.

WSo what are integrated marketing communications, and why do they work so well? In this blog post, we’ll answer those questions and give you some tips on how to create your own integrated marketing communications plan.

What Are Integrated Marketing Communications?

The goal of integrated marketing communications is to create a consistent message and brand identity that customers will recognize across all channels.

This requires a coordinated effort that includes all aspects of marketing, from advertising and public relations to sales and customer service.

For example, if a customer sees an ad for your product on TV, hears about it on the radio, and then visits your website, they should have the same experience.

Your message should be consistent across all channels, and each channel should work together to support the others.

Why is this important?

Well, in a world where 77 percent of B2B buyers spend time researching purchases online and purchase frequency is 250 percent higher on omnichannel vs. single-channel shopping, you need to make sure your message is getting through, loud and clear.

An integrated marketing communications plan will help you do just that by bringing all of your marketing efforts together into one cohesive strategy.

The difference between single channel and omnichannel order rates.

Why Integrated Marketing Campaigns Work

Integrated marketing communications campaigns work because they provide a consistent message across all channels that are reinforced with each interaction.

This type of marketing allows you to control the conversation about your brand and ensure that your target audience is seeing the same message no matter where they encounter your brand—–whether it’s through paid advertising, social media, or even in person.

Plus, integrated marketing communications campaigns are often more cost-effective than single-channel campaigns because you can leverage existing content and assets across multiple channels.

Key benefits of an integrated marketing communications plan:

  • Rreach a wider audience than single-channel experiences
  • Kkeep your brand top of mind across all channels
  • Bbuild audience trust with consistent messaging and campaigns
  • Ssave budget by reusing content and assets

If that’s not enough, research from the Harvard Business Review found that customers who use omnichannel shopping spend 10 percent % more online and four4 percent % more in-store than single-channel customers.

Integrated Marketing Communications Examples

Looking for your next great integrated marketing communications campaign? Check out these examples for inspiration.

Budweisers’ “Whassup?” Campaign

The “Whassup?” campaign by Budweiser first aired during Monday Night Football in 1999. The campaign featured characters answering the phone saying, “Whassup?” in a comical, slurred way.

While the internet was still in its infancy, Budweiser became a pioneer by directing viewers to its website.

On the website, visitors could learn how to say “Whassup” in over 30 different languages! With this new marketing campaign, only one phrase increased visitors to Budweiser’s website and sealed the integrated marketing communications campaign’s efficacy.

The campaign was a success and won the Cannes Grand Prix award as well as the Grand Clio award. The catchphrase was also featured in pop-culture hits such as Scary Movie (2000), Friends (2003), The Simpsons (2002, 2005), and Ant-Man and the Wasp (2008).

For the 2020 Super BowlSuperbowl, Budweiser brought this campaign back in a pandemic-themed re-make titled, “Whassup again?”

Domino’s “AnyWare” Campaign

Another integrated marketing communications campaign example success story comes from Domino’s Pizza.

ToIn order to increase digital orders, Domino’s created AnyWare, which allows customers to order pizza through various platforms such as a tweet, text, Ford Sync, Smart TVs, and smartwatches.

Each new way to order was introduced with its own press release and driven to the DominosAnyWare.com website.

In 2015, Dominos also launched a national TV ad campaign featuring celebrities arguing that their way of ordering was the best.

To date, the AnyWare campaign has generated 2 billion earned media impressions including spots on The Ellen Show, Jimmy Fallon, and The Today Show. The TV campaigns generated 10.5 percent year-over-year growth for the brand.

An image of an Apple Watch with a Domino's pizza tracker on the screen.
Dominos “Anywhere” Campaign.

The Martian Movie

To promote the theatertheatre release of 20th Century Fox and Ridley Scott’s, “The Martian” in 2015, a prologue campaign was created to increase awareness and excitement.

The goal of the “The Martian” prologue campaign was to build box office hype around the new film.

An integrated marketing communications strategy was built to be consumed on a variety of channels including, but not limited to: social media, video, celebrity endorsements, and traditional PR and marketing efforts.

The campaigns included a mock episode of Neil deGrasse Tyson’s StarTalk from the year 2035, an Under Armour campaign showing “The Martian”‘s main character, Mark Watney, as a superathlete of the future, and mock-declassified NASA footage showing each character going through psychological testing before heading out into space.

The Martian opened number one at the box offices and had the second-highest fall opening of all time. It was also the number one movie in the U.S. for four4 weeks.

How to Create an Integrated Marketing Communications Plan

If you want to create an integrated marketing communications plan that highlights the best of your brand, here are a few key steps you need to take.

1. Get to Know Your Audience

Before you start developing your communications plan, you must takeit’s important that you take the time to get to know your audience.

Consider demographic factors, such as education level, gender, income, age, race, and geographic location. Then, think about behavioral and psychological traits, including things like interests, hobbies, and values.

Take demographic factors like education level, income, age, race, gender, and geographic location into consideration. Don’t forget about psychological and behavioral traits like values, hobbies, and interests.

Creating a customer profile that is specifically tailored to your ideal customer will help you make better decisions about your marketing campaign.

In some cases, you may have more than one customer profile for a given campaign. Sometimes, you may have multiple customer profiles for one campaign. In that case, it’s important to segment your audience so that you can tailor your message to each group.

For example, if you’re marketing a new line of environmentally-friendly cleaning products, you might have one customer profile that is interested in saving money and another that is interested in saving the planet.

Tailoring your message to each group will help you create an integrated marketing communications plan that highlights the best of your brand.

2. Set a Budget

Let’s face it, you might not be in a position to hire Neil deGrasse Tyson, NASA, and Under Armour in your first integrated marketing communications campaign.

But tThat doesn’t mean you can’t create a strong, compelling message.

The key is to set a realistic budget and then allocate your resources accordingly.

If you have a limited budget, focus on creating high-quality content that can be distributed across multiple channels.

If you have a larger budget, look for high-profile partnerships, influencer marketing, and other paid media opportunities.

In either case, make sure you have a clear plan for how you will spend your money and what your limits are.

3. Outline Your Unique Selling Proposition (USP)

One of the most important parts of creating an integrated marketing communications plan is understanding what makes your brand unique.

  • What do you offer that no one else does?
  • What can you do better than anyone else?

Answering these questions will help you develop a strong unique selling proposition (USP), which will be a key component of your communications strategy.

Once you have your USP, make sure it is front and center in all of your marketing materials.

It should be the through-line that ties together your various communications channels and provides a consistent message to your target audience.

For example, if you are a luxury car brand like Audi, your USP might be “Luxurious and comfortable cars delivering excellent engine performance.”

Make sure this message is clear in your advertising, social media posts, website content, and any other marketing collateral.

If you’re selling running shoes like Nike, your USP might be “The best shoes for athletes and fitness.”

Again, this should be a consistent message across all of your communications channels.

Your USP will be the foundation of your integrated marketing communications strategy, so take the time to develop it thoughtfully.

A venn diagram depicting the difference between what your customers want and what your business does well.
Use your unique selling proposition to create an effective integrated marketing communication campaign.

4. Decide Which Platforms You’ll Use

Once you know who you’re speaking to and what you want to say, you need to decide which channels you’ll use to reach your target audience.

This will be different for every business, but some common options include:

  • Eemail marketing
  • Ssocial media platforms (Facebook, Twitter, Instagram, LinkedIn)
  • Aadvertising (digital and traditional)
  • Ccontent marketing (blog posts, infographics, eBooks)
  • Eevents and tradeshows
  • PR and media relations

Once you decide on overarching channels, you’ll also need to determine which specific tactics you’ll use on each platform.

For example, if you’re using Facebook to reach your target audience, will you primarily rely on organic posts or paid ads? If you’re using email marketing, what sort of content will you include in your newsletters?

Asking yourself these types of questions will help you create a more comprehensive and effective IMC strategy.

5. Messaging Style

While your brand voice needs to be consistent across all channels, the way you actually communicate with your audience will vary depending on the platform you’re using.

For example, the messaging you use in a Facebook ad will be different from than the messaging you use in an email newsletter.

Your tone might also change depending on whether you’re trying to build awareness, generate leads or drive sales.

Keep this in mind as you create your content calendar and start to populate it with messaging that’s in line with your brand voice and the goals of each individual piece.

Here are two examples from sneaker company No Bull, which uses different messaging styles on Facebook ads versus Twitter posts.

An IPhone screen showing a Facebook ad of sneakers.
A Facebook ad example from No Bull.

<blockquote class=”twitter-tweet”><p lang=”en” dir=”ltr”>About to take on the week like…<br>Congrats on a great finish in Dubai, Tola!<a href=”https://twitter.com/hashtag/IAMNOBULL?src=hash&amp;ref_src=twsrc%5Etfw”>#IAMNOBULL</a> <a href=”https://twitter.com/hashtag/JustTheHorns?src=hash&amp;ref_src=twsrc%5Etfw”>#JustTheHorns</a> <a href=”https://twitter.com/hashtag/BehindTheHorns?src=hash&amp;ref_src=twsrc%5Etfw”>#BehindTheHorns</a> <a href=”https://t.co/RqlABILona”>pic.twitter.com/RqlABILona</a></p>&mdash; NOBULL (@justthehorns) <a href=”https://twitter.com/justthehorns/status/1206646654989783047?ref_src=twsrc%5Etfw”>December 16, 2019</a></blockquote> <script async src=”https://platform.twitter.com/widgets.js” charset=”utf-8″></script>

6. Set Your Targets and Goals

You’re almost ready to start putting your IMC plan into action, but first, you need to set some targets and goals. Consider the following:

  • What do you want are you looking to achieve with your integrated marketing communications strategy?
  • Are you trying to improve your external reach?
  • What about internal communications?
  • Is there a particular target audience you’re looking to engage?

Attaching numbers to your objectives is a good way to measure progress. For example, if one of your goals is to increase brand awareness, you could measure this by tracking the number of mentions your brand receives online.

Or, if you’re looking to improve customer satisfaction, you could survey your customers after they’ve made a purchase.

Other goals can include:

  • Email sign- ups
  • Social media follows and engagement
  • Website traffic
  • Sales or conversions
  • Phone calls
  • Event sign-ups and ticket sales

Once you have some goals and targets in mind, it’s time to start putting your integrated marketing communications plan into action!

7. Track and Optimize

Once your integrated marketing communications campaign is up and running, it’s important to track progress and optimize along the way.

Analytics are key in understanding what’s working and what’s not.

Be sure to keep an eye on your campaign goals and KPIs, and adjust as necessary. If you’re not seeing the results you want, don’t be afraid to change things up.

For example, let’s imagine you’re running an email campaign as part of your integrated marketing communications plan.

You might want to track metrics such as:

  • Oopen rates
  • Cclick-through rates
  • Uunsubscribe rates

If your open or click-through rates are low, you might want to consider changing up your subject lines or email content.

Or, if you’re seeing higher than average unsubscribe rates, that could be an indication that your content is not relevant to your audience.

It’s important to constantly test and measure the performance of your campaigns so that you can make necessary adjustments to ensure success. By doing so, you’ll be able to create an integrated marketing communications plan that highlights the best of your brand.

Frequently Asked Questions: Integrated Marketing Communication Plans

What does integrated marketing communication mean?

Integrated marketing communication is an approach to marketing that uses all aspects of a company’s communication channels to deliver a consistent message.

What are the benefits of using an integrated marketing communications plan?

The benefit of an integrated marketing communications plan is to ensure that all of a company’s marketing efforts are working together in harmony to deliver a consistent message.

What are the five forms of integrated marketing communications?

There are five main ways to market your product or service. They are advertising, direct marketing, internet marketing, sales promotion, and public relations. All of these methods can be used together to create a harmonious marketing plan.

Do integrated marketing communication plans help drive ROI?

Yes, integrated marketing communication plans can help drive ROI by ensuring that all marketing efforts are working together to deliver a consistent message. This will result in increased brand awareness and customer loyalty, which will lead to increased sales and profits.

Final Thoughts on Integrated Marketing Communications Plans

An integrated marketing communications plan is the key to success for any company.

By creating a plan that outlines the main ways to market your company and product, you can ensure that all of your marketing efforts are working together to deliver a consistent message.

This can result in increased brand awareness and customer loyalty, which can lead to increased sales and profits.

The end result? A more successful company that is better able to compete in today’s marketplace.

How have you found success with integrated marketing communications?

How to Create Your Personal Brand’s Visual Identity

Visual branding is the most effective way to create a powerful online presence. If you don’t believe me, check out this article on why visuals are important in marketing: When half of the human brain …

The post How to Create Your Personal Brand’s Visual Identity appeared first on Paper.li blog.

The post How to Create Your Personal Brand’s Visual Identity appeared first on #1 SEO FOR SMALL BUSINESSES.

The post How to Create Your Personal Brand’s Visual Identity appeared first on Buy It At A Bargain – Deals And Reviews.

How to Create an Effective Social Media Content Calendar

Are you striving for consistency with your social media marketing? A good social media content calendar could be the missing ingredient.

Creating a social media calendar is a simple process, but it can have some impressive results.

Here’s how to quickly set up your social media content calendar and start leveling up your performance.

What Is a Social Media Content Calendar?

A social media calendar gives you a detailed overview of your upcoming social media posts.

This helps you to be more strategic with your content, maintain consistency, and delight your target audience on a regular basis.

Your social media calendar can be as simple as setting out what dates you’re going to post on, or it can be much more detailed.

Many successful social media content calendars will include high-level information to help you get more from each post:

  • Platform: Facebook, Instagram, TikTok, or LinkedIn.
  • Content-Type: Behind-the-scenes video, testimonial, product, etc.
  • Date: Proposed schedule date.
  • Time: Proposed schedule time.
  • Title: The title of the post.
  • Topic: What the post is about.
  • URL: The URL of any links you will use.
  • Visuals: A description of any visuals you want to use.

This information gives you an initial framework you can use to build out each post.

Be careful when you are planning, though.

There’s a clear distinction between a content calendar and a content plan. Generally, a content calendar will set out the dates and times for your posts, whereas a content plan will detail the strategies and topics you want to use for your social media marketing.

Since these ideas are closely related, they’re often referred to interchangeably—and can be incorporated into one document.

To give you a better idea of what to include, and where, take a look at this example of a content calendar:

Example of a social media content calendar from Asana

By taking a strategic approach with your planning, you may find a social media content calendar helps you save time and be more effective with your social media marketing.

Why You Need a Social Media Calendar


Over 72 percent of the U.S. population use at least one social media platform
, so your social media marketing is clearly important.

The question is, how does a social media calendar fit in?

Let’s take a look at two of the most important aspects of social media marketing: understanding your target audience and being consistent.

If you don’t understand where your target audience hangs out, what content they want to see, and how they consume information, then how do you expect to reach them? It’s difficult to connect with your audience when you’re making social media posts on the fly, which is why a social media content calendar can be so valuable.

The other thing that takes you a long way in social media marketing is consistency. It might not seem like it, but this one is actually very difficult to pull off. It’s not easy to keep coming back each day (or however often you post) with top-quality content.

It’s simply impossible unless you’re planning ahead.

Whatever niche you’re in, there’s tons of competition out there, so you need time to bring your ideas to life and make sure they’re perfectly targeted to your audience.

Those aren’t the only reasons to start using a social media content planner though. They can also help you:

  • save time
  • schedule posts
  • reduce errors
  • create more cohesive campaigns
  • create a stronger brand identity
  • run timely campaigns that fit with holidays and sales promotions
  • track performance more accurately

The great thing is that anyone can start using a social media content calendar right now and use these benefits to improve their social media performance.

6 Steps to Create a Customized Social Media Content Calendar

You don’t need any fancy software to create an effective social media content plan. All you need to do is open a spreadsheet and follow these 6 steps.

Step 1: Review Your Social Media Goals

Before you create any plan, you need a clear idea of what you’re trying to achieve.

We all have some kind of goal for our social media posts, but it pays to narrow in on this and make them much more implicit. When you know exactly what you’re working towards, then it’s going to be much easier to come up with the content that’s going to help you achieve it.

Before you create your social media content calendar, make sure you sit down with your team and set yourself SMART goals (specific, measurable, achievable, relevant, and time-bound).

It’s also important to understand what KPIs you will use to measure your performance against these goals. For instance, are you most concerned with followers, impressions, clicks to your site, or something else?

Once you’ve got clearly defined goals, and a process for measuring your performance, then you’re ready to proceed.

Step 2: Audit Your Current Accounts

Now that you’ve got a clear picture of what success looks like, it’s time to find out how you’re currently performing.

This information is important because it’s going to serve as your baseline. Once you have this data, it’s much easier to test the changes you’re making and adjust your strategies accordingly.

You can add a sheet for all your KPIs to your social media content calendar to keep an eye on this and help make sure you’re constantly working to improve your processes.

Gather all relevant information and make sure it’s easily accessible:

  • account details and passwords
  • specific goals for each platform
  • audience demographics
  • responsibilities of each team member
  • information on your most successful posts and campaigns
  • areas for improvement, gaps in your content, poor results
  • platform-specific KPIs to measure future success

This will require a little bit of hard work, but it’s well worth it!

One of the main reasons you’re creating a social media content calendar is to make sure you’re giving your audience the content they’re looking for, and you’ve got to understand your past performance to do this.

Step 3: Choose What Social Platforms You’ll Use

If we went back a decade or so, this step would have been pretty simple. There were a handful of social platforms dominating the scene, which made this question easy to answer.

Today though, there are lots of thriving social media platforms, each with its own demographics. For instance, if you’re advertising to people aged 18-25, you’re probably going to have to use different platforms than if you’re trying to reach the over 55s age group.

Don’t get me wrong though, they’re all on social media!

58.4 percent of the global population is on social media, but how can you best reach your specific target audience?

You don’t have unlimited resources, so that might mean focusing your efforts on a handful of platforms. Bear in mind, that those platforms won’t necessarily be the biggest ones, they just have to be the ones where your target audience hangs out.

Check out the in-depth demographics in the image below and think about which platform might be the best fit for your target audience.

Social Media Content Calendar - Choose With Social Platform to Use

As you can see, these figures vary greatly, so it’s important to decide where you want to be and when.

Step 4: Outline How Often You’ll Post

One of the greatest benefits of a social media content planner is that it helps you to be more consistent, but the question still remains, how often should you post?

The answer will vary for each business.

If you’ve got a huge marketing team working on different elements like images, video, copy, personal interactions with followers, and everything else, then there’s no reason why you can’t post multiple times a day.

However, if you’re a one-man team working on every part of your business, then this probably isn’t realistic.

Ultimately, it’s about utilizing your resources to achieve a good balance between quality and quantity. If you’re putting out poor content that nobody interacts with though, it’s no use to anybody.

There’s no hard and fast answer to this question, but the key is maintaining a schedule where you can be consistent. Most algorithms (whether that’s Google, Facebook, or YouTube) value consistency.

This is something you can be in complete control of, especially with a good social media content calendar.

Step 5: Decide What Type of Content to Post

It can be helpful to break your posts down into categories to give your audience a mix of different content types.

There are two rules that are popular for this and they can help ensure you’re offering variety as well as making life a little bit easier for yourself.

The 80/20 Rule

This rule helps you strike a balance between engaging your audience and trying to sell your products.

It states that 80 percent of your posts should be designed to engage, inform, and educate, and the other 20 percent should be used to directly promote your business.

People don’t go on social media to be bombarded with promotions, so this formula helps you hit the right balance of growing sales while maintaining a positive brand image.

  • 47.6 percent of people use social media to stay in touch with friends
  • 36.3 percent of people use social media to fill their spare time
  • 35.1 percent of people use social media to read news stories
  • 31.6 percent of people use social media to discover content

You’ve got to figure out how your content can fit with these goals.

The Social Media Rule of Thirds

If you’re always posting the same type of content then it can quickly get boring. This is why many brands use the Social Media Rule of Thirds throughout their content calendars.

In the social media rule of thirds, one-third of your posts promote your own content, one-third share curated content, and one-third share personal interactions with your followers.

Step 6: Audit Your Resources

The last thing you need to do before setting up your social media content calendar is audit your resources. How big is your team, and what skills do you have available to you?

If you have a team full of social media specialists, videographers, and content creators, then your plans are going to be a lot more ambitious. However, you’ve also got to put systems in place to bring these people together.

This is where your social media content calendar becomes even more important.

When you’ve clearly set out your schedule for the next month, or even quarter, then everybody can see what they need to work on.

Your writer can work on the copy, and your videographer and graphic designer can work on the visuals, bringing everything together on time.

Social Media Content Calendar Template

The easiest way to create a social media content calendar template is using a Google sheet.

Open up a new sheet, and split your calendar into weeks.

Use the columns at the top to set out your dates, and in the rows, enter the following for each platform you intend to post on:

  • type of content
  • title
  • topic
  • links
  • visuals

This should allow you to create a basic template in just a few minutes. It should look something like this example of a social media content calendar:

Social Media Content Calendar Template

From here, you can build your social media content calendar out as much as you like, however, this should give you an excellent starting point.

If you have a budget, you could look at different project management systems like Trello or Airtable to custom-build your social media content calendar. As you start to use them, you’ll be able to spot trends, plan promotions, and much more.

Social Media Content Calendar Frequently Asked Questions

What are the benefits of a social media calendar?

The benefits of a social media calendar are that it saves you time, helps you to be more consistent, reduces errors, and allows you to be more strategical. This should help you provide your audience with better content and increase brand engagement.

Do I have to have a social media calendar?

You don’t have to have a social media calendar but it can be incredibly helpful. It’s hard to consistently offer your audience high-quality content, and sometimes you need time to plan what you’re doing. Knowing what posts you have coming up gives you time to get your copy and visuals in place and tie them to your promotions.

What should my social media calendar include?

You can get as detailed as you want with a social media content calendar. Some basic information to include is the type of content, title, topic, links, and visuals that are needed.

How do I create a monthly social media content calendar?

The easiest way to create a social media content calendar is in a spreadsheet. It’s very simple to set up, and you can have a functioning content plan in just a few minutes.

{
“@context”: “https://schema.org”,
“@type”: “FAQPage”,
“mainEntity”: [
{
“@type”: “Question”,
“name”: “What are the benefits of a social media calendar?”,
“acceptedAnswer”: {
“@type”: “Answer”,
“text”: ”

The benefits of a social media calendar are that it saves you time, helps you to be more consistent, reduces errors, and allows you to be more strategical. This should help you provide your audience with better content and increase brand engagement.


}
}
, {
“@type”: “Question”,
“name”: ”
Do I have to have a social media calendar?”,
“acceptedAnswer”: {
“@type”: “Answer”,
“text”: ”

You don’t have to have a social media calendar but it can be incredibly helpful. It’s hard to consistently offer your audience high-quality content, and sometimes you need time to plan what you’re doing. Knowing what posts you have coming up gives you time to get your copy and visuals in place and tie them to your promotions.


}
}
, {
“@type”: “Question”,
“name”: “What should my social media calendar include?”,
“acceptedAnswer”: {
“@type”: “Answer”,
“text”: ”

You can get as detailed as you want with a social media content calendar. Some basic information to include is the type of content, title, topic, links, and visuals that are needed.


}
}
, {
“@type”: “Question”,
“name”: “How do I create a monthly social media content calendar?”,
“acceptedAnswer”: {
“@type”: “Answer”,
“text”: ”

The easiest way to create a social media content calendar is in a spreadsheet. It’s very simple to set up, and you can have a functioning content plan in just a few minutes.


}
}
]
}

Conclusion: How to Create an Effective Social Media Content Calendar

Creating an effective social media content calendar shouldn’t be difficult.

With some basic Microsoft Excel skills, you can create a content calendar that clearly outlines your strategy for the weeks and months to come. Not only will this help you create better content, but it’s also going to save you time.

Whether you’re a large social media team or an individual marketer, a good social media content calendar is going to make it much easier to coordinate your efforts and ensure you consistently meet your audience’s needs.

Start doing this, and your social media marketing results are going to improve dramatically.

How often do you post to social media?