Best Image Editing Tools to Create Killer Rich Media

I’m just going to say it: Visual marketing is the wave of the future.

There’s no denying the power images have on gaining traffic, shares, and rankings.

In fact, if you have at least one image on your blog post, you are much more likely to rank on the top page of Google.

Images should be the lifeblood of your content marketing strategy.

Great content without any images likely won’t get many shares, much buzz, or any viral promotion.

But that’s easier said than done, right?

Making images that are visually pleasing can be time-consuming.

We don’t all have the creativity or design skills to do it, either.

Heck, I surely don’t have the creativity to produce diverse designs from scratch.

But I know I need the visuals if I want my content to be viewed and shared.

Without visuals, I’d probably drive 50% less traffic.

So I make it a priority.

In every blog post I write, I try to include a visual with every 100 words.

That number can be tough to hit when I can’t think of creative designs, but thankfully, there are a ton of free (or crazy cheap) image editing tools that make you look like a professional.

And that means you can shave time off your day with just a few minutes of image editing.

Thankfully, almost all of them are easy to use even if you have little-to-no experience with graphic design.

Here are six image editing tools that make you look like a pro and will drive your social shares through the roof.

1. VistaCreate

VistaCreate is an all-in-one online platform for designing literally anything a marketer or small business owner may need — no design skills necessary.

vista create home page

You can use it to create posts and stories for socials, make email designs, ads, presentations, and even print materials.

The editor offers thousands of premade templates that already look great, so you can just quickly customize a design and use it right away.
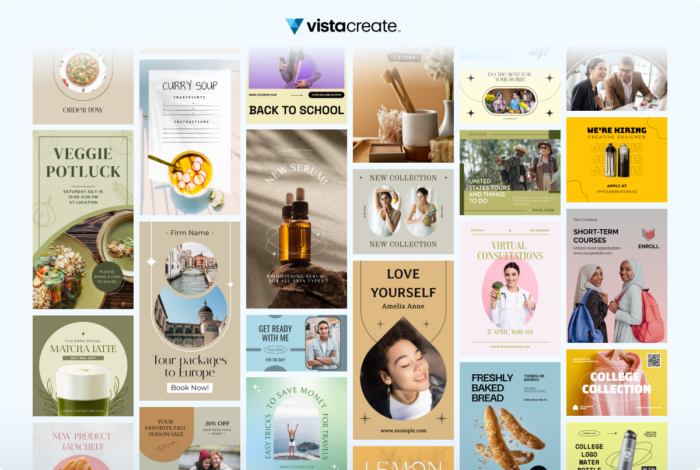
vistacreate templates screen

And unlike other graphic design platforms, ALL their templates are free.

In addition to templates, you access a huge library of royalty-free stock photos, videos, vectors, objects, animations, fonts, and music tracks.

With all these tools, you can make videos and animated visuals in addition to static designs.

If you want to publish your design right away, you can post it directly from VistaCreate to your Facebook and Instagram business accounts, and Pinterest. Handy, right?

I like that most of their tools are free, so that you can create a cool design on a budget.

To start creating, log in or sign up to VistaCreate.

So I’ve talked a bit about what VistaCreate can do for you, but let’s show it in action. Here’s a real-life look at me putting this great tool to use.

To begin, I decided to create an Instagram video story for an event I’ll be speaking at.

So, I chose a template first.
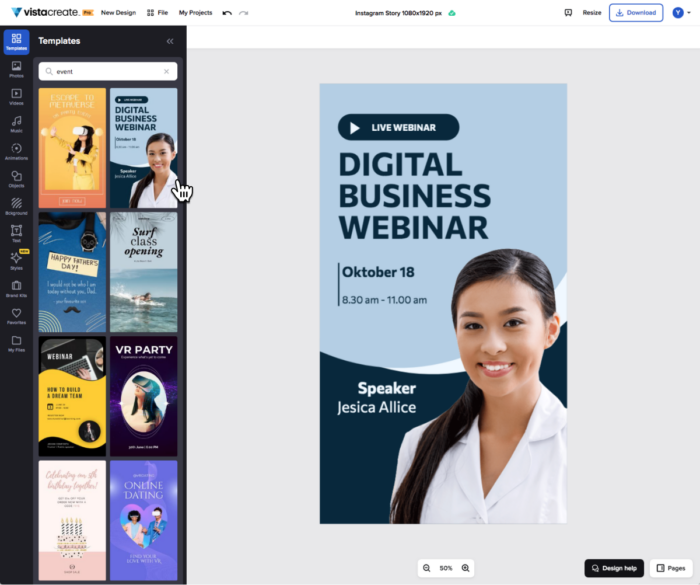
vistacreate choosing a template screen

I changed the colors, added objects and my photo, and used the Background Remover to erase the background in one click.
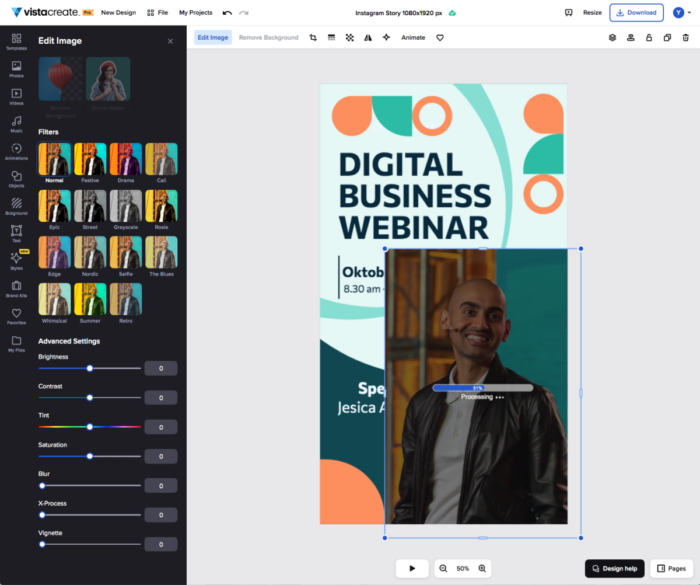
screenshot of vistacreate background remover

Next, I applied a black-and-white filter to make my photo match the style of the conference.
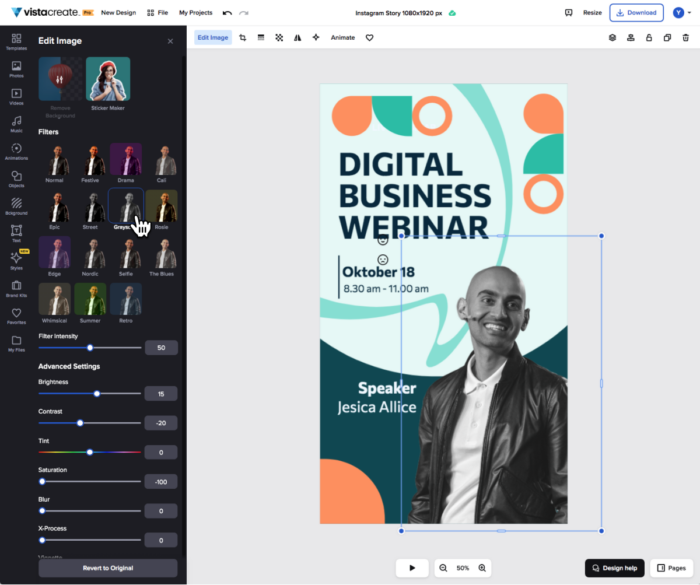
screenshot of vistacreate image filter

It’s pretty cool!

Next, I animated my photo and objects.
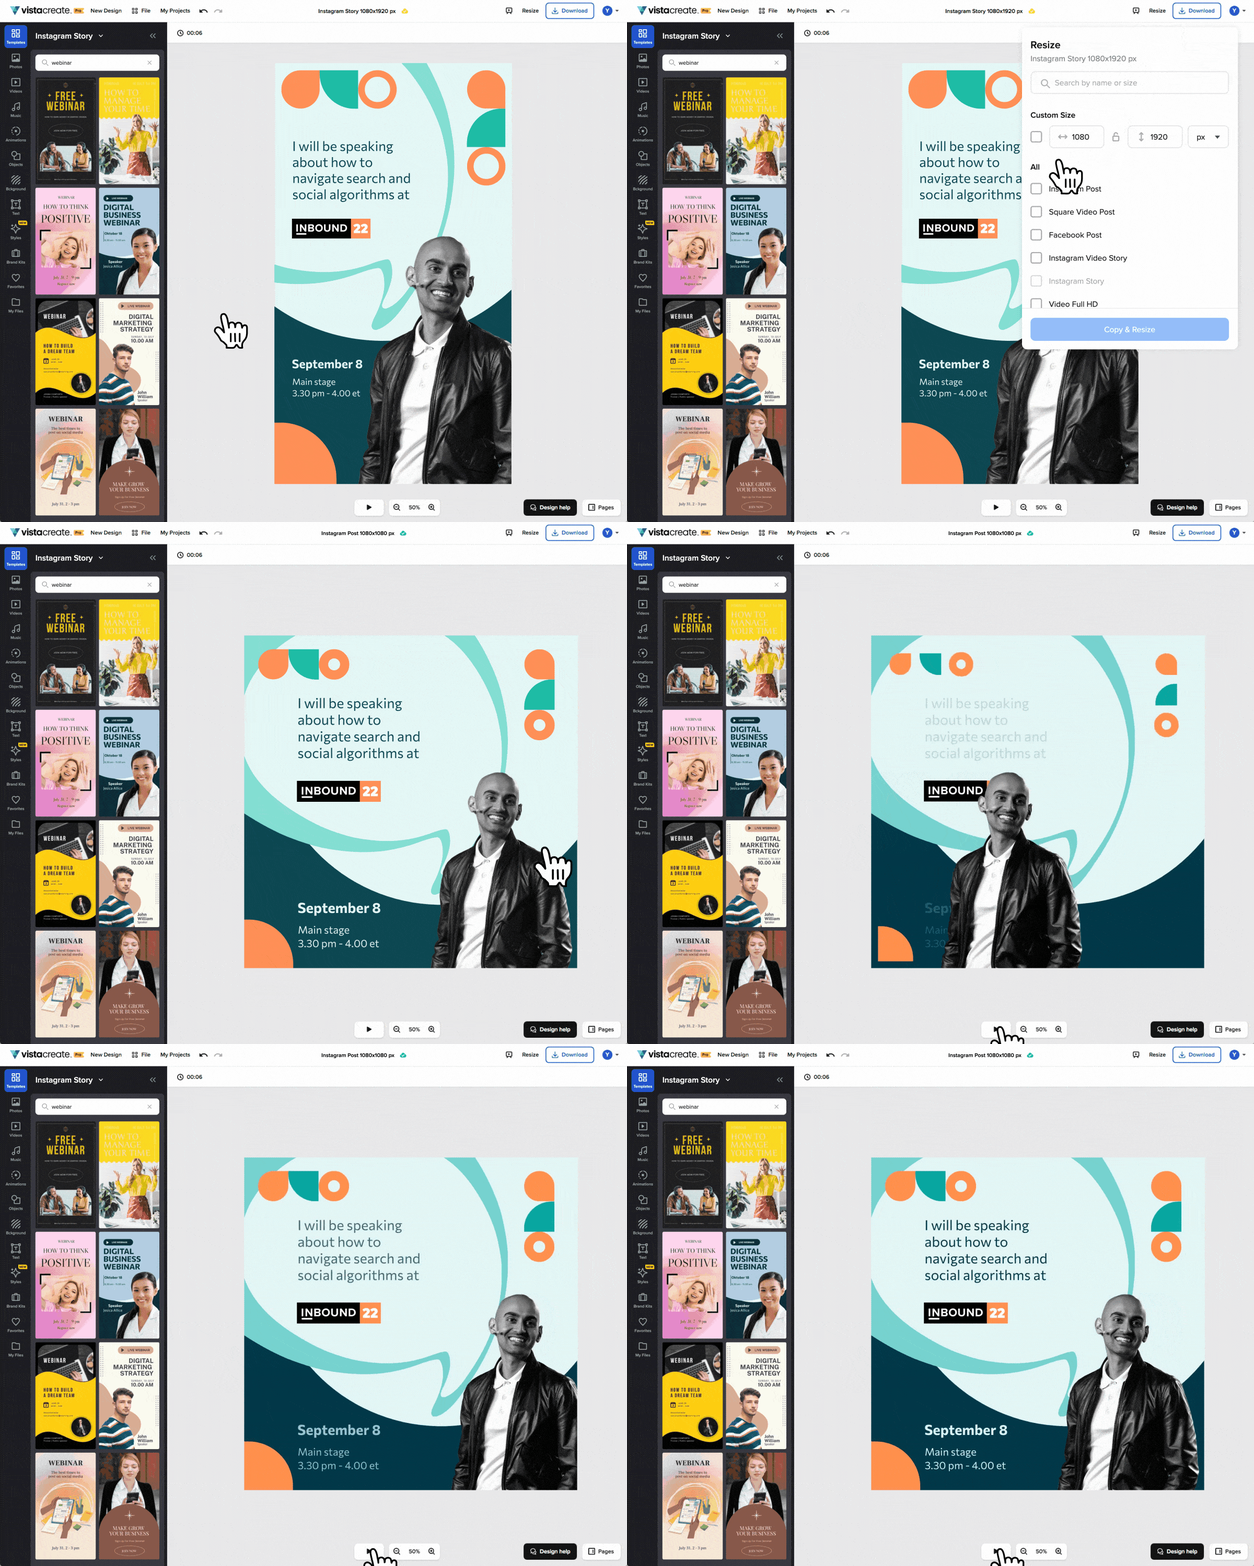
Gif of Vistacreate being used to create an instagram story.

I added all the information about the event and tried different styles to see which color scheme worked best.
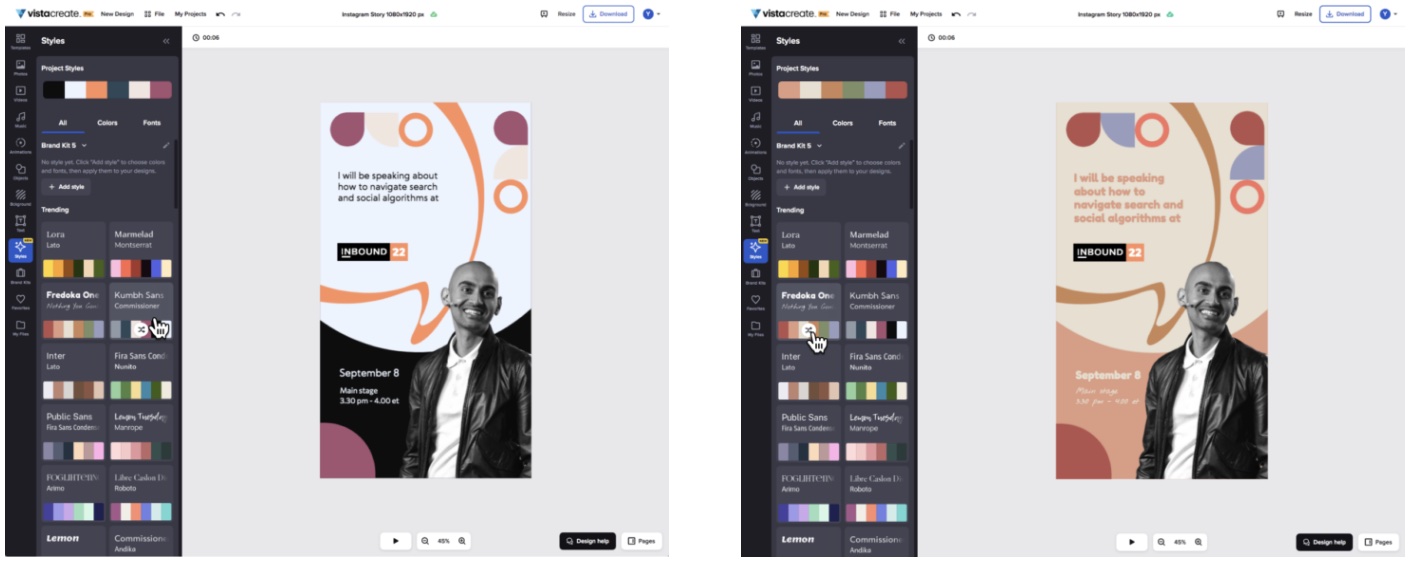
Graphic of instagram stories in VistaCreate.

After that, I’m ready to post!

VistaCreate also has a resize feature that allows you to make one design and resize it for different platforms in just a few clicks:
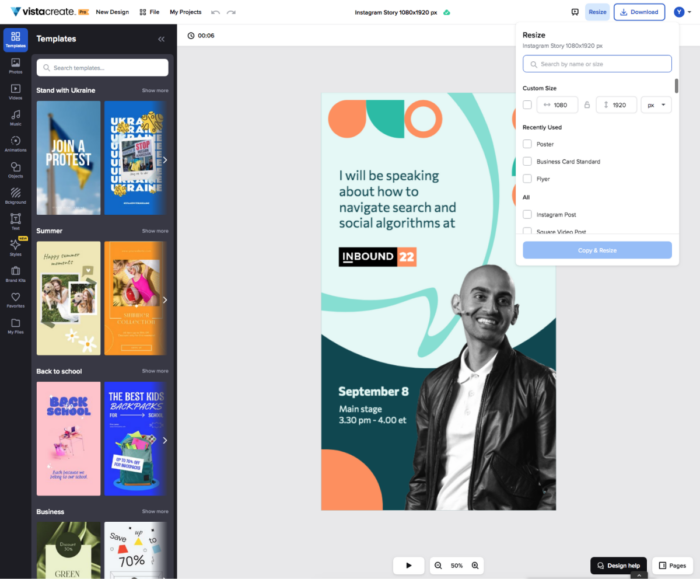
Resizing Instagram stories in Vistacreate.

Speaking of branded designs, you can build a brand kit in VistaCreate and use it to create a cohesive look for your branding.

Add your business’s colors, fonts, and a logo to your brand kit — and apply it to a template to create your on-brand design.

Having a brand kit is very convenient, especially if you work with many different companies and want to simplify your workflow.
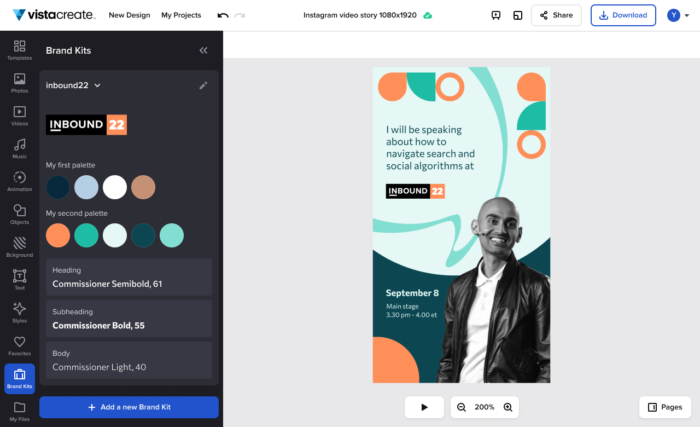
vistacreate brand kit screenshot

If you work for a new company that doesn’t have a logo, you can create one right from the Brand Kit page using the Logomaker tool.

Click on “Create a logo from scratch”, select an industry, type in your company name — and the Logomaker will offer tons of logo designs.
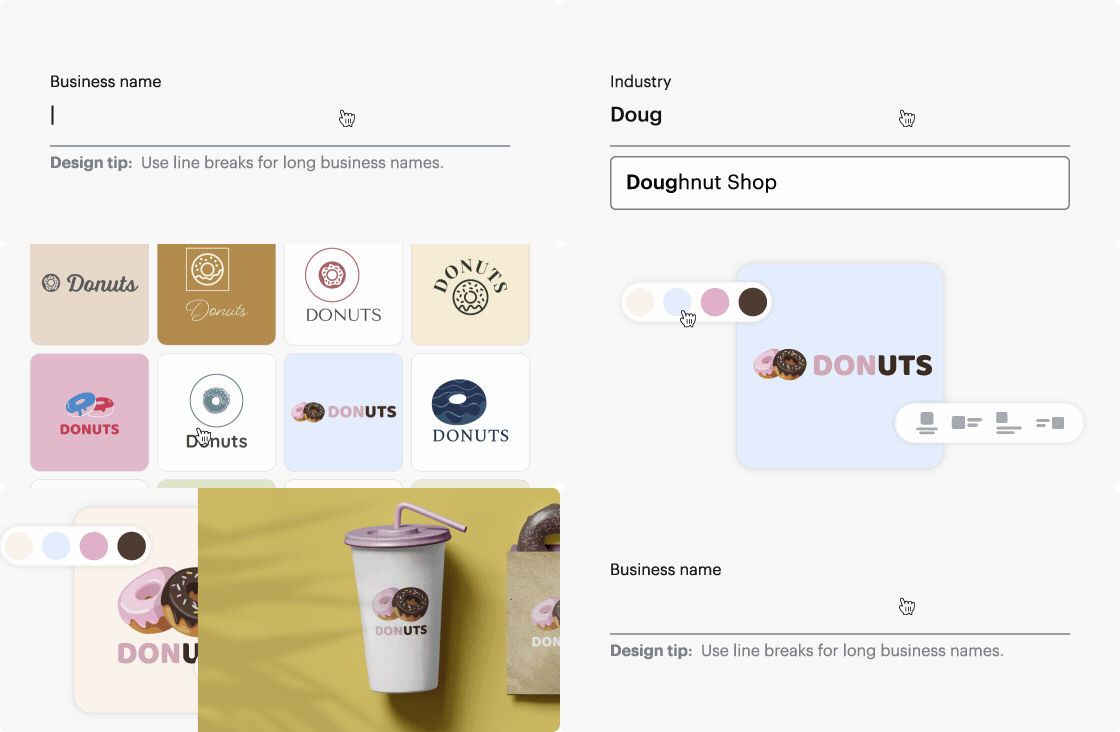
vistacreate logo maker in action

On top of that, I like that VistaCreate works for both digital and print, so that you can make business cards, flyers, posters, postcards, and other printables in one place.

If you live in the US, you can even use VistaPrint (both companies are part of the Vista family) to have your designs printed and delivered to your door.

For now, you can use them to print posters, flyers, and business cards, with more formats coming soon.

In short, VistaCreate covers all the needs marketers might have — creating branded content for social media and ads, making a brand kit with a logo, and designing print collateral.

You can access it on both desktop and mobile, with the app available for Android and iOS.

2. PicMonkey

PicMonkey is another helpful tool to use for image editing.

If you aren’t a graphic designer but want crystal clear images with high production value, PicMonkey is one of your best bets.
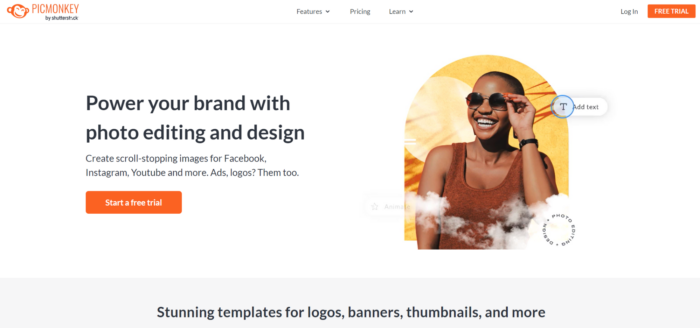
Use PicMonkey as an image editing tool.

PicMonkey has a slew of diverse features.

For example, you can edit existing images that you have on Facebook, your computer, or anywhere else:
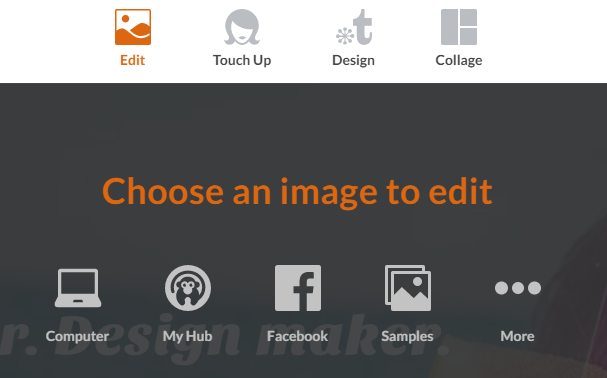
PicMonkey is an image editing tool that allows you to edit existing images.

You can also touch up specific photos with new effects.

Also, you can easily start a new design from scratch or with a preset template.

To get started, click “Start a free trial” and create your free account:

Start a free trial with PicMonkey, an image editing tool.

You can set up your new account with an email or by signing up directly with Facebook:
Sign up with the image editing tool, PicMonkey, using your Facebook account.

Once you’ve created a free trial account, you should be directed back to the dashboard to edit content:
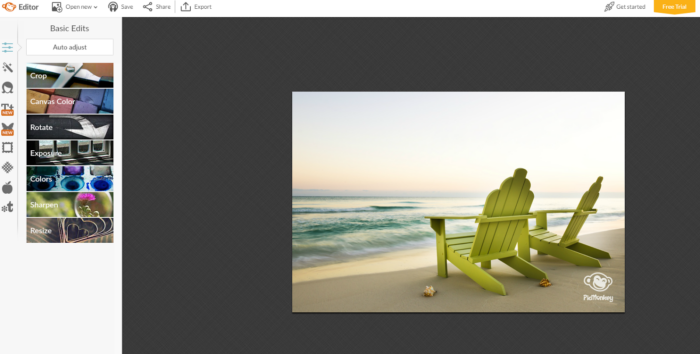
Edit content using the image editing tool, PicMonkey.

One of the best benefits of PicMonkey is the actual photo editing ability.

For example, other platforms focus more on social media and content marketing images.

But PicMonkey allows you to use diverse filters that you’d find in an expensive application like Photoshop.

For example, you can edit things like filters, sharpening, and blurring:

Edit filters, sharpening, and blurring with the image editing tool, PicMonkey.

You can even tap into more advanced photo editing tools like curves and levels:
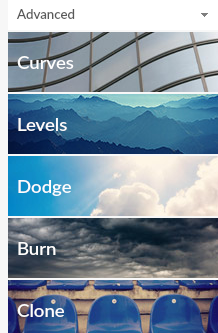
Use advanced editing tools in PicMonkey, an image editing tool, to edit curves and levels.

On top of that, you can touch up real-life photos of yourself or your company—if stock photos are not ideal—using awesome image editing tools:

Touch up real photos of yourself or your company using PicMonkey.

Want to add a spray tan? Who doesn’t?

The portrait photo editing tools are great and allow you to perfect any headshot for your social media or team photo for your website.

On top of that, you can add tons of cool overlays to your content.
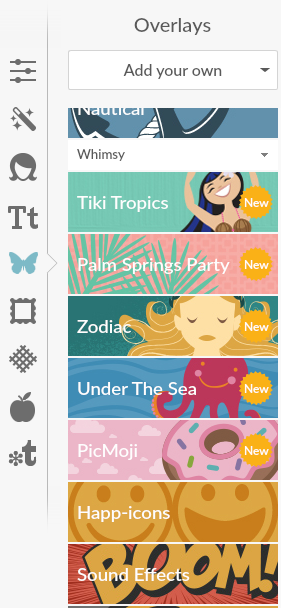
Add overlays to your content using the image editing tool PicMonkey.

For example, if you wanted to add emojis in your picture, simply click the “PicMoji” option and click any emoji to instantly add it:
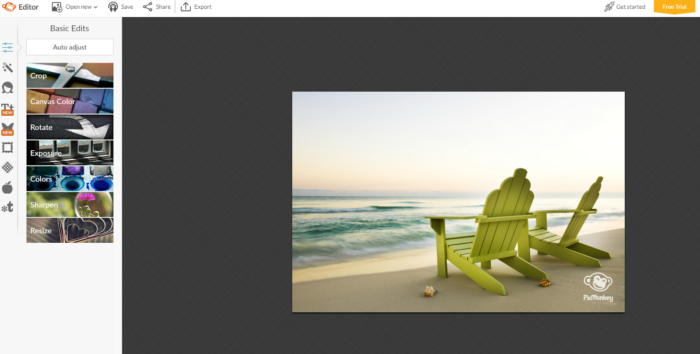
Add emojis to your pictures using PicMonkey.

You can also pick from a bunch of different existing themes and templates if you are lacking inspiration or creativity:

Use different themes or templates on the image editing tool PicMonkey.

PicMonkey is similar to other tools but lacks the diverse template and preset options some offer.

What it lacks in templates, though, it makes up for in diverse image editing capabilities.

The ability to edit things like curves and levels or touch up portrait-style photos really stands out.

PicMonkey is a great tool for the everyday person who needs detailed image editing but doesn’t want to get bogged down by advanced, technical programs.

If you want to create a beautiful photo in just a few minutes that is less focused on text and templates, this is your go-to tool.

3. Snappa

I’m also a big fan of Snappa for image editing.
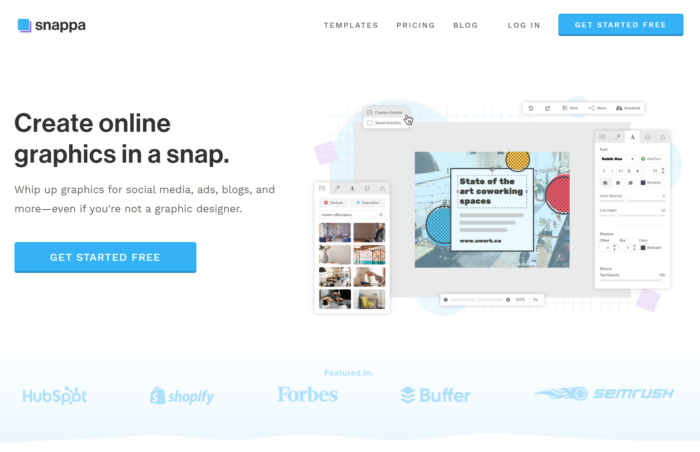
See Snappa's homepage to learn more about them as an image editing tool.

Snappa is similar to other tools in that it has countless high-quality templates to start from.

But my favorite features are the countless free stock photos and high-quality icons:

Snapp has high quality stock photos and icons that they offer for free.

They are some of the best free icons I have ever seen.

One of the best features Snappa has to offer is the social media scheduling tool:
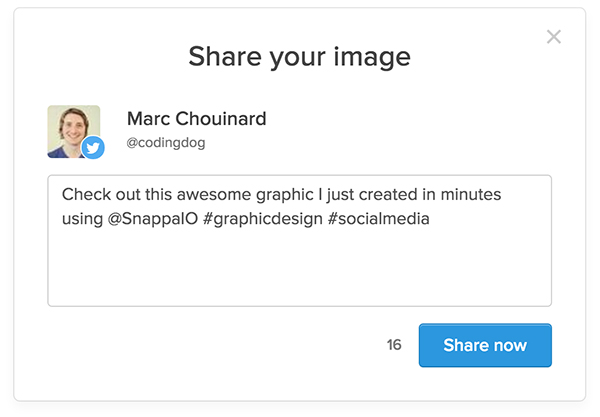
Snappa has its own social media scheduling tool.

You can share your graphics directly from Snappa in seconds, saving you the time it takes to download and schedule on a different tool.

You can even use the tool to resize existing images, which is a lifesaver when it comes to repurposing content for different platforms:

Use the image editing tool, Snappa, to resize images.

To start creating your graphics in just a few minutes, click “Create My Graphic Now” on the homepage:

Create your own graphics on the image editing tool, Snappa.

Sign up for a free account and head to your dashboard to get started.

Here, you can start to create an image based on custom dimensions:

Use custom dimensions to create your own graphic on Snappa.

Or simply choose from common template sizes meant for various platforms:
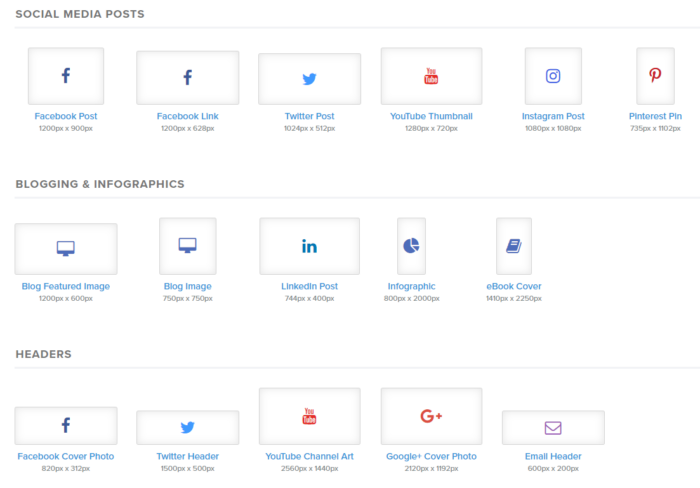
Snappa has common dimension templates that match different social media platforms.

One of my favorite uses for Snappa is the diverse selection they have for social media and PPC ads:
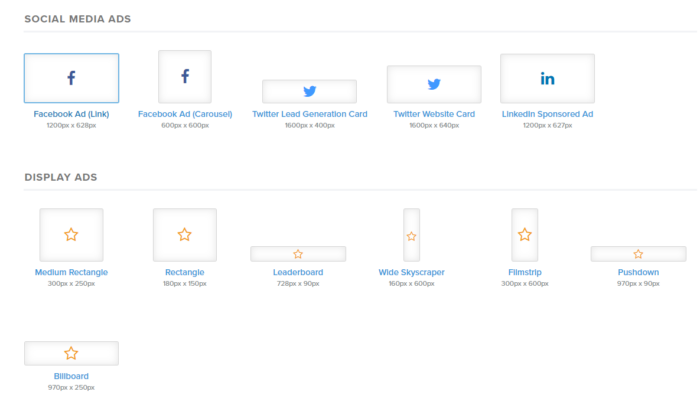
The image editing tool, Snappa, has a diverse selection of social media and pay per click ads.

It’s probably the one of the best image editing tools with the most options when it comes to creating high-quality ads in just minutes.

You don’t need to pay a designer outrageous prices for a few banner ads anymore.

Snappa allows you to do it in minutes.

Got a new idea for an ad on Facebook? Don’t wait 48 hours for your designer to make it.

Once you’ve picked out your desired template size, you can choose from a bunch of free options:
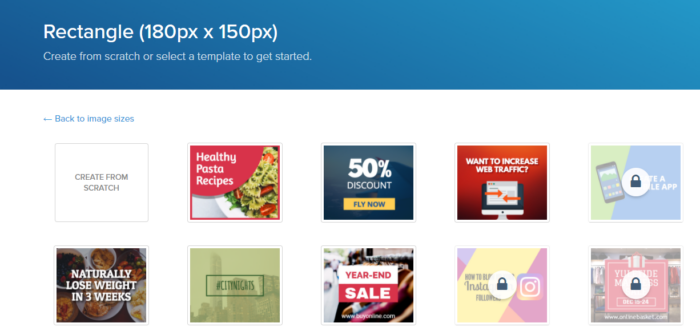
Choose from free options on Snappa's website to edit your images.

These templates are awesome and easy to work with.

After selecting your template, you can customize just about everything on it.

You can add high-quality background images or icons for free:
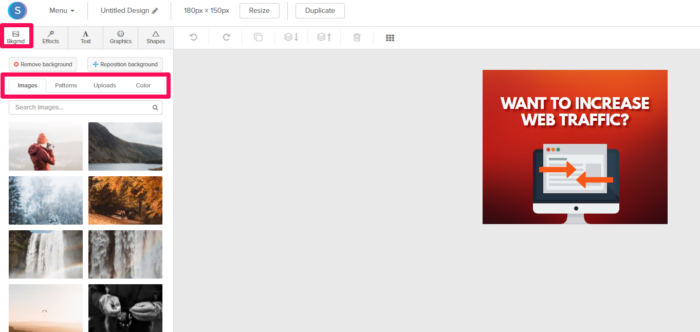
Edit background images with the image editing tool Snappa.

But the best part about Snappa’s editing tool is the free, high-quality icons.

These icons are what you’d expect from a professional graphic designer and they are all available for your use:

Snappa has the essential icons needed to edit images.

They have just about anything you can think of, from social media to emoji-style icons.

If you have a particular icon graphic in mind, you can simply search in the bar above to narrow down your results:
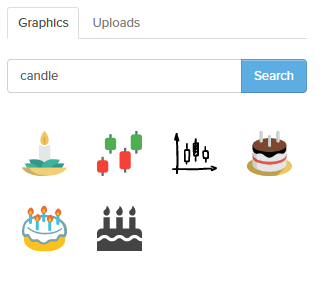
Use the search tool to look for specific icons you have in mind with Snappa.

And the free, professional-quality stock photos are endless:

Use the image editing tool Snappa for high quality stock images.

Snappa is an awesome tool if you love to use icons or stock photos in your work.

If you like instant social scheduling, Snappa has that, too.

Simply hit “Share” in the top-right corner and you can connect social media accounts and even send content to Buffer for scheduling:

Share your images with Snappa, an image editing tool.

Take advantage of the diverse, free offerings from Snappa if you want images that make you look like a professional designer.

4. Piktochart

Beyond just basic image editing tools for social media, Google Ads, or Facebook Ads, Piktochart is centered around infographics.
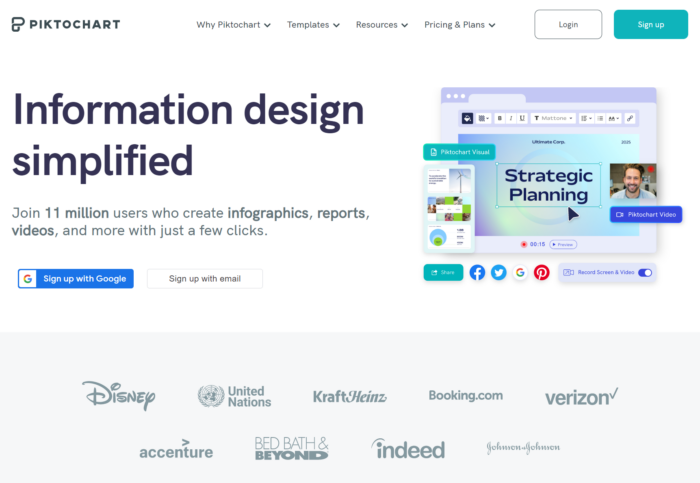
The image editing tool Piktochart is great for creating infographics.

Piktochart is one of my favorite free tools for making infographics.

Usually, infographics take quite a bit of time to create.

They are a laborious process that can require professional designers and lots of money.

But you don’t need any of that.

Piktochart is extremely simple and easy to use, and I’ve used it countless times to make infographics on QuickSprout.

To get started, click the “Start For Free” button on the homepage:

Start a free trial with Piktochart.

Once you’ve created an account, it should instantly direct you to the dashboard.

From here, you can choose between three types of graphics:

Choose between three types of graphics when editing images on Piktochart.

You can create printable graphics, presentations, and infographics.

My personal favorite use of Piktochart is for the infographic templates.

There are tons of totally free templates to take advantage of:
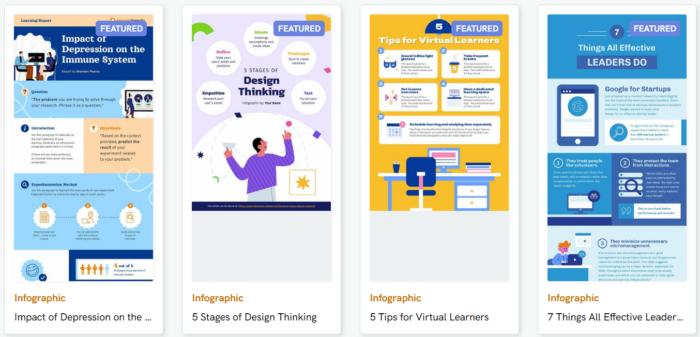
Choose from free templates on Piktochart.

If you want to inspect one and get a preview, simply click on the template to get a sneak peek:
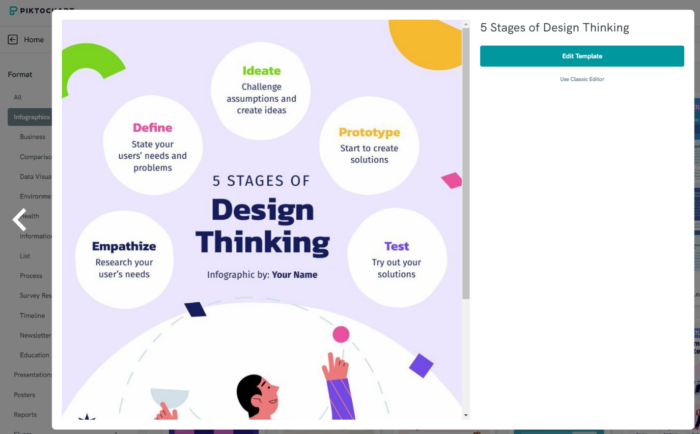
Preview an infographic template that you are considering using.

If you like the design, click “Use Template” at the top:

Select "use template" when you've decided which template you want on Piktochart.

From here, you can select between multiple color schemes to fit your company branding:
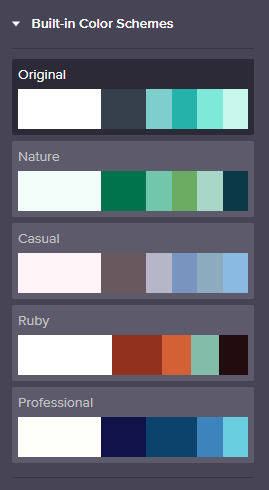
Choose between Piktochart's different color themes when editing your image.

On top of that, Piktochart offers really high-quality graphics just like Snappa:
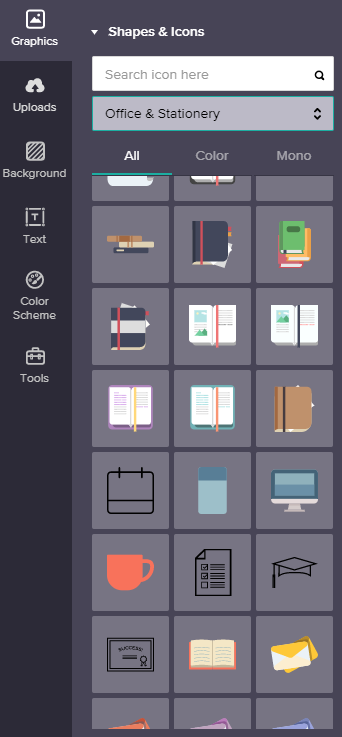
Piktochart offers high quality graphics for image editing.

You can pick from thousands of icons related to almost anything you can think of.

They also have a diverse stock photo library:

Choose between quality stock photos when editing your image on Piktochart.

Piktochart is one of my favorite infographic tools because they have some of the best free options on the market.

And they don’t try to trick you into buying anything.

What you see is what you get.

If you want a high-quality infographic editing tool, this is your best bet.

5. Pixlr

Now that we’ve covered some of the best image editing tools on the market, it’s time for one of my all-time favorites.

This tool isn’t for the faint of heart, though.

It’s meant for more experienced users who want deep customization options and who have a basic background in graphic design.

If you don’t have experience developing graphics out of a blank canvas, you might find this tool a bit frustrating.

Pixlr’s photo editor resembles Photoshop almost exactly. It has just about every editing feature you’d find in a paid tool.
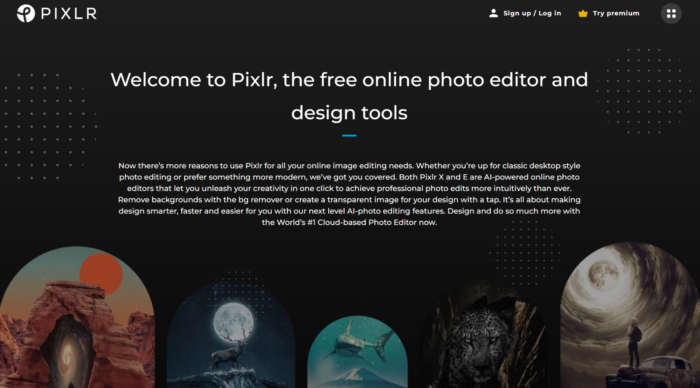
Pixlr is a free image editing tool that resembles other high quality, expensive applications.

It’s a completely free tool with incredible customization options you’d expect in a high-quality, expensive application.

To get started, head to Pixlr and create a new image from scratch or open an existing one from a URL or your computer.

If you aren’t comfortable with creating designs from scratch, then Pixlr probably won’t be your go-to tool.

It requires some design elements and skills that are above the level of Snappa.

If you create a new image, you can select the dimensions to your liking:
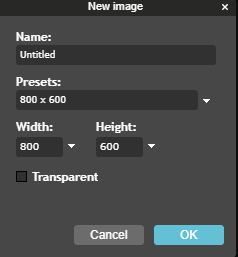
Select your image dimensions when creating a new image on Pixlr.

From here, you start to edit a blank canvas just like you would in Adobe’s Photoshop:
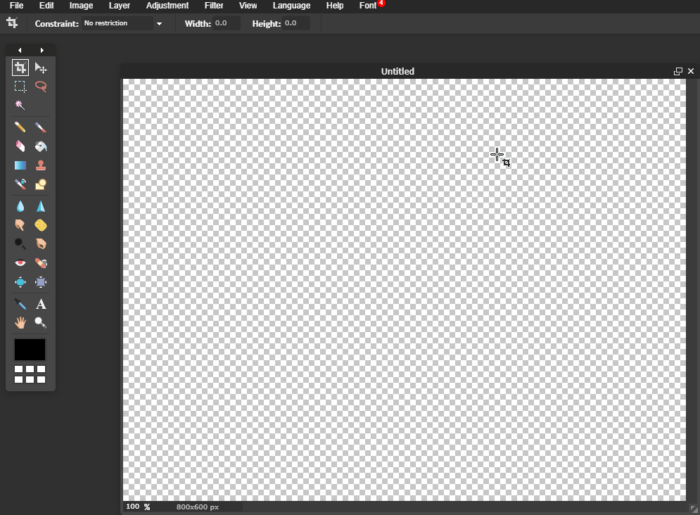
Edit on a blank canvas with Pixlr.

The greatest strengths of this tool come in the form of detailed filters, layers, and adjustments.

For example, you can use it to edit an awesome image or create a new blog graphic with various options:
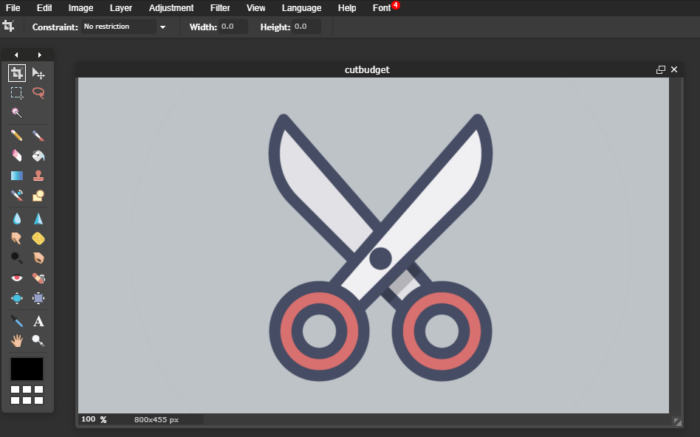
Create custom graphics using Pixlr.

It’s definitely not the easiest tool on the market to use, but if you are looking for a completely free tool with more customization options, Pixlr is a great one.

You can build graphics from the ground up or simply stitch them together like you would in Photoshop.

Go ahead and give it a try today!

6. Luminar AI

From Skylum, we have the first photo editor powered solely by artificial intelligence: Luminar AI.

Its goal is to take some of the stress out of photo editing by automating the process.

Bridging the gap between basic image editing tools and pro software like Photoshop, this software offers the right in-between gear. Best of all, you need no experience to use it.
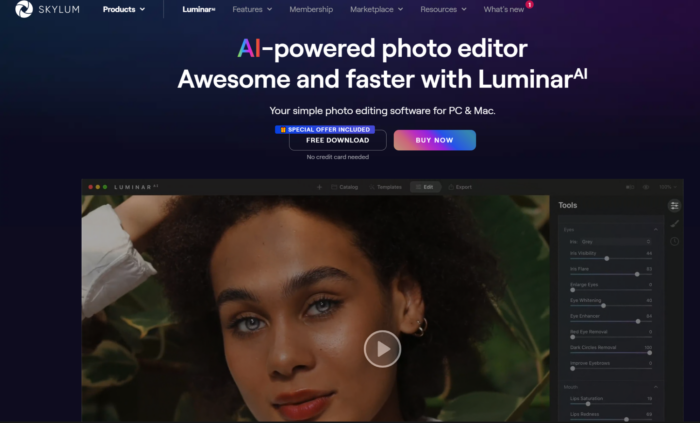
Luminar AI is a great image editing tool that fits in between basic image editing tools and pro software like Photoshop.

Once you choose an image to work on, you can start making additions and enhancements.

Navigate through the templates and editing features. The specialty features of Luminar are Face AI, Landscape, and Portrait Bokeh. The software will even walk you through the process with editing suggestions it curates.

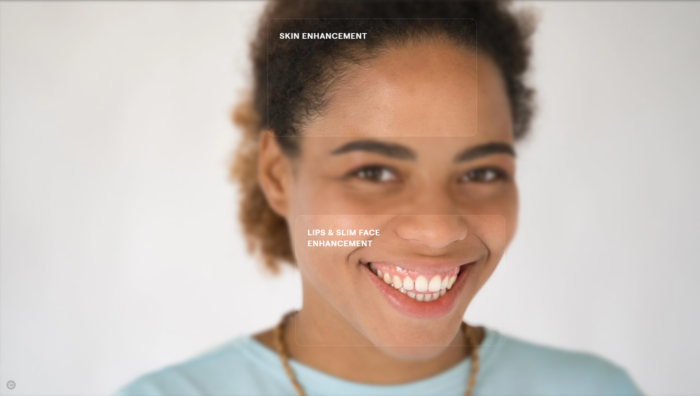
The AI portrait, or Face AI, is meant to make enhancements from shine removal to face slimming to color correcting. Highlight your muse’s smile and give them flawless skin for that “wow” level Luminar helps you strive towards.
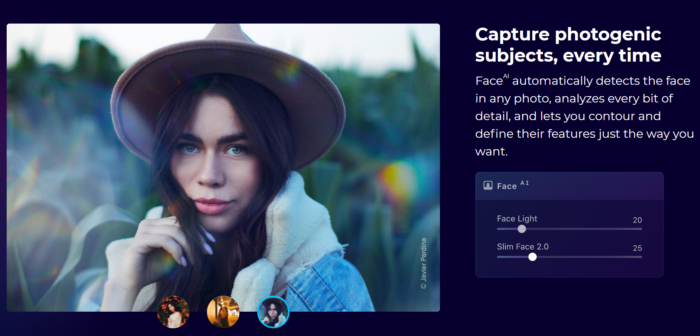
Luminar AI offers AI portrait, or Face AI, to enhance photos.
An image of a woman smiling is being edited with skin, lip, and slim face enhancement on Luminar AI.

This is the creative influence that makes Luminar stand out from other AI editing software.

In the section that has more advanced tools, you will see options that help you replace a background or get the perfect bokeh effect. The cool thing is: This can all be done on the same photo.

With Landscape EnhanceAI, a custom brightness map is used to intelligently balance both light and color across the entire image to make it shine.

A portrait image of a dock, boat, water, and mountains and trees in the background is being enhanced using Landscape Enhance AI on Luminar AI.

Lighting is everything with photo editing. The Bokeh Effect is tough to master, getting the proper balance of light just right. Luminar AI puts you in control and makes suggestions for proper focus and blur for an aesthetically pleasing edit.
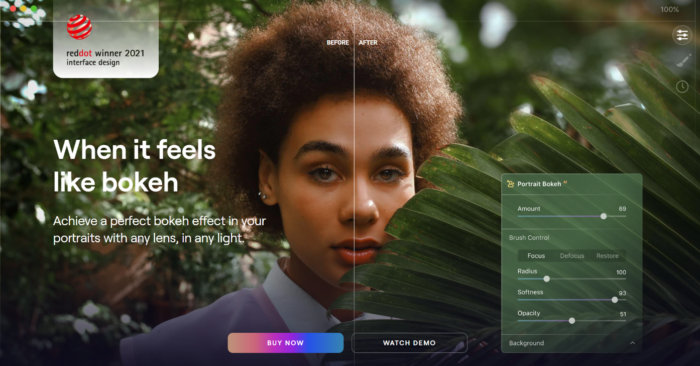
Acheive the perfect bokeh effect when editing images on Luminar AI.

When you first start using the software, it can be a bit of a chore to learn. After some time, though, you’ll remember which features are your favorite.

No matter your experience with editing, Luminar allows you to make quick edits at the push of a button. This is especially great for those of you who don’t like sitting in front of your computer too long.

One other thing about this software I like besides its ease of use: While it may be a Photoshop competitor, Luminar can be used as a Photoshop plugin.

That’s right. You can have the best of both worlds with all the aspects of each tool.

So, all around, I say it’s a tool most of you will be a fan of.

Frequently Asked Questions

What is image editing?

Image editing is the process of enhancing digital or analog photographs using various methods, devices, or programs. Photo and image editing might be different when creating graphics versus editing a picture. Scanners, digital cameras, and other image-capturing tools may produce good yet imperfect images that need further editing attention.

What are image editing tools?

An image editing tool is software that enables the editing and conversion of images to varying graphic formats. Everyone knows Photoshop as one of the most popular image editing tools, but there are many others with similar capabilities. Some specialize in removing backgrounds or are a beginner-friendly version of capabilities found within Photoshop. If you want to make an infographic, try Piktochart. Maybe you want some AI guidance when editing, try Luminar AI instead. Think of your needs or what you want to learn and let that drive your starting point for your editing journey.

How should I choose an image editing tool?

Think about the functionality you need to perform the task at hand. Maybe you need to crop, rotate, or straighten an image. Perhaps you need to correct a smile or the shading of colors of an image. You might need to create an infographic. Read up on the handy tools I mentioned in this post and choose the one that’s best to get your job done.

What are some features I need to have when editing images?

Some standard features of a basic image editor include:

  • Crop and rotation
  • Lighting adjustment (exposure, brightness, contrast, saturation, etc.)
  • Focus and sharpness correction
  • Blemish corrections
  • Red-eye adjustment

Along with some of these basic features, items you want to have especially for editing images include adding layers to create different amounts of transparency and adding elements like blur or vignette to create specific appearances.

What is photo editing?

This post-production technique of digital photography involves using photo editing tools to alter images to your desired outcome. It is the digital photography equivalent of a darkroom, where photographs are edited after they’re taken.

How to learn photo editing?

Start with photo editing tutorials to learn your style. YouTube is always a great place to start, but the software you use likely offers a tour of its features – use them to your advantage. You can avoid the need for a lot of editing by adjusting your camera’s settings as well. A higher-quality camera helps, too. With many of the tools like I’ve mentioned, the software provides step-by-step instructions telling you how to use the product in real time of your editing process. If you’re still unsure how to get started, read our complete guide on designing stunning visuals as a beginner.

How to calibrate monitor for photo editing?

This will depend on whether you have a Mac or PC

For PC: Go to Start > Control Panel > Appearance and Personalization > Display > Calibrate Display Color. Then open the software that will walk you through and give you a general screen calibration. You can also find it by searching for “Calibrate Display Color” in your Windows search box.

For Mac: With the glossy glass, it’s a bit more difficult, but setting your white point to 5500 will give your screen a warm and fairly accurate display.

What’s the difference between a photo editing tool and image editing tool?

Photo editing tools are exclusively used for manipulating images captured with a camera. Image editing tools can do this as well, but also have the capacity to work on static graphics, or potentially combine the two.

{
“@context”: “https://schema.org”,
“@type”: “FAQPage”,
“mainEntity”: [
{
“@type”: “Question”,
“name”: “What is image editing? “,
“acceptedAnswer”: {
“@type”: “Answer”,
“text”: ”

Image editing is the process of enhancing digital or analog photographs using various methods, devices, or programs. Photo and image editing might be different when creating graphics versus editing a picture. Scanners, digital cameras, and other image-capturing tools may produce good yet imperfect images that need further editing attention.


}
}
, {
“@type”: “Question”,
“name”: “What are image editing tools? “,
“acceptedAnswer”: {
“@type”: “Answer”,
“text”: ”

An image editing tool is software that enables the editing and conversion of images to varying graphic formats. Everyone knows Photoshop as one of the most popular image editing tools, but there are many others with similar capabilities. Some specialize in removing backgrounds or are a beginner-friendly version of capabilities found within Photoshop. If you want to make an infographic, try Piktochart. Maybe you want some AI guidance when editing, try Luminar AI instead. Think of your needs or what you want to learn and let that drive your starting point for your editing journey.


}
}
, {
“@type”: “Question”,
“name”: “How should I choose an image editing tool? “,
“acceptedAnswer”: {
“@type”: “Answer”,
“text”: ”

Think about the functionality you need to perform the task at hand. Maybe you need to crop, rotate, or straighten an image. Perhaps you need to correct a smile or the shading of colors of an image. You might need to create an infographic. Read up on the handy tools I mentioned in this post and choose the one that’s best to get your job done.


}
}
, {
“@type”: “Question”,
“name”: “What are some features I need to have when editing images? “,
“acceptedAnswer”: {
“@type”: “Answer”,
“text”: ”

Some standard features of a basic image editor include:

  • Crop and rotation
  • Lighting adjustment (exposure, brightness, contrast, saturation, etc.)
  • Focus and sharpness correction
  • Blemish corrections
  • Red-eye adjustment

Along with some of these basic features, items you want to have especially for editing images include adding layers to create different amounts of transparency and adding elements like blur or vignette to create specific appearances.


}
}
, {
“@type”: “Question”,
“name”: “What is photo editing? “,
“acceptedAnswer”: {
“@type”: “Answer”,
“text”: ”

This post-production technique of digital photography involves using photo editing tools to alter images to your desired outcome. It is the digital photography equivalent of a darkroom, where photographs are edited after they’re taken.


}
}
, {
“@type”: “Question”,
“name”: “How to learn photo editing? “,
“acceptedAnswer”: {
“@type”: “Answer”,
“text”: ”

Start with photo editing tutorials to learn your style. YouTube is always a great place to start, but the software you use likely offers a tour of its features – use them to your advantage. You can avoid the need for a lot of editing by adjusting your camera’s settings as well. A higher-quality camera helps, too. With many of the tools like I’ve mentioned, the software provides step-by-step instructions telling you how to use the product in real time of your editing process. If you’re still unsure how to get started, read our complete guide on designing stunning visuals as a beginner.


}
}
, {
“@type”: “Question”,
“name”: “How to calibrate monitor for photo editing? “,
“acceptedAnswer”: {
“@type”: “Answer”,
“text”: ”

This will depend on whether you have a Mac or PC

For PC: Go to Start > Control Panel > Appearance and Personalization > Display > Calibrate Display Color. Then open the software that will walk you through and give you a general screen calibration. You can also find it by searching for “Calibrate Display Color” in your Windows search box.

For Mac: With the glossy glass, it’s a bit more difficult, but setting your white point to 5500 will give your screen a warm and fairly accurate display.


}
}
, {
“@type”: “Question”,
“name”: “What’s the difference between a photo editing tool and image editing tool?”,
“acceptedAnswer”: {
“@type”: “Answer”,
“text”: ”

Photo editing tools are exclusively used for manipulating images captured with a camera. Image editing tools can do this as well, but also have the capacity to work on static graphics, or potentially combine the two.


}
}
]
}

Conclusion

Content marketing should always include visuals.

You can’t just stick a bunch of text up on a page and expect your audience to read and digest every word.

It’s just not going to happen.

Videos and images are a great way to grab their attention and get your message across.

And, like I said, Google likes them, too. A recent study on Google rankings found that images can even help you rank better.

Images should always be a focus in your content marketing and social media strategies.

They are great for driving shares and clicks that plain text just can’t make happen.

But how do you create images when you have no graphic design experience?

Thankfully for us, there are tons of free tools online that have templates and drag-and-drop style design.

These tools are amazing for creating designs in a fraction of the time without the need to learn graphic design skills.

Most of these tools have thousands of free themes, icons, and tools for you to use!

Start by using VistaCreate.

It’s one of the most popular image editing tools on the market. It’s great for fast, easy designs for almost anything you can think of.

Try PicMonkey for diverse portrait editing and more advanced tools with an easy interface.

Snappa is excellent if you want high-quality icons and integrated social publishing.

Pixlr is the most advanced of the tools, but offers incredible Photoshop-quality features for free.

Luminar brings a new concept to photo editing tools with AI capabilities.

Even a beginning designer will look like a pro with these tools.

What are your favorite image editing tools to use for content marketing and social media?

Using Ubersuggest for E-Commerce: Everything You Need to Create a Killer Online Store

Despite the growth of social selling for e-commerce, SEO keyword optimization is still crucial to long-term business success. Why? Because that’s how most customers find you.

Search traffic is responsible for 65 percent of e-commerce sessions. If you’re not optimizing for keywords, buyers won’t find you among your competitors.

SEO offers many other advantages. SEO offers many other advantages. For instance, it has a fantastic ROI when done correctly. 

If you want further proof of SEO’s advantages, case study after case study shows how a few tweaks can potentially get your site to the front page of Google. 

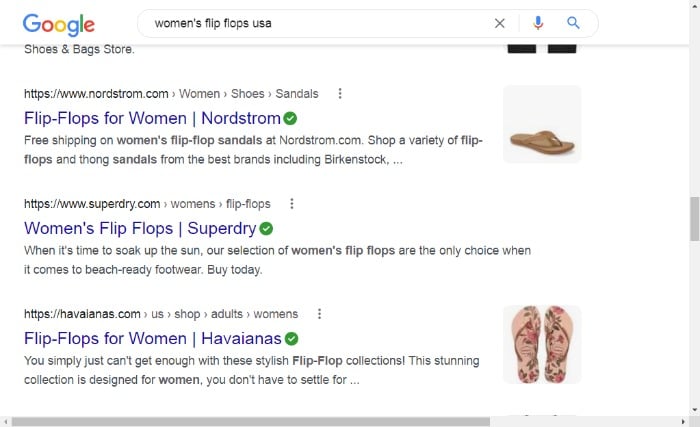
ubersuggest for ecommerce - search results

A few words of warning before I move on: 

  • Don’t expect results overnight. SEO can take time to yield results, but it’s a valuable investment that pays off long-term. 
  • Don’t let SEO overwhelm you. There are numerous areas of SEO I could discuss here, but let’s just focus on keywords for now.

Why Should E-Commerce Companies Care About SEO Keywords?

With an estimated 4.2 million e-commerce businesses in North America, there’s a ton of competition. 

To stay ahead of the curve, you need to do everything possible to optimize your site, rank higher in SERPs, and increase visibility. You’ve probably guessed by now, but one of the best ways to do this is with strategically chosen keywords.

For guidance, your chosen keywords should be:

  • Relevant to your product and target audience. 
  • Attainable in search results.
  • Lucrative in terms of driving targeted, profitable traffic to your online store.

When it comes to finding keywords, you need resources to help you along the way. This is where Ubersuggest comes in. 

Ubersuggest is a free tool that makes it easy to research keywords and identify which ones to target. 

But, you don’t have to take my word for it. Let’s talk about how Ubersuggest helped our e-commerce customer, Portrait Flip, improve traffic and drive ROI. 

Portrait Flip is an online store that creates real portraits by real artists from customer photos around the world. Using Ubersuggest for its keyword research, the company increased its organic traffic by 70% in just two years and increased revenue by 32.33 percent over their goal. 

Perhaps you think that’s unattainable. However, there’s a simple reason behind the enhanced results: you drive more relevant, organic traffic to your website by optimizing your pages by targeting the right keywords.

How to Use Ubersuggest to Create a Killer Online Store

From SEO audits and competitive analysis to monitoring results and adapting your approach, plenty goes into running a successful online store. However, there’s no need to get overwhelmed. With the right tools, creating a killer e-commerce store isn’t complicated. 

Below are five steps to creating a killer online store using Ubersuggest. (link to each section)

  1. Create a project from your dashboard in Ubersuggest,
  2. Perform an SEO Audit.
  3. Find the right keywords to target. 
  4. Conduct Competitive Analysis
  5. Create a Backlinks Plan
  6. Track Your Progress

I’ll walk you through each step of the way. 

Step #1 Create a project in Ubersuggest

If you’re new to Ubersuggest, you need to start with the basics.

Begin by registering for a free account.

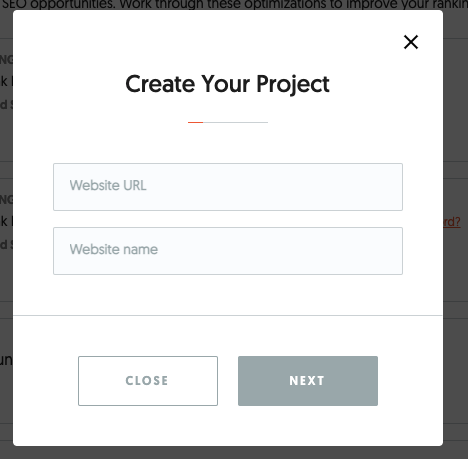
Once you do that, go to the dashboard and click on “Add Your First Project.” Next, add your website URL and name.

create your project using ubersuggest for e-commerce

It’s also essential to connect your project to your Google Account to see how your keyword strategy is affecting your Google presence. Here’s how to do that:

  • Go to the dashboard.
  • Select the project you want to connect to Google Search Console. 
  • Click ‘connect with Google.’
  • Connect the account or select the ‘Use another account’ option.

Remember, SEO takes time, and there might be some trial and error along the way. Therefore, once you’ve set it all up, I recommend you use Ubersuggest at least once a week to: 

  • Check-in on your SEO progress (you can use the different weekly alerts to help you understand where to focus your efforts).
  • Work through the suggestions in your dashboard.
  • See what your competitors are up to and take small steps each week to compete against them.
  • Find new keywords to target on your product pages (try A/B testing product pages with different keywords to see which one ranks higher).

Portrait Flip did this and achieved significant success and savings:

“We were able to create and implement a clear SEO strategy with Ubersuggest starting in January of 2020 that helped our organic traffic take off. We’ve saved thousands of dollars on paid advertising by keeping Ubersuggest at the heart of our SEO, and we’ve watched our SEO and our revenue grow exponentially, too.”

Step #2 Perform an SEO Audit.

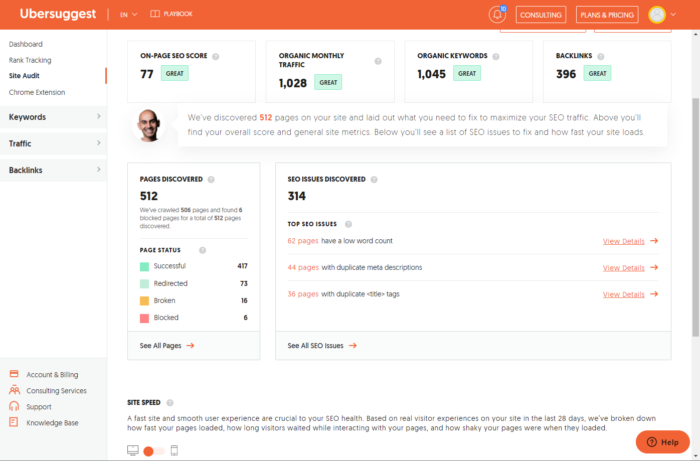
The Ubersuggest Site Audit is the best place to start with your Keyword Strategy. When you perform this analysis, you get a general overview of your website’s SEO standing. 

From here, you can understand where your website ranks in terms of industry-standard for optimal SEO health.

site audit using ubersuggest for e-commerce

To perform a site audit:

  • Go to the project dashboard.
  • Find SEO explorer on the left side menu and select ‘SEO Analyzer.’
  • Wait for the analyzer to create a report; your report sorts errors by difficulty and how fixing them impacts your SEO.
  • Review your report. Pay careful attention to the ‘See All SEO Errors,’ on the associated tab.
  • Click ‘What is this, and how do I fix it?’ on the associated tab. 
  • Once you’ve reviewed the major issues, select the ‘SEO Analyzer Overview’ option. This takes you back to the site audit main page.
  • Now, you’re ready to review the second part of your audit report, which details your desktop and mobile web speed. Use the orange circular toggle, to switch between Desktop and Mobile reports.
  • Fix the issues, return to the ‘SEO Analyzer’ overview, and choose the ‘recrawl’ button at the top of the page.
  • Finally, review the report to see if you’ve fixed the errors or if there are any fresh ones. 

Here’s how Portrait Flip used the site audit feature.

First, Portrait Flip optimized its results by focusing on the ‘Broken Link’ finder.

This helped the business understand where it was losing potential customers due to broken product links. 

At first glance, this might not seem like an important issue, but broken links negatively impact your SEO and the customer experience.

Portrait Flip also found the ‘Page Load Time’ report invaluable, as the company was keen to see if any added website code was inadvertently increasing its load times.

Again, this may not seem like a significant issue. However, speed is crucial for online shopping. Ideally, you want your e-commerce store to load within two seconds. Anything above that adds to your bounce rate and customer dissatisfaction and leads to lost sales. 

After fixing simple issues on the Portrait Flipw website, 98 percent of the revenue generated from its SEO and PPC efforts in 2021 came from organic search. 

Step #3 Research Keywords to Target

Now, this is where the fun starts. 

You can use the Ubersuggest Keyword Reports to understand which keywords to include in your content to drive relevant and lucrative traffic.

ubersuggest keyword ideas for ecommerce

There are two main features to focus on here. 

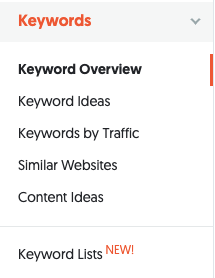
1. Keyword Overview 

The keyword overview allows you to see how competitive a keyword is and its search volume trend over time. To narrow down your keyword choices, think of the general search terms your target audience might use when searching for a product you sell.

2. Keyword Ideas  

The keyword research feature shows you how people search for keywords related to your business and your products. It enables you to uncover valuable keywords that other competitors aren’t targeting.

How Portrait Flip uses these tools:

Content marketing is at the heart of Portrait Flip’s efforts to attract traffic to its site. For example, the business used blogging and posted regularly on its social media channels. However, these efforts weren’t driving traffic the way the company hoped. 

This is where Ubersuggest proved its worth.

  • The Keyword Overview report enabled Portrait Flip to find relevant keywords to focus on and that prospects use in their searches. 
  • Next, Portrait Flip optimized its blog posts and e-commerce product pages with new keywords. 
  • Finally, Portrait Flip used the Keyword Idea and Content Idea reports to help them plan out their next blog topics. 

The results were exceptional.

Portrait Flip exceeded their traffic expectations in one quarter by over 27 percent—and that’s without any paid advertising. If you’re planning on using these reports, here are a couple of tips to get the most out of it them: 

Find The Most Competitive Keywords

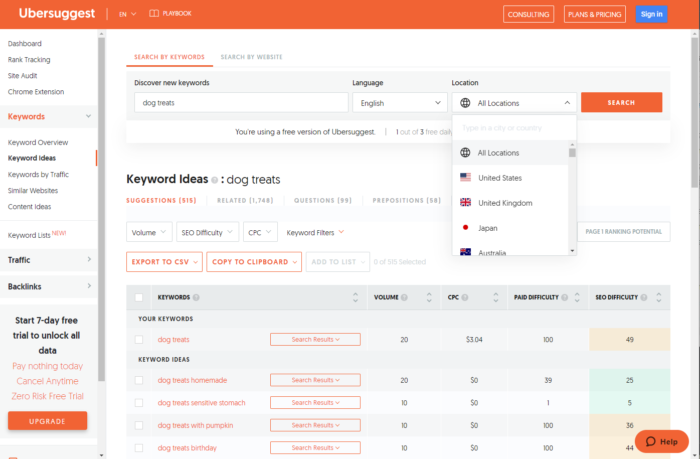
Use the ‘SEO Difficulty’ filter to help determine which keywords are more competitive than others. Be intentional in comparing this with the ‘Paid Difficulty’ feature to help decide if you should pay for Google Ads against the keywords. 

NOTE: Keywords with high Paid Difficulty are usually lucrative. However, they are almost always more expensive.

find competitive keywords using ubersuggest for ecommerce

Search by Location

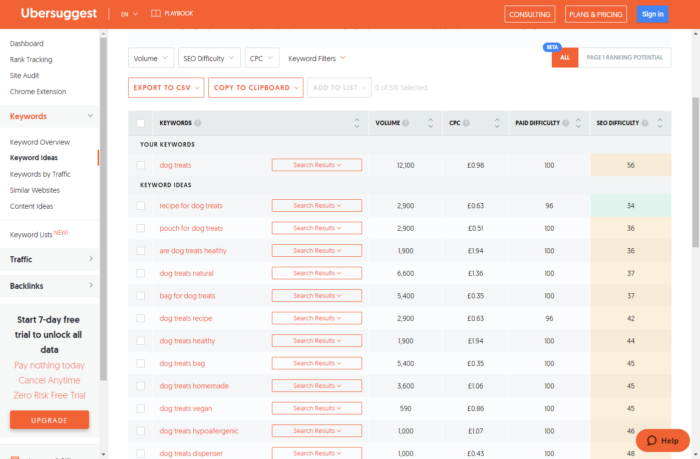
If you want to attract a worldwide audience, search for global keywords on the ‘location’ tab. You can target your geographical search towards specific local traffic or by country. This can help you find unique keywords in different regions to target.

using ubersuggest for keywords by location for e-commerce

Step #4 Conduct a Competitive Analysis

Competitive analysis is an essential part of any effective SEO strategy. By understanding your competitors, you can learn what techniques and keywords they’re using to rank well in search engines and replicate their successes.

Ubersuggest makes this task more manageable than ever. Just use the following tools: 

  • Keywords by Traffic: Go to Ubersuggest, enter the competitor domain URL, and hit “Search” to find the top keywords that the website ranks for. Note any organic keywords and monthly traffic, the domain score, and backlinks. You can also add your competitor’s URL as a project in your Ubersuggest dashboard for regular tracking. 
  • Backlinks Opportunities: Discover what websites are linking to your competitors and get a detailed overview of who to reach out to request links back to your site. Here’s how: 

1. Enter your domain name or URL from your site into the Backlinks Opportunity tool. (Linked above).

2. Enter a competitor domain or a URL from their site. 

3. Click ‘search.’

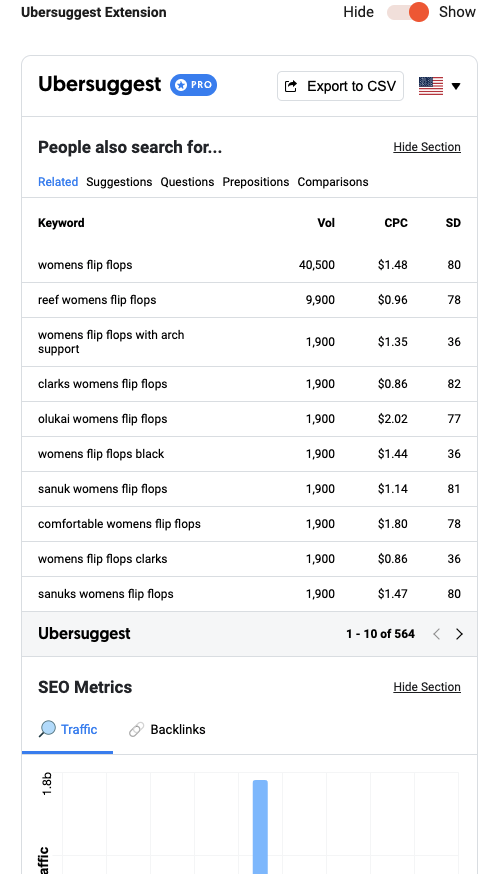
You can also use the Ubersuggest Chrome Extension for keyword analysis directly in Google search results, YouTube, AND Amazon pages for further insights.

ubersuggest chrome extension

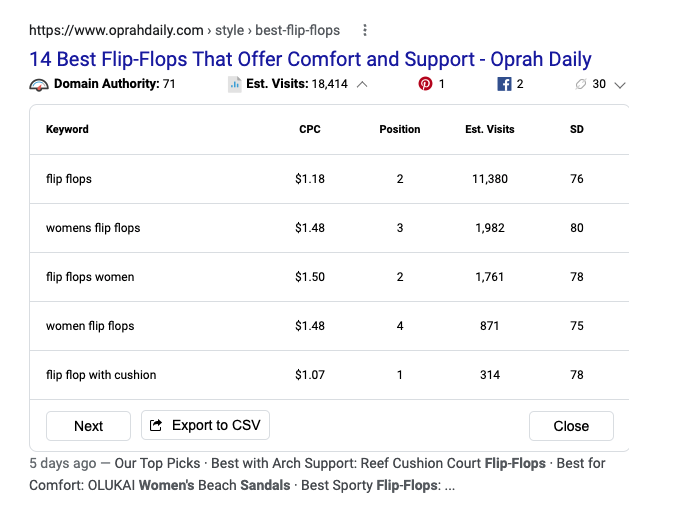
Here’s how you’ll see the data in your SERPs: 

You can also remove competitors or add them.

You’ll also see monthly search and CPC: 

ubersuggest chrome results for ecommerce

Here’s how to use this feature: 

Create a Project for each Competitor: On the Dashboard, click “add a project” and add a few of your competitors to get a complete overview and consistent updates on your competitor’s ranking. You can easily remove competitors or add them. Here’s some more information on using Ubersuggest to spy on your competitors.  

How Portrait Flip used Ubersuggest’s competitive analysis tool: 

Portrait Flip monitored how its competitors were performing and what keywords they were ranking for. Specifically, the company used the Keywords by Traffic and Top Pages by Traffic reports together to get an idea of keywords they were losing out on. Using the information, Portrait Flip secured Page #1 on Google above competitors for primary keywords that drove converting traffic to their site.

Step #5 Start Tracking Your Progress

As you work on your SEO Keywords, it’s critical to be patient and track your progress over the long term. 

Although you might see results with your plan in the next few weeks, as I’ve repeatedly stressed, SEO is an ongoing process and it takes time to get results. Typically, you can expect to wait a few months, so if you’re not seeing immediate progress, don’t get discouraged. 

When you track your keywords, you can see which ones aren’t working and use some fresh ones to optimize your content. 

Then rinse and repeat! 

Keep testing and learning. A/B test different targeted keywords on product pages over time and track to see which performs best. 

You can use Ubersuggest to monitor keyword performance. Here’s how:

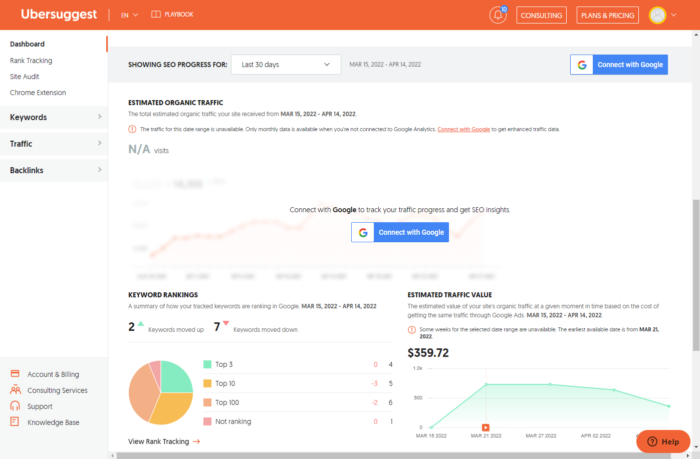
In your Dashboard, you can view SEO progress over a specific time. Plus, you can see your progress in keyword ranking and estimated traffic value.

dashboard view of seo ovetime in ubersuggest for ecommerce

How Portrait Flip did this:

As they tracked their progress, they found that most of their year-to-year growth came from organic traffic, which steadily grew once they started using Ubersuggest. 

Conclusion: Using Ubersuggest to Improve Your E-Commerce Store

One of the toughest tasks for e-commerce business owners is standing out from the competition. Gaining visibility, discovering the right keywords, identifying backlinking opportunities, and conducting competitive analysis are some of the most challenging tasks every online store owner faces.  

Fortunately, Ubersuggest offers a solution to these common problems, allowing you to enhance your e-commerce store in key areas. This allows you to increase visibility, attract targeted prospects, and enhance conversions. 

10 Ideas For Killer YouTube Ad Creatives

Ad creatives are the ads served to users on a social media or digital media platform. On YouTube, these are most often video ads and may include images, video, audio, and text. When combined, these creative elements form a full video advertisement.

YouTube ads are just another way to expand your reach. To ensure your campaigns are most effective, though, you need to ensure you are creating killer YouTube ad creatives.

This article will look at the ten best ideas for creating killer YouTube ad creatives. By the end of the post, you’ll understand how to ensure your ad creatives are the best they can be.

10 Ideas for YouTube Ad Creatives

Here are a few ideas for creating top-notch YouTube advertisement creatives for your video ad campaigns.

1. Use the Element of Surprise

In a survey of Twitter users, 43 percent of respondents say they would watch the entire video ad if it has interesting content. That is where the element of surprise comes in.

There are a handful of brands that are known for their outlandish and surprising ad content. These include Skittles, Cheetos, Doritos, and Old Spice. Their content often starts on a relatively normal note, but then takes a surprise turn.

Take a look at this Old Spice YouTube ad they ran before Super Bowl LV: 

The ad starts with a relatable activity that then turns fantastical in a matter of seconds. The element of surprise here is funny and lives up to the brand’s usual commercial antics.

2. Be Relatable

A crucial part of any successful YouTube ad is that it is relatable to your target audience. What that looks like will differ, but here are some tips to help.

To be relatable, you must first know who it is you are relating to. That would be your target audience. They will be defined by various data points, including:

  • age
  • gender
  • education background
  • purchasing power
  • social class
  • location
  • consumption habits

With that information in hand, you can shape a story that either piques their interest or pushes on a pain point. Your ad creatives would be tailored to that audience using relevant audio and visuals.

The key is not to try too hard to relate. It should come organically within the creative process. The better you know your audience, the more natural it will appear.

3. Improve on Competitors’ YouTube Ad Creatives

You don’t have to reinvent the wheel for every YouTube ad creative. If a competitor created an ad with the right idea but less-than-stellar execution, this lets you step in and improve.

To be clear, this does not mean plagiarizing your competition’s work. The fact is, there are no truly original ideas, but every idea can be expanded upon and improved.

To begin, take a look at competitor advertisements. Ask yourself these questions:

  • How can the storytelling be improved?
  • How can the audience be better targeted?
  • How can the audio/visuals be improved?
  • What creatives could be added to enhance the experience?

With a few ideas on how to improve your competitor’s video ads, you can now work to create a campaign with improved video ad creatives. The best place to start is by applying a unique angle to a similar ad creative concept.

4. Include a Call to Action

Do you want your ad to educate, inspire, or convert? You are likely looking to achieve at least two of the three. Instead of leaving your audience wondering what they should do, tell them.

A call to action is a message that clearly states what action you want your audience to take. You’ll often see these as “Learn more” or “Buy now” online. There is often hesitancy to include a direct call to action as it may appear pushy. The fact is, viewers will know they are viewing an ad and expect to be told what to do.

If you’re wary of direct calls to action, consider a subtler approach. Let’s take another look at that Old Spice advertisement from above:

At the end of the ad, the star can be seen gesturing to the top right of the video playback. He’s pointing to a call to action, which aligns with how YouTubers often point out additional information or other videos to view. It’s a subtle touch, but one that uses YouTube’s in-built features to drive their point home further.

5. Continuously Experiment

With ad creatives, it’s crucial to experiment and track audience engagement continuously. This ensures better results as you learn what your audience responds to.

What should you be testing? When it comes to testing, creative elements that include text, font color, and size can be manipulated to test viewer engagement. This is especially important with calls to action.

Other elements to test on your video ad creatives include:

  • dialogue
  • background music versus no background music
  • different types of background music
  • visual backgrounds
  • visual transitions

For best results, stick to testing just one creative element at a time. You can run multi-element tests once you have data from these initial A/B tests.

6. Tell a Story or Narrative

One element of a good ad is the ability to draw your audience in. An easy way to do this is by using storytelling. A story can be informative, heartwarming, funny, or a combination of the three. What’s most important is that you draw the audience into the story with vivid ad creatives.

Take, for example, the “A Parent’s Imagination” Subaru Forester ad. It clearly outlines the fears of all parents as their teens take to the road:

The combination of somber music and the back-and-forth visuals between imagination and reality drives the story home. It’s a story easy enough to understand without dialogue and one that pulls at the heartstrings.

7. Make the Ad Seem Native

Whether you intend to inform, educate, or convert, your ads don’t have to be explicit in their intention. In fact, obtrusive and blatant advertisements can be harmful to your overall marketing campaign. 

According to HubSpot, 77 percent of online browsers say they prefer to ad filter rather than completely ad-block. Viewers dislike the more obnoxious and intrusive ads, which means the industry needs to adapt. One way to do so is with native ads, or ads that seem to be part of the landscape instead of separate from it.

This is growing increasingly common with influencers who seamlessly incorporate sponsorships into their video content. You can do the same with ads that play as more of a mini-episode or vlog than as an advertisement.

8. Incorporate User Generated Content

User-generated content, or UGC, is content provided by real users of the service or product. These are often in the form of reviews, photos, or videos submitted to the brand on social media sites or via feedback forms. 

With 54 percent of internet users trusting online review content versus just 20 percent of the information they get from the brands themselves, you can’t afford to exclude UGC from your marketing efforts.

One way to incorporate user-generated content into YouTube ad creatives is with customer reviews. This Grammarly video ad featuring a writer, filmmaker, and Grammarly user is a perfect example of incorporating UGC into YouTube ad creatives: 

9. Highlight the Benefits

Brands commonly focus on the features in ads. However, potential customers really want to see direct benefits.

What is the difference between features and benefits? Forbes offers a succinct explanation: Features are the attributes of a product or service, while benefits are the advantages a customer gains from the product or service.

You can use many of the above ideas to highlight the benefits. These include telling a story or incorporating UGC. 

Many brands do this well, but perhaps none as well as Apple:

The ad lists the technical features, while also showing how they benefit the consumer. You don’t have to sacrifice features for benefits; rather aim to show both.

10. Consider the Device

YouTube, like many digital media platforms, is optimized for use on various devices. Its video content and, therefore, its ads are also optimized in much the same way. This ensures a better experience for users whether they’re on desktop or mobile.

With this in mind, consider optimizing ad creatives to work across various devices. YouTube encourages this with the capability to upload multiple versions of one video ad in different aspect ratios.

YouTube videos can be uploaded in square, vertical, and landscape ratios to best serve all YouTube users. This may require a little extra work to ensure the full experience is viewable in all aspect ratios, but it’s worth the effort. By uploading your video in numerous ratios, you ensure you are reaching a broader audience.

3 Examples of Successful YouTube Ad Creatives

Now, let’s look at a few:  

1. HelloFresh

Recipe videos and GIFs have taken over social media news feeds over the last few years. HelloFresh takes advantage of this with their recipe video advertisements.

The brand commonly uses influencers and TV personalities (in this case, Antoni Porowski) as the home-inspired chef. This is a great way to leverage influencer relationships with their loyal viewers, thus making it more likely they’ll watch the entire advertisement.

2. Always

There has been a sharp increase in brands using their platform to draw attention to serious issues. However, Always pioneered this form for video advertising.

The documentary-style of Always #LikeAGirl video ads tell a story in a relatable manner. The advertisements draw in the viewer and stir feelings of hope and inspiration.

3. Skittles

If you’re hoping for a chuckle, then Skittles won’t disappoint. 

Skittles, similar to Old Spice and Doritos, uses the element of surprise regularly in its video advertisements. While the regular use of surprise may seem contradictory, the brand always outdoes itself, which keeps viewers engaged.

Frequently Asked Questions About YouTube Ad Creatives

What are the fundamentals of YouTube ad creatives?

According to Google, the fundamentals are best summed up as:

  • Attract: Hook consumers’ attention.
  • Brand: Help consumers hear or visualize your brand.
  • Connect: Make consumers feel something about your brand.
  • Direct: Encourage consumers to take action.

What makes a good YouTube ad creative?

Beyond the fundamentals, a good ad creative will follow a traditional story arc. This contains five elements, which are the lead-in, the build, the climax, the offer, and the branding.

What are the ideal YouTube ad specifications?

YouTube ad specifications vary by ad format. Google offers an in-depth look at both YouTube ad formats and ad requirements.

What types of ad creatives are most successful?

The beauty of the many social and digital media platforms is the ability to create different types of ad creatives for different groups of your audience. The type of ad creative that is most successful, then, will vary by platform.

On YouTube, the most successful types of ad creatives are video. The same may not be true for Instagram or Facebook.

{
“@context”: “https://schema.org”,
“@type”: “FAQPage”,
“mainEntity”: [
{
“@type”: “Question”,
“name”: “What are the fundamentals of YouTube ad creatives?”,
“acceptedAnswer”: {
“@type”: “Answer”,
“text”: ”

According to Google, the fundamentals are best summed up as:

  • Attract: Hook consumers’ attention.
  • Brand: Help consumers hear or visualize your brand.
  • Connect: Make consumers feel something about your brand.
  • Direct: Encourage consumers to take action.


}
}
, {
“@type”: “Question”,
“name”: “What makes a good YouTube ad creative?”,
“acceptedAnswer”: {
“@type”: “Answer”,
“text”: ”

Beyond the fundamentals, a good ad creative will follow a traditional story arc. This contains five elements, which are the lead-in, the build, the climax, the offer, and the branding.


}
}
, {
“@type”: “Question”,
“name”: “What are the ideal YouTube ad specifications?”,
“acceptedAnswer”: {
“@type”: “Answer”,
“text”: ”

YouTube ad specifications vary by ad format. Google offers an in-depth look at both YouTube ad formats and ad requirements.


}
}
, {
“@type”: “Question”,
“name”: “What types of ad creatives are most successful?”,
“acceptedAnswer”: {
“@type”: “Answer”,
“text”: ”

The beauty of the many social and digital media platforms is the ability to create different types of ad creatives for different groups of your audience. The type of ad creative that is most successful, then, will vary by platform.

On YouTube, the most successful types of ad creatives are video. The same may not be true for Instagram or Facebook.


}
}
]
}

YouTube Ad Creatives Conclusion

Once you have wrapped your head around YouTube ad creation, the hard part is over. You can spend the rest of your time on the fun aspects, which include ensuring creating fun and effective ad creatives. 

The above guide will help you implement new ideas into your creative process and inspire you to create the best ad content possible. That doesn’t mean you will always create the “perfect” ad, but you can learn what ad creatives work best for your audience through experimentation and testing.

What of the above elements do your favorite YouTube video ads include?

Obtaining a Killer News Hook

Obtaining a Killer News Hook Obtaining an information hook. When you are mosting likely to create a news release most likely one of the most essential point you can do is produce an awesome information hook. A news release without an information hook is simply outright marketing, basic as well as ordinary. There is absolutely …