A Starter Guide to Google Ads Manager Accounts

If your business has complex advertising needs, there’s a good chance Google Ads Manager can help.

Rather than having your PPC spread out across several separate Google Ads accounts, Google Ads Manager brings all of your paid ads together in one place. This makes managing your campaigns much more efficient and allows you to maximize return on ad spend.

Setting up a Google Ads Manager account is simple and can quickly change the way you run your paid ads. Ready to give it a try? Here’s how to get started.

What Are Google Ads Manager Accounts?

Google Ads Manager accounts are dashboards that allow you to manage multiple Google Ad accounts all in one place.

Rather than logging in to lots of different ad accounts with separate usernames and passwords, Google Ads Manager puts everything in one place, making it more convenient to manage your ads.
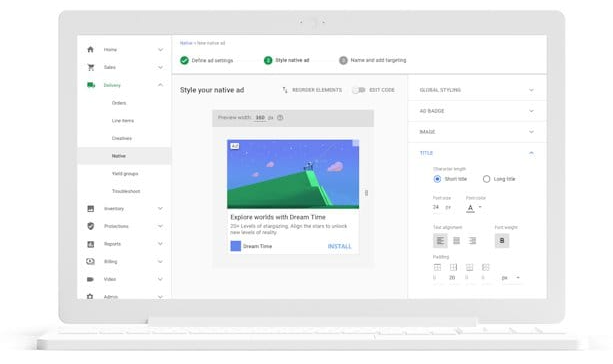
google ad manager dashboard

Originally called My Client Center, Google Ads Manager provides many benefits to organizations with complex marketing needs. You can:

  • Manage all your ads in one place
  • Access campaigns across different accounts
  • Control who has access to different accounts
  • Quickly monitor and compare performance across separate accounts
  • Consolidate billing to better understand your costs

If your business needs to access many different Google Ad accounts, then a Manager account might save you a ton of time and allow you to work far more efficiently.

Why You Should Use Google Ads Manager Accounts

If your business requires access to multiple Google Ad accounts, then a Google Ads Manager account can significantly boost your efficiency. Here’s a few benefits of using this tool:

Save Time

Logging in and out of accounts takes time and it also means you don’t get a complete picture of the data. The more information you have at your disposal, the easier it is to optimize your ads, and with a Google Ads Manager account, you bring all of this data together in one central place.

Improve ROI

Running paid ads is all about return on investment. If you’re not getting the right return, then there are other digital marketing strategies you could be focusing on. According to WebFX, the average small and medium-sized business spends between $108,000 and $120,000 per year on PPC. Google Ads Manager can ensure you’re making the most of your ad dollars.

Who Should Use Google Ads Manager Accounts?

Google Ads Manager accounts are ideal for businesses that run multiple ad accounts. The most obvious example is advertising agencies, but this also applies to businesses of all sizes that do a lot of PPC.

Ads Manager Accounts are particularly useful for marketing agencies because you can seamlessly integrate with client’s accounts.

For example, my agency works with clients from all over the world, so it’s just not feasible to log in to each client’s account with a separate username and password. Instead, through Google Ads Manager Accounts, we can manage up to 85,000 accounts (depending on ad spend) all in one place.

This makes life easier, but it also makes the data much more powerful. If you have all the insights from 100 clients in the same industry all together in one place, it’s much easier to identify where campaigns are going well or where there’s room for improvement.

Plus, this type of account enables clients to share access to their Ad accounts securely. The client doesn’t have to share their passwords or bank details, and they’re still able to make changes to the account or unlink from the manager account if they wish.

While marketing agencies are most likely to be running paid ads on a scale where they benefit from Google Ads Manager Accounts, there are also plenty of other companies that run multiple ad accounts.

Large companies with multiple departments may have separate marketing teams running their own Google Ad Accounts. Although it’s important to make your marketing specific and targeted, which the multiple ad accounts allow for, you also need to have a clear view of the big picture.

Bringing your accounts together under Google Ads Manager allows you to combine the individuality of segmented marketing with the benefits of greater oversight and analysis.

How Many Ad Campaigns Can Be Used in Google Ads Manager Accounts?

The more Google Ad accounts you need to manage, the more Google Ads Manager becomes beneficial. While you can have up to 20 Ad accounts on one email, Google Ads Manager makes them much easier to manage, and beyond 20 accounts is almost a necessity.

No matter what type of campaigns you’re running, you need to have oversight, so Google Ads Manager can be beneficial.

Here are some campaigns where Google Ads Manager can make a difference:

Google Ad Campaigns With Multiple Collaborators

Large paid advertising campaigns often have multiple collaborators, including managers, paid ad experts, and team leads. All of these people need access to the account, but you don’t want to share passwords and grant unlimited access.

If you’ve got hundreds of campaigns, you want people to have easy access to the parts they need without having to share sensitive non-essential details.

While a regular Google Ads account allows you to do this, it’s very time-consuming to update permissions on multiple accounts constantly. Instead, Google Ad Manager will enable you to share access securely from a central point.

When you manage multiple ad campaigns and have multiple stakeholders, Google Ads Manager is a great way to smooth out the process.

Google Ad Campaigns Targeting People at Different Points in the Sales Funnel

One of the main benefits of paid ads is the ability to target very specific groups of people. When you run an ad on Google, you’re not just putting it out there and hoping the right people find it; you set specific parameters that ensure your message reaches the right people.

For example, you might segment your audience based on where they are in the sales funnel. When you do this, though, you’ve got to be highly organized to optimize each stage of the funnel.

When data is spread out across lots of different accounts, it’s almost impossible to keep track of performance across segments. You need to quickly access all your campaign data and make changes based on specific insights. To do this, you need everything to be in one place.

This offers a huge opportunity to stand out as 76% of marketers aren’t using behavioral data to target customers with relevant ads.

Google Ad Campaigns Where Analytics Overlap

The key to optimization is in the analytics, and when you have the data from hundreds of campaigns all in one place, you’re much more likely to get those crucial insights you need.

Most of your ad campaigns will have some similarities. Maybe they target the same audience, they’re in the same niche, or they target the same point in the sales funnel.

While every campaign should be unique, there’s also a lot you can learn from comparing similar campaigns.

When you have all your analytics in one place, you can use them to spot trends you otherwise wouldn’t be able to see.

For example, you might have 20 different campaigns all targeting people at the decision stage of the sales funnel, and one is performing particularly well. Even if your campaigns are in completely different industries, you can use the data to isolate why that one campaign is doing so well and find ways to implement it in other markets.

The more data you have, the more useful it becomes, and Google Ads Manager allows you to bring all your analytics together in one place.

Google Retargeting Ad Campaigns

Retargeting is an incredibly useful tool for marketers, and Google Ads Manager makes retargeting even more powerful.

When people click on your ads and visit your website, they’re added to your remarketing audience through browser cookies, allowing you to target them with very precise ads. People who have already visited your site are more likely to become customers, which might be a great way of boosting your ROAS (return on ad spend).

Need help setting up retargeting ads? Here’s my A to Z on setting up your retargeting with Google.

Google Ads Manager helps you better use retargeting data by allowing you to piggyback off all the hard work you’ve done on other campaigns. For example, if one specific type of audience or ad works well in one vertical, you can test it in others.

How to Set Up and Use Google Ads Manager Accounts

Setting up a Google Ads Manager account and linking all your ad accounts is simple, and it might make your life a lot easier.
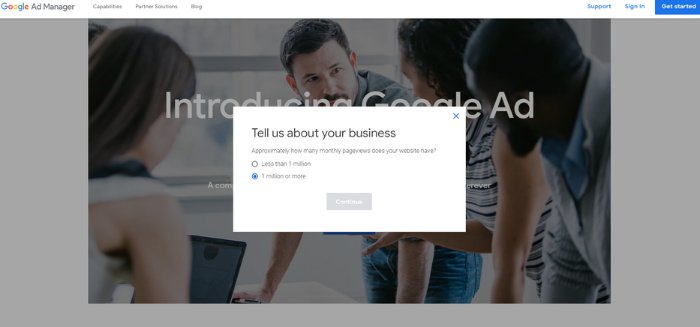
Google Ads Manager Account - front page
  • head to the main Google Ads Manager page and click “Get Started”
  • answer a couple of quick questions about the number of page views your website gets and whether or not you have an AdSense account

If your website has more than one million page views per month, you’ll be directed to get in touch.
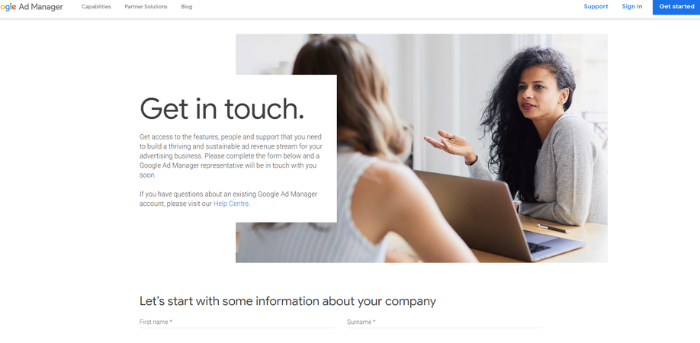
Google Ads Manager Account contact form for websites with more than 1 million views
  • Fill out the contact form with information about your business.
  • A Google representative will contact you and help you with your setup.

If your website has less than one million page views per month:

  • Create a new AdSense account or sign in to your existing one
  • Name your account
  • Select what you’re using your account for
  • Choose a timezone
  • Select the currency you want to use for your campaigns
  • Accept the terms and conditions
  • Click on save, and you’re ready to go

Once your Google Ads Manager account is ready, you can start to link your ad accounts or those of your clients:

  1. Click link existing account (next to create an account).
  2. Enter the client account’s Google Ads ID (this is the ten-digit number in the top-right corner).
  3. The client account will receive a request to link to the Ads Manager in its account.
  4. The client account needs to accept the request.
  5. The client account chooses the level of access it grants: administrative, edit, or view.
  6. Once the client accepts the request and grants you administrative access, you can manage that Google Ad account.

It only takes a few minutes to set up a Google Ads Manager account and link as many Google Ad accounts as you wish, but it can save you a whole lot of time when it comes to managing your paid ads.

Conclusion

If you have complex PPC campaigns spread out over several Google Ads accounts, then Google Ads Manager could make a huge difference to your operations.

To maximize your return, all your campaigns should work in unison, allowing you to target particular groups and make use of all the data available to you. This is very difficult to do if you’re running campaigns through different accounts.

When you create a Google Ads Manager, you bring all your pay-per-click advertising together in one place, improving efficiency. Rather than logging into multiple different accounts and trying to piece together lots of different analytics, set up your Ads Manager account and get more out of your PPC.

Are you set up with Google Ads Manager yet?

The Ultimate Guide to Social Media for E-Commerce

Social media for e-commerce has become a critical element in sales growth for many businesses. Using social media to boost your marketing offers many benefits to help build your business, so don’t wait to explore these valuable channels.

Sprout Social reports that after following a brand on social media, consumers continue to engage in other ways. Ninety-one percent check out the brand’s website or app, 89 percent make a purchase, and 85 percent recommend the brand to someone they know.

Let’s look at what you can do to promote your e-commerce business with social media and which tools and best practices you should use.

14 Steps for E-Commerce Companies to Find Success Using Social Media

The more people integrate social media platforms into their daily routines, the more it makes sense to market to them here. Consumers spend almost two and a half hours per day on social media channels.

Why not reach them with social posts where you know they spend a significant amount of time? For example, eye-catching posts with appealing visuals like these posts from Sephora are a great way to market products on Instagram.

Social Media for E-Commerce - Sephora on Instagram

How can you stay on top of new developments and know what you should be doing to serve your customers best? Follow industry leaders in your feeds and keep tabs on trending topics in your industry. You can also discreetly watch what other companies are doing that seems to gain traction.

While social commerce is still relatively new, it’s making a significant impact on e-commerce businesses and how they market to customers. As each platform improves its features to help users sell, opportunities grow for businesses to tap into these audiences to boost their marketing.

The steps below can help you develop best practices in your business to optimize your social media for e-commerce.

1. Define Your E-Commerce Company’s Social Media Goals

There are two main ways to use social media for e-commerce: to drive traffic to your company website or drive sales. While each can be important in its way, it’s essential to identify which you value most so you can effectively plan how to use your resources.

It’s essential to establish your goals before investing time into strategy and implementation to ensure you’re taking action to move you closer to your goals.

If you don’t set goals, you can’t measure your success or repeat what works.

2. Decide If You Want to Become a Social Commerce Company

Social commerce is selling directly to your customers on social media platforms. Everything from discovering your product or service, to a buying decision, to the checkout process happens in the app or platform they are already using.

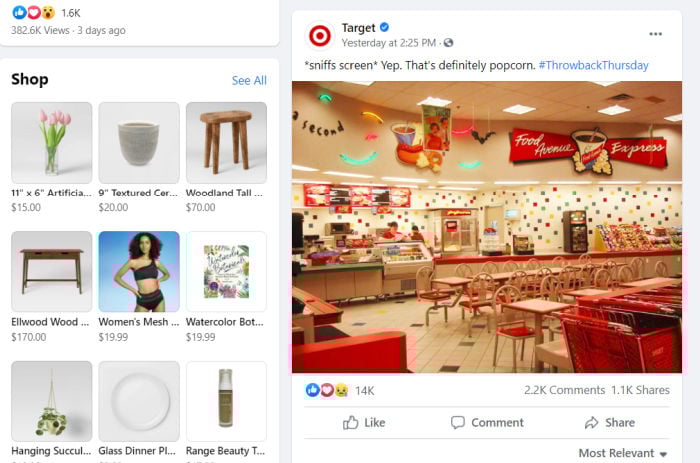
Target’s Facebook page, for example, has a shop built right into it where customers can browse and purchase products.

Social Media for E-Commerce - Target on Facebook

You might find success with social commerce if you sell products that a potential customer can quickly evaluate online from a photo and might buy on impulse. Think lower price points and items that aren’t likely to need returning.

An apparel company might successfully sell their clothing and accessories on social media as the process suits how people tend to buy these products.

When is social commerce perhaps not a great fit? If your products or services are higher ticket items where customers want to discern quality in-person. A customer buying an engagement ring will want to spend more time evaluating options and vetting sellers than social commerce might allow.

Start by focusing on the networks your ideal customer and target audience uses the most. Take time to engage your audiences and respond to their comments and questions.

Whether or not you want to pursue social commerce for your business, you should still be investing in social media marketing. Social channels can help boost your visibility, increase website traffic, generate leads, and help you engage with your customers.

3. Create a Social Media Strategy for Your E-Commerce Company

You’ll need a social media strategy for your e-commerce company that considers your goals, your resources, and the best platforms that will help you reach your customers. Once you clarify these parts of your strategy, you can expand on each element to create effective campaigns that fit your goals.

When you work from a social media strategy, you’re also more likely to use best practices to help you be more effective overall. Get a clear idea of your target audience, where they spend time, and their worries. From here, do some research to check which platforms are most popular with your target demographic.

With this information, you’ll be better able to plan where your time and effort will pay off.

4. Determine Which Social Media Channels Your E-Commerce Company Should Target

First, look for established platforms that offer a range of features, different ways to advertise and sell products, and focused targeting. Some may appeal to you because they are an excellent fit for your products.

The apparel brand we mentioned earlier would likely want to use Instagram because it is image-focused, and consumers are already used to discovering and purchasing apparel on the app.

Next, consider which platforms attract your target demographic. You’ll want to go where your ideal customers spend time.

What kind of data might inform your decision? With some research, you might discover 60 percent of Pinterest users are women, and 98 percent of Facebook users access the site via mobile devices. From these and other data points, you’ll be able to pinpoint which platforms might be best for your business.

5. Optimize Your Social Media Accounts for E-Commerce

One of the first steps you’ll need to take is to optimize your social media accounts. Fill out your profiles completely, adding helpful information wherever you can.

Make it easy for people to find the information they need at a glance to understand your business and buy from you. Perform research to identify relevant keywords and hashtags to use so you show up in search results. Make your location obvious.

Be sure to link to pages where customers can find the products they clicked through to see. Use clear CTAs so people know what to do to buy from you.

6. Run Social Media Paid Campaigns Optimized for E-Commerce Companies

Nearly every social platform has a version of paid advertising that can allow you to raise visibility even as organic reach becomes more challenging to achieve.

There are also different ad types on each, so it can be valuable to explore the various options. You may try different types of ads on each platform. You might try retargeting ads on Facebook, but use Shoppable posts on Instagram. Take advantage of audience targeting capabilities on each.

7. Use Automation Tools

If social media is a part of your sales strategy, you’ll need to explore automation tools and use what you can. Why is automation so key to social selling? People expect timely and personal interaction on social media networks. To meet their expectations, you’re going to need help.

It’s simply not possible to run a successful business and spend every waking moment online replying to comments and answering questions. Social media is like a storefront that is open 24 hours a day, seven days a week (plus holidays!), so don’t take the chance of turning people away or missing crucial requests or concerns.

8. Consider the Mobile Experience

More people are accessing social media networks and websites via their phones than ever before. When it comes to social media for e-commerce, however, mobile design is just the first step. The whole purchase journey needs to be seamless.

Payment options should be mobile-friendly. Apple Pay, for example, allows you to let users make purchases from their phones. We’ll look at more payment options further down the page.

Consider content formats as well. With more than 100 million hours of video consumed on Facebook every day, you’ll want to offer videos in vertical format for mobile users. People like convenience, a personalized experience, and to feel like they can easily navigate and engage with your site.

9. Optimize Landing Pages for E-Commerce

Optimizing your landing pages for e-commerce helps create a better user experience by providing people with all the information they need to make a buying decision.

If they click through to your site, you want them to understand quickly they’re in the right place. They should be able to move seamlessly to purchasing the item they wanted.

Ensure you have high-quality product images and videos, if appropriate, with well-written product copy outlining features and benefits. Include sizing or specifications on the product page and clear calls to action (CTAs) to help them convert.

10. Create Clear CTAs on Social Media Optimized for E-Commerce

CTAs are what motivate your user to convert to a customer. Take the time to craft these carefully and include them in each interaction you have with potential customers.

You can use different CTAs, like asking questions, including hyperlinks, or simply adding clickable buttons. Your page design might include banners with clear offers, sidebar clickable buttons, or pop-up ads to help customers convert.

11. Ensure Easy Website Navigation

User experience (UX) should be your priority when you launch your e-commerce site. You want shoppers to find products quickly and understand how to move from browsing to purchasing without confusion.

The easier you make it for people to buy from you, the better the chance they’ll convert from visitor to customer. Keep your navigation simple to understand and avoid design elements that are too unusual for people to use easily.

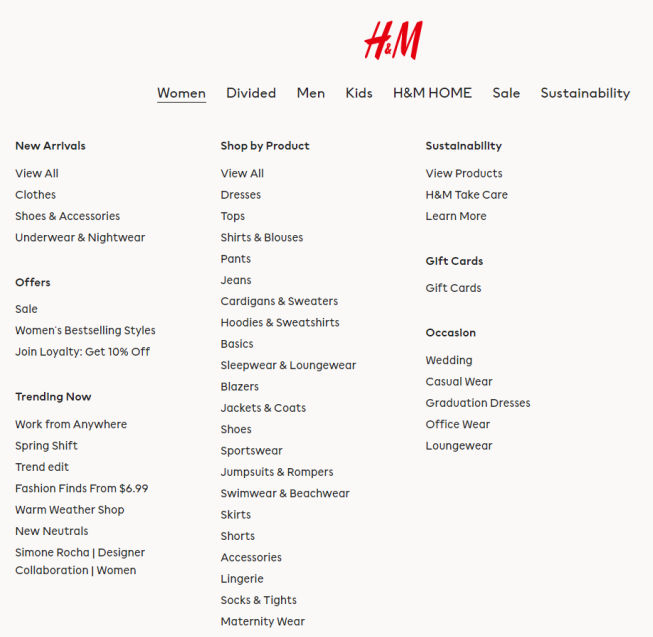
Organize your site information with clear labels for product categories and avoid tricky navigation styles that could create confusion.

Social Media for E-Commerce - H&M site navigation

12. Offer Easy Payment Options for Customers

If you’re going to run a successful e-commerce site, you need to offer reliable and trustworthy ways for people to pay for your products and services.

You can explore a wide range of payment options for your e-commerce business, each with its features and policies. Options include Square, PayPal, Stripe, Apple Pay, Google Pay, and many others.

Some social media platforms allow customers to purchase directly from the app, depending on what features you choose to use. A few of these options include Facebook (with Facebook stores, Messenger Chatbots, and Ads), Instagram (with Stories, Shopping, Live, IGTV, and Ads), and Pinterest (with Promoted Pins, Rich Pins, and Shop the Look Pins.)

You also can investigate third-party websites as a way to advertise and sell your products. Keep reading to learn more about a few of these that may support your e-commerce business.

13. Advertise and Sell on Third-Party Websites

There are other options for boosting your sales beyond your website. Third-party websites allow you to benefit from established functionality and huge audiences while building your legitimacy and website traffic.

One example of third-party website selling is Amazon. While shoppers on Amazon may realize they’re buying from you instead of directly from the retail giant itself, you still benefit from the credibility of their brand and purchasing capabilities. You also get to tap into their vast audience of visitors with a solid intent to buy.

Another option is using sites like Like to Know It, which allows readers to purchase an item or items from an Instagram post by linking the product emailed to them.

RewardStyle is an invitation-only affiliate network focusing on lifestyle, fashion, and beauty products, allowing sellers to earn money through content creation featuring certain products.

14. Track the Success of Your E-Commerce Company’s Social Media Strategy

It’s essential to track your strategy’s results as you implement your ideas, so you can accurately analyze your successes and where you need to improve.

Choose quantifiable metrics representing engagement (such as likes, shares, comments, or retweets). Track your website traffic and how much traffic you are getting from your social media channels. Keep track of sales generated by social media marketing and sales completed online or through your campaigns.

It’s not always easy to tie your efforts to your results, but you can try. With specific metrics, you’ll be better able to repeat the working tactics and revisit the areas that don’t seem to be offering you the same return on investment.

Conclusion

Social media is a big part of everyday life for many people and offers an excellent opportunity to get in front of potential customers and sell your products and services. You can use various platforms to strengthen your brand, increase sales, and develop loyal fans.

If you also sell online, using social media for e-commerce is a natural step for your business as you plan future growth. If you haven’t tapped into the benefits of social media marketing yet, start now, so you don’t miss out on the opportunity it represents.

With the steps outlined above, you’ll be ready to reap the benefits of social media for your e-commerce business. If you haven’t explored these options or want some help to make them work for you, reach out for digital marketing support.

Have you invested in social media for e-commerce in your business? Which of the above tips will you try next?

The 6-Step Guide to Make Your Mobile Site Load Faster

Your users expect your site to load fast. If it doesn’t, you could lose a ton of traffic.

How fast, you ask?

Some research suggests that if a page doesn’t load in the literal blink of an eye, people could lose interest. That’s about 400 milliseconds.

Just a one-second delay can reduce customer satisfaction by 16 percent and one in four visitors will abandon a site if it takes more than four seconds to load.

mobile site speed stats

Not to mention the mighty Google says site speed is a ranking factor for mobile sites.

So if your site isn’t fast, both your audience and Google will think poorly of it. You’ll lose visibility and traffic.

So, how fast is your site?

Because if it takes longer than one or two seconds to load, you’re losing traffic right this moment.

It’s okay if your site is slow. There are steps you can take to make it faster to ensure you don’t let a single visitor slip through your fingers. Here’s how.

Step 1: Test Your Mobile Site Speed

Before you do anything else, you should test how fast your mobile site really is.

You might think it loads just fine, but it could be slower than you think.

One of the best mobile tests is from Ubersuggest. Here’s how it works:

Step #1: Enter Your URL and Click “Search”

ubersuggest make your site load faster

Step #2: Click “Site Audit” in the Left Sidebar

ubersuggest make site load faster site audit

Step #3: Scroll Down to “Site Speed”

ubersuggest make site load faster site speed test.

This is where you’ll find the loading time for both desktop and mobile devices. This shows that my site’s mobile loading time is 2 seconds, which is an “excellent” score.

It also tests speed related to six key elements of your website:

  • First Contentful Paint
  • Speed Index
  • Time to Interactive
  • First Meaningful Paint
  • First CPU Idle
  • Estimated Input Latency

If your site speed is excellent, you shouldn’t have any concerns. But if there’s room for improvement, don’t wait to take action. Every additional 0.5s it takes to load your site increases the percentage of visitors that will leave.

I’m going to address the most common causes of slow mobile sites and explain what you can do to improve yours.

Step 2: Perfect Your Mobile Site Design

Think back to when you designed your site.

Did you have mobile devices in mind?

I’m guessing you didn’t. (If you did, give yourself a pat on the back.)

If you didn’t now is the time to rethink your design with a mobile-first mindset.

Mobile sites have changed a lot in the last few years.

It used to be that sites would have two versions, one for mobile and one for desktop.

A mobile site is easily identified by the “m.” subdomain:

mobile subdomain make your site load faster.

In this situation, the mobile and desktop sites are two completely different animals operating separately from one another.

This is no longer the case. Now, most sites use responsive design.

Responsive design allows you to have one site that dynamically changes depending on how it’s being accessed.

So your mobile and desktop users will be looking at the same site, but it will appear differently on each device.

This is actually what Google prefers. They state it quite simply:

“Responsive design is Google’s recommended design pattern.”

You’re probably thinking, “Okay, cool, but what does this have to do with speed?”

Responsive designs typically load faster than mobile-only sites, so you’re gaining a massive SEO advantage there.

If you use a responsive design, your site will get more attention in the form of social shares, which will also boost your SEO.

Making your site responsive is good for both the short term and the long term. If you don’t already have a responsive site, I recommend looking into it as soon as you can.

Step 3: Keep Your Site Lightweight

It’s easy to get caught up in making the best and most eye-catching design out there.

Sometimes you get too caught up, and as a result, your site gets slower and slower because you keep adding more and more.

This is a condition that developers call code bloat.

Code bloat happens when your site gets weighed down with excess code.

make your site load faster code bloat

Most of the time, code bloat happens when a designer is too focused on the visual presentation of a site.

Don’t get me wrong. How a site looks is extremely important.

But performance can’t take a backseat to looks.

Luckily, it doesn’t have to. You can have your cake and eat it too. Here are some tips to keep in mind when designing your site:

Keep it Simple

Leonardo da Vinci had this to say about simplicity:

Simplicity is the ultimate sophistication.

Now, about five hundred years later, his words still ring true.

Look all around you. The complex designs of the past have been replaced with the minimalist designs of the future.

This applies to websites too. Especially mobile sites.

On a mobile screen, sites can easily become too crowded, so it’s important to keep everything open and decluttered.

As a rule of thumb, you should only have one call-to-action per page. This will help you reduce the amount of code you use, and it’ll also improve your site’s user experience.

You might also want to consider a more simplistic design like this one from Rug Doctor:

It’s not flashy, but it catches your attention with its sleek style.

You don’t need lots of bright colors and photos to make your site stand out. When it comes to mobile design, less is often more.

Eliminate Steps

The less your users have to do, the better.

Think about it. Why should there be seven steps between a customer and a sale when there could be only 3?

This effectively shortens your sales funnel, but it also makes the user experience even simpler.

Lots of ecommerce sites use this strategy to increase their sales.

On Boden’s mobile site, it’s super easy to buy a product. You add it to your cart, click checkout, and pay.

It’s straightforward and to the point. There are no unnecessary steps.

This also naturally helps relieve code bloat. It’s hard to go overboard with code if you don’t have tons of pages on your site.

Cutting out unneeded steps is one of the best things you can do for your visitors. Mobile users are much more likely to stay on your site if they don’t have to do much.

Save your users a few clicks, and you’ll reap gigantic rewards.

Use Fewer Images 

Before I get into this, I want to say that good images are definitely important for any site, and they also have SEO benefits.

However, you can have too much of a good thing.

In this case, you can go crazy with images and slow down your site in the process.

You may not think this is a big deal, but images make up roughly 63 percent of a page’s “weight.”

From 2011 to 2015, the size of the average mobile page tripled.

make your site load faster use fewer images

That means images are some of the most demanding elements on your site. They take up a lot of space, so having too many is not good.

One solution is to simply cut back on images.

Another (probably more practical) solution is to compress your images and reduce their file sizes.

Compression basically makes your images smaller without degrading the quality. This reduces the amount of time it takes for your site to load.

As a bonus, it also reduces the amount of time it takes for search engine bots to crawl and index your site.

Sites like Compressor.io can do this in a snap.

make your site load faster compress images

In fact, this is a best practice you should adopt even if your site is already blazing fast.

Don’t Use Custom Fonts

 I like a nice custom font as much as anyone else, but some of them are really high maintenance.

Some fonts use tons of CSS, while others go heavy on JavaScript. Either way, you’re looking at a ton of code.

If you want a really deep read on this subject, check out this post on Google’s Web Fundamentals site.

If you want the short version, here it is: Only use custom fonts when they’re absolutely necessary.

Step 4: Minify Your Code

Minification is a super useful technique for streamlining your code.

Here’s a quick definition of what it means to “minify” code:

make site load faster minify code definition

Essentially, minifying your code takes out everything that’s redundant and unnecessary. It makes sure your site is only using the code it needs.

This goes a long way toward making your site lightweight.

You can minify code manually (instructions here), but if you don’t have any coding experience, it can be a little bit intimidating.

Thankfully, there are several free tools you can use to minify your code in no time at all.

Minifycode.com offers several minifying tools to let you simplify your HTML, CSS, JavaScript, and more.

minify code tool make site load faster

If your site runs on WordPress, you have even more options thanks to plugins like Better WordPress Minify:

minify code wp plugin make site load faster

By using these tools, you can minify your code with just a few clicks, and you’ll be well on your way to a speedier site.

Of course, you should do all that you can to make sure there’s no unnecessary code, but mistakes happen. These tools let you fix those mistakes and improve your site at the same time.

Step 5: Cut Down on Redirects

I love redirects. They can be really useful for SEO and user experience.

But just like code, redirects have limited uses. You can’t use redirects all over the place and expect your site to perform well.

That’s because redirects inherently slow down your site.

When you click on a normal mobile link, the server provides the document found at that link.

But a redirect means there’s no document at that particular link. Because of that, the server has to go to the page where the document lives and retrieve it.

make site load faster reduce redirects.

This process has to happen with each file on a web page. That means every image, CSS file, and JavaScript file will go through the redirect.

As a result, it could be several seconds before the right page loads. By that time, your users could be long gone.

I recommend using Screaming Frog to check for redirects.

Then you can trace the roots of your redirects and change any that aren’t completely necessary.

The less work your site has to do, the faster it’ll go. While redirects have a time and a place, don’t overuse them or grow dependent on them.

Step 6: Load Above The Fold First

It’s obvious that users see above the fold content before they see anything else.

So why load your entire page all at once?

Why not load only the above the fold content at first and then load the rest as needed?

This is a concept referred to as “lazy loading,” and it can work wonders for site speed.

I bet that if you had the choice, you’d rather lift three pounds than 30. Am I right?

Lazy loading is that exact same concept applied to websites.

By implementing lazy loading, you’re asking your site to do only as much work as it needs to do and no more.

If you’re comfortable with code, you can use this jQuery plugin.

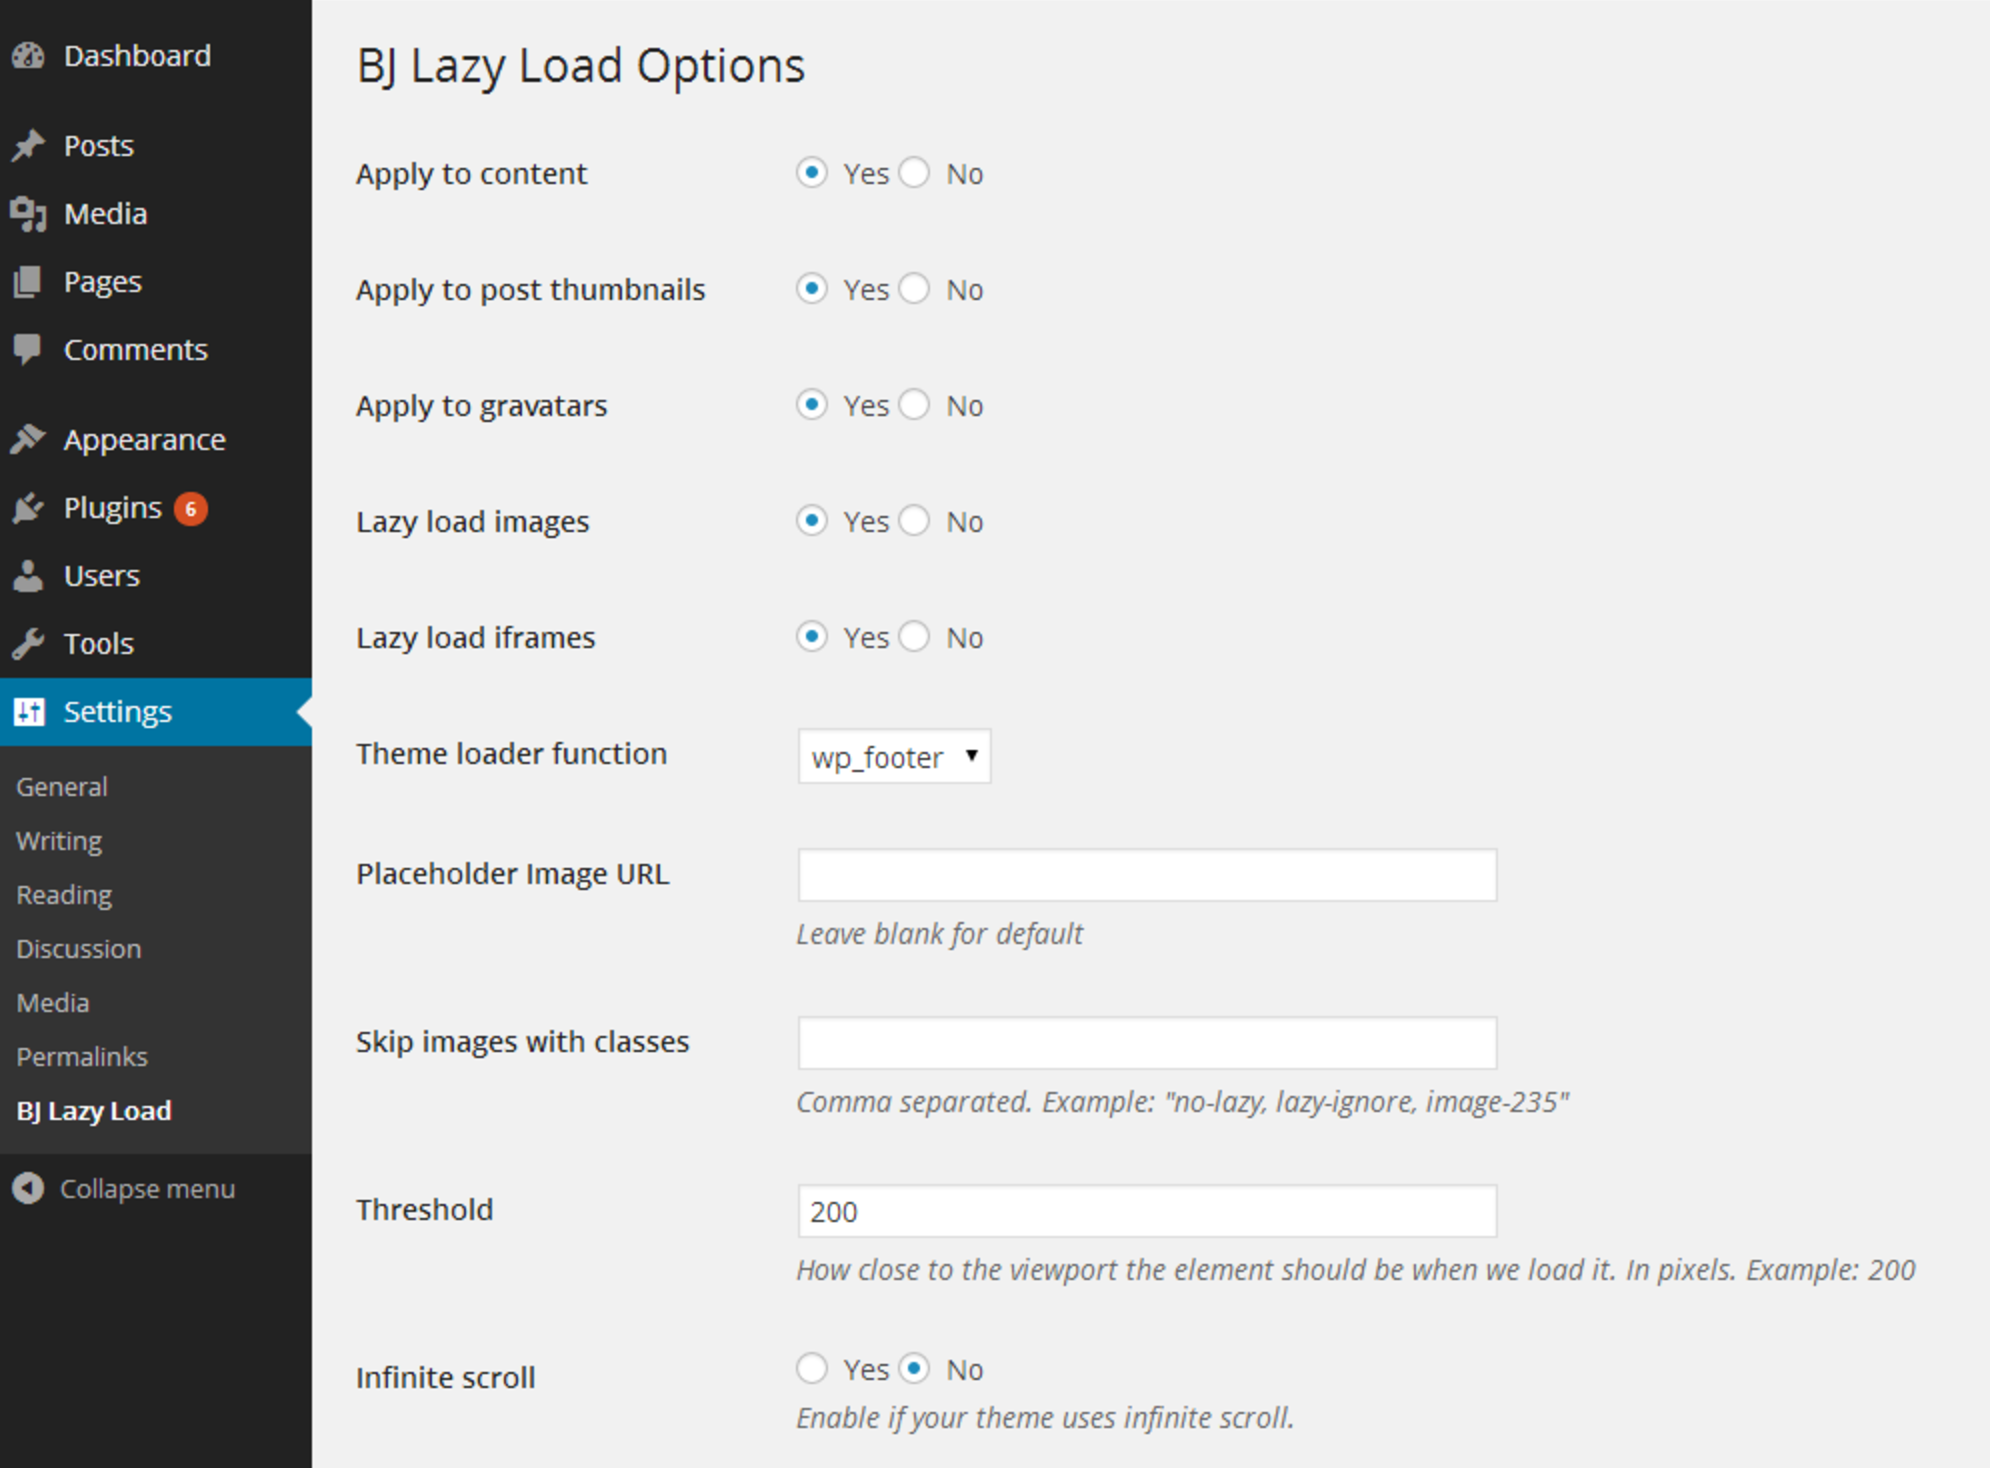
For WordPress sites, there are plugins like BJ Lazy Load to come to the rescue.

lazy load make site load faster

If neither of those options fit, you may need to hire a developer to help you out.

This is a more advanced technique, but it can save your site from doing a lot of work in the long term.

Conclusion

Speed isn’t just for race cars. It’s one of the most fundamental ingredients of a great mobile site.

A faster mobile-friendly site can increase traffic and bring in a flood of new customers and conversions.

It’s no surprise.

Mobile is here, and it’s here to stay.

Desktop performance still matters, but mobile is the present and the future.

In short, make your site as fast as possible and reduce the amount of weight your site is pulling.

This Think With Google article put it perfectly: “If speed thrills, friction kills.”

Improving your mobile site speed is a one-two punch that will make your site better for your users and for search engines.

If you haven’t focused on mobile yet, I urge you to start today.

Which of these techniques are you going to use to speed up your mobile site?

The Ultimate Guide to Guest Blogging

We’ve discussed how you can build authority in your industry through blogging. Today, we are going to look at exactly how you can get guest blogging opportunities and make the most out of them.

Determine Your Guest Blogging Goals

Before we begin, your first task is to decide what your goal for guest blogging is. Knowing this goal ahead of time is key in determining the right kind of blogs to submit guest posts to. Typically there are three main goals for guest blogging.

  1. Positioning yourself as an authority and well-known name in the industry.
  2. Getting exposure (traffic) back to your website.
  3. Building backlinks to your website (though this should never be the main focus, as Google frowns on this).

With the right kind of content on the top blogs, you can do all three of these things.

If you are trying to accomplish either #1 or #2, then you will want to find blogs that have a wide and engaged audience.

If you are just trying to accomplish #3, you need to pinpoint blogs with strong root domain authority. You can check this for free using tools like Ubersuggest.

Knowing your goals in advance will help you in determining which blogs will be the best for you to submit guest posts to.

How to Find Guest Blogging Opportunities

The first thing you will want to do is find guest post opportunities. When looking for places to guest post, your main goal is to find sites relevant to your niche or industry. You are looking for blogs that fit the following criteria:

  • the content is focused on your niche/industry
  • the audience of the blog will be interested in your industry
  • the blog has engaged readership (posts have been shared socially and commented upon)
  • the blog owner is active on social media (so you know that they will be promoting your work on their site)

If you are selling plant seeds, for example, you will want to find gardening blogs with an engaged audience of gradeners. The following should help you find the right kind of guest post opportunities

Google Searches

Google is a great place to start in the search for guest posting opportunities. You can use any of the following keyword searches to find blogs that accept guest posts. Just replace keyword with keywords from your industry.

  • keyword “submit a guest post”
  • keyword “guest post”
  • keyword “guest post by”
  • keyword “accepting guest posts”
  • keyword “guest post guidelines”

These searches should lead you to a blog’s guest post guidelines page, guest post submission page, or actual guest posts by other writers.

Prolific Guest Bloggers

Know of any prolific guest bloggers in your industry? If you read enough blogs in your industry (which you should), you’ll know some of the same names that repeatedly pop up in guest bogs.

Just as few of the top influential marketing guest bloggers include Neil Patel, Jeff Bullas, Mark Traphagen, Tony Right, Jenny Halasz, Brian Harnish, Kevin Indig, Adam Riemer, Robyn Johnson, Benji Acciola, Kevin Rowe, Anna Crow, and Kirk Williams.

Using Google search, search for the name of prolific guest bloggers in your industry plus the phrase “guest post by”. This will reveal all of the sites that these guest bloggers have posted upon. They should be good places for you to guest post upon as well. A bonus would be if you actually know a guest blogger in your industry that can make an introduction for you to the owners of blogs they have guest posted upon.

Competitor Backlinks

If you (or your online marketing agency) have ever pulled up a backlink analysis of a competitor while working on your SEO campaign, chances are one or more of your competitors have backlinks from guest posts they have done.

If you have access to tools like Open Site Explorer, you can look at the backlinks of your competitors and spot any of the blog posts they have written.

If you don’t find any, you can do a Google search.

link:domain.com -domain.com “guest post” (replacing domain.com with your competitor’s domain) which should reveal sites that a competitor has written for.

Example:

link:backlink.io -neilpatel.com “guest post”

Social Searches

A lot of bloggers and guest posters will share their latest guest posts on social networks. Since the easiest one to search is Twitter, you should try running a Twitter search for the keyword “guest post” to get the latest tweets about guest posts in your industry. Just follow the links to see which blogs are accepting the guest posts.

Seek Guest Blogging Opportunities

Need more keyword search ideas or just a list with lots of different guest posting opportunities?

Check out this post on 14 additional ways to syndicate your content.

MyBlogGuest

Last, but definitely not least, is My Blog Guest, a community of guest bloggers. Sign up for free and search for blogs accepting guest posts. Better yet, post your own information to say that you are looking to write guest posts on a particular topic so blog owners can find you!

Preparing to Pitch a Guest Blogging Post

Notice that we don’t just jump from finding guest blogging opportunities to contacting the blogs. That’s because there are a few things you need to do before you propose a guest post for a site you’ve just found.

Get to Know the Blog’s Content

Getting to know your target blog’s content is key. Sure you know they have content about the keyword you searched for while looking for guest post opportunities. But you need to know even more about that content such as…

  • What level of audience are they writing for (beginners, intermediate, advanced)?
  • What type of audience are they writing for? If your business is B2B, then you will want the blog audience for your guest post to be businesses, not general consumers.
  • What type of content do they write? Is it mostly general concepts or specific, detailed tutorials? Do they like lists?

See How Other Guest Posts Do

While a blog may have guest posts, the question is do the guest bloggers do well? Do guest blog posts on the site get as many comments and social sharing as blog posts by the owner? Some sites might accept guest posts, but if the audience is only tuning in for the blog owner, then you won’t do so well if your goal is to build authority or get traffic back to your website.

See Who the Guest Bloggers Are

Some blog owners are more likely to accept guest posts by certain types of people over others. Peruse a few guest blogger bios on the blog to see if they are fellow bloggers, freelancers, consultants, business owners, and so forth. This will be important when you introduce yourself to the blog owner for your pitch. You can read more about the success rates of guest posting outreach in this study on SEOmoz.

Find Out What Posts Do the Best

To ensure that your guest post gets accepted, you will want to pitch the blog owner with topics that will do well with their audience. To get some good ideas of topics that will work with the blog’s audience, use the following sites to see what posts have been popular on social media.

  • Oktopus: Oktopus tracks and reports on your social media performance.
  • Digg: This will show you the \blog posts that have received the most amount of Digg votes.
  • Buzzer: Buzzer schedules your social media posts and provides data and analytics.

Become a Familiar Face in the Blog Community

To increase your chances of getting accepted as a guest blogger, you will want to get some recognition from the blog owner first. The best way to do this is to take a week or two and comment on their latest posts. You’ll get bonus points for sharing those posts on Twitter too – just be sure to include the blog owner’s @username on Twitter. This way, when you pitch your guest post, you won’t be a complete stranger.

The Best Times to Pitch a Guest Blogging Post

You won’t always have a golden opportunity to pitch a guest post, but there are certain things to take advantage of when they arise. These include the following.

  • when a blog mentions you in one of their posts or on social media (Twitter, Facebook, Google+, etc.)
  • when the blog lists you, your business, or your product in one of its posts
  • when the blog specifically advertises they are looking for guest posts
  • when the blog publishes another guest post

Basic Pitch Best Practices

The following are absolute musts when pitching a guest blog post to another blog owner.

Read the Guidelines

The last thing you need to do before contacting the blog owner is read the guest posting guidelines, if applicable, and follow them closely. Does the blog owner want you to pitch an idea or actually submit a full post? What format do they want it in? Do they want you to create an account and enter it into WordPress? These are all things to know ahead of time before you contact the blog owner.

Personalize Your Email

As a blogger who receives daily guest post pitches, nothing turns me off more than an email starting with “Dear Sir or Madam,” “Dear Webmaster,” “To the owner of Neilpatel.com,” or simply “Hi.”

Somewhere on the blog, there should be the name and contact information for the owner of the blog you are targeting for your guest post.

You might have to ferret around for it on the about page or on one of the blog’s social media accounts, but it is more than likely out there. Find it, and use it to start the email.

Who Are You?

Remember the part about seeing who guest bloggers are on your target blog? Some blog owners are particular about only allowing other bloggers to submit guest posts on their sites.

If you noticed that most guest bloggers are bloggers themselves, then you might want to introduce yourself as a blogger at [insert your personal or business blog here]. You can always be a business owner on the side; just focus on your blogging skills first.

Why You Should Be a Guest Blogger

In your pitch, be sure to include why you should be a guest blogger. Add a few links to posts you have published elsewhere, including your own blog. Preferably go with posts that have a good bit of social engagement so the blog owner will see your potential value with their audience.

How to Pitch a Guest Post Idea

If the guest post guidelines ask you to submit a topic idea, then (based on your research of previously popular posts), pitch a few different ideas so the blog owner has some to choose from.

How to Submit a Great Guest Post

One of the common questions about guest blogging is whether you should be using your best content for your own blog or for your guest posting. It really depends on the quality of the blog you are submitting your content to.

If the blog has nothing but 900+ word posts with lots of screenshots, then your post should be similar. If the blog has nothing but posts with 500 words or less with only one image, then your posts (again) should be similar. The following are other good tips for making your guest post as awesome as possible.

It’s Not About You

The first thing to remember about a great guest post is that it is not about your business, your products, or your services. Guest posts should be valuable sources of information; not advertisements.

Any information about your business and related items should be reserved for the author bio. Occasional mentions, stories, or examples are okay to illustrate a point, but the majority of the post should be focused on something other than your business.

Format Posts Like the Ones on the Site

Take a look at posts on your target blog. Do they use lots of headers, bolded text, images, quotes, or other special formatting? Make sure that your post has similar elements to match other posts on the site.

Include Internal and Source Links

Show the blog owner that you know their content by including a few internal links back to some of their posts. The easiest way to do this is to do a Google search for site:domain.com intitle:keyword.

This will get you their top posts on a particular keyword so you can link that post to the keyword in your post. Also, if you mention any specific products, books, etc., be sure to link to those too (assuming it’s not self-promotional).

Include a Call to Action for Comments

At the end of your amazing guest post, be sure to include a call to action for comments. The more discussion your post generates, the better!

How to Craft a Great Guest Bio

The most important part of guest blogging (for you) will likely be your guest post bio. This is usually the only place you should include self-promotion links back to your website, blog, product, service, book, etc. What you write in this section will depend on your guest blogging goals.

  • If your goal is to get good backlinks, make sure your bio includes a link back to your website with your target anchor text and you are all set.
  • If your goal is to get traffic back to your website, then you might want to consider where you want that traffic to go. Depending on the subject of your guest post and the audience of the blog you place it upon, you might want to send traffic to a custom landing page or page about a specific product/service.
  • If your goal is to increase followers of your social accounts, do this by adding a line to the end of your bio that says something like, “Follow me on (insert your top social network and link here).”

How to Be the Best Guest Blogger

If you’re aiming to become a regular contributor to a blog, or simply want the blog owner to brag about what a great guest blogger you are, then be sure to do your best to promote your post to throughout your own audience. The blog owner will love it if you send new readers their way.

Also, be sure to reply to comments or questions that people leave on your post. That will go a long way if you are working to build authority in your industry.

Tracking Your Results

When the goal is traffic, the results of your guest blogging should definitely be measured. The best way to do this is to create an Advanced Segment in Google Analytics.

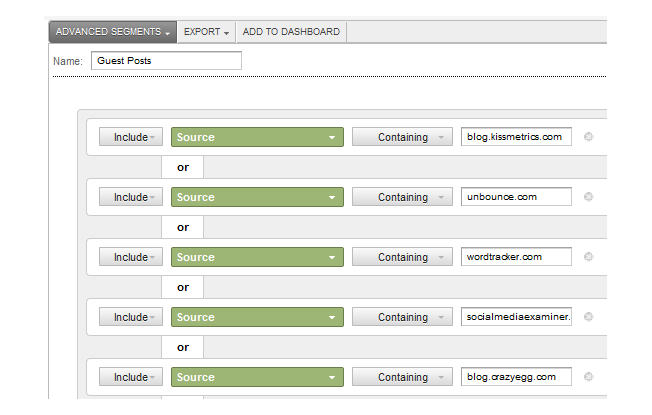
You can learn how to set up an Advanced Segment in this post on how to find out which online marketing strategy drives the best traffic. All you need is one segment using the source dimension with multiple statements for each domain that you have guest blogged for. This can be up to 20 per Advanced Segment. Mine looks like this:

google analytics guest blogging advanced segment

Using this, you can view all of your Google Analytics data based on referrals from your guest posts. This can help you determine the success of your overall guest blogging strategy in terms of getting traffic and making conversions.

If you’re not sure how to track conversions, see this post on getting actionable data to learn how to set up goals.

How to Get Guest Bloggers for Your Blog

Finally, don’t forget that guest blogging can be a two-way street. It’s tough to maintain your own blog content while guest posting on a lot of other blogs.

Be sure to open an invitation for the blog you wrote for to write a guest post for you as well. This keeps your content fresh content on your own blog, which can help gain perspective on your audience, and hopefully get new readers from your guest blogger’s community. It’s a win-win situation!

Conclusion

Guest blogging on reputable sites is a great way to leverage the success of blogs that are already popular in your industry. To get the spot for a guest blog, you need to send engaging pitches that show your worth.

Guest blogging is just one of many strategies to incorporate in your content marketing campaigns. If you need help shaping or tracking your content marketing methods, our agency is here for you.

Do you use guest blogging as part of your online marketing strategy? What other things would you suggest for a business looking to increase their guest blogging success?

A Marketer’s Guide to Working Remotely

Remote work is going from an occasional perk to the norm. As long as you have a computer and internet connection, you can perform your job anytime, anywhere.

For marketers, creating promotional materials, meeting clients, and completing projects from home, hotel, coffee shop, library—basically anywhere with an internet connection.

While working remotely has many benefits, employees who regularly worked in the office may have a difficult time making the transition to exclusively working this way.

In this article, we’ll talk about the how’s and why’s of remote work for marketers.

The Rise in Popularity of Working Remotely 

Remote work has been around for years. 

However, the COVID-19 pandemic made it unexpectedly the norm for many businesses, and both employers and employees are realizing the work-from-home system can be successful.

According to Global Workplace Analytics, big companies like Best Buy, British Telecom, Dow Chemical found remote workers are 35 percent to 40 percent more productive. 

The survey also found employees call in sick less often and feel empowered to work independently while also increasing collaboration. Importantly, many people are less likely to report unemployment due to workplace discrimination or lack of transportation.

Employees often prefer working remotely than regularly frequenting the office. In fact, 72 percent of employers believe remote work leads to increased employee retention. 

These numbers show remote work is likely here to stay. 

Employees prefer the convenience of working from their desired location. Meanwhile, employers can enjoy a more productive and efficient workforce. It’s a win-win-win situation for everyone. 

The Benefits of Working Remotely As a Marketer

There are a ton of benefits to working remotely as a marketer. For many, there are feelings of freedom and improved work-life balance that didn’t exist when going into the office every day.

Here are five of the top benefits of working remotely as a marketer.

1. Working From Anywhere in the World 

Gone are the days when employees had to issue a leave of absence to go on a vacation. 

As long as you have a laptop and WiFi access, you can create promotional content from a beach in Thailand or a coffee shop in Japan. As long as you work during your expected hours, where you’re working from generally doesn’t matter.

Hence, talented marketers who want to explore the world can do their job and travel simultaneously. 

2. Work at Your Preferred Time 

While this isn’t allowed by every workplace, working remotely may allow you to have more control over your hours.

If you’re a morning person, you could start your day at dawn and be done by the afternoon. If you’re a night owl, you could start and end later.

This type of work also frees you up to use your breaks however you please. For instance, if you want to hit the gym, you don’t have to worry about showing up back at work with wet hair—or showering at all, if that’s your thing.

3. More Time for Loved Ones

You know the feeling: You get up early, commute, are “on” all day at work, commute home, and are just spent when you walk in the door. 

If you have a long commute, you may be out the door before your kids even finish breakfast or feel unable to go out with friends at the end of the day.

With working remotely, you may have more time to help the kids prepare for school or have conversations with your significant other. 

Upon finishing your deliverables, you don’t have to spend an hour in traffic. Instead, you can just walk out of your home office and transition to your “real life.”

4. Take Advantage of Time Zones 

While being in different time zones could make finagling meetings a bit challenging, there are also some benefits. Your end of the day is the beginning of the day on the other side of the world, meaning you could send a project from your desk in New York to a worker in Singapore at 5:00 pm your time, and they’ll instantly receive it—at 5:00 am their time. 

While you sleep, they can work, and it’s almost like your project traveled through time to meet your deadline.

5. Save Money 

Remote work can help you save money. 

You don’t have to spend money on gas, a professional wardrobe, or an expensive lunch in the cafeteria—which can amount to $4,000 per year

A FlexJobs study found the average commuter spends $2,000 to $5,000 annually on gas, vehicle maintenance, and insurance (which can cost less if you drive less). If you work from home, that money can stay in your pocket.

Besides transportation costs, households spent $1,866 a year on clothes and $3,459 on “food away from home.” As a remote marketer, you may only need to dress up during video calls and cook from your kitchen.

Challenges of Working Remotely as a Marketer

Not everything is perfect, including remote work arrangements. Here are a couple of hurdles marketers may encounter when they’re far from an office. 

1. Reimbursement for Office Equipment 

Marketers creating video content and editing images may require a high-end computer and software. You may also need to purchase a home office setup. Who would foot the bill? 

Plenty of big companies provide quality equipment for marketers, but small agencies and startups may not offer these privileges. 

If you’re interviewing for a remote position, don’t be afraid to ask them about these costs before you accept the position: Who will pay for the internet connection, software, or equipment? Will your employer provide a home office stipend?

2. Difficult to Establish Relationships 

Marketers based in an office may find it easier to establish genuine relationships with their teams or bosses. 

As they fulfill tasks together, they can make small talk and get to know each other better. In contrast, remote work means you may talk to co-workers only during meetings. (Though off-topic group chats aren’t uncommon.)

Moreover, you’re not exactly working closely with your boss. Hence, it may be challenging to set yourself up for a promotion or improve your professional relationship with your boss. You have to take extra steps to build camaraderie.

Tips for Successfully Working Remotely 

How can you succeed as a remote worker? Let’s take a look at these tips which could help you out. 

Minimize Distractions 

As a remote marketer, you don’t get to be monitored by your boss or co-workers. You can work anytime and anywhere as long as you finish your deliverables. 

The downside is you may also be prone to distractions. It’s easy to get sidetracked by a social media notification when no one is watching your back. 

How to minimize distractions? Some practical tips include the following:

Put Your Phone in a Different Room

While chances are you’ll need your phone at some point during the day, consider putting it in a different room when it’s not necessary for your work. Otherwise, you may find yourself scrolling through Twitter instead of staying on task.

Plan Your Break Time

Most marketers have a ton to accomplish in a day, such as blog post writing, SEO optimization, and planning marketing campaigns. The hectic tasks may tempt you to take an unplanned 30-minute break which quickly becomes a one-hour break. 

To help yourself avoid this, plan your break time and length of the breaks before beginning the day. Set alarms and timers to force yourself to remain focused. 

Understand Your Most Productive Time

When are you most productive? 

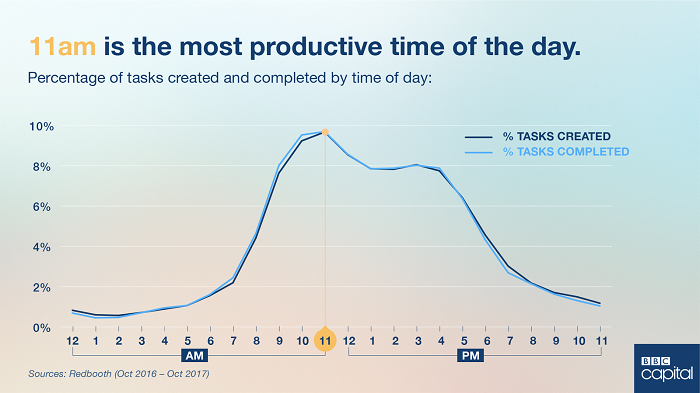
According to BBC, 11 in the morning is the most productive time of the day. Of course, this may vary by person.

Tips for Successfully Working Remotely - Understand Your Most Productive Time

Determine when you’re at your peak productivity and tackle difficult tasks then. For instance, a morning person could start with high-priority tasks in the morning and switch their attention to less important tasks in the afternoon.

Time Yourself

Setting timers isn’t just for breaks. You can also use it to set self-imposed deadlines or give yourself permission to step away from a stressful task.

For projects needing to be done soon, you could set yourself a 60-minute timer, telling yourself you can’t even check your email until that timer goes off. You can come back to it later, but returning with fresh eyes could help you improve what you’ve created.

If you’re working on something mentally exhausting, like a very emotional piece, you could also set a timer for yourself. If you know you’re going to need to step away from it for your own wellbeing, it may be much easier to stave off the negative feelings if you know you only have to look at it for one hour right now.

While you could use your phone timer, there are other time tracking software options that could help you reach maximum productivity. Plus, these may make it easier to keep track of what time of day it is so you don’t suddenly look up and realize you were off work an hour ago.

Create a Workspace

Having a dedicated workspace is the key to maximizing productivity and focus. The ideal workspace can help you get in the mood to get the work done. 

Here are some tips for creating a good workspace for marketers.

Pick a Good Spot

In a perfect world, you could set up an office in a space no one else has much access to, like a spare bedroom. An ideal workspace should help you concentrate on your current marketing campaigns. Hence, pick a quiet area free from distractions. 

For example, Li-Chi Pan’s workspace keeps it simple with a desk equipped with an iMac and lamp. Her entire setup is beside a panoramic window which provides ample lighting and a gorgeous view of Sydney’s rooftops. 

Tips for Scuccessfully Working Remotely - Pick a Good Spot for Workspace

However, this option isn’t available to everyone.

If you don’t have a spare space, set yourself up in an area that’s as distraction-free as possible, even if that means facing a wall at your kitchen table. Avoid setting up a space in your bedroom, as that may make it harder to view it as a place of rest.

Change Up Your Remote Work Scenery 

Even when your workspace looks gorgeous, sometimes working a long time from home can lead to boredom. After all, when you’re around others at the office, what you see is constantly changing.

I highly recommend working in a coffee shop, library, or co-working space when possible. This could not just stave off boredom from looking at the same stuff all day, but if you’re someone who thrives with company, it could help prevent feeling isolated.

Have a Board for Your To-Do List or Ideas

Marketers often have plenty of sticky notes for their various tasks or marketing campaign ideas. The nice thing about being at home and not the office is you can arrange this however you want because you’re in control of the space.

Consider having a board where you can place your schedule or creative schemes to help you stay organized. 

For example, this workspace by Oh Happy Day has a transparent glass board where a marketer can place their weekday priorities. 

Tips for Successfully Working Remotely - Have a Board for Your To-Do List or Ideas

Get the Right Office Equipment and Office Supplies for Remote Work Success

Ask your employer to provide your equipment such as monitors, a mouse, and a keyboard. You can also inquire about reimbursement for office supplies or even needed furniture like a desk.

While much of your work may be possible via video conferencing tools, some clients prefer talking on the phone. If this is the case for you, ask your work about getting you a work phone so you don’t have clients calling your personal number. 

Unfortunately, these expenses are often not tax-deductible anymore, though some states allow this, so be sure to check on your laws and talk to a tax professional if needed.

Ensure Your WiFi Works Well Enough

Whether you’re working from home or on the beach, make sure your internet connection is strong. You don’t want work to delete just before it backs up or for a client’s call to be dropped.

I highly recommend using Virtual Private Networks (VPN) to guarantee you’ll have a secure and private connection. Some marketing agencies may also benefit from a VPN because it helps them determine the organic search results, peek at YouTube ads, and conduct competitor analysis when browsing from a specific country or region. 

Celebrate Your Remote Work Wins

Did your marketing campaign generate record-breaking results? Have you gotten a new client? Every groundbreaking achievement is a cause for celebration. 

Sadly, your wins and successes may not be as visible when you’re working from home or a remote location. 

A potential solution is to encourage teammates and employers to set-up an announcement system whenever you and your teammates have a win. This can be as simple as announcing the achievement through a dedicated group chat or sending an email with a list of successes. 

Conclusion 

Just like everything else, working as a remote marketer comes with perks and drawbacks. Productivity may go up, and money may be saved—both for employees and employers—but it can get a bit lonely.  

As long as you can minimize distractions and have a dedicated workspace, you could efficiently accomplish your projects and marketing campaigns. Don’t forget to ask your employer for the right equipment and to ensure you have WiFi access.

Whenever you and your digital marketing team experience big or small victories, celebrate your successes. This way, everyone is motivated to do their best even when they’re apart. 

How will you succeed as a remote marketer?

A Starter Guide to Amazon Vendor Central

Becoming a third-party seller isn’t the only way to make money on Amazon. What if I told you there’s a way to get rid of the bulk of your seller admin and focus solely on helping a single customer who will sell your products for you? Well, that’s what you can expect from Amazon’s Vendor …

The post A Starter Guide to Amazon Vendor Central first appeared on Online Web Store Site.

The 6-Step Guide to Creating a Content Cluster that Ranks

The past few years have witnessed an increase in the evolution of Search Engine Optimization (SEO) content marketing. Such a positive change gives you an edge over other professional SEOs out there.  With the exponential increase in competition for high ranking on Google, a number of people are coming up with great content. However, they …

The post The 6-Step Guide to Creating a Content Cluster that Ranks first appeared on Online Web Store Site.

The post The 6-Step Guide to Creating a Content Cluster that Ranks appeared first on ROI Credit Builders.

The Advanced Guide to Facebook Watch

In 2017, Facebook launched its answer to the burgeoning streaming video market: Facebook Watch. Through Watch, users could view both scripted and live video from professional networks, brands, influencers, and everyday people.

Facebook released Watch to a limited group of users, and for that first year, it flew pretty much under the radar. In 2018, they launched it globally, and the service took off like a rocket.

By 2019, Watch had 270 million monthly users, and by 2020, that number had shot up to over 1.25 billion, according to Facebook.

I covered Facebook Watch in a previous post when it initially launched. Since then, they have expanded their content offerings (even getting into the music space!) and added a ton of features for brands and marketers.

In this post, I’ll dive deep into how to use Facebook Watch for marketing, now that the platform has matured.

Content on Facebook Watch

Facebook is still experimenting with different content types by adding, subtracting, and tweaking to find the right balance for their platform. In 2019, Facebook’s head of global creative strategy Rick Van Veen told Variety,

We’re still figuring it out and learning. When you start a new platform, you’re going to have to throw a bunch of stuff at the wall and see what works and what doesn’t.

Scripted Content

Facebook Watch Original Series

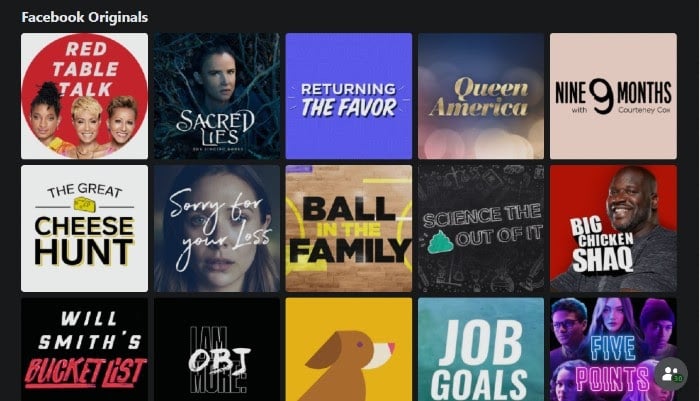
Facebook’s scripted content can be found under the Show tab. This section is where they’ve entered the ring with the likes of Netflix, Apple+, and Hulu. Here, users can find everything from comedies to critically acclaimed dramas to reality and talk shows.

“Red Table Talk,” for example, is a popular show starring Jada Pinkett Smith, where she brings on guests to discuss sensitive topics such as divorce and gender identity. Meanwhile, Mike Rowe of “Dirty Jobs” fame stars in “Return the Favor,” which won a Daytime Emmy.

Facebook Watch Red Table Talks

However, they’ve recently scaled back on their scripted content, canceling some of their popular shows in favor of live and sourced content from brands and users.

Live Content

Facebook Watch Live Video Content

Facebook Live predates Watch by a year. When Watch launched, however, Live was bundled in with the rest of the video content.

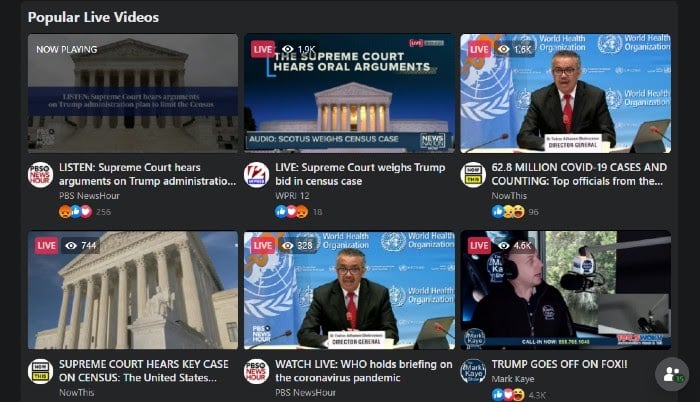
Types of videos on Live range from U.S. Senate committee hearings to live author readings and skiers showing off their tricks.

Small businesses have also rushed to Live, creating events and classes to increase revenue.

Music Videos

Facebook Watch Music videos

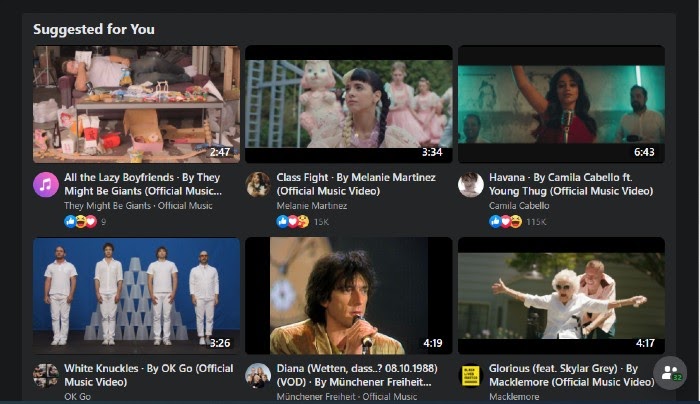
In August 2020, Facebook launched its new music discovery platform, Facebook Music. Here, users can explore videos by genre, trending topics, artist, and even mood. Currently, the app is only available in the U.S., India, and Thailand, but it’s already garnered a lot of attention.

For instance, Katy Perry debuted her music video “Smile,” the title track of her fifth album, on Facebook Watch.

How Facebook Watch Works

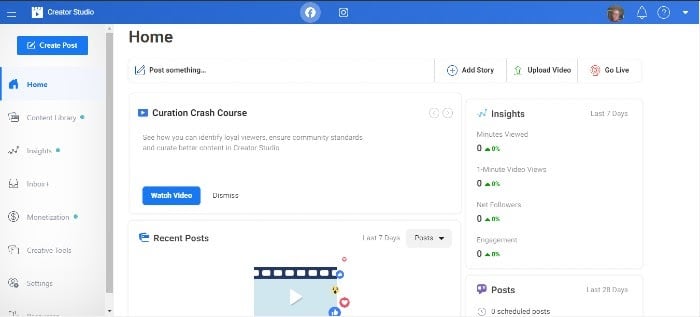
When you create a video on Facebook Watch, whether it’s a live event or a scripted show, you upload it to Facebook using their Creator Studio.

The Creator Studio is the hub for all of your business content for Facebook. From here, you can bulk upload videos, crosspost to different pages, schedule posts, consolidate engagement, and monetize. You can also use their in-depth analytics tools to monitor your content.

Facebook Watch Creator Studio Dashboard

On the videos you upload, Facebook places mid-roll ads. Forty-five percent of the revenue from those ads goes to Facebook, while the remaining 55 percent goes to you.

Helpful Hint: Facebook prioritizes longer videos (3+ minutes) and content that engages the audience and sparks conversation. They’re looking for content creators who respond to user comments and pin the best comments to the top of the feed.

How Your Business Can Benefit from Using Advanced Facebook Watch Features

In France, according to Facebook, national broadcaster M6 began creating videos for Watch. Their one-minute video views more than doubled in nine months and they acquired 6 million new follows organically.

Here in the U.S., says Facebook, Buzzfeed has increased their revenue by creating videos over three minutes across their Tasty, Goodful, Nifty, BringMe, Cocoa Butter, and Pero Like pages.

“We moved quickly and increased our payout from total in-stream ads by 20% compared to the previous half,” Maycie Timpone, Executive Director, Video & Publishing at BuzzFeed, told Facebook.

Facebook Watch has become a powerful tool in marketers’ pockets. Let’s take a look at a few ways Watch helps you increase revenue and attract new followers.

Hyper-Personalized Content

Facebook is all about personalized content, and Facebook Watch lets you upload videos right to your target audience. Your videos will also appear in specific categories, such as “Shows Friends Are Following.”

Facebook will also categorize your videos by genre, topic, and even mood.

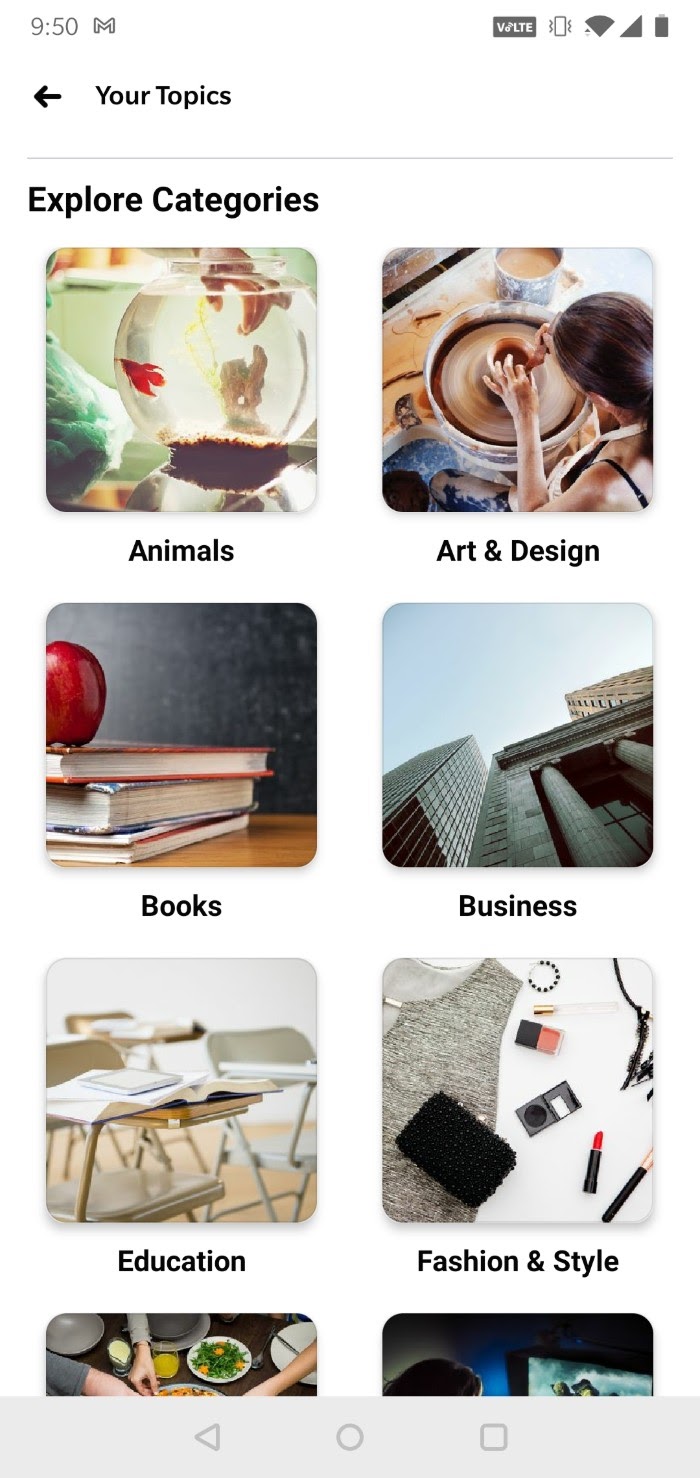
Recently, Facebook introduced Topics to mobile users. Topics allows users to further customize their video feed by choosing categories that interest them.

Facebook Watch Topics

Show Pages

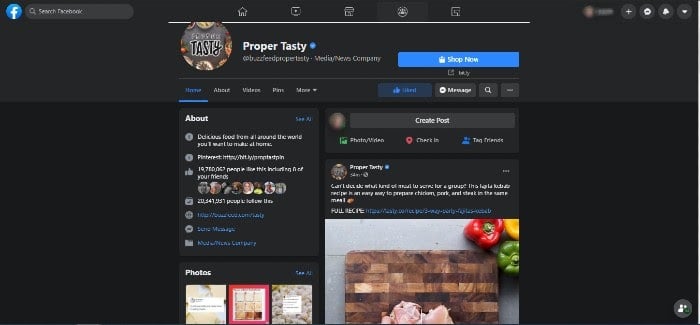
Proper Tasty on Facebook Watch

Show pages allow users to interact with show creators and fans. They can leave comments, ask questions, or even engage in interactive video content. Just like any other Facebook page, they can like, follow, and share pages with friends.

Real-Time Engagement

This feature is particularly helpful with live video. Viewers can react to, share, and comment on a video in real-time.

Real-time engagement is a great opportunity to get initial feedback on your video and engage with your audience by asking and answering questions and becoming part of the conversation.

Facebook Watch Parties

Facebook’s number one goal is to bring people together. It’s why they added groups a few years back, to allow people with similar interests to find each other.

With Facebook Watch Parties, viewers can bring a group of friends together to watch videos and chat about them in real-time.

Video creators can make content tailored to watch parties to boost engagement.

Playlists

Playlists allow video creators to group videos and post them to their pages. Videos play consecutively to boost views.

Marketers can use playlists for video series or to group videos by topic.

Optimizing Your Facebook Watch Videos

You may be creating killer content for YouTube already, but optimizing Facebook Watch videos is a little different. Here are some tips for getting the most out of your Facebook video content:

First, Make Sure It’s Original

Pulling content over from YouTube or even your website won’t work for many reasons. First, the aspect ratio may be wrong (more on that next). Second, original content exclusive to Facebook will keep people coming back, allowing you to take advantage of Facebook’s monetization tools.

Pay Attention to Aspect Ratio

Facebook gives video creators specific aspect ratios for all pages on both Facebook and Instagram.

You’ll want to follow those guidelines, but in general, make sure your video is shot for mobile. The vast majority of Facebook users access it via mobile, and more than half of ad revenue comes from mobile-first video ads.

Add Captions

Eighty-five percent of videos on Facebook are watched without sound. So, adding captions to all of your video content will naturally boost engagement.

Include a CTA

When you upload a video, Facebook allows you to add a CTA at the end. Whether it’s an invitation to watch more videos, check out a product, or simply like your page, adding a CTA can increase engagement and even boost conversions.

Beyond the Basics: Advanced Uses and Features of Facebook Watch

Recently, Facebook has added a bunch of cool new features that marketers can take advantage of. Let’s take a look at them.

ThruPlay

ThruPlay is a default setting and one you should keep on. With ThruPlay, if your video is shorter than 15 seconds, it will post it to users who are more likely to watch the whole thing. If it’s longer than that, it will deliver it to users who generally watch videos longer than 15 seconds all the way through.

Paid Online Events

Paid online events are a function of live video and have become an essential tool for businesses. Brands can create, host, and promote an event all in one place. They can also set a price and collect payment easily.

Helpful Hint: Facebook normally collects a fee for a paid online event. At least until August 2021, however, they have waived their fees.

Fan Subscriptions

Creating the ability for fans to subscribe to your video page boosts engagement. It also allows you to foster customer loyalty through exclusive offers and content for subscribers.

According to Facebook, it also allows you to predict revenue monthly.

Stars

Another feature is Stars, a tool that allows fans to support your work. Users can purchase stars to send to you. For every star a fan sends to you, Facebook gives you 1 cent.

(Think “Ralph Breaks the Internet” and the hearts he had to earn on his videos.)

The more you engage with users, the more likely they are to send you stars.

Facebook is still rolling out this program to a limited number of users, but you can sign up to show your interest.

A/B Testing Tools

On the back end, Organic Video Post Testing allows video creators to test between two and four variations of a video at a time. Videos are distributed to your target audience, but they’re not posted to your page. The video with the most engagement after a period of time is then posted to your page automatically.

In-Stream Ads

According to Variety, Facebook takes in 22 percent of U.S. digital ad spend. Before Watch, ads that appeared in newsfeeds and the right rail kind of got lost in the mix, right?

However, as pointed out previously, ads that would usually get lost in Facebook feeds get a lot more attention when they appear in the middle of a video.

Mining Audience Data from Your Facebook Watch Viewers

When it comes to analytics, Facebook Creator Studio is a veritable treasure trove. Here are some of the cooler stats you can mine from your dashboard:

Views

There are so many different ways you can parse these metrics. For example, if you want to see the number of minutes viewed, you don’t have to settle for a lump sum. You can break it down by minutes viewed on your page, in shared posts, and crossposts.

You can also see how many views were over three seconds long or how many people viewed the whole video, depending on what comes first.

You can also filter by auto-played vs. click-played and paid vs. organic.

All of the views are measured over a 28-day period.

Audience Engagement and Retention

To get a quick overview of your posts, you can look at the number of reactions, comments, and shares for videos with at least 100 views.

Facebook Watch Post Engagement

You can also go way beyond that. You can see audience demographics, and you can filter by fans and non-fans to know who you’re truly reaching.

If a video is performing well, you can choose to boost it right from your dashboard.

To dig even deeper into each video, Facebook shows your viewer retention through the entire length of the video. Line graphs like this one show you exactly where viewers dropped off in your video so you can make adjustments.

Facebook Watch Video Retention

What’s really neat: when you hover over the line graph, each point of the line displays your video’s corresponding frame.

Finally, you can measure each post against other posts to assess which types of videos and content are working well (or not) for you.

Negative Feedback

Just as important as the positive metrics are the negative ones. Facebook can show you negative comments, as well as how many times people hid your video from their feed or reported it as inappropriate.

Click-Throughs

Finally, Facebook can differentiate between clicks to play your video, clicks on links embedded in your video description, and clicks on your CTA.

Increasing User Engagement Via Facebook Watch (and Why This Matters!)

We’ve talked about all the levers you can pull with Facebook Watch, but how do you use them to increase user engagement? Here’s how to use all their cool features to do just that:

Take Advantage of Real-Time Commenting

Comments give context to all those reactions and shares, but you probably knew that. Of course, you can use them to improve your content by creating more of what gets positive comments and less of what doesn’t.

More importantly, you should be responding to comments, not only on your videos but also on your pages. Show your fans that you’re paying attention, and they will be engaged followers.

Spark Conversations

Instead of simply reacting to conversations already happening, create and direct the discourse yourself. Invite fans to comment on specific elements of your videos, share their tips, or ask questions.

If you’re a part of the Star program, this is a great way to encourage people to send some your way.

Use the Subscription Function

Subscriptions are a great way to create that velvet rope effect. Create an exclusive space for fans to get updates on content before anyone else. Offer content and giveaways for subscribers.

Make them feel special, and they’ll keep coming back for more.

Put That Mined Data to Good Use

As you’ve seen, Facebook gives you a wealth of analytics about your videos, right down to the minute viewers stopped watching your videos.

Use that information to compare and tweak content, experiment with longer or shorter videos, or introduce and keep track of new content.

Don’t Neglect the A/B Testing Functionality

While it is time-consuming to create more than one video, A/B testing multiple versions of videos will only increase your engagement, and you can’t deny how easy Facebook makes it.

Since they don’t post anything to your page until the end of the testing period (which they do automatically), you really have nothing to lose.

Conclusion

Facebook Watch has had explosive growth and attracted the attention of brands, celebrities, small businesses, and influencers. The sheer number of viewers and the amount of ad revenue on the table makes creating original content for Facebook a no-brainer.

The real trick is pulling the right levers to create engaging videos that get reactions, shares, and comments. If you can get subscriptions, even better.

Dive into your Creative Studio to look at all the advanced tools Facebook offers.

How will you use Facebook Watch to build your audience and boost your revenue?

The post The Advanced Guide to Facebook Watch appeared first on Neil Patel.

How to Create an Editorial Style Guide

As a digital marketer, you know just how important the tone and message of your blog are to the overall success of your business. A cohesive approach to your digital content, especially the content on your blog, is critical to your brand.

The best way to ensure your site is editorially cohesive is with an editorial style guide.

This article will walk you through the basics of an editorial style guide. You’ll learn the steps you need to follow to create your own style guide whether from scratch, with the use of a template, or with help from a freelancer.

What is an Editorial Style Guide?

An editorial style guide is a set of guidelines for the writers and editors on your team. These guidelines will include standards for grammar, spelling, sentence structure, and image use.

The goal of a style guide is to ensure your content stays consistent and high quality no matter who is writing or editing the article.

Why Does Your Website Need an Editorial Style Guide?

More than just a preferred list of grammar rules, an editorial style guide provides your content team with guidelines for the creation of useful, on-brand content. An editorial style guide ensures a standard baseline for quality and consistency. This will become more critical as your in-house editorial team grows.

Perhaps you think your website is too small, or you can always create your content now and flesh out the details later. The truth is, the sooner you can get your editorial style and processes nailed down, the less work for you and your team.

Without clear guidelines in place, your inbox will soon be flooded with questions from your writers and editorial staff. Your editorial staff may think that lack of guidelines gives them free reign over content. This may result in inconsistent and maybe even poor quality work that has your brand name all over it.

Elements of a Style Guide

There are specific elements all style guides should include, such as:

Grammar

Do you expect your writers to use the Oxford comma? Are there instances where you prefer the semicolon over the em-dash? These are the grammatical rules to call out in your style guide.

Other grammatical elements to take a stand on include where punctuation falls in relation to quotation marks (inside or outside), prepositions at the end of a sentence, and starting sentences with conjunctions.

Spelling

A subscription to services like Grammarly takes care of the majority of misspellings. There may be times where a word can be spelled correctly in two or more ways, so which one should your writers choose?

The most common spelling differences are those with American English versus British English variations. Examples include:

  • Center vs. centre
  • Theater vs. theatre
  • Color vs. colour
  • Criticize vs. criticise
  • Program vs. programme

You should consider where the majority of your audience lives when deciding on a spelling “style.” But the most important thing is to choose one style and be consistent.

Voice and Tone

The voice is the overall expression of your brand, while the tone is how that message is delivered. The tone will vary depending on the medium (e.g. social media post, blog post, newsletter, press release), but the overall brand voice will be your writers’ guiding light.

Is your brand voice considerate and simple like Uber or functional and expressive like Starbucks? Once you have found your brand voice’s sweet spot, it’s time to determine what your tone is and when that may change depending on the medium or circumstances. Perhaps your tone is casual and conversational in blog posts, but witty in social media posts.

You’ll want to include relevant examples here as Uber does in the Applications section of their style guide. These will help to solidify your stance while also giving your writers a handy guide to refer to should they need it.

Sentence and Paragraph Length

From witty one-liners to groupings of five to six sentences, there are many valid ways to form a paragraph. Here you want to outline your general preference and when exceptions should be made.

On academic websites, for example, longer sentences and paragraphs are the norm. This is because there is a lot of high-level information that needs to be delivered at once. On recipe or hobby blogs, however, shorter sentences and paragraphs can help to drive a point home.

Links

This section of your style guide should discuss how links on your blog should be formatted, but also how often to use links and to where (e.g. external versus internal content).

If you’re a medical or academic marketer, for example, you may require that links to outside sources meet a minimum quality standard. If that’s the case, you should provide explicit examples of websites and sources that you trust.

Resources

Your editorial style guide should be in-depth, but if it’s too long it can be difficult for your writers and editors to use effectively. One way to reduce your style guide’s length without compromising content is with resources.

The resource section of your style guide should include links to guides that you have properly vetted. These may include:

  • Academic style guides (e.g. APA or MLA)
  • Grammatical rules and guidelines
  • How-to guides and documentation for platforms your writers and editors will use
  • Database links

You want to set up your writers to be self-sufficient. An expansive resource section within your editorial style guide is a great place to start.

Images and Other Media in an Editorial Style Guide

If you encourage the use of images and other media in your website content, you’ll need to be explicit about formatting, attribution, content, and more. What do these elements cover?

  • Formatting: Specify minimum and maximum dimensions, image size requirements, and placement within an article
  • Attribution: Outline your expectations for how your writers should attribute content to the creator. This will vary depending on the copyright license, but compliance with copyright laws is a must.
  • Content: You should call out any limitations or restrictions you have on certain activities within imagery, such as drinking alcohol. Or maybe you have a style preference for feature images, such as overlay shots. This information is useful for your writers and editors.

There are very real potential consequences to improperly attributed imagery, so this part of your style guide should be very specific. It’s best to provide examples and even templates for your writers and editors to use.

Creating Your Editorial Style Guide

Now you’re ready to create your own style guide. Where should you begin?

Before you become overwhelmed with the process, let’s discuss three ways you can go about creating your own style guide.

Hiring a Freelancer to Create Your Editorial Style Guide

You can hire a freelancer for just about any blog or website-related task, so why not consider hiring a freelancer to create your style guide? Freelancers with experience in writing industry-specific content, including style guides, do exist. If you can find a freelancer with experience creating a style guide in your field, then even better!

There are various freelance recruitment platforms, such as Freelancer and Upwork. You can also reach out to your personal and professional network for recommendations.

An experienced freelancer can walk you through the process of editorial style guide creation. You should come to the table with some information prepared, though. For example:

  • Brand voice and tone (Casual? Authoritative? Academic?)
  • Your preference for tense and point of view
  • Any strong preferences you have (e.g. oxford comma, text formatting, image formatting)
  • Industry or company requirements

You hired the freelancer for their knowledge and expertise, so don’t forget to utilize it. If your freelancer has created an editorial style guide in your niche, then ask them for recommendations based on their previous work.

You may be surprised at the sections you didn’t even think to add, and others that you can cut. Using this previous experience can boost the quality of your style guide and prevent issues caused by ambiguity.

Creating an Editorial Style Guide From a Template

If a freelancer isn’t in your budget, you don’t have to go it alone. There are many style guide templates available for you to work with.

The best place to look for such templates is on marketing, branding, and design blogs.

TechWhirl offers a Word document template for download, and Lucidpress has its own template you can customize using their online editor. You may also have luck with template repositories like this one from Microsoft.

The important thing to remember is a template is a guide, not a rule book. You don’t need to include all of its sections, and you’re free to add any sections you feel necessary.

Creating Your Own Editorial Style Guide

If you prefer to create your own style guide from scratch, then consider the step-by-step process outlined below.

Start With a Solid Base

At this stage, it’s time to choose an established style guide as your base.

There are plenty of options as described below, including APA and MLA. By choosing one of these guides as your baseline, you make it easy to create the foundation of your style guide.

These established guides already include rules on grammar, structure, and formatting. You can then build upon those rules to create a robust editorial style guide for your website.

Establish Brand Voice and Set the Tone

Two critical elements of marketing content are often overlooked: brand voice, and tone. The reason these are so often overlooked isn’t because they’re unimportant, but because they can be difficult to distinguish.

The voice is your brand’s personality. This remains the same throughout the life of your brand.

Skittles, for example, has a playful and upbeat voice. Their marketing campaigns are slightly fantastical with an eye towards bright colors, loud sounds, and catchy quips.

Skittles marketing campaigns as a proof of their use of an editorial style guide

The tone is the inflection on your brand voice that will change depending on the situation. Even if you have an army of writers, you can ensure your blog stays cohesive by setting a tone for your writers and editors to abide by.

Remember the Big Three: Tense, Voice, and Point of View

Now you know the tone of your content, it’s time to outline the “how-to.” How do you intend for your writers to speak to your audience? The answer will depend on the tense, voice, and point of view you prefer.

Writing tense refers to the three tenses: past, present, and future.

There may be reasons all three tenses are used on your website or blog. You should still pick a dominant tense for your writers to defer to in most circumstances.

Voice refers to active voice versus passive voice. That means putting the subject first (active) or putting the object first (passive). Active voice is the standard for most bloggers and marketers. It offers a more conversational tone readers find compelling.

Point of view refers to the perspective of the writer: first, second, or third person.

Bloggers and marketers will typically utilize first person (“I” statements) or second person (“You” statements). The point of view you choose will depend largely on your content niche and your overall tone.

It’s best to have a default recommendation for all three of the above. You may include exceptions to the rule, but be sure to provide specific examples if you do so.

Establish Standard Formatting

The way your content flows is largely dependent on its formatting. Some basic formatting guidelines to consider are headers and subheaders, bold and italic text, and hyperlinking text.

You may want to consider your content management system and any potential limitations when it comes to header tag guidelines.

If you are heavily relying on a style guide such as the APA, you can utilize their recommendations for text formatting. For example, italicizing terms that have a technical or special meaning.

Define Image Requirements

There are many good reasons to include imagery on your website. However, images can take up precious space, and they come with their own copyright risks. This is why you must define image requirements within your style guide.

On the technical side, you should define minimum and maximum image size. This will largely depend on your content platform, and it may vary by image type (featured image versus in-content image). With copyright infringement always being a risk, you also want to provide strict requirements when it comes to including images in content.

If you use a premium image repository, like Shutterstock, you may include account login details in this part of your style guide. You can also link to free image repositories such as Unsplash or Pexels.

Beyond that, you should clearly outline (with examples) the desired format for image references. What should be included, and how should it be formatted? Again, it may be helpful to fall back on your chosen style guide’s standard.

Incorporate Standards of Performance

How will your writers know when they hit the nail on the head or, conversely, miss the mark? This is where standards of performance come in handy.

Standards of performance are guidelines that your writers and editors can refer to when evaluating their content piece. The more objective your standards of performance, the better.

When it comes to establishing standards of performance, it helps to think of a grading rubric. For each standard, it’s possible to score anywhere from one to five points. What standards can you choose that will be easy to evaluate on a five-point scale? A few examples include:

The standards of performance will be beneficial to your writers, as well as your editorial staff.

Picking a Preexisting Editorial Style Guide as a Base

The likelihood is something will inadvertently be left out of your editorial style guide. This is why having a default style guide for your writers and editors to refer to is crucial.

These style guides have typical use cases, though they can be adapted for uses beyond the norm. Let’s look at the four most common style guides.

Associated Press (AP)

The Associated Press (AP) style guide is most commonly used by journalists. Its focus is on disseminating information clearly with simple formatting.

American Psychological Association (APA)

The American Psychological Association (APA) style guide is most commonly used in college in science and social science courses. It has a slightly more formal bent than the MLA, though not so formal as the Chicago Manual of Style.

This style guide is ideal for academic writing, including blogs or websites dedicated to discussing academic subjects.

Modern Language Association (MLA)

The Modern Language Association (MLA) style guide is most commonly used in college-level English courses, and it’s also the default for many bloggers, marketers, and content writers. This guide offers a more laid-back approach desirable to writers, editors, and readers alike.

Chicago Manual of Style

The Chicago Manual of Style is the most rigorous of the style guides. This style guide isn’t a popular choice for most bloggers due to its meticulous nature.

The key differences between the four style guides are largely related to formatting, though there are some grammatical and structural variations as well. There isn’t one style guide better than the other as they all have their strengths and weaknesses. The guide you choose will depend largely on preference, ease of use, and familiarity.

Picking a Platform to Host Your Editorial Style Guide

You’re ready to create your style guide, but where should you host it? You have a few options, and they each have their pros and cons.

Microsoft Word

A word document is perhaps the simplest option. The most obvious limitation of word documents is the inability to automatically update the guidelines. You would need to send the updated document out to all writers and editors as additions or changes are made.

Google Docs

If you like the idea of a simple document, then consider Google Docs. You will still have access to the basic content tools offered by a word document, but updates will be reflected live. You can also collaborate with members of your editorial team.

Sharepoint

Perhaps you want a more secure platform than Google. If that’s the case, then Sharepoint may be for you. Sharepoint is compatible with the Microsoft Suite, including Word. Using Sharepoint, you can upload an already existing Word document or create your own within the platform.

Just like Google Docs, your changes are reflected immediately and you can collaborate with as many team members as needed.

Confluence

If more robust collaboration is needed, especially when you’re just beginning to create your editorial style guide, you may prefer a platform like Confluence. This is a wiki-style platform that enables you to create your style guide with your team.

Resources to Create a Quality Editorial Style Guide

As you create your style guide, you’ll find yourself going down many rabbit holes. With this in mind, we’ve compiled a list of helpful resources to get you started on your research.

To familiarize yourself with institutional style guides, check out these resources on the AP, APA, MLA, and Chicago Manual of Style style guides.

Are you finding yourself needing some inspiration? Take a look at the style guides created by institutions like Princeton and Rutgers. Your favorite companies and brands may also have their style guides publicly available, including Mailchimp, Google, and Atlassian

Mailchimps Editorial Style Guide

Conclusion

An editorial style guide ensures there is no ambiguity in your requirements. When utilized correctly, this style guide will help you to maintain a high standard of quality for your site and consistency across your written content.

It can also clear up any confusion or questions from your team and contractors, to cut down on the back and forth questions.

What unique elements will you be sure to include in your editorial style guide?

The post How to Create an Editorial Style Guide appeared first on Neil Patel.

Micro Startup Acquisition: The Definitive Guide to Buying and Selling Small Startups

The problem with selling your startup is the long exit time. Sometimes it can take as long as seven years before you can sell your business and hop on the next idea.

And the investors? They feel the same way.

Who wants to wait almost a decade to buy a startup when the face of tech is evolving at such a rapid pace? Plus, the price tag on those more established businesses often run into the billions.

That’s an expensive mistake if you make the wrong investment.

The solution? Micro startup acquisitions.

From Facebook to Microsoft, there is a massive trend to seek out tiny teams of five or less, buy them, and use the technology and talent to gain a competitive edge.

In this guide, we’ll discuss the benefits of buying and selling a micro startup, the trends changing M&R strategy, and the top tools you can use to sell (or buy) your startup.

But before we dive into that, we need to look into what micro startup acquisitions are and why you need to sit up and take notice.

Micro Startup Acquisitions: What Are They, and Why Should I Care?

Micro startup acquisitions are a move away from buying businesses with established products or even proven revenue streams.

Instead, larger tech companies like Twitter and Pinterest are making investments in small startups. These businesses usually consist of 2 to 3 people, and companies are taking bets on their products that aren’t even fully realized yet.

Why?

Companies are becoming more proactive and want to acquire complementary products earlier on in their road maps as a way to outwit the competition and obtain the best talent in the industry.

What does this mean for startups?

Your exit strategy timeline is A LOT shorter. Gone are the days of waiting 5, 7, or 10 years to sell, making it more affordable than ever to bootstrap your startup.

Hike Labs was founded in 2014, and by 2015, Pinterest had swooped in and acquired the San Francisco-based mobile publishing startup.

Micro Startup Acquisition Trends

Over the last couple of years, there have been clear trends in why big companies are choosing to invest in these small teams and use them as part of their growth strategy.

More deals are about gaining access to new capabilities or markets. While it’s a trend across sectors, it’s picking up steam in tech where companies are looking to deliver more complete solutions to consumers.

These acquisitions, which focus more on scope than scale, accounted for 90% of tech deals in 2019, which is a 40% increase from 2015. It’s a clear indicator that businesses want to expand their offerings and capabilities.

It’s Harder to Build the Right Product from Scratch

No one wants to be late to market.

Yes, the tech giants could develop the software these micro startups are making, but by the time it’s ready for market, a competitor might have rolled a similar product out and taken all the glory.

Or you could make the mistake of investing too much in the wrong idea, and there goes money, time, and resources down the toilet. It’s usually much cheaper to acquire a startup that has done the legwork than get an idea internally developed.

By acquiring micro startups, companies can mitigate both risks and reap the rewards.

For example, HR and finance SaaS vendor Workday bought Scout RFP (a San Francisco startup with a team of 8) for $540 million.

The startup built a cloud-based office procurement system that helps customers streamline supplier management. The acquisition is a step in the right direction for Workday to compete as a holistic enterprise resource planning solution.

The Micro Startup Talent Hunger Games

It’s no secret that attracting top tier talent can take your business to the next level.

These micro startup acquisitions aren’t only about products. Sometimes it’s the talent that attracts the bigger guys. Micro teams can amplify a company’s productivity while getting rid of the learning curve which comes with new hires.

The innovation and ability to push a startup idea into production mean the team has skills and knowledge that is invaluable to an established company.

For example, when Instagram bought Luma (its first acquisition), the tiny three-person team was part of the deal. The Luma team’s knowledge in video stabilization technology was critical in launching Instagram’s complementary app, Hyperlapse.

The Attractive Price Point of Micro Startups

A massive advantage of purchasing micro startups is the price.

It’s way cheaper to go small than fund a big, established company with hundreds of employees.

And the risk of it going under? A much softer blow.

If the investment goes the same way as Jay-Z’s Tidal music streaming app, it’s a much smaller amount to write off. Plus, you get to keep the team.

For example:

Microsoft spent $200 million to acquire Accompli and only $100 million for Sunrise. When you compare that to the $7.5 billion they spent on the acquisition of Github, or their purchase of Skype for $8.5 billion, that’s quite a bargain.

The same goes for Google acquiring Android for a measly $50 million in 2005 with key employees joining the company. As of 2020, the net worth of Android is estimated to be over $2.5 billion.

The Race for Artificial Intelligence With Micro Startups

Another major trend in micro startup acquisitions is artificial intelligence. Companies in almost every sector are looking to take advantage of machine learning and integrate it into their products.

When you combine this with the shortage of AI talent, there is a race to scoop up startups and their teams who are in the early stages of funding and research.

In 2019, Facebook quickly snapped up a visual search startup called GrokStyle, who developed an app that can automatically detect decor and home furniture from a photo. When asked about the acquisition, Facebook responded in a statement that “their team and technology will contribute to our AI capabilities”.

Tools for Acquiring or Selling Micro Startups and Other Businesses

Want to cash in on the micro acquisition boom? Whether you’re looking to sell or invest in a small business, there are various tools to help you swipe right and find your perfect match.

Micro Acquire

micro acquire

Micro Acquire is a marketplace that connects startups to buyers. The platform is free, private, and has no middlemen.

When you sign up, you’ll get instant access to over 10,000 trusted buyers with total anonymity.

The marketplace is designed to cut down on the time you need to sell your business and find startups to invest in. Once you’ve found a buyer or a seller, you’ll get a letter of intent (LOI) in 30 days or less.

Who Is It For?

Micro Aquire is for startups with an annual recurring revenue (ARR) of less than $500,000. It’s one of the best platforms for serial entrepreneurs to invest in small companies and grow them into booming successes.

Key Features

  • 30-day closing period.
  • Filter the listings to find a startup that ticks all your boxes.
  • Sell your startup by following a quick and simple selling process.
  • Each seller provides key metrics to give buyers an accurate idea about the sustainability of their business.
  • No middlemen. The sale is direct between the seller and buyer.

What Does It Cost?

  • Free: Micro Aquire is free for sellers and buyers with basic features.
  • Premium: For $290 per year, you’ll get the newest listings sent straight to your inbox before the other buyers on the free version. It gives you the chance to review, negotiate, and snap up a deal before anyone else. Plus, Micro Acquire won’t charge any commission from the sale.

Flippa

flippa

Flippa is a marketplace for buying and selling websites, apps, domains, and online businesses.

While it helps to streamline the negotiation and transaction process, it does have a history of scam listings.

If you decide to buy on Flippa, do your due diligence and put the listings under a microscope to make sure it’s legit to find those diamonds in the rough.

Who Is It For?

Flippa is an ideal marketplace for small to medium-sized businesses. You can find a range of sellers at any price.

You can buy or sell online businesses and products like:

  • Blogs
  • E-commerce stores
  • Affiliate sites
  • SaaS businesses
  • Apps
  • Shopify stores
  • Amazon FBA stores
  • Domains

Key Features

  • The easy-to-use site navigation makes it simple to list your business in under 10 minutes.
  • There are tons of filtering options to help you find a business that meets your needs and budget.
  • Choose the “Auction” feature to sell your business within 30 days or set it at a fixed price. Fixed price listings usually take 3-5 months to sell.
  • The “Broker-Matching Service” connects you to a personal broker who will manage the entire sales process from marketing to closing the deal on your behalf. You will need a net annual profit of at least $100,000 to qualify.
  • The “Self Service” feature gets you a Flippa account manager to help you with the sales process.
  • Use Flippa’s free Online Valuation Tool to get a sense of how much your business is worth.

What Does It Cost?

Flippa’s listing fees depend on what you’re selling:

  • Starter/template websites: $15
  • Domains: $10
  • iOS and Android Apps: $15
  • Established websites: $49

There is also a 10% success fee on each sale, and you can upgrade your listing with various packages starting at $295.

Tiny Capital

tiny capital

Tiny Capital is a different breed in the micro acquisition space. Unlike some of the other tools mentioned above, it’s a traditional venture capital firm, with a twist.

Instead of buying companies and becoming a micromanaging nightmare, Tiny has a hands-off approach.

Besides the required monthly and quarterly reports, founders rarely have contact with the firm, with some businesses only speaking to Tiny Capital founder, Andrew Wilkinson, once every six months.

Who Is It For?

Tiny Capital seeks to invest in profitable internet businesses within the information technology sectors.

Think your business would be a good fit?

You need to meet the following requirements:

  • 3-5 years in business.
  • A minimum of $500k per year in annual profit.
  • A high-quality team.
  • You have a simple online business with high margins that doesn’t require complex technology or large teams
  • Your business has a competitive advantage.

It’s the perfect micro acquisition option for founders who want a quick sales turn around (most deals are complete within 30 days) and an investor who is going to be seen and not heard.

Key Features

  • There is a simple selling structure where you can get a full or partial cash payment upfront.
  • Tiny Capital has a simple 30-day sales cycle that includes a 15-day due diligence process.
  • Founders can stay or go.
  • No culture change required.
  • No in-person meetings before or after the sale.

What Does It Cost?

There are no upfront costs with Tiny. All you need to do is contact the team, and you’ll get a response within 48 hours. If Tiny likes your business, you’ll get an offer within 7 days.

FE International

fe international

FE International is an acquisition advisory team for businesses earning five figures or more. With a 94.1% sales success rate, it’s one of the top tools for micro startup acquisitions.

As a full-service M&A (mergers and acquisitions service), the platform has integrated solutions for all the major elements of a successful acquisition. From valuation to exit planning to post-sale considerations, it’s all handled under one roof.

Who Is It For?

FE International specializes in selling websites in the SaaS, content, and e-commerce industries. It’s an excellent choice for startups within the 5 to 8 figure range who want top-tier support throughout the sales process.

Key Features

  • FE has a high sales success rate compared to its competitors.
  • It has a vetted investor network of 50,000 people, ensuring only qualified, seasoned professionals view information about your business.
  • Several brokers are always available to minimize disruptions in the sales process.
  • To help you get the best possible deal, FE International creates a thorough sales plan and marketing materials to attract qualified buyers.
  • FE brokers will approach several pre-screened and vetted investors and negotiate the best deal on your behalf.

What Does It Cost?

There are no listing fees for sellers or joining fees for investors. Brokers are paid a 15% commission fee on all sales, and there is a buyer transaction fee of 2.5% with a maximum threshold of $1,000.

Empire Flippers

empire flippers

Since opening its doors in 2013, Empire Flippers has sold over $93,000,000 worth of websites and online businesses with an impressive 88% selling success rate.

Who Is It For?

Empire Flippers is interested in websites within the following categories:

There is an intensive seller vetting process to ensure only quality listings make it onto the marketplace, and there is a dedicated team for each step of the process.

To qualify for a listing on Empire Flippers, you must meet the following requirements:

  • Your business or website must have a 6-month solid track record of at least $1000 profit per month.
  • You must be using Google Analytics for the past 6 months.

Key Features

  • Empire Flippers has a dedicated migrations team to take care of transferring your new business to you.
  • Get an estimate on how much your business is worth on Empire Flippers before you start the vetting process.
  • New listings are sent out via email to a list of over 45,000 people.
  • If you list with Empire Flippers, you will need to agree to not list your business anywhere else for 2 months. Sellers also need to sign a 3-year non-compete agreement.

What Does It Cost?

Empire Flippers has a $297 listing fee for first-time sellers. But if your listing is declined, it is 100% refundable.

If you’re a repeat seller, you’ll only pay $97 to list your site.

Potential buyers must pay a refundable 5% deposit fee to gain access to a listings URL, P&L, and Google Analytics.

There are commission fees ranging from 8% to 15% depending on the final sale price.

Conclusion

The race is on for micro startup acquisitions.

Companies who understand the benefits of expanding their scope by adding complementary products and talent to their portfolio will reap the rewards.

Companies who forgo adding micro acquisitions as part of their mergers and acquisitions strategy are going to get left in the dust by competitors and struggle to find top-tier talent.

In short, there is no better time to be a desirable tiny startup.

Have you ever sold or acquired a micro startup? What has been your experience?

The post Micro Startup Acquisition: The Definitive Guide to Buying and Selling Small Startups appeared first on Neil Patel.