A Florida landlord is launching a website to assist other property owners with squatters after she spent thousands of dollars to remove illegal residents from her own property.
“My goal is to drive state and federal laws to treat squatters as criminals and to expedite the review of fraudulent leases,” Patti Peeples, 61, told Fox News.
Earlier this year, Peeples and her business partner Dawn Tiura ejected two female squatters from their home after they moved in illegally for over a month and left thousands in damages.
The website, PushOutSquatters.org will launch later this week and will intentionally go by the abbreviation “POS.”
“So many who responded to news articles used that abbreviation, so I went with the double entendres,” said Peeples, who is a retired entrepreneur with experience in marketing.
The website will be both informational and community-oriented, she said.
“The purpose of the website will be to present the risks associated with squatting, the rise in frequency and to offer resources for those attempting to get squatters out, including everything from security resources to legal resources on how to review state statutes,” Peeples said.
She added that other squatter victims will be able to share their stories on the website so others can learn from those experiences.
Peeples plans to also sell hats and t-shirts with the website’s logo featuring a stick figure kicking another stick figure out of a house.
“We will use the funds to lobby state legislators for better laws,” Peeples said.
Although Peeples successfully removed the two squatters from her Jacksonville, Florida, investment property, they illegally occupied it for 34 days and left behind $38,000 in damages. During the ordeal, Patti lost an interested buyer in the house, was physically pushed out of the house by the squatters and decided that she has had enough of working in real estate.
“This is my retirement, and so any sort of income that I was trusting to live off of for this year is diminished because of this act of stealing,” Peeples told Fox News. “That’s essentially what they’ve done – they’ve stolen my home from me.”
The squatters, who have a history of illegal occupancy, produced a fraudulent lease when police were called, allowing them to remain in the home until Peeples took them to court.
Peeples and Tiura were forced to pay $5,000 in legal fees to eject the squatters.
Peeples said that since her story became public, she’s seen a positive impact, including former President Trump mentioning squatters in Florida in a jab at Gov. Ron DeSantis.
“I’ve had hundreds of people send me messages on social media,” Peeples said, adding that the stories about her situation have been seen by millions of people.
“The publicity has also encouraged our local sheriff’s office to pay more attention to this and pursue criminal charges if they can find the squatters,” she added.
Click here to learn more about the squatters in Jacksonville, Florida.
We know Google has hundreds of ranking factors when it comes to determining where a URL will land on Search Engine Results Pages (SERPs). According to Google, website accessibility is not a direct ranking factor because it’s difficult to quantify. So if that’s the case, is there any correlation between accessibility and SEO? While there … Continue reading Does Poor Website Accessibility Affect Your Rankings?
We know Google has hundreds of ranking factors when it comes to determining where a URL will land on Search Engine Results Pages (SERPs). According to Google, website accessibility is not a direct ranking factor because it’s difficult to quantify.
So if that’s the case, is there any correlation between accessibility and SEO?
While there may not be a direct link, there is likely to be an indirect one. This comes down to user experience metrics. So what exactly is the correlation and what should you expect as a website owner?
In this post, we’ll introduce website accessibility standards and why they exist. We’ll then compare the performance of four websites with varying levels of accessibility compliance to see if accessibility does have a noticeable impact on SEO. So let’s dive in!
Why We Have Website Accessibility Standards
Accessible websites that are intuitive and easy to use for all visitors are the right thing to do. Unfortunately, that doesn’t often translate to what website owners actually do.
It’s not out of malice. In fact, it’s mostly from a lack of knowledge on the topic. How can one even begin to make their website accessible if the definition of “accessible” varies from person to person?
That’s where website accessibility standards come in. These standards lay the foundation for accessibility best practices. So instead of website designers and developers creating what they think is accessible, they can know the techniques they implement are part of the approved standards.
Where Do Sites Struggle Most With Website Accessibility?
The greatest struggle for sites is in the marriage between design and accessibility. That is, web designers and developers feel like they have to prioritize one over the other. A few common examples of this include:
Popups or flyouts that may confuse visitors or screen readers
Text on images without a high enough contrast for visually impaired visitors
Text on images with too small font size
Complex nested navigation
Poorly structured tables
Lack of “skip to content” link
There are plenty of ways to combine design and accessibility whether you’re using a pre-built layout or building your own from scratch.
What We Learned From Analyzing 4 Websites
In this part of the article, we’ll look closely at the breakdown of accessibility issues for each site. We’ll also consider the last six months of domain ranking information and that domain’s keyword positions for the month of June. This will help us to develop a fuller picture and understand the true impact of web accessibility and SEO.
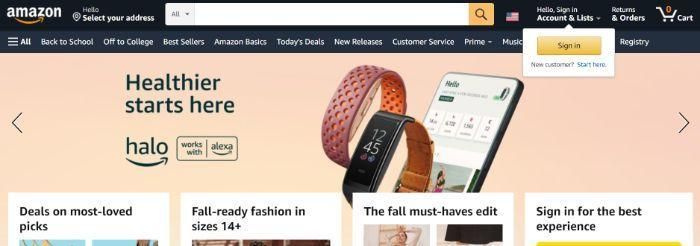
Amazon: Not As Accessible As You Would Think
Surely a global giant like Amazon would have website accessibility all figured out, right? Unfortunately, that’s not the case based on our analysis. Amazon is actually number two on our list when it comes to the number of total accessibility issues.
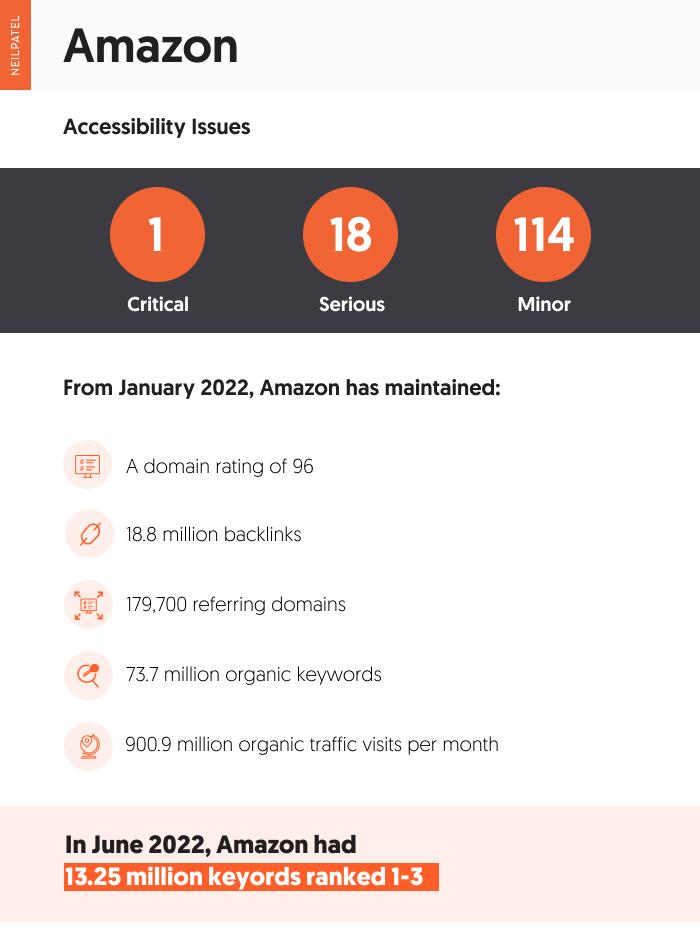
The breakdown of issues, as of this writing, is one critical issue, 18 serious issues, and 114 minor accessibility issues.
To provide some context, here are the differences between these classifications:
Critical issues are those that stop most users of assistive technology (e.g. screen readers, screen magnifiers, refreshable braille displays) from using the website.
Serious issues are those that may cause problems or increased frustration for users, but it doesn’t fully prevent them from using the site.
Minor issues are those that may cause problems or frustrations for a smaller number of users.
To understand the impact of accessibility and SEO, we must also consider other domain ranking factors. As such, we’ve analyzed the last six months of website domain statistics.
Over the last six months, Amazon has maintained a domain rating of 96, 18.8 million backlinks, and 179,700 referring domains. When looking at their ranking profile, in particular, we see 73.7 million organic keywords with roughly 900.9 million organic traffic visits per month.
To narrow in even further, in June 2022, Amazon has 13.25 million keywords ranking in positions one through three. Of those keywords, 13 million are non-branded.
Etsy: All-Around Accessibility and Performance
Etsy is a marketplace, like Amazon. Unlike Amazon, which has a wide range of manufactured products, Etsy focuses on handmade and vintage products.
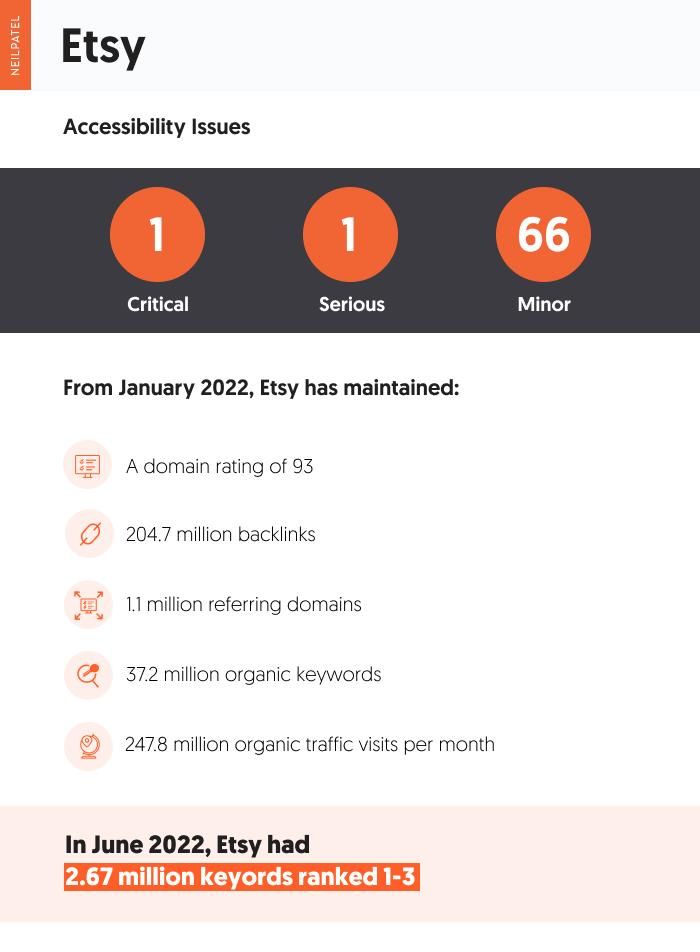
When it comes to accessibility issues, Etsy has 68 total issues with one critical issue and one serious issue among them.
Over the last six months, Etsy has maintained the second highest domain ranking on our list, 93. In addition, its number of backlinks is 204.7 million with 1.1 million referring domains. When looking at keyword statistics, in particular, Etsy ranked for 37.2 million organic keywords with roughly 247.8 million organic traffic visits per month.
And how about keyword ranking performance? In June 2022, Etsy has 2.76 million keywords ranking in positions one through three. Of those, 2.74 million are non-branded.
Nordstrom: The Front-Runner
Amazon and Etsy are e-commerce marketplaces with tens of thousands of brands (or millions, in the case of Amazon). Nordstrom, on the other hand, is an e-commerce storefront. So how does it compare?
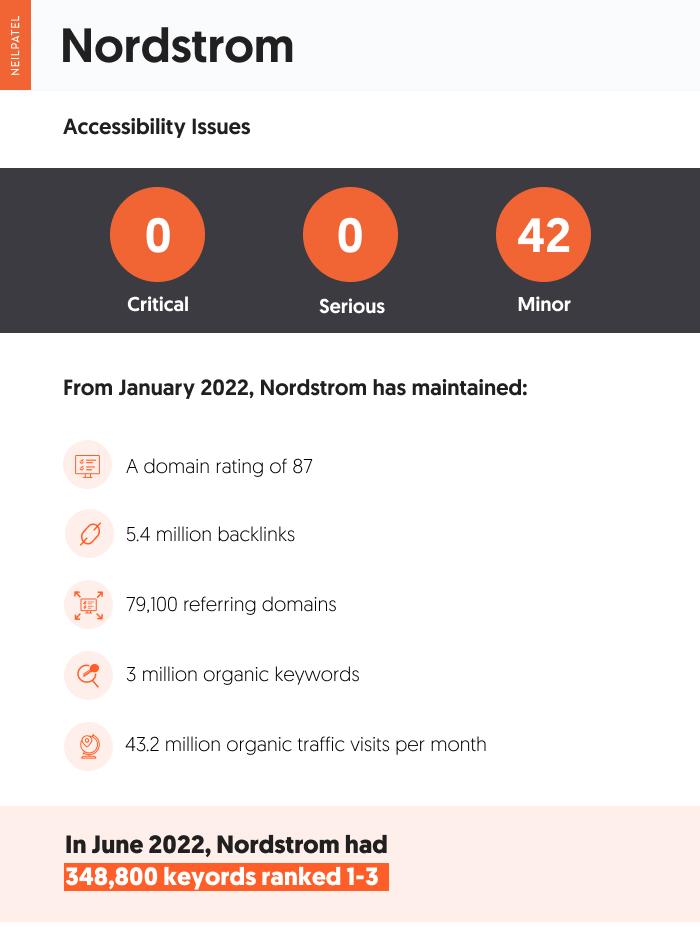
According to our analysis, Nordstrom is the most accessible website on our list with a total of 42 accessibility issues. Nordstrom has no critical or serious accessibility issues, unlike the other three websites in our analysis.
When it comes to domain rating, Nordstrom scores an 87. The e-commerce site has 5.4 million backlinks and 79,100 referring domains. It also ranks for 3 million organic keywords with roughly 43.2 million organic traffic visits per month.
For June 2022, Nordstrom has 343,800 keywords ranking in positions one through three. Of those keywords, 329,600 are non-branded.
Lululemon: How Accessibility and Performance Interact
Lululemon is an athletic wear and lifestyle apparel brand founded in the ‘90s. It grew in popularity within the Yoga community, but it soon expanded its reach to all areas of athletic and leisure apparel. Similar to Nordstrom, Lululemon hosts an e-commerce storefront.
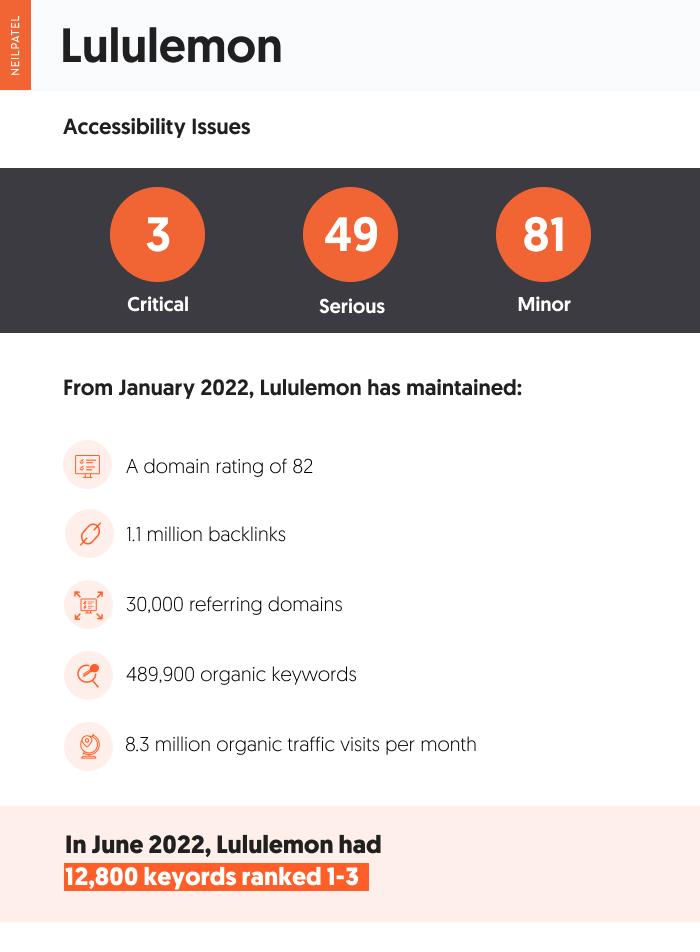
According to our analysis of accessibility issues, Lululemon is the least accessible website on our list with 133 total issues. This includes three critical issues and 49 serious issues.
Coincidentally, Lululemon also has the lowest domain rating on our list with an 82. Over the last six months, Lululemon has maintained 1.1 million backlinks, 30,000 referring domains, and 489,900 organic keyword rankings. This has netted Lululemon roughly 8.3 million in organic website traffic per month.
When zeroing in on June 2022, Lululemon has just 12,800 keywords in positions one through three. Of those, just 1,900 are non-branded.
Web Accessibility Main Takeaways
The goal of this part of the article is to determine just how much of a factor website accessibility is on website rankings. To do so, compared the keyword ranking metrics of each website based on overlapping keywords. What did we find?
Using the Keyword Gap tool in ahrefs, we narrowed it down to roughly 2,900 overlapping keywords that ranked in positions one through three. These include keywords like “mesh sports bra,” “tie dye mens shorts,” and “mid rise skirt.”
Of those almost 3,000 keywords, this is how each of the four sites performed:
Amazon ranked for 2,470 keywords in positions one through three;
Etsy ranked for 479 keywords in positions one through three;
Nordstrom ranked for 694 keywords in positions one through three; and
Lululemon ranked for 84 keywords in positions one through three.
Lululemon did rank lowest among the four websites, which isn’t surprising considering its domain rating and organic keyword profile. If website accessibility was a big factor, though, you’d expect Amazon to do poorly. However, Amazon has the highest number of ranking keywords by far. This may have to do with its strong domain rating.
While these results don’t show a direct correlation between poor website accessibility and keyword rankings, it’s still a legal requirement. While there are no enforceable laws in the United States specifically referencing website accessibility, most websites do fall under Title III of the Americans with Disabilities Act (ADA). This means website owners can face civil lawsuits from website users and potentially be fined by the federal government.
We also know sites with better User Experience (UX) perform the best in SERPs, so having an accessible website is a must.
Creating an Accessibility Improvement Strategy for Your Website
According to the Web Content Accessibility Guidelines (WCAG) as outlined by The World Wide Web Consortium (W3C), to be compliant, a website must be:
Perceivable
Operable
Understandable
Robust
These terms of subjective, so how can we know what’s truly accessible? Fortunately, WCAG lays that out very clearly.
So how do we put this into practice?
There are a lot of steps you can take to meet ADA website compliance requirements. If you’re just getting started, these are the most important ones to consider.
Choose a Content Management System that Supports Accessibility
Not all e-commerce platforms are created equal. There are some that support accessibility better than others. So if you’re in a position to choose a new content management system, then do so with accessibility in mind and be sure to add it to your redesign checklist.
An accessible platform will make it easy to incorporate accessibility features like alt text, anchor text, high-contrast text, and content structure. It may also have accessibility elements built into its HTML structure, or it gives you full access to the HTML files to do so yourself.
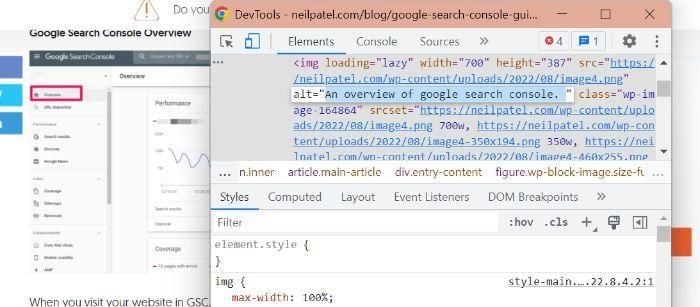
Include Descriptive Alt Text for Images
Images make up about 50% of digital content. As such, they cannot be ignored when it comes to making accessibility accommodations on your website.
Alt text is a written description of the content of the image. It describes what it is and the contextual purpose it serves on a website or blog post.
As an added bonus, descriptive alt text can also increase the odds of your content being found with Google image search.
Use a Logical Content Organization Structure
Screen readers and other types of web accessibility software rely heavily on HTML to determine what content should be read in what order. A logical content organization structure is important for this type of software, but also for visual readers in general.
What do we mean by a logical structure?
This includes the page structure itself, consisting of the header, nav, main, aside, and footer elements. It also includes content structure as you might see on a product page or blog post. This includes the use of heading and subheading tags like H1, H2, etc.
Use Descriptive Anchor Text for Links
How you link can be just as important as where you link. Descriptive anchor text ensures users understand where they are going before they click a hyperlink on your site.
An example of non-descriptive anchor text would be:
“To learn more about this topic, go here” with “here” serving as the anchor text.
A better way to link to internal and external sites is to incorporate your links naturally into your content. In the example image above, you can see “Search Console website” is another link that goes to – you guessed it! – the Search Console website.
The clear and concise anchor text leaves no questions as to what type of content the link will lead to.
FAQs
Do you still have questions about web accessibility and SEO? Here are the answers to some frequently asked questions.
What is website accessibility?
Web accessibility is the inclusive practice of making websites available and easy to use for all visitors. This is inclusive of those with physical disabilities, cognitive limitations, and even socioeconomic factors like bandwidth restrictions and speed.
What are some examples of accessible design?
Examples of accessible design include any measure that’s designed to ensure those who are differently abled or have limitations can make full use of a website. This can range from closed captioning on any video/audio to items like reducing image size to make it easier for pages to load for users with lower internet bandwidth.
Why is website accessibility important?
Web accessibility’s main goal is to make the internet a more accessible place for all people. It is also a great way to ensure a smooth user experience for everyone, regardless of disabilities or limitations. There can even be an added SEO benefit to doing so.
Where can I find tools to check my website’s accessibility?
There are plenty of free and paid tools to check your website’s accessibility. These include accessiBe, WAVE, and audioeye.
How do I make my website accessible?
One of the best first steps you can take is doing an accessibility audit using both your own team’s expertise as well as free and paid tools. When you know what areas your website is struggling most, begin laying out a plan to address them. Depending on your team’s bandwidth, you may have to focus on lower-effort areas like lowering image sizes and make plans for more extensive changes later.
Web accessibility is the inclusive practice of making websites available and easy to use for all visitors. This is inclusive of those with physical disabilities, cognitive limitations, and even socioeconomic factors like bandwidth restrictions and speed.
”
}
}
, {
“@type”: “Question”,
“name”: “What are some examples of accessible design?”,
“acceptedAnswer”: {
“@type”: “Answer”,
“text”: ”
Examples of accessible design include any measure that’s designed to ensure those who are differently abled or have limitations can make full use of a website. This can range from closed captioning on any video/audio to items like reducing image size to make it easier for pages to load for users with lower internet bandwidth.
Web accessibility’s main goal is to make the internet a more accessible place for all people. It is also a great way to ensure a smooth user experience for everyone, regardless of disabilities or limitations. There can even be an added SEO benefit to doing so.
”
}
}
, {
“@type”: “Question”,
“name”: “Where can I find tools to check my website’s accessibility?”,
“acceptedAnswer”: {
“@type”: “Answer”,
“text”: ”
There are plenty of free and paid tools to check your website’s accessibility. These include accessiBe, WAVE, and audioeye.
”
}
}
, {
“@type”: “Question”,
“name”: “How do I make my website accessible?”,
“acceptedAnswer”: {
“@type”: “Answer”,
“text”: ”
One of the best first steps you can take is doing an accessibility audit using both your own team’s expertise as well as free and paid tools. When you know what areas your website is struggling most, begin laying out a plan to address them. Depending on your team’s bandwidth, you may have to focus on lower-effort areas like lowering image sizes and make plans for more extensive changes later.
”
}
}
]
}
Conclusion
There isn’t such a clear connection between web accessibility and SEO. While it is likely a ranking factor considered by Google, it’s not one that seems to have a noticeable impact on search results. That doesn’t mean it’s something you can forego. Web accessibility standards are a legal requirement, so a website not in good legal standing is likely to see some negative impacts. So if you want to achieve SEO success, it’s just good practice to have an intuitive, user-friendly, accessible website.
Disclosure: This content is reader-supported, which means if you click on some of our links that we may earn a commission.
WordPress powers more than 43% of all websites on the internet.
With an excellent reputation and loyal user base, It’s arguably the most reliable way to start and run a website. I use WordPress for my business, and I think it makes sense for most people to build a website on this platform.
Fortunately for you, creating a WordPress website is easy. I’ll teach you how to build a WordPress site in less than an hour.
Your Two-Minute Cheat Sheet
Don’t have enough time to go through the whole article? Here’s your quick cheat sheet.
This is just the barebones guide. You can find complete detail on every step below.
While you have several web hosting provider options available, I recommend starting your WordPress website journey with Hostinger. It’s super dependable, offers fast loading times, and is good for your budget.
Just click here to head over to Hostinger, select the WordPress Starter package, and then Hostinger’s setup wizard will take care of much of the rest.
Towards the end of the guided setup process, you’ll be able to secure your free domain name (included with your Hostinger WordPress Starter plan). Just make sure to opt for WHOIS privacy when you’re given the option after selecting your domain.
Normally you’d have to install WordPress next, but Hostinger has already done that for you. Familiarize yourself with how everything is set up and pick a theme for your website that suits your brand.
My favorite is place for new and striking themes is ThemeForest, but you can also stick to WordPress’s official directory.
Make sure you set your permalink structure to make your links more readable and optimized for the SERPs. This is super important, so please don’t skip it. You can also install plugins to extend your website’s abilities, but it’s strictly optional.
Finally, all that’s left to do is create fantastic content that makes visitors flock to your website.
Voila! You now have a WordPress website that looks beautiful, has amazing content, and is ready to handle the traffic.
Let’s now see how the whole thing works in more detail. Feel free to jump ahead if you’ve already gotten some of the early steps done!
Your domain name is your identity on the internet. It’s how your audience will find you and identify your brand. Precisely why you should choose something that reflects your brand and is easier for people to type into their browser and find you.
You have complete freedom to choose your domain name, though. You can choose any name you want—provided it is available and not registered by other companies.
Here are a few tips for selecting a great domain name for your website:
Make it brandable and unique-sounding
Make sure it’s memorable
Keep it short
Keep it easy to spell, pronounce, and type
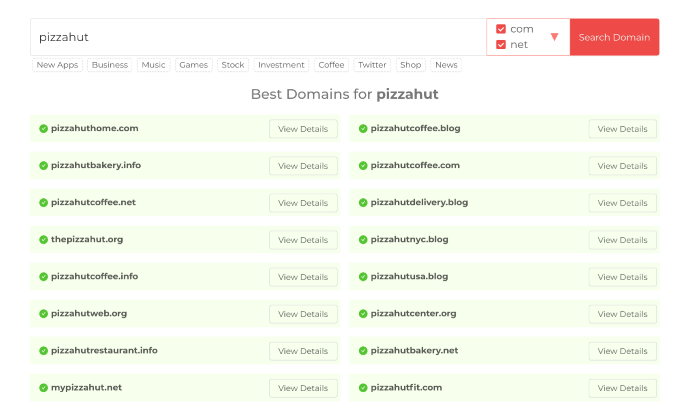
Include niche-related words. For instance, if you plan on selling pizza, it would make sense to add pizza somewhere in the domain.
Think about it: Doesn’t www.pizzahut.com sound better than pizzasellingplace.com? Exactly.
You can use Domain Wheel, a free website name generator, to develop more ideas if you’re looking for some inspiration. Simply put in a keyword related to your niche, and the tool will give you tons of suggestions to inspire you.
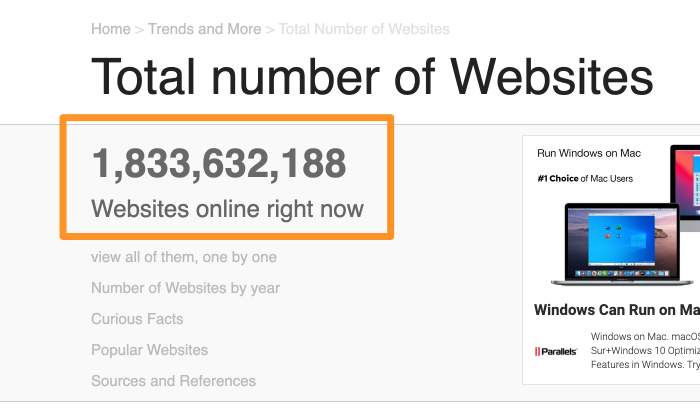
Now that you have a prospective domain name, you have to check for its availability. Considering there are about 1.8 billion websites online, staying original can be a little challenging, but it’s definitely worth the effort.
Since we all love free things, you can register your domain free of cost when subscribing to a web hosting service.
Speaking of domain registration…
Step 2: Select a Web Hosting Provider and Register a Domain Name for Free
There are hundreds of companies that sell web hosting services and tons of companies that allow you to register a new domain name. But wouldn’t it be more convenient to choose a company that offers you both services?
This web hosting provider is reliable, beginner-friendly, cheap, AND gives you a domain name for free—take it from someone who has created many websites for his clients in his career.
Just head to the Hostinger website using this link, click Start Now, and then click Select under the WordPress Starter plan. That’s the most affordable hosting package that includes a free domain.
On the checkout screen that follows, make sure you select the four-year term to get the best monthly rate for this plan.
After you create your Hostinger account and submit your payment information, Hostinger’s guided setup wizard takes over.
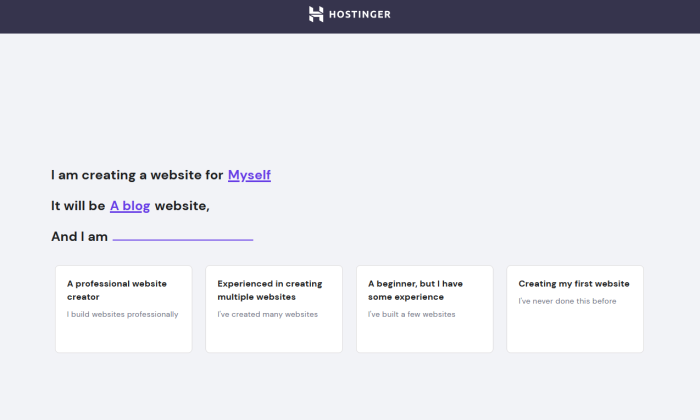
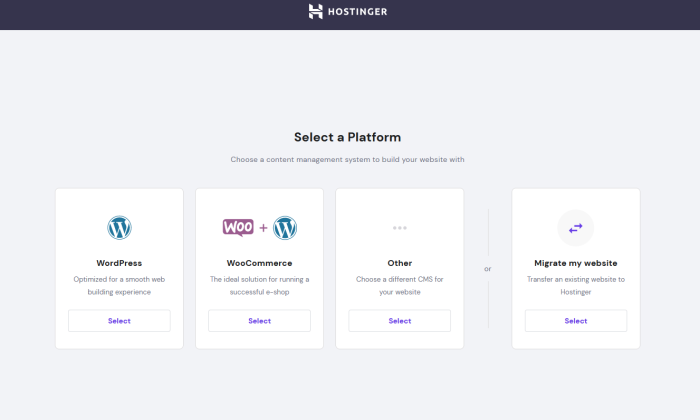
It will ask you a few quick questions about the purpose of your website and your comfort level with building one.
After that, select WordPress as your platform of choice. Hostinger will take care of installing it for you.
Hostinger will even let you pick a theme at this point, but you can just skip that step since we’ll find a good theme later on in this guide.
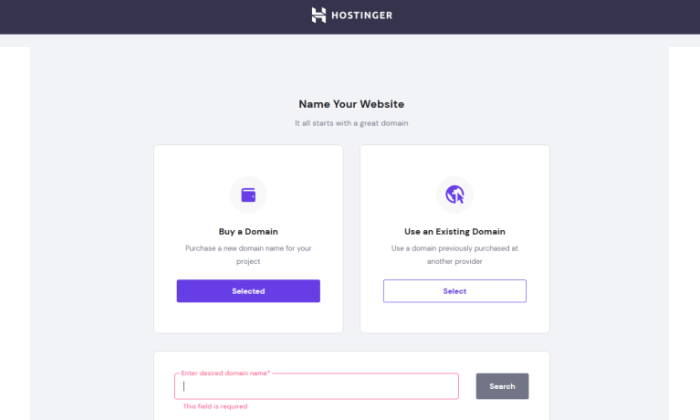
You’re almost done now! The last step is securing your free domain.
The next screen will give you the choice to get a new domain or use an existing one that you already own. Click the option on the left and a little box will appear that allows you to search for you domain name.
Since we did all the legwork in Step 1 of finding an available domain, just enter it into the box and select it when it appears.
There’s one important thing to keep in mind here. I highly recommend opting for WHOIS Privacy for $10/year. It conceals personal information like name, email, and phone number from appearing in public databases. After all, spending a few extra cents is nothing when it comes to security.
The option to add it on will be right below your selected domain. Just finish checkout there and you’re all done!
Hostinger will take a few minutes to finish the WordPress installation and set up your site.
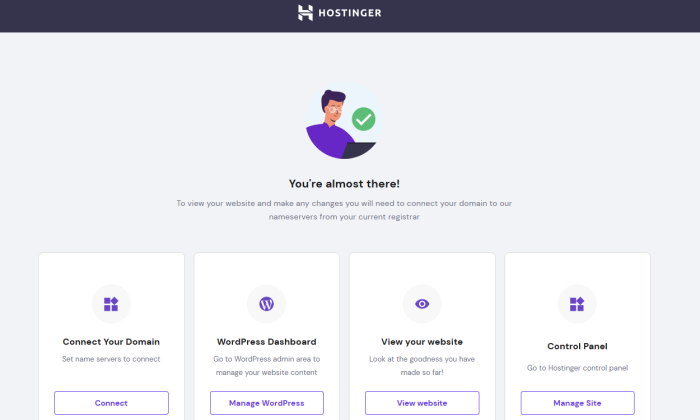
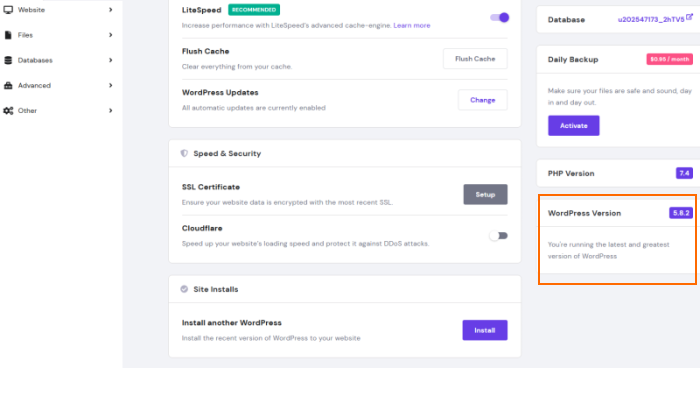
Once that’s done, Hostinger will take you to your dashboard. You’ll be greeted by this screen the first time you visit it after initial setup:
Click Manage WordPress and you’ll be whisked away to the WordPress dashboard.
There, you can see what WordPress version has been installed.
You can even do a fresh installation of WordPress in the same area.
So, you’ve got your hosting and domain secured and a WordPress site ready to go! Now it’s time to make it your own.
Step 3: Use a Theme or Design for Your Website
One of the biggest USPs of WordPress is it supports themes.
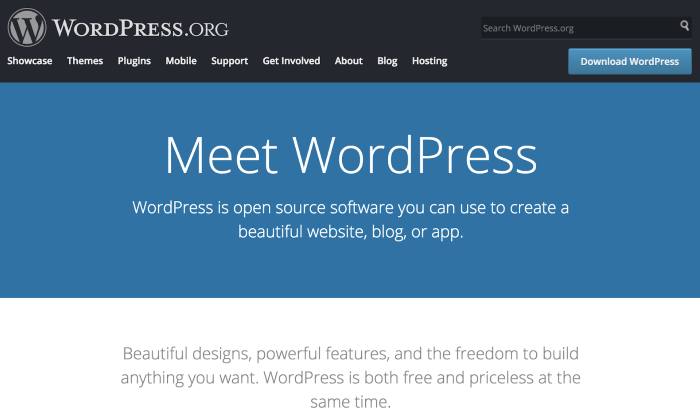
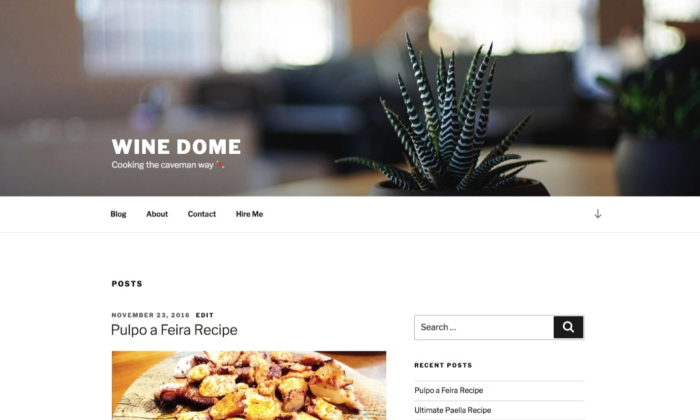
Themes are interchangeable designs that allow you to change how your WordPress website looks at the touch of a button. For example, this is what your website will look like by default:
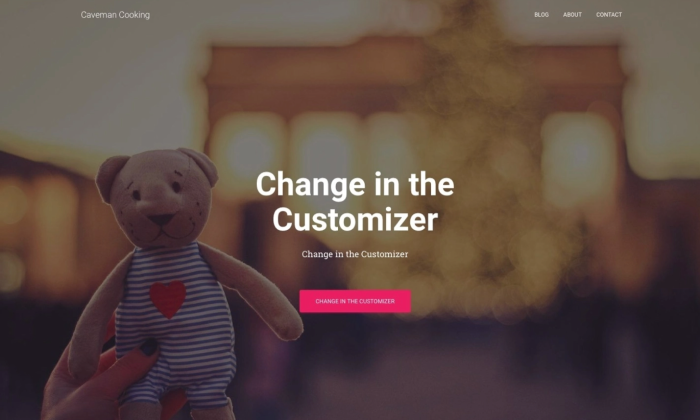
You can change your website’s appearance by choosing another popular free theme (I chose Hestia). It’ll now look like this:
See why theme compatibility is WordPress’s biggest USP?
Choose a Theme You Like
There are hundreds—if not thousands—of WordPress themes out there.
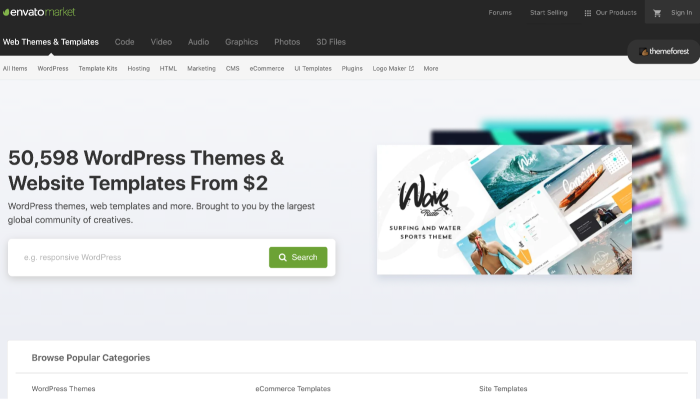
You can start by looking at the official directory at WordPress.org. But other than that, there are several other theme stores and marketplaces, such as ThemeForest. These are third-party sites that offer free and premium themes to alter the website’s presentation without changing the contents.
You can go through all the different sites and select a theme that you like best.
Install Your Chosen Theme
If you select a theme from the official directory at WordPress.org, all you have to do is hit Install right away. Here’s how to go about it:
Go to Appearance, followed by Themes, and then click on Add New. Enter the name of the theme you want to install in the search bar, and then click on the Install button under your desired theme.
After the installation, click on Activate to enable the thing on your website.
If you want to use a theme bought from a trusted third-party, the steps will differ slightly.
Here’s how you can install a premium theme on your site:
Start by downloading the .zip file of the new theme.
Log in to your WordPress dashboard, and go to Appearance, and then Themes.
Click on the Add New option. You’ll then be directed to the WordPress theme dashboard.
Select the blue button at the top of the screen that says Upload Theme. Choose the .zip file from your computer after the prompt.
You’ll see a link to activate your team after a success message. That’s it!
While some themes are free, premium themes vary in price. There are options starting at $10 and ones going all the way up to $200. You can choose an option that fits your budget and preferences best.
Step 4: Install Plugins (Optional)
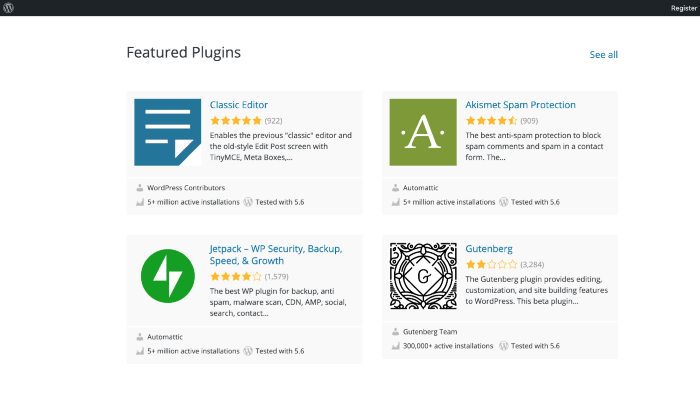
You can consider installing plugins to boost the functionality of your website. Think of them as applications for your mobile phone.
You can refer to our best WordPress plugins guide to zero down options, but you have free reign to choose the ones that appeal to you most. From optimization to website traffic analysis to security, you’ll find tons of options for every category.
That said, don’t go overboard when installing plugins. It ends up slowing down your website, which, in turn, might result in traffic loss.
As they say, there is too much of a good thing.
Step 5: Configure Important Site Settings
Setting up permalinks is very, very important! Precisely why you should do this immediately after starting your WordPress website.
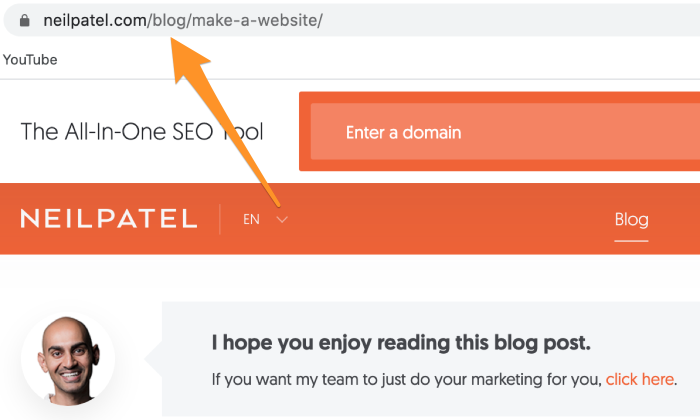
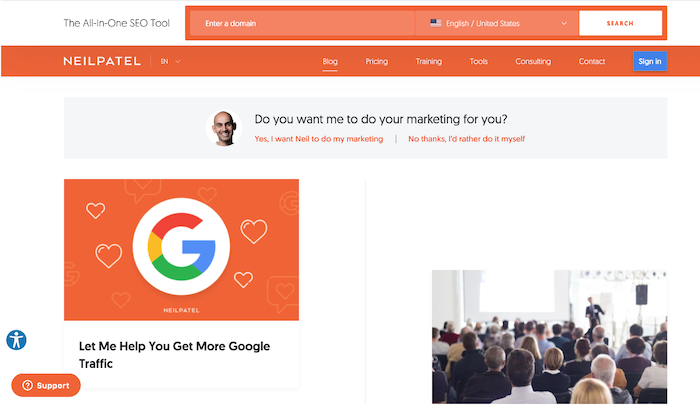
Permalink structure decides how your website links look. Think of it as a representation of your site structure. For NeilPatel.com, it looks something like this:
A good permalink structure tells your visitor exactly where they are on your website (in our example, they are in our blog section), while a bad structure does the opposite. Getting the permalink structure right is also crucial for boosting your SEO ranking.
There are many ways to do it wrong, which is why I’ve compiled a three-step guide to help you get it right:
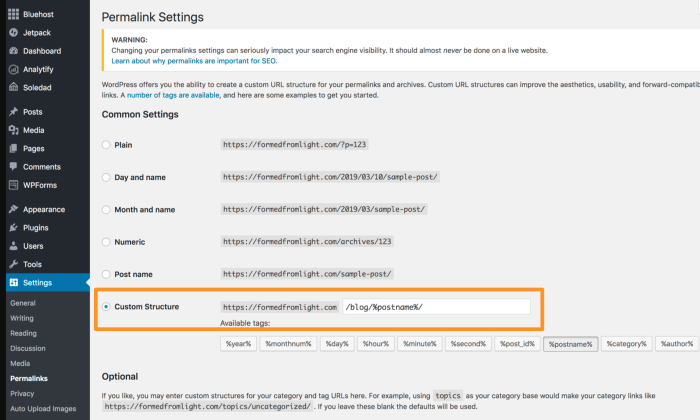
In your WordPress dashboard, click on Settings from the side menu and go to Permalinks.
Under the Common Settings field, click on Custom Structure.
It makes zero sense to go for Numeric as it’ll only confuse your visitor. Plus, it doesn’t serve much for SEO purposes.
Enter the tag string “/blog/%postname%/“
Once you’re done, click on Save tosave the changes.
Step 6: Set up Important Webpages and Promote Your Site
With your website ready, you can now focus on creating high-quality content that helps you boost your traffic and conversions. Start by creating essential webpages like About, Contact Form, Privacy Policy, Portfolio, and Store (if applicable).
I really cannot emphasize enough the importance of having optimized content on your website that is relevant to your niche. So make sure you do thorough research to get all the nitty-gritty right.
Conclusion
That’s it! The six steps above are all it takes to launch a WordPress site.
At the end of the day, it all starts with a domain, CMS, and a reliable web hosting provider like Hostinger to launch your website. Continue experimenting and making changes to your site, and you’ll quickly establish a loyal audience that continues coming back for more.
Have you launched your WordPress site yet? If yes, what web hosting provider are you using?
Disclosure: This content is reader-supported, which means if you click on some of our links that we may earn a commission. Looking to create a professional website without buying a new service? There are a few good free website builders out there. Yes, I’m talking about zero-cost tools that don’t require any coding or design … Continue reading Best Free Website Builders
Disclosure: This content is reader-supported, which means if you click on some of our links that we may earn a commission.
Website design used to be very hard, but that is no longer true.
Years ago, when I first started designing my websites, there weren’t a ton of resources. There were basically two options—learn the basics of website programming languages or hire a designer. The first choice is difficult and time-consuming. The latter is expensive.
After a brief attempt of trying to design everything on my own, I ended up spending top dollar on a designer. It was more than I wanted to spend, but I didn’t really have much choice.
Today, new website owners have more resources at their disposal. It’s possible to design a professional website without hiring a designer or learning how to code.
Whether you’re a complete beginner or just looking for an alternative way to design websites, you’ve come to the right place. I’ll explain how to design a website below in this step-by-step guide.
My Favorite Tool For Website Design
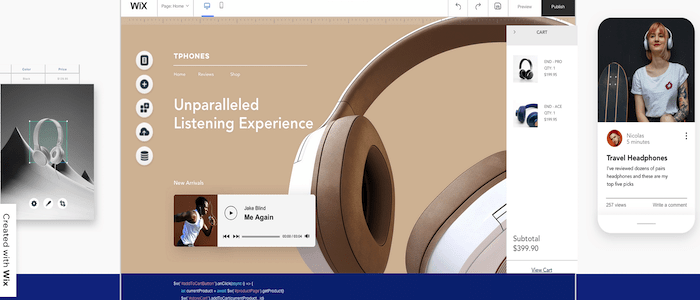
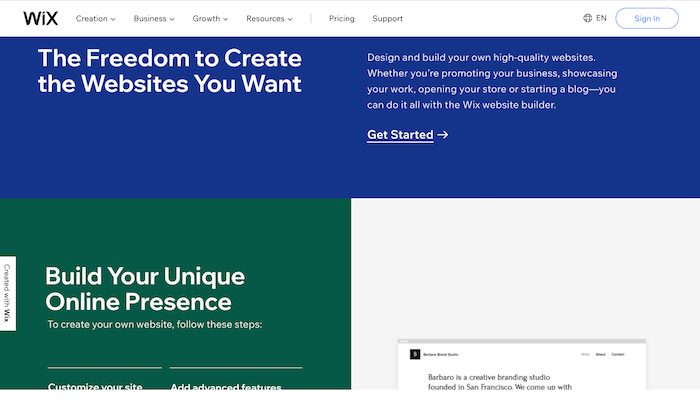
Wix is my favorite tool for website design. It’s essentially an alternative method to sidestep web design altogether.
As a free website builder, Wix makes it easy for anyone to build and design a website from scratch—no experience, development skills, or design knowledge required.
The reason I love Wix so much is that it’s just so effortless. Even for such a simple tool, the final design always looks professionally made. People will just assume you hired a designer—it’s that good.
That effortlessness extends to important things you don’t want to deal with on your own, like security and reliability.
Wix manages optimization for both on their end, so your site is always protected and their servers are always able to deliver your website to visitors.
Plus, they go the extra mile with automated site data backups that make sure you’re never left starting from scratch should something terrible happen.
Another reason why I recommend Wix so highly is because of its versatility. It can accommodate the design needs of virtually every type of website under the sun.
From simple blogs to portfolio sites, online stores, restaurant websites, small business sites, and more, Wix can do it all. Other website builders on the market just don’t have the same versatility.
Continue below, and I’ll teach you how to design a website for free using Wix.
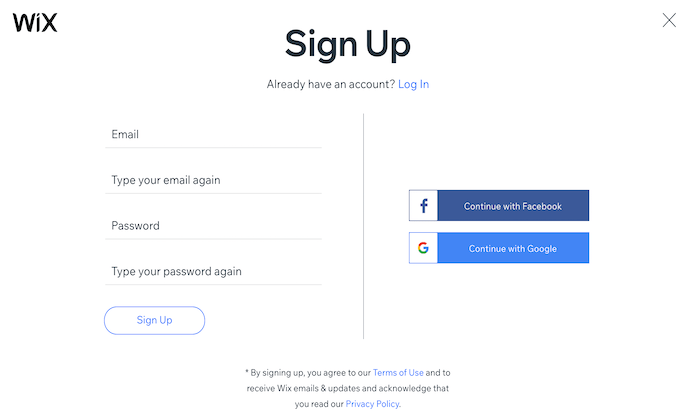
The first thing you need to do is sign up for Wix. So head over to Wix.com and create an account. This is 100% free to do, and you don’t even have to give your credit card information.
Just click one of the many “Get Started” buttons on the homepage or anywhere else on the site.
Unlike other platforms, the Wix sign-up process can be completed in a matter of seconds. There aren’t any complex form fields to fill out. They just need your email and a password.
You can even bypass typing anything and sign-up with a single click using Google or Facebook.
Once you’re signed up, Wix will automatically walk you through the website design process.
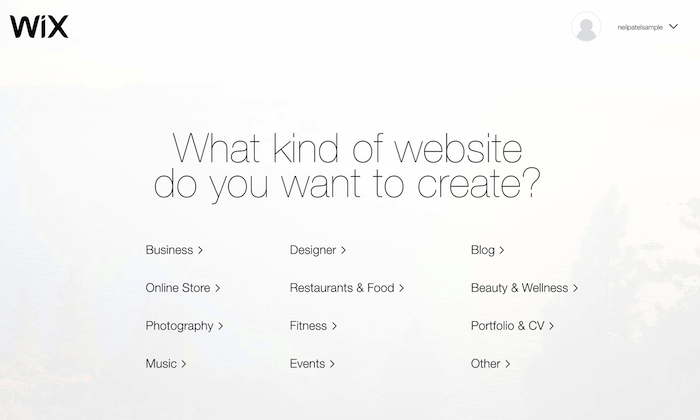
Step #2: Choose Your Website Type
Next, you’ll need to figure out what type of website you want to design. Your answer will have a significant impact on your design choices.
For example, a personal blog and an ecommerce website will have major differences in design choices. A portfolio site used to showcase photography or custom art won’t have the same design as a local restaurant website.
Wix makes this step easy for you. You’ll be prompted to select your website type from a wide range of potential options.
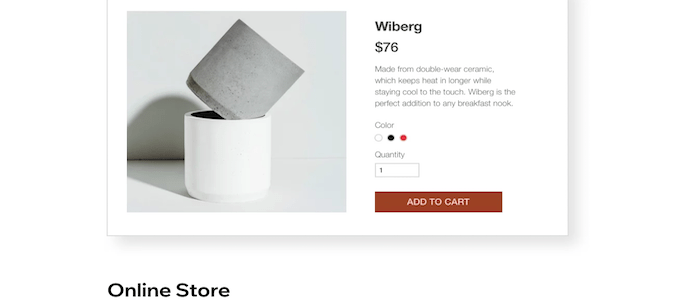
Based on your answer, Wix will automatically present you with applicable templates in that category. For example, if you select “online store,” then the layout will accommodate product pages, product categories and make it easy for you to design a checkout process.
Once you choose a website type, Wix presents you with two options for your design:
Let the Wix ADI create a website for you.
Create your website with the editor.
The first option is straightforward and is excellent for people who are in a rush. You’ll just answer a few simple questions, and Wix will design a site for you based on your responses. It’s impressive how quickly the process takes.
You’ll have a brand new custom website design in less than a minute. The design comes out beautiful, and aside from customizing the pages with your own content, you’re done.
For the purposes of this tutorial, we’re going to stick with the second option—creating a site with the Wix editor. This will give you more freedom and control over every aspect of the design choices.
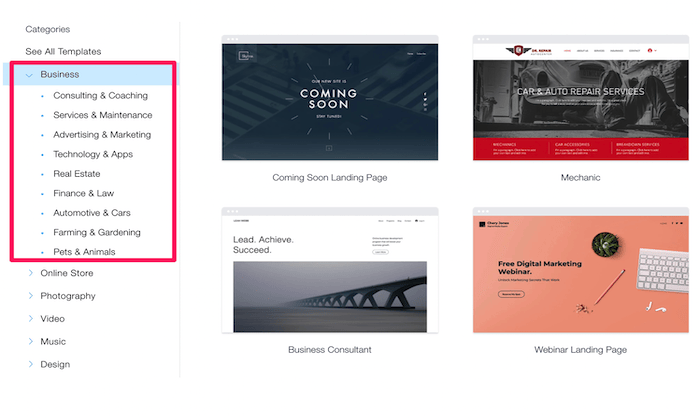
Step #3: Select a Template
Rather than trying to design a website with a blank canvas, it’s much easier to start with a template.
Take a few minutes to browse through the different options. What styles do you like? Which templates emulate your brand image? Wix has thousands of templates to choose from. It can be a bit overwhelming at first. But narrow your focus based on your specific type of website.
For this example, I choose a “business” website. But that’s a really broad category. If you look to the left side of the screen, you can narrow your focus further into types of businesses.
Wix has specific templates for consultants, real estate companies, professional services like finance and law, marketing, and so much more. Every website type has different subcategories with templates.
For example, if you select “online store,” then you’ll see templates for clothing, jewelry, electronics, home decor, beauty supplies, sports equipment, and more. If you’re designing a blog website, Wix has templates for personal blogs, travel blogs, fashion blogs, podcasts, etc.
Your template will become the foundation for the rest of your website design. So it’s important to take your time and not rush through this step. You’ll still be able to customize different design elements to your liking, but that’s much easier with the right template.
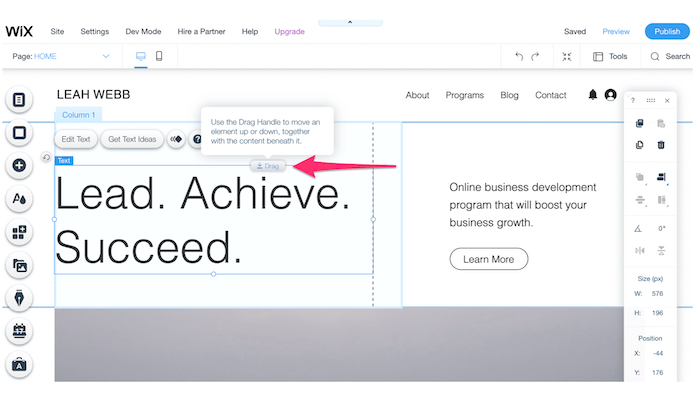
Step #4: Edit Your Layout
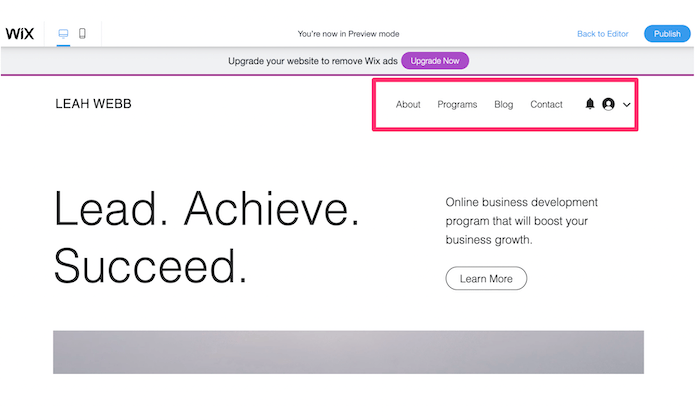
Website visitors will form an opinion about your website in less than one second of landing on the home page. That’s why the design is so important, and it all starts with the right layout.
Wix templates have already been optimized for a user-friendly design. But you have the freedom and flexibility to make some changes here.
In this example, I’m editing the “Business Consultant” template. Let’s say I wanted to move the positioning of the headline on this homepage. I’d simply click the box in the Wix editor and drag it somewhere else on the page.
Or maybe I want to reposition that “Learn More” call-to-action on the right half of the screen. I can click on it and drag the button anywhere I want.
I encourage you to move a few things around when you’re first getting started. This will introduce you to the Wix editor, so you’re comfortable down the road. If you ultimately don’t want to make any layout changes, you can always revert back to the original design.
Step #5: Prepare Your Content
Content is a significant component of your site’s design. You can’t completely finalize the design without understanding exactly what materials will be featured on the website.
Gather images, videos, GIFs, logos, slogans, text (copy), and whatever else you want to display on your site.
Let me show you an example to illustrate my point.
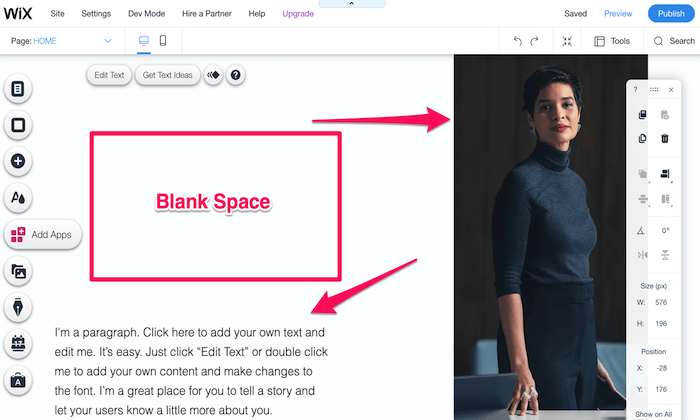
I’m still editing that same business consultant template. One of the first things I’d do on this part of the page is swap the image with a picture of myself. But before I do that, I’d also need to think about the corresponding text copy on the screen’s bottom left side.
By default, the template has some blank space here, as I’ve highlighted above. While blank space is an important web design feature, I don’t love how it’s used in this instance.
So these are my options:
Use a full-length photo (like the one above) and add a paragraph in the blank space.
Use a smaller photo (like a headshot) and just use a single paragraph of text.
Both will achieve my goal of eliminating that empty section of the page. Do you see how one component impacts another? All of this is related to the design, and it’s much easier if you have your content prepared ahead of time.
Step #6: Define Your Branding Strategy
Start to think about how visitors will perceive your website. Things like the color scheme, fonts, and other design components will directly impact your brand image.
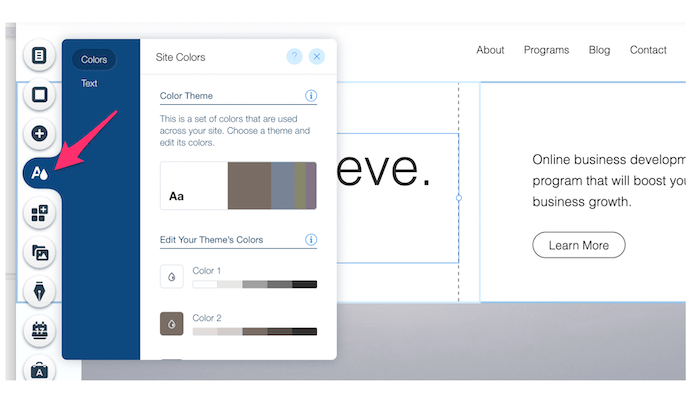
Click the “Theme Manager” on the left side of your Wix editor. This is the button with an “A” and what looks like a raindrop or paint drop.
From here, you can change your site’s theme colors. You’ll also have the ability to edit your default text themes for headers and paragraphs.
In this case, the current color scheme works well for a business consultant. It’s modern and professional. But let’s say you were designing a website for kids. You could have a bit more fun with bright colors and big, bold fonts.
If you added your company logos and other materials back in step #5, you’ll want to make sure that the color scheme flows well with the rest of your content.
Step #7: Add Landing Pages
Your landing pages will each have unique designs. While they should all follow the same branding principles and theme of your home page, the design choices will have some variations.
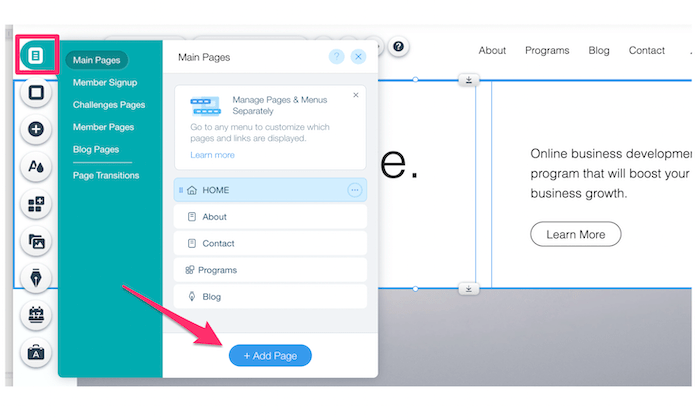
To add a page, click the top icon on the left side of your Wix editor. Then click “add page,” as I’ve highlighted below.
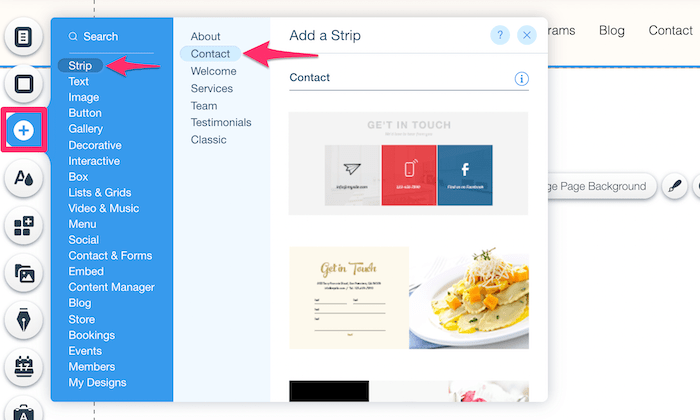
New pages will essentially be a blank canvas, except for your header and footer. But rather than starting from scratch, you can “add a strip” to any page based on what content it will contain.
Just click the “+” button on the editor to browse through some options.
Think of this as a mini template. Apply the same principles you used back in step #3 when you first chose your overall site template.
This is just an easier way to design new landing pages. Wix already has so many great options that it’s not worth trying to build your pages from scratch.
Step #8: Focus on Usability
Sometimes during the design process, you can start to lose focus on how visitors will engage with your site. But user experience (UX) can’t be overlooked.
There are certain design best practices people expect when they visit a website. For example, they expect the navigation menu to be at the top of the page. They expect the footer to contain contact information. They expect the logo to take them back to the home page.
Let’s look at something simple, like a navigation menu:
In this example, there are only four pages in the menu. You could maybe get away with adding one or two more. But beyond that, it’s too much.
Imagine if this website had 10 or 20 pages in the menu. It would be a disaster. The top of the page would be too cluttered, and visitors would never find what they’re looking for. Overall, that would be a poor design choice.
Think about usability with every design choice you make, from CTA placement to scroll effects, white space, architecture, and everything in between.
Don’t try to reinvent the wheel here. Follow web design best practices, and the UX will be fine.
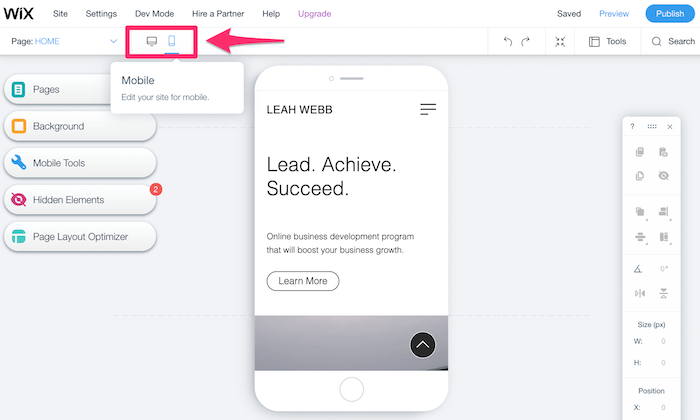
Step #9: Optimize the Design For Mobile Devices
According to Statista, roughly half of all global web traffic comes from mobile devices. So there’s a coin-flip chance that each visitor on your site will be browsing from a smartphone or tablet.
You need to make sure your website design is mobile-friendly. Otherwise, visitors will bounce, and you’ll never get mobile conversions.
Fortunately, Wix makes this process easy for you.
From the editor or previewer page, simply click the mobile icon to switch away from the desktop view of your website.
Wix will automatically optimize your website for mobile. But it’s still a good idea to check everything out for yourself to see if you want to make any changes. If you see something you’d like to change, you can edit your site’s mobile design without changing the desktop version.
Step #10: Publish Your Website
Once you’ve finalized the design, it’s time to get your site live on the web.
It’s worth noting that your site doesn’t have to be 100% finished to publish it. You can always go back and add pages at a later time. But once you have a homepage, about page, contact page, and a handful of site elements, get it published so you can start generating some traffic. Just be sure you don’t publish any incomplete pages.
Click the blue “Publish” button at the top right of your Wix dashboard to continue.
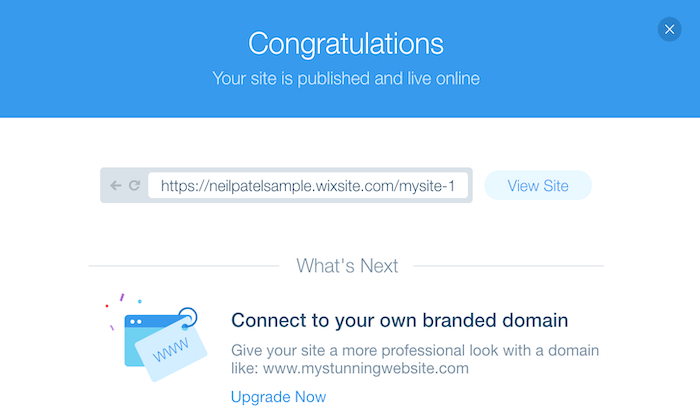
As I said before, you can design and publish a site with Wix 100% for free. But there’s a catch.
Free Wix users won’t get to customize their domain. All domains include your Wix account name, followed by Wix’s branding, and then your site’s name. As you can see from the example above, the domain here would be:
http://neilpatelsample.wixsite.com/mysite-1
This is not a viable option for any business-related website. It’s okay if you’re just using the site to play around with web design principles. But if you want a legitimate site with real visitors, you’ll need to upgrade to a premium Wix plan.
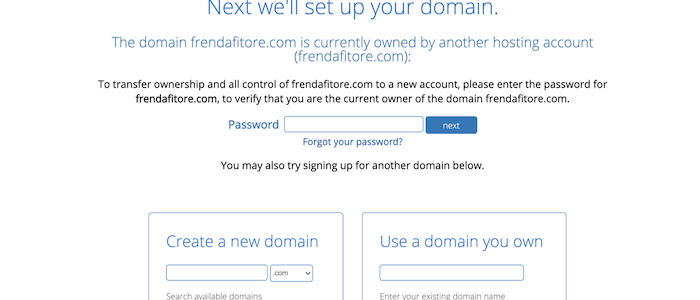
Now you’ll be able to use a custom domain name, either purchased directly through Wix or from a third-party domain registrar. If you don’t already have a domain, just get it from Wix. It’s easier to manage everything through a single platform.
Conclusion
Website design has really evolved over the years. What was once a major challenge or expensive venture for new site owners can now be accomplished with ease.
Website builders like Wix essentially eliminate the need to design websites from scratch.
Non-technical users and people with zero design experience can choose a template and populate their site with custom content. There’s no need to learn any web programming languages or hire a designer.
Sign up for Wix, follow the step-by-step process listed above, and you’ll have a professionally designed website in a matter of minutes. It’s that simple!
Disclosure: This content is reader-supported, which means if you click on some of our links that we may earn a commission.
Making a website has gotten much, much easier over the years. It’s cheaper, faster, and more straightforward than ever before.
But what do you really need to build a website?
A stable internet connection and an hour or two of your time is plenty.
You don’t need any web development experience or tons of money, don’t worry.
In this step-by-step guide, I’ll teach you how to make a website from scratch in just one afternoon. Just follow my tactics below to avoid the mistakes I made when I was starting from ground zero.
Your 2-Minute Cheat Sheet
Here’s your quick-start guide to making a website. This section won’t cover the details–just the crucial steps–each step is broken down in more detail below.
Start by choosing the right web host. We highly recommend Bluehost for speed, reliability, and ease of setup. It only costs a few bucks a month, and it’s got everything you need to make your first website look professional.
Then you’ll need a domain name that represents what your website is going to be all about. A .com domain name is best because it helps you earn brownie points in the eyes of visitors.
One reason I like Bluehost so much is that they throw in a free domain name for the first year. That saves you some cash and the extra step of having to go through a domain registrar.
Once you’ve registered your domain name, choose a content management system or CMS. You can consider WordPress, Joomla, or Drupal, among others.
I like WordPress the best and it’s what I use for my site. If you go with Bluehost, WordPress is a one-click install.
Boom, now you have a version of a website up and running. Congrats!
But you aren’t done yet.
Next on your list would be to market your business. Since branding is crucial today, you need to consider a logo, write your website copy, plan your marketing strategy, and definitely install Google Analytics.
Basically, the exciting stuff that you may know all about already.
Now let’s discuss how to build a website in more detail. Keep reading or jump right to the step you need help with:
Do you remember how your school library had those large categorized bookshelves?
A web hosting company is precisely like that bookshelf, while the library is the internet.
A hosting service provider or a web hosting company stores your website on a server, making everything you put up on your website visible on the internet and your visitors.
These companies offer monthly or annual plans on shared servers, dedicated servers, or virtual private servers, allowing you to choose a plan according to your security and support requirements.
If your website doesn’t collect or store personal or financial data, you can always select the basic plan. So, you don’t have to shell out a lot of money.
But how do you know which web hosting company or service is right for you?
Site Speed
If you want to earn money from your website, you need to get a stable and fast web host.
Fast sites have many things going for them. They rank better, help with SEO, and maximize conversions.
I would 100% recommend Bluehost, as it keeps loading time minimal and short.
That said, we would also advise you to avoid shared hosting or overly cheap services.
Shared hosting means you’ll be sharing your web server with thousands of other sites. In other words, hosting speed will be slow–plus, you may even end up sharing the server with spammy sites, which you may end up with you facing the brunt of Google.
As for skipping cheap hosting services, the rule here is simple: You get what you pay for.
The level of security, speed, and uptime wouldn’t be as great when you pay $5 per month, especially when you compare it to plans costing more than $120 per month.
I’m not telling you to buy the most expensive plan–just avoid the cheapest hosting.
Uptime Dependability
Your web hosting service should always operate properly. Otherwise, no one can access your website.
A good hosting provider provides you an uptime guarantee–something like “We offer a 100% network uptime guarantee” or similar claims.
For instance, if a hosting provider tells you 99% uptime, your site can be down for 3.5 days a year. But providers offering 99.99% or 99.999% will have about one hour and five minutes downtime, respectively.
Look for a provider that offers a guarantee for insurance. If your website goes down, you can be compensated with hosting credits.
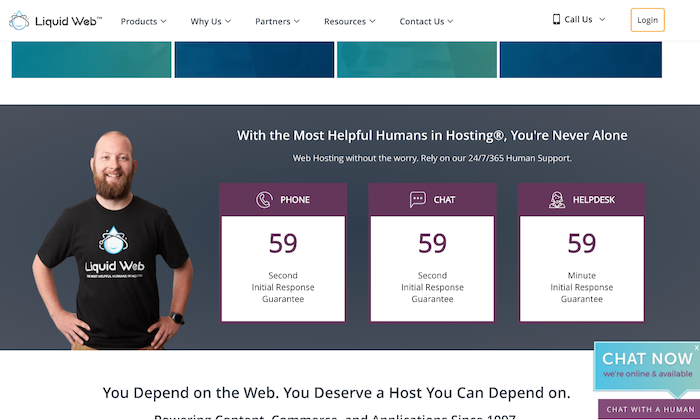
Customer Support
You’ll need quick and efficient backup support when technical difficulties arise. Chat, email, or telephone – there are various support methods. In my experience, though, email is the absolute worst. It’s much better to receive support by phone or live chat.
Choose a hosting provider that offers 24/7 support. This way, you’ll be able to get your business back online if something goes wrong within minutes.
You should also check your service level agreement (SLA) to get an idea of the kind of support you’ll receive. Looking at the company’s website will give you an idea about their support team too.
Definitely go with a host that offers you a free trial period–it’s the only way to get a real sense of the service you’re going to get. Even if you don’t need help, hit them up a few times during the first 30 days. See how quickly they get back to you.
If your new host is slow to respond, the quality of service is probably not going to improve. That’s why the free trial is so important. Bluehost lets you cancel for free within the first month if you’re not happy. DreamHost offers a 97-day money-back guarantee.
Scalability
Scalability is vital for two reasons. First, a hosting provider should grow organically with you, enabling you to upgrade when needed. Second, your website should be able to handle massive spikes in visitor numbers.
Consider the following questions to understand whether your web host is flexible:
Will the web host upgrade you from an entry-level shared hosting plan to an intermediate VPS when your visitor numbers reach a certain level without any downtime?
How easy is this upgrade process?
Can the web host support seasonal fluctuations in web traffic seamlessly?
You should aim to get a solution that checks all three boxes.
Visit web hosting forums to learn about other people’s experiences with providers. Then compare services and prices to determine the right plan based on your needs and budget.
With a web host provider in place, you can move on to Step 2.
Step #2: Select a Unique and Relevant Domain Name
Don’t go looking for the perfect domain name–there isn’t one. Some names better than others, but ultimately, it’s a small part of your business. The content of your website remains most important.
A domain name is your website’s address on the internet. Mine is NeilPatel.com, and it reflects my personal brand. Yours can be anything you want it to be, provided it’s related to your business, topics that you want to write about, or your name.
The options are endless!
Following are a few rules of thumb to help you choose the right domain name:
Keep it relevant
Stick to short, memorable names
Avoid numbers
Choose a .com, .org, or .net
Make sure your chosen domain name is available
Find the perfect name is also possible using the following methods:
Method 1 – Brute Force Method
Many have the creativity to come up with the perfect domain name independently. If that’s you, you’ll need a domain name registrar to purchase the domain, and then search the availability of your prospective domain name.
Bluehost is a great place to start, as it gives you a free domain for one year with their hosting plans, and you can search availability.
I’ll also advise you to avoid going for domain names that have hyphens (like neil-patel-marketing.com) even when you get it at a dirt-cheap price. It can get confusing.
Method 2 – Use a Tool
Some of us are not very creative, and that’s okay.
If you get stuck when coming up with a domain name, try using name generators. Just enter one or two keywords, and the generator will look for ways to combine those words into a domain name.
In addition to speed and downtime reliability, Bluehost also allows you to check domain name availability. Visit the sign up now page and enter your domain name in the box, and voila! You’ll have a name.
Bear in mind that your preferred domain name may be unavailable. Try mixing up words, using a thesaurus, or adding a verb if it happens.
After you’ve chosen your domain name, you’ll next need a website building platform.
Step #3: Select a Good Website Building Platform or CMS
A quick Google search about website builders and CMS will leave you overwhelmed with the enormity of options.
CMS stands for Content Management System. It allows you to edit your website within the domain itself, helping you save tons of time and make everything way simpler. Customizing layouts, settings, content, creating new pages and posts, and so on, becomes easier thanks to ready-to-use website templates.
Here are a few options to consider:
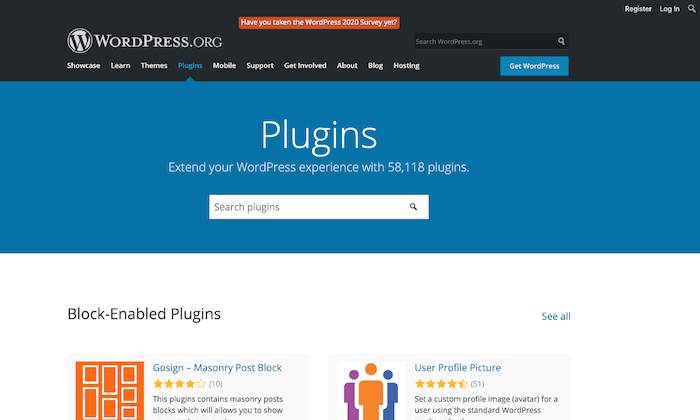
WordPress. WordPress is number one when it comes to CMSs. It’s popular, user-friendly, and super easy to use. Moreover, the platform has over 58,000 plugins that allow you to do almost anything you want on your site.
Keep in mind that WordPress.com and WordPress.org aren’t the same. While the former is a third-party site that allows you to create free blogs, the latter enables you to download the WordPress software to install on a website.
Wix. Wix is another website builder that makes things super easy. If you need a site with just a few pages, like restaurants, local businesses, freelancers, or portfolio sites, this could be a great option. Their reliability (99.98% uptime) and security features (like 24/7 managed monitoring and optimization) give you peace of mind, as well.
However, if you want to build a large site, Wix may lack the advanced features required for large amounts of traffic.
Drupal. Drupal is the most advanced website building solution, which is why it has a steeper learning curve. Though when you consider the level of customization it offers, the hard work seems worth it.
While I don’t recommend Drupal for beginners, if advance customization is a priority on your list, this is hands down the best option. You can always hire an expert to learn the ropes of the platform.
You’ll now have a website up and running. All that is left to do is to make it look great.
Step #4: Design Your Website to Make It Look Awesome
For any website builder, you’ll have to install a theme. Themes can be free and paid, but the latter is more professional-looking and gives you more flexibility when customizing your website. They aren’t excessively expensive as well and can be bought for less than $100.
WordPress and Wix have some great free themes, but if you want to try out the premium variety, you can give StudioPress a shot.
Themes are built on the basic CMS but are customizable to give your website a unique look and allow it to function differently. After all, shouldn’t an artist’s website look different from a SaaS or a restaurant?
Visual representation is incredibly important as your visitors judge your website in a fraction of a second based on how it looks. If your site looks obsolete, untrustworthy, or doesn’t match their expectations, your visitors will be gone in seconds.
Luckily, choosing a good theme is easy.
I recommend reading reviews about the themes before choosing and never prioritizing visual appeal over functionality.
Yes, you want your website to look good with all those fancy fonts and colors, but that shouldn’t be at the cost of functionality.
Additionally, you can always change the theme at a later date. Just don’t change it frequently, as it will harm SEO and branding.
Step #5: Protect Your Website by Using a Child Theme
The best way to protect your website is to use a child theme. A child theme is a style sheet stored separately from the rest of your theme’s files on the webserver. Not only will it make your site hard to break, but it even protects you from redoing changes whenever you update a theme.
Keep in mind that different website builders have different names for creating a child theme.
You build a “child theme” in WordPress, but you create a “sub-theme” in Drupal. Also, some websites don’t allow you to create a child theme, but you can always make a duplicate theme to serve as back up, as in Joomla.
Step #6: Configure Your Website and Add Relevant Content
At this point, you’re done with most of the technical part and can now finally focus on the more interesting things.
Start by setting up navigation to make it easier for visitors to know what your website is all about and grant them easy access to different parts of your website. Choose a couple of colors to represent your site without going overboard.
For instance, I chose orange and white.
Organize, separate, and highlight the important areas of your website to make it eye-catching and clear. You can also install plugins to help your website function smoothly.
Here is a quick checklist of things you need to start marketing your business, especially if you want to earn money from the website:
Get a logo. This will represent your brand, so be very careful here.
Write your website copy, including the home page, About Me page, and other basic pages.
Install Google Analytics code to your website to keep track of visitors.
Start planning your marketing strategy to figure out your visitor’s likes and dislikes.
As for the last pointer, you’ll have to understand online marketing, content marketing, and the often neglected link building to gain visibility, generate leads, and achieve your business goals from your website.
Conclusion
Making a website does have its fair share of struggles, but the more experience you gain, the better you’ll become, and the easier it’ll be.
While we’ve covered all the necessary details for building your first website, if you find yourself getting stuck anywhere, you can turn to Google or YouTube to solve your problem.
Trust me, there are tutorials for almost everything out there on the internet.
Choosing a web host and CMS, designing your website, and marketing is just the tip of the iceberg. You can’t expect overnight success, but was just a bit of patience, you’ll see real progress.
Learn how to use an Article Title Generator to enhance your page traffic on the Search Engine Result Page. You will learn how to create great titles, and get to know an incredible tool called Blog Title Generator. What will you learn? Know all about article title generator: what it is, why we need it, … Continue reading Improving your website visibility with Article Title Generator
Disclosure: This content is reader-supported, which means if you click on some of our links that we may earn a commission.
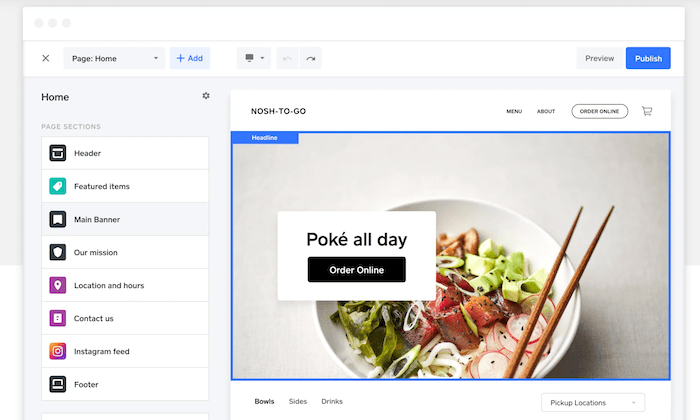
Every great online store starts from the same place—with an ecommerce website builder. These tools make it easy for anyone to launch an ecommerce business by building a website from scratch.
So if you’re interested in selling products or services on the web, you’ll need to find an ecommerce builder to create your online store.
You don’t have to have any web design experience whatsoever to get started. To find an option that suits your goals, check out recommendations below.
You’ll find in-depth reviews of the eight best ecommerce website builders, followed by a brief buyers guide to help you narrow in on the best one.
#1 – Wix Review — The Best Drag-and-Drop Ecommerce Builder
Wix is one of the best overall site builders on the market today. The platform can be used to create any website—including ecommerce sites.
More than 160 million people across the globe have used Wix to create a website from scratch. There’s no code to write, no technology to master. If you know what you want, you can build it in Wix.
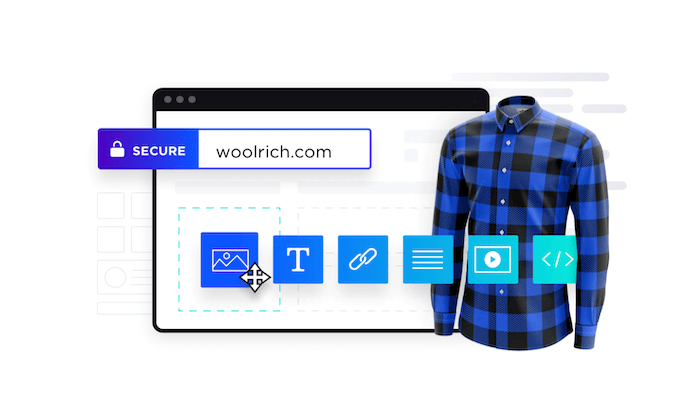
Start with one of Wix’s beautiful online store templates. These have been used by thousands of businesses to get their products and deals in front of customers. From there, you can customize the look and feel of your site to match your brand using the simple drag-and-drop ecommerce website builder.
Wix is a great option for beginners. Anyone can use this platform to build an ecommerce site, regardless of technical skill level. Here’s what makes Wix so great:
Intuitive drag-and-drop site builder
500+ stunning templates
Optimized for SEO
App marketplace for custom functions
Advanced design features like video backgrounds, animations, and scroll effects
Mobile-optimized ecommerce site
Custom domain, free hosting, and free SSL certificate
Supports multiple payment methods
Product pages and store manager tools
$300 in advertising vouchers
24/7 customer care
Unlimited products
Ecommerce plans from Wix start at $23. But I recommend starting with the Business Unlimited plan, at a minimum. It’s just $4 more per month and comes with enhanced features.
You can start building your Wix site for free to try out the drag-and-drop builder. Then take advantage of a 14-day free trial to access premium features.
#2 – BigCommerce Review — TheBest for Large Ecommerce Sites
BigCommerce is another industry leader in the ecommerce world. For more than a decade, this platform has served ecommerce sites in 120+ countries.
Over $25 billion in merchant sales have been powered by BigCommerce. It’s a great option for people who don’t want to hit annoying limits about what their site can and can’t do.
This platform is great for wholesalers, international ecommerce sites, B2B sellers, and multi-channel sales. For selling at scale, look no further than BigCommerce.
Easy to use and secure platform
Powerful ecommerce analytics and customer insights
Drag-and-drop building tools with no coding required
WordPress integration
Custom checkout capabilities with checkout API and SDK
Built-in Javascript, HTML, and CSS for full theme customization
Optimized for mobile and SEO
Built-in faceted search
Cross-channel sales support (brick & mortar, social, marketplaces, etc.)
Multiple currency support
Global CDN
Cross-border fulfillment
Built-in payment processing
Overall, BigCommerce is my top recommendation for large ecommerce websites. If you want to sell online without restrictions, this will be a top option to consider.
#3 – Squarespace Review — TheBest for Beautiful Ecommerce Designs
Squarespace is another all-in-one website builder that can be used to create any type of website.
But unlike other traditional site builders out there, Squarespace is optimized for businesses. With the exception of the personal plan, all Squarespace subscriptions come with built-in ecommerce functionality.
Squarespace is a popular choice for creative professionals who want to showcase their portfolios and sell online. It comes with features like:
Award-winning design templates
Built-in tax tools
Supports sales for subscriptions and digital content
Discount codes and gift cards
Secured checkout process from any device
Abandoned cart recovery tools
Ecommerce integrations for shipping and payment processing
24/7 customer support
You’ll need to connect your own payment processor to run an online store with Squarespace. Ecommerce plans start at $18 per month. Upgrade to the Basic Commerce plan ($26 per month) to avoid 3% transaction fees.
If creating a visually appealing ecommerce site with stunning designs is your top priority, Squarespace should definitely be on your shortlist.
#4 – Square Online Review — TheBest for Small Businesses with Physical Retail Space
Square is best known for its payment processing and POS solutions. But the platform also provides business owners with the ability to create a free online store.
If you’re a brick and mortar retailer that’s currently selling with Square POS, you can easily expand your online presence by building an ecommerce site using Square Online.
Let’s take a closer look at some of the features and benefits that you’ll get with Square Online:
Fast setup with no coding required
Built-in payment processing
Automatic sync with your Square POS system
Supports in-house and on-demand delivery
Instagram integration
Inventory management tools
Accept gift cards, Google Pay, and Apple Pay
Launching an ecommerce site with Square Online is free; you’ll only pay the transactional fees (starting at 2.9% + $0.30). For advanced features, paid plans start at $12 per month. Try it for free.
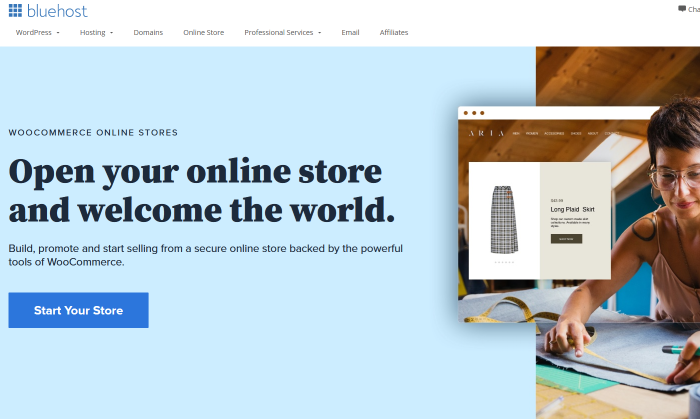
#5 – Bluehost Review — The Best Turnkey WooCommerce Store Builder
It can be a hassle to get a WooCommerce store up and working brilliantly.
From managing the WordPress plugins—both WooCommerce itself and the companion plugins needed to power up WooCommerce for your needs—to conducting regular updates, health checks, backups and so on, building a WooCommerce store can be daunting.
With their specialized WooCommerce Online Stores offering, Bluehost has made setting up a WooCommerce store a breeze.
It starts with Bluehost’s Online Store Creation Experience, a tool that will guide you gently through initial store creation and product uploads.
I love this because Bluehost has long been one of WordPress’ recommended hosting providers. They get WordPress, so who better to trust with maximizing the best ecommerce store plugin for it?
And remember what I said above about companion plugins?
Well, Bluehost has picked out the top ones your web store will need and included them at no charge to you.
That’s a big deal since it would cost you $80 each to install and utilize USPS shipping, FedEx shipping, and UPS shipping, for just one example. Right off the bat, you get the three major shipping providers and Bluehost saves you $240.
And that’s just three of the many plugins included.
Bluehost is generous with included features beyond that, as well. In the basic package, you’re allowed unlimited products and access to traffic analytics, 24/7 support, easy payment processing, manual order creation, and much more.
Plus, you get a free year of CodeGuard Basic for regularly backing up your site.
All of this comes at a good price of $12.95/month if you agree to a 36-month commitment. But if you’re serious about running an ecommerce store, I’d expect you want to be around for at least three years.
Upgrade to Premium—which starts at $24.95/month for the same 36-month term—and you’ll also get the ability to sell subscriptions, customize your products on a deeper level, and book appointments online.
Plus, they’ll give you CodeGuard basic completely for free, as well as domain privacy and protection.
In essence, Bluehost is taking so much work, research, and upkeep off your hands, there’s no question that this is one of the easiest ways to build and maintain an ecommerce store on your WordPress site.
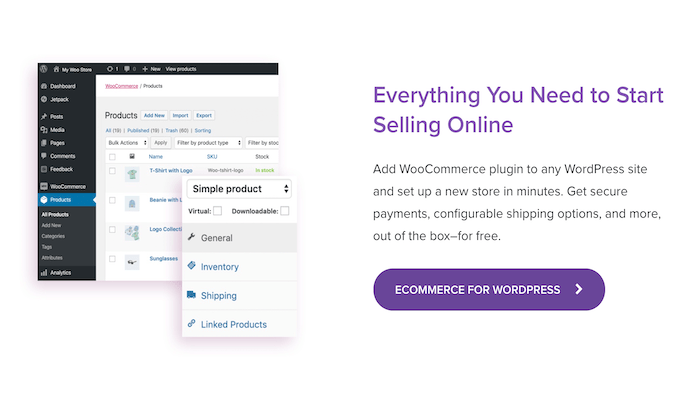
If you currently have a WordPress website and need to add shopping cart functionality to it, WooCommerce will be the best option for you.
This plugin is built specifically for WordPress, and it’s one of the most popular WordPress plugins on the market today.
What makes WooCommerce so great? Let’s take a closer look:
Fully customizable with features that can extend its functionality
Flexible and open-source
140+ gateways and payment integrations
Ability to manage orders on the go
Supports physical products, digital products, and subscriptions
Hundreds of free and paid extensions
Fully scalable
Developer-friendly with REST API
To get started with WooCommerce, you’ll need to have an existing WordPress site. That means you’ll have to handle the domain registration and hosting on your own as well.
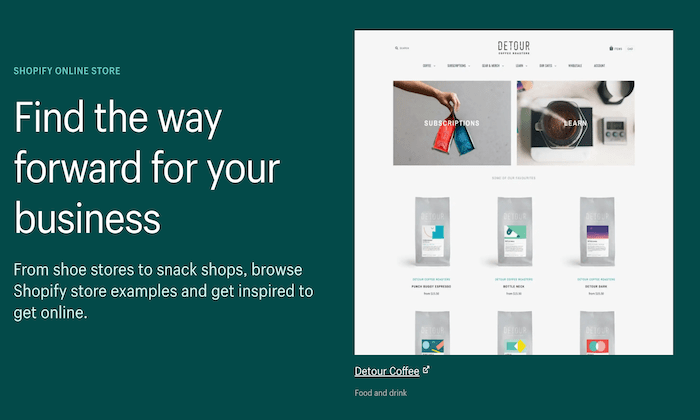
Shopify is king in the ecommerce space. Trusted by 1+ million websites in 175 countries, it’s one of the most popular ecommerce platforms available on the market today.
More than $200 billion in online sales have been facilitated via Shopify.
The platform is extremely versatile. Whether you’re starting a new ecommerce business from scratch or expanding your physical presence to an online store, Shopify can accommodate your needs. It comes with everything you need to build your website and start selling online:
Industry-specific templates
Supports multiple sales channels (point-of-sale, social media, online marketplaces, etc.)
Drag-and-drop store builder
70+ templates
Custom domains
Secure checkout
Gift cards
24/7 support
Unlimited products
Built-in payment processing
Shipping discounts
Marketing tools
Business insights
Regardless of your business size or industry, Shopify’s ecommerce platform is versatile enough to support your site.
If you have unique needs and you’re working with a developer or designer, Shift4Shop (formerly 3DCart) might be the solution for you.
Shift4Shop isn’t quite as popular as some of the other ecommerce website builders on our list. But with that said, it’s not for everyone.
While Shift4Shop does have drag-and-drop building tools to accommodate beginners, the software is powerful enough to support the needs of developers and design experts. So it can essentially be as simple or complex as you want it to be.
Other top features and noteworthy highlights of Shift4Shop include:
200+ built-in features
200+ ways to accept payments
50+ free themes
Simple and versatile shipping setups
Robust security
Supports dropshipping
Supports subscriptions, tickets, events, and print-on-demand sales
Powerful CMS
Optimized for SEO
All plans come with secure hosting, unlimited orders, 24/7 support, and no transaction fees.
If you use Shift4Shop for your payment processing, the entire platform is free to use. Whereas some ecommerce website builders cost hundreds of dollars a month, Shift4Shop doesn’t cost a thing more than the transaction fees, which you would still be paying on a platform that cost money.
The potential to save big is yet another reason I recommend Shift4Shop. Subscriptions are backed by a 30-day money-back guarantee. Try it free for 15 days.
What I Looked at to Find the Best Ecommerce Website Builder
Before you start searching for different ecommerce site builders, it’s important to understand how to evaluate these options.
Much will depend on where you are starting from and where you want to go.
Someone who wants to add ecommerce functionality to an existing website, for example, has a different set of challenges than a person who is still planning to launch their site.
Here are the major factors to consider as you’re shopping around and narrowing down your top picks.
Technical Skill Level
What is your technical background?
Some ecommerce website builders are designed for beginners, others are made for advanced users and developers, and the rest fall somewhere in between. If you’re a DIY-type person, then your technical abilities will play a significant factor in choosing the right platform.
Beginners should aim for platforms that don’t require coding. These website builders will let you put everything together with simple drag-and-drop functionality.
Advanced users and developers may want the ability to access the site’s backend code for advanced customizations. Businesses should consult with their tech team or whoever will ultimately be working on the site before finalizing a decision.
Business Stage and Size
New business and rapidly scaling startups won’t necessarily have the same needs in an ecommerce website builder. Some of you might even be looking to sell a handful of products online as a small side project or part-time job.
If you already have an existing website, you might not need a complete site builder. There are other tools out there that can add shopping cart functionality to your current site (more on this shortly).
Do you still need to register your domain name? Have you picked a web hosting plan yet?
There are website builders out there that provide you with all of these capabilities out of the box from a single platform. In other instances, you’ll need to get your domain and hosting plan separately.
Dropshipping
Dropshipping makes it possible to run an ecommerce website without having to buy, store, or ship inventory to your customers. When someone purchases something from your website, the supplier handles fulfillment and ships the product directly to those customers.
If you’re interested in running an ecommerce site that follows this business model, you need to make sure that your site builder supports dropshipping.
While not every website builder will come with dropshipping functionality out of the box, the best ones will seamlessly integrate with dropshipping software and third-party tools.
Design and Templates
Start to think about the visual aesthetics of your ecommerce site. The best ecommerce website builders will make it possible for you to create a beautiful site without having to hire a designer.
The easiest way to do this is by starting with a pre-built template and customizing it with your content. You should be able to choose a theme or template that fits with your brand image and industry.
As you start browsing and evaluating different platforms, you’ll quickly realize that the templates and design tools aren’t equal across the board—some are undoubtedly better than others.
Built-in Functionality
Not every ecommerce website builder comes standard with a long list of functions. In some cases, you’ll have to customize your site’s functionality by adding features from a marketplace or app store. Depending on the functionality you’re looking for, you might even need to integrate your site with a third-party tool or platform.
With that said, other site builders will provide you with all of the functions you could possibly need out of the box (with some restrictions).
There’s really no right or wrong answer here; it’s all about personal preference. Would you rather have every feature at your disposal as soon as you create an account? Or do you prefer adding functionality as needed?
The answer to these questions will help you narrow down your choices.
Limitations
Your ecommerce website builder might restrict how many products you can sell on the site. Some platforms will even charge you extra fees based on your traffic volume.
This usually isn’t a concern for new websites, but as your site scales, this can definitely become a problem.
Look beyond the rock-bottom prices and entry-level plans offered by different platforms. See how much it will cost you if your product list doubles, triples, or quadruples. Will you incur extra fees?
Some ecommerce site builders are better for selling just a dozen products or so as opposed to managing extensive product catalogs in the hundreds or thousands.
Conclusion
The first step to selling online is finding a viable ecommerce website builder.
Which one is the best? It really depends on what you’re looking for. Here are my top recommendations:
Shift4Shop — Best developer-friendly ecommerce software
For many people, Wix is going to be the absolute easiest option on this list. All the builders I picked are intuitive, but if your not super confident in your technical skills, Wix is a safe bet.
Of course, if you already have a WordPress site, WooCommerce is going to be even easier. For new WordPress sites, go with Bluehost, as they include so much at a great price.
In order to find the best option for your website, refer to the buying guide, reviews, and recommendations outlined in this post. This will definitely help you narrow down your options.
The key factor in the “great seo game” is how well you optimize your site. No matter how brilliant a product or service you have, you’ll have a hard time making money if no one can find it. This guide will help you understand how to optimize your website—for free—without having to use paid tools, … Continue reading How to Optimize Your Website For Free
GDPR Cookie Consent Agreement
This website uses cookies to improve your experience. We'll assume you're ok with this, but you can opt-out if you wish.AcceptRejectRead More
Privacy & Cookies Policy
Privacy Overview
This website uses cookies to improve your experience while you navigate through the website. Out of these, the cookies that are categorized as necessary are stored on your browser as they are essential for the working of basic functionalities of the website. We also use third-party cookies that help us analyze and understand how you use this website. These cookies will be stored in your browser only with your consent. You also have the option to opt-out of these cookies. But opting out of some of these cookies may affect your browsing experience.
Necessary cookies are absolutely essential for the website to function properly. This category only includes cookies that ensures basic functionalities and security features of the website. These cookies do not store any personal information.
Any cookies that may not be particularly necessary for the website to function and is used specifically to collect user personal data via analytics, ads, other embedded contents are termed as non-necessary cookies. It is mandatory to procure user consent prior to running these cookies on your website.