What Are Canonical Tags?

Itching to learn about canonical tags? First, let me explain why they’re relevant to your website ranking.

There’s been a longstanding belief that Google penalizes duplicate content. In case you haven’t already heard, that’s not strictly true.

As Google search advocate John Muller explains:

“…it’s not so much that there’s a negative score associated with it,”

“It’s more that if we find exactly the same information on multiple pages on the web, and someone searches specifically for that piece of information, then we’ll try to find the best matching page.”

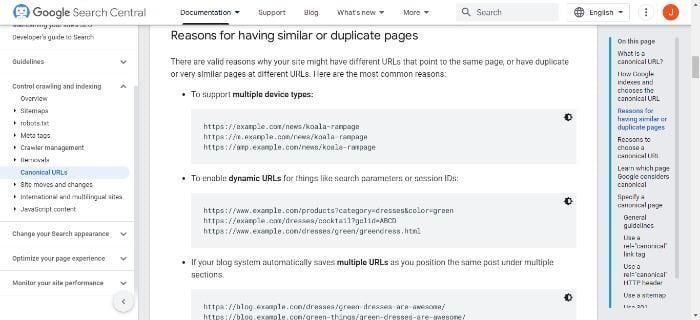
Additionally, on its ‘how to avoid duplicate content’ page, Google states:

“Duplicate content generally refers to substantive blocks of content within or across domains that either completely match other content in the same language or are appreciably similar.”

As Google makes clear, there are times when a website owner has a genuine reason for having duplicate content, like online stores or printer-only web pages. However, these duplicate pages can cause confusion for search engines, and they don’t always know which is the original or which page you want to prioritize.

How do you get past this? You could try 301 redirects or use top-level domains, but you could also use a canonical tag URL.

If you’re wondering what canonical tags are, or you want to know how they can help you, read on to find out more.

The Basics of Canonical Tags

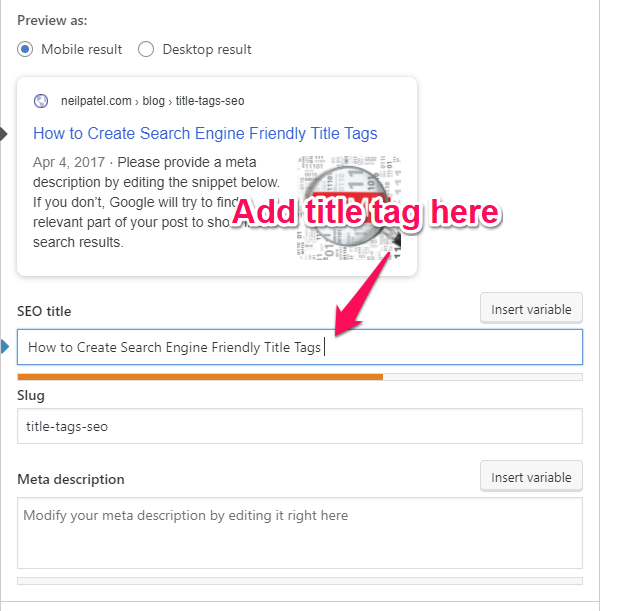
In the most basic terms, a canonical tag is an HTML snippet (rel=canonical). As I’ve touched on in the intro, you implement a canonical tag when you want to indicate to the search engines which is the original page. For example, you might have multiple versions of a page if you’re an e-commerce site owner or if you’ve got a mobile and desktop version of your website.

Now, if you wanted the search engines to prioritize the mobile pages, you’d add a self-referencing canonical tag to the mobile version to tell the search engine to index that page. This means that the URL attached to the rel=canonical is the page itself.

In other words, once you implement canonical tags, the search engines know which pages to dismiss and which ones to display in the SERPs.

Canonical tags are simple to add to your page by including rel=”canonical” in your header, but what does this do for your SEO?

How Do Canonical Tags Help SEO?

Canonical tags are an essential part of any SEO strategy, enabling your site to rank higher. There are several ways they do this:

First, they tell search engines which URL version is the “correct” one, preventing duplicate content from ranking lower and ensuring you get the right page indexed.

Further, a canonical tag assists your SEO efforts in other ways, like:

Syndicated content: Canonical tags allow you to better manage syndicated content. When you syndicate content from one site to another, it’s important to ensure the search engines still reference the original content. Just add the rel=”canonical” tag to your header to indicate which page you want to index.

Improved rankings: When you have multiple versions of a webpage or article, adding a canonical indicates to the search engine you want people to go to that specific page, enhancing the original ranking.

Tracking: canonical tags enable you to track traffic from different sources. For example, if you have two URL versions, say, one with www and one without. This can help you determine which version generates more traffic and optimize your site accordingly.

Regular search engine crawling: Here’s what Google has to say about crawling: “Google will choose one URL as the canonical [main] version and crawl that, and all other URLs will be considered duplicate URLs and crawled less often.” In other words, if you don’t want Google to make the choice for you, then add a canonical tag.

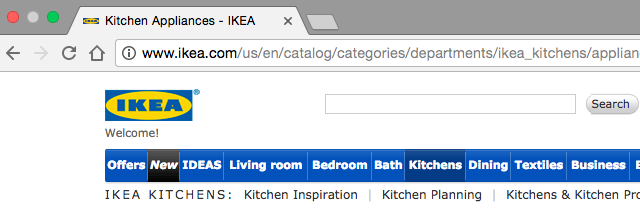
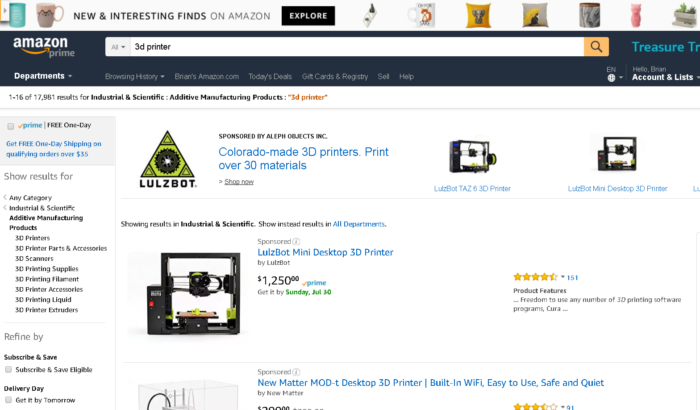
Filtering for e-commerce stores: It’s not uncommon for e-commerce stores to have large volumes of duplicate content that might look like this:

Example of duplicate content in ecommerce stores.

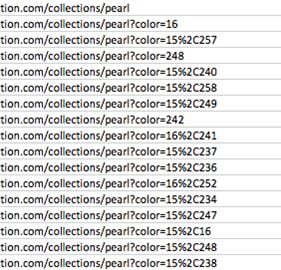
To ensure the search engines index your preferred e-commerce page, you would include a canonical tag.

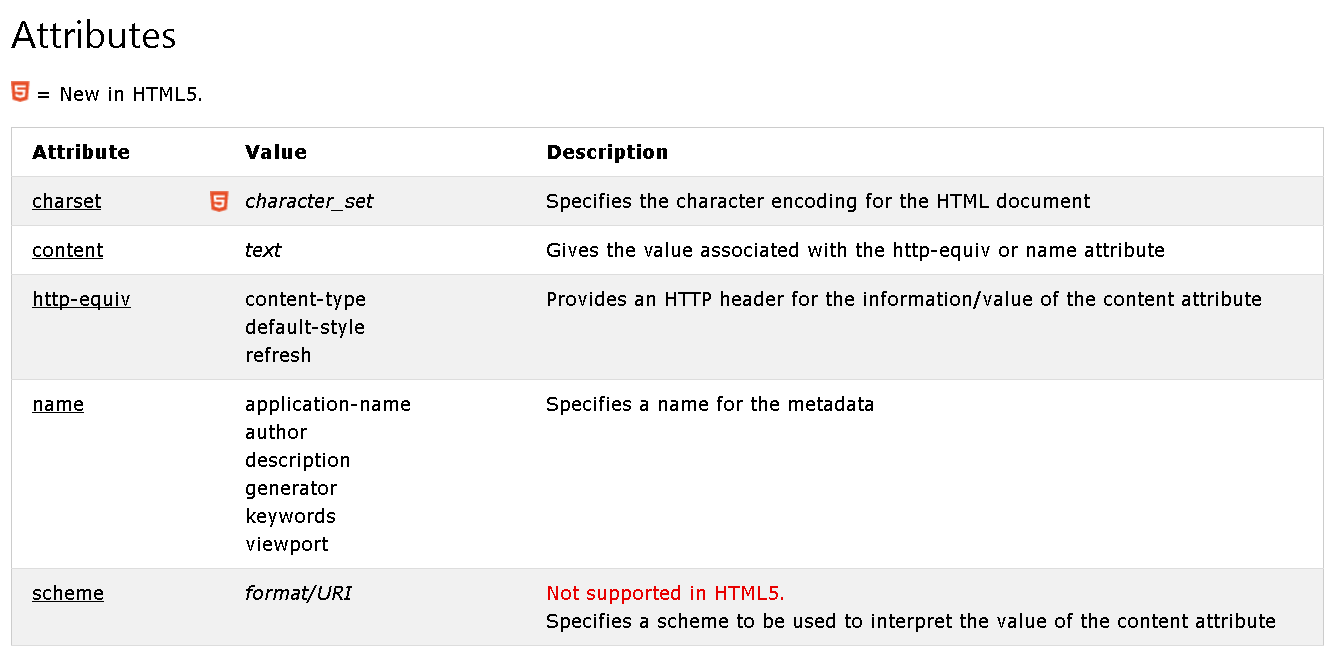
What Does A Canonical Tag Do?

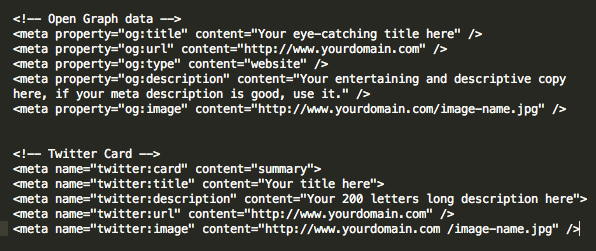
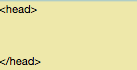
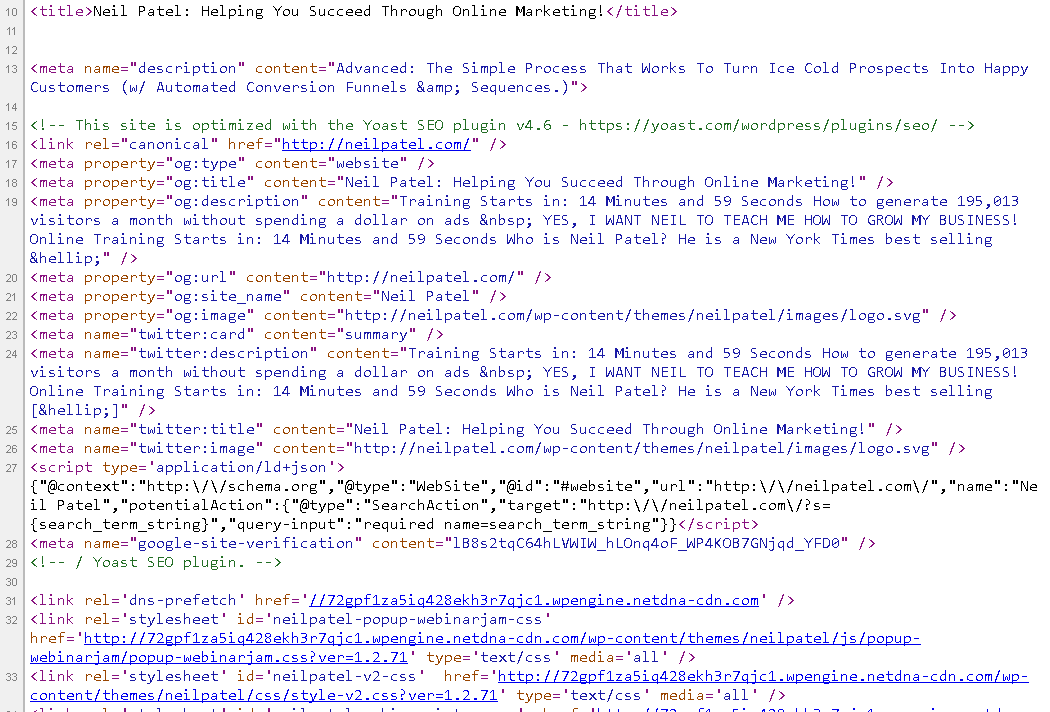
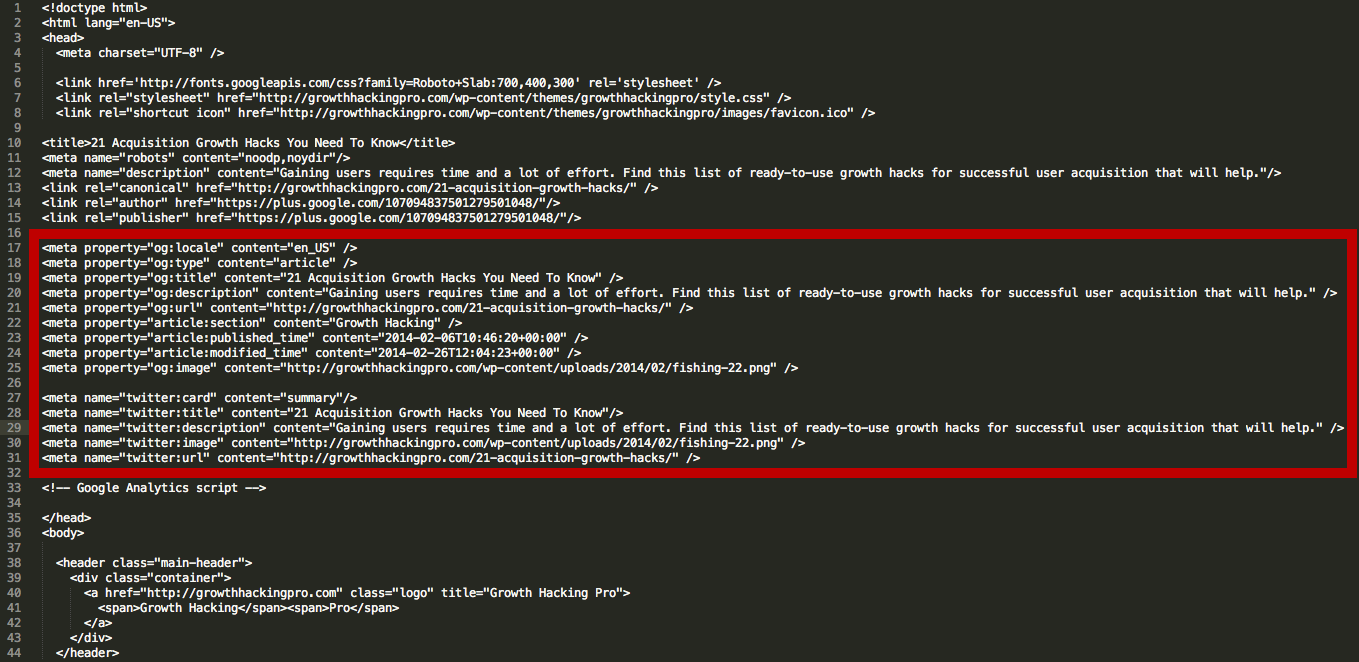
As I’ve explained, canonical tags can tell search engines which version of a URL you want them to index. They’re also known as “rel canonical” or a ‘canonical link element.’ You add a canonical tag to the <head> section of your page, which looks like this:

What a canonical tag looks like.
Examples of canonical tags.

When you use a canonical tag to tell the search engine which version you prefer, it helps keep your site’s SEO consistent and can also help prevent duplicate content issues.

What Are The Issues With Duplicate Content?

First, let’s explain what duplicate content is.

We can define duplicate content as identical or similar content appearing on multiple pages of your site. Several factors can contribute to duplication, such as reprinting an article from another site, copying and pasting text from one page to another, or using multiple URLs for the same page.

Another common cause is unintentional duplication.

This can happen when two or more pages have similar titles and metadata, and it can occur when site owners syndicate their content to other websites or use software to generate pages automatically.

A further reason for duplicate content is intentional duplication. Sometimes site owners create multiple versions of a page in an attempt to manipulate search engine rankings. They may also copy and paste content from other websites to increase traffic or improve their SEO ranking – which is basically black hat SEO.

When multiple pages on a website contain the same or very similar content, it can confuse search engines and dilute the ranking power of those pages, which stresses the importance of adding a canonical tag.

How To Check for Duplicate Content

There are a few ways to identify duplicate content on your website.

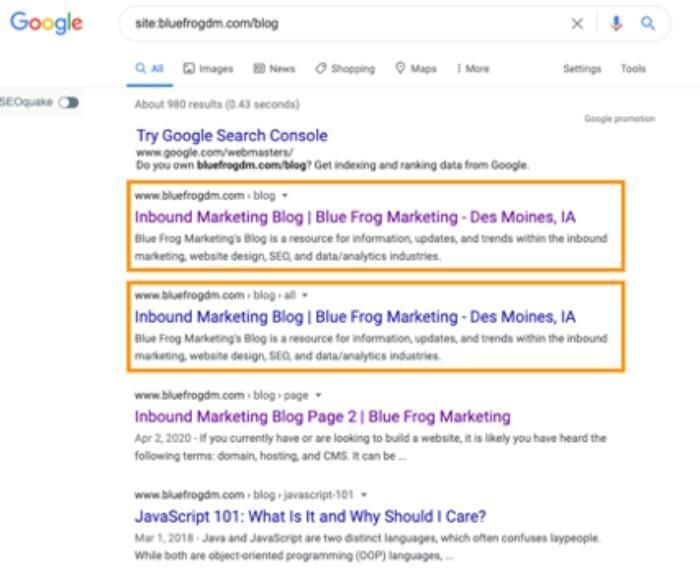
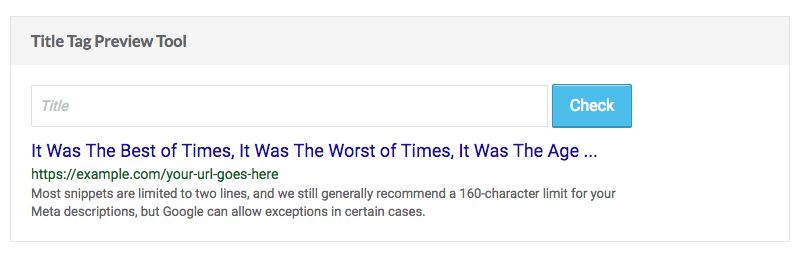
The simplest is to do a Google site search; this would look like site:yourdomain.com, and see if any results show up that you didn’t expect. If you have an XML sitemap, you can also use Google’s “site:www.yoursite.com” operator to check for duplicate pages.

Other methods to check for duplicate content are:

  • Checking your site’s index status in Google Search Console. Compare the number of pages indexed in Google with the number of pages you think should be indexed. The results may look something like this:
How to check for duplicate content.
  • Using the “site:example.com” search operator to find pages that are only on your site and not on other websites.
  • Spotting duplicate content by using a tool like Copyscape or Siteliner. These tools will scan your website and report any instances of copied text.
  • You could also use a tool like Screaming Frog to crawl your website.

How To Implement Canonical Tags

There are two ways to add canonical tags to your pages: manually or with a plugin. If you’re adding them manually, you need to add a <link> tag to the <head> section of each page that you want to canonize (make your main/original page).

If you’re using a plugin, many platforms give a simple way to add canonical tags to your pages. Below are some of the options for adding tags to various main hosting options.

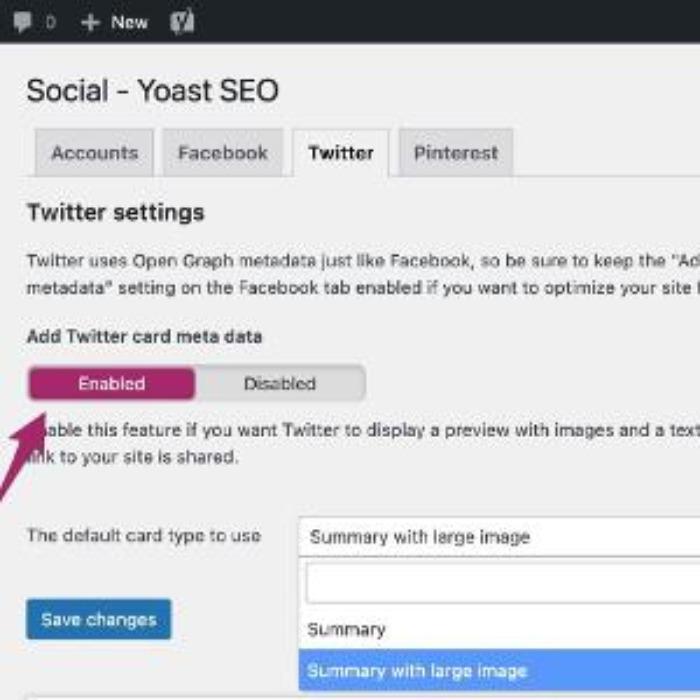
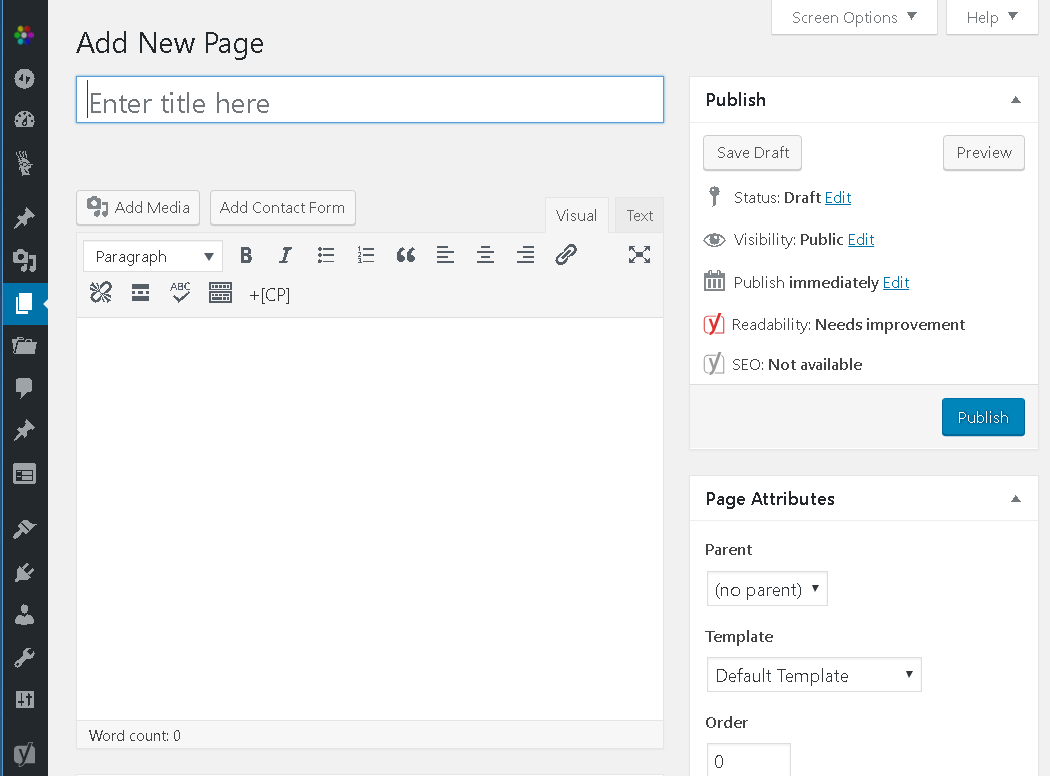
Implementing Canonical Tags in WordPress

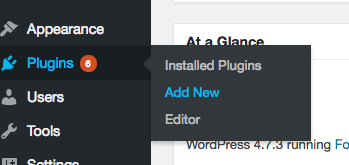
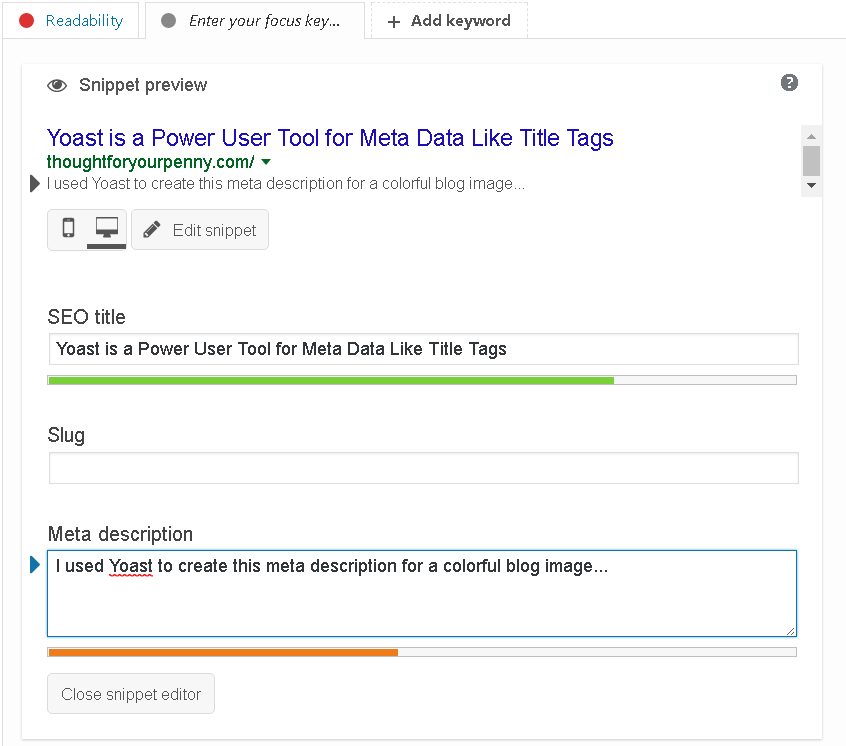
If you’re using WordPress, the easiest way to add a canonical tag is with a plugin. WordPress users can install it by:

  • Going to the installation page on WordPress and selecting ‘Add new’
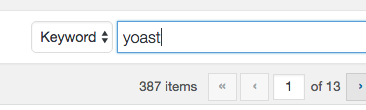
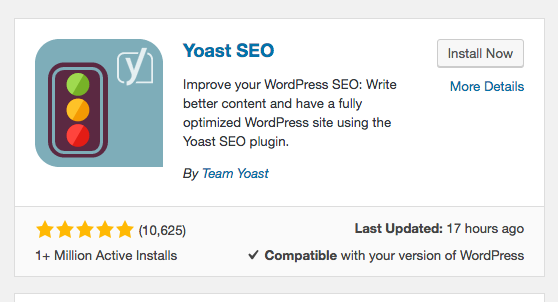
  • Look for the Yoast SEO plugin
  • Activate Yoast
  • Then go to the ‘after activation’ option

You can also install canonical tags manually by adding some PHP code to the header, which looks like this:

Implementing canonical tags in wordpress.

Implementing Canonical Tags in Shopify

Shopify has a guide explaining how to add a canonical tag url.

Or to add canonical tags manually, just:

  • Go to your admin panel
  • Find the ‘sales channels’ option, go to ‘online store’ and click ‘themes’
  • Select the theme to edit, select ‘actions’ then ‘edit code’
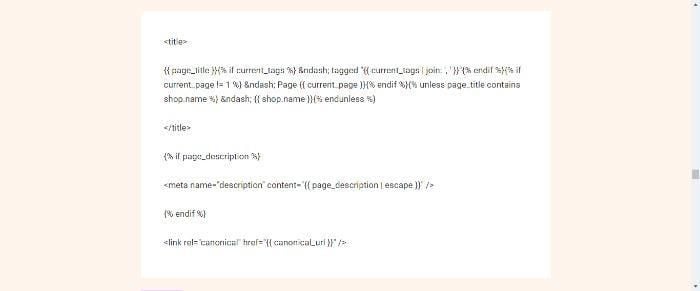
  • Go to layout and choose theme.liquid
  • Insert code into closing ‘head’ tag
  • Enter the code, which looks like this:
Implementing canonical tags in shopify.

Implementing Canonical Tags in Squarespace

Fortunately, canonical tags are easy to implement on Squarespace websites. In the Squarespace editor, all you need to do is:

  • Go to ‘Pages’
  • Choose the gears option
  • Select ‘advanced’ from the menu
  • Follow the directions from there.

Best Practices For Implementing Canonical Tags

With canonical tags, there are a few best practices to keep in mind. First, always use a canonical tag when you have multiple page versions.

Second, make sure the canonical tag points to the correct page. If you accidentally point to the wrong page, it can result in lower rankings for that page. :

Also:

  • Use canonical tags on all duplicate pages; this ensures that the search engines only index one version of each page.
  • Implement absolute URLs when specifying the canonical tag to enable search engines to index pages correctly.
  • Only specify one rel=”canonical” tag per page.

One good idea is to make sure that you audit your canonical tags to help identify any potential implementation issues and correct them. SiteChecker offers a free trial of a canonical URL checker.

Finally, only use canonical tags when necessary; too many canonicals can hurt your site’s ranking potential.

FAQs

What is An Example of a Canonical Tag?

A canonical tag looks like this: example.com?dress=1234 and example.com/dresses/1234 (Source: Google).

Is a Canonical Tag Necessary? 

Some people argue that canonical tags are unnecessary, as Google has stated that they do not use them as a ranking factor. However, if you want to avoid duplication issues and have a preferred page you want to direct traffic to, then a canonical tag may be the way to go. 

Conclusion

A canonical tag is important for helping search engines understand the relationship between pages on a website. Canonical tags can prevent duplicate content issues and enhance your SEO efforts, allowing your preferred pages to get indexed by search engines.

There are significant benefits to adding canonical tags, such as improved web page performance, more regular crawling, and easier tracking. They’re also highly beneficial for e-commerce site owners who often have multiple pages of duplicate content.

Although there are other methods you could use, a canonical tag is quick to implement, and major platforms like WordPress and Shopify have options to add plugins to simplify the task.

Do you use canonical tags? How have they helped you?

12 Essential Open Graph Meta Tags for Facebook and Twitter

Every marketer knows the phrase ‘content is king’, but that content is nothing without readers and followers.

These days, there’s one sure-fire way to get your content out to a broader audience and share your awesome new blog post: social media.

With a ready audience of millions, sites like Facebook and Twitter are some of the best ways of getting the word out. However, if you want to optimize that outreach potential, there’s a super-easy way to do it: open graph tags (OPGs).

Not heard of the open graph protocol behind OPGs? Then let me explain what are they, why do they matter, and — most importantly — how do you use them?

What Is Open Graph and Why Was It Created?

Facebook introduced Open Graph in 2010 to promote integration between Facebook and other websites by allowing posts to become rich objects with the same functionality as other Facebook objects.

Put simply, it helps optimize Facebook posts by providing more control over how information travels from a third-party website to Facebook when a page is shared (or liked, etc.).

To make this possible, information is sent via Open Graph tags in the <head> part of the website’s code.

Other social media sites are also taking advantage of social meta tags. For instance, Twitter and Linkedin recognize Open Graph tags; Twitter has its own meta tags for Twitter Cards, but if Twitter robots cannot find any, it uses OGP tags instead.

Neil Patel looking at the camera.

See How My Agency Can Drive Massive Amounts of Traffic to Your Website

  • SEO – unlock massive amounts of SEO traffic. See real results.
  • Content Marketing – our team creates epic content that will get shared, get links, and attract traffic.
  • Paid media – effective paid strategies with clear ROI.

BOOK A CALL

Why Marketers Should Care About OGP Tags

OGP tags are vital for marketers because they help ensure that when a user shares a link to your content on social media, the correct information is automatically populated. This can help increase engagement and help potential customers learn more about your brand or product.

Additionally, marketers should care about OPG tags because social media sites are the primary drivers of most web traffic. Consequently, the ability to harness the power of social meta tags is a vital skill for today’s marketers.

Also, using OGP tags can help you track how your content is performing on social media, enabling you to adapt your sharing strategy.

However, most notably: open graph tags can have a massive impact on conversions and click-through rates by solving common issues.

For instance, have you ever shared a link on Facebook only to find the thumbnail was missing, or there was a different picture than you expected?

Knowing just a little about OGP tags can help you tackle these problems and improve your social media marketing.

There’s one thing they won’t do, though, and that’s influence your on-page SEO. However, the boost you can get from the extra reach on social media means it’s worth looking into.

Now, let’s look at the most essential OGP tags for Facebook and how to optimize them for better sharing.

Understanding Facebook OGP Tags

As explained in the intro, OGP tags are crucial because they allow you to control how your content appears when it’s shared on sites like Facebook. The open graph tags let you control the title, description, and image in the post; it’s a great way to ensure your content looks amazing when you share it.

In addition:

  • Adding OGP tags ensures that you use the correct image and description, which can help improve click-through rate, while enabling you to add specific details such as whether it’s a movie, book, or product.
  • Using OGP tags allows you to track how your content is performing on Facebook. When someone shares one of your articles on the site, the OG tags send traffic data back to Facebook. This data then lets you see which articles are getting the most engagement, and which need improvement.
  • Including OGP tags ensures you use the correct image and description when sharing your links on Facebook, which can help improve click-through rates.
  • Adding OGP tags is easy, and most content management systems have plugins or extensions to simplify the process.

Facebook has several open graph tag types. You can use OGP tags to specify things like the site’s name, the image used as the thumbnail on Facebook, and the description that will appear when someone shares your page.

In this section, I cover the different types, and then explain how to use them.

An image of the inside of a car with arrows pointing to different types of ogp tags.
An example of various OGP tags being used in a post from VentureBeat.

og:title

The og: title is how you define your content’s title. It serves a similar purpose as the traditional meta title tag in your code. In fact, if Facebook doesn’t find the og:title tag on your page, it uses the open graph tag title instead.

As Facebook explains, most content is shared as a URL. If you want control over the way your content looks on its site, you must add OGP tags.

In Facebook’s own words,

“Without these Open Graph tags, the Facebook Crawler uses internal heuristics to make a best guess about the title, description, and preview image for your content. Designate this info explicitly with Open Graph tags to ensure the highest quality posts on Facebook.”

To get the best from OGP, you also want to think about the way your text appears and its length.

Keep in mind that the text shown on a Facebook feed is bold and extremely eye-catching. It must be compelling, just like a good post title.

There is no limit on the number of characters, but it’s best to stay between 60 and 90. If your title is longer than 100 characters, Facebook will truncate it to only 88!

Example:

<meta property=”og:title” content=”Your eye-catching title here” />

og:url

When you share a link on Facebook, you can add Open Graph tags. These tags help Facebook display rich information about the link, such as an image, title, and description.

This is how you set the canonical URL for the page you are sharing. This means that you define one page to which all your shares go. It’s helpful if you have more than one URL for the same content (for example, using parameters). Important note: URL provided is not shown on the Facebook newsfeed, only the domain is visible.

Example:

<meta property=”og:url” content=”http://www.yourdomain.com” />

og:type

This is how you describe the kind of object you share: blog post, video, picture, or whatever. The list to choose from is long. Here are some examples:

Web-based:

  • website
  • article
  • blog

Entertainment:

  • book
  • game
  • movie
  • food

Place:

  • city
  • country

People:

  • actor
  • author
  • politician

Business:

  • company
  • hotel
  • restaurant

You can see the complete list of types here.

This tag is important if your page has a “Like” button and represents a real-life object (like a book or a movie). It determines if your content appears in a user’s interest section of her profile in the event they “Like” it.

In most cases, you will use the “website” value since what you are sharing is a link to a website. In fact, if you don’t define a type, Facebook will read it as “website” by default.

Example:

<meta property=”og:type” content=”website” />

og:description

This metadata descriptor is very similar to the meta description tag in HTML. This is where you describe your content, but instead of it showing on a search engine results page, it shows below the link title on Facebook.

However, unlike a regular meta description tag, it won’t affect your SEO, but it’s still a good idea to make it compelling to get people to click on it.

Og: description tags don’t limit you to a character count, but it’s best to use around 200 letters. In some cases, depending on a link/title/domain, Facebook can display up to 300 characters, but I suggest treating anything above 200 as something extra.

Example:

<meta property=” og:description” content=” Your entertaining and descriptive copy here, if your meta description is good, use it.”/>

og:image

This is the most interesting OGP tag for many marketers because a picture always helps content stand out. This is how you ensure that Facebook shows a particular thumbnail when you share your page, and it can be beneficial for your conversion rates.

Make sure you set the og:image you choose, otherwise, Facebook shows something stupid like an unwanted ad banner scraped from the page or nothing. You definitely don’t want that!

Here’s a few more pointers:

  • It’s important to remember that if your page is static and you don’t use any sort of content management system (CMS) (like WordPress), you need to change the og:image manually for each of your pages.
  • If you control your website with a CMS and you install the relevant plugin, the og:image tags are assigned automatically for each page. Look for the list of plugins further down.
  • The most frequently recommended resolution for an OG image is 1200 pixels x 627 pixels (1.91/1 ratio). At this size, your thumbnail will be big and stand out from the crowd. Just don’t exceed the 5MB size limit.
An example Facebook post used to represent og:image tags.
An example of the og:image OGP tag with the image rendered at full size.

If you use an image that is smaller than 400 pixels x 209 pixels, it will render as a much smaller thumbnail. It’s nowhere nearly as eye-catching.

An example facebook post showcasing a smaller thumbnail image as an example of thumbnail size.
An example of the og:image OGP tag with the image rendered at a smaller size.

Keep in mind that the picture you use as an Open Graph image can be different from what you have on your page.

Why wouldn’t you leverage that opportunity to stand out even more?

For example, if your title is good, but the picture you are using is not very exciting (not an infographic or a good-looking person, etc.), consider using an image with a good line or two of copy instead (see example below).

One thing you need to remember if you do this: place your text, or the most significant part of it, in the middle of the image. This matters because Facebook trims the sides of thumbnails.

An example facebook post showing where to use text in thumbnails.
An example of putting text in the most effective part of a thumbnail.

Example:

<meta property=”og:image” content=”http://www.yourdomain.com/image-name.jpg” />

For an easy way to add OPGs, there’s an online generator.

Advanced Facebook Open Graph Tags

The Open Graph tags above are the ones you need to know. However, you can use other, more advanced tags to provide even more in-depth specifications.

For example

  • og:locale – defines the language; American English is the default
  • og:site_name – if the page (object) you are sharing is part of a larger network
  • og:audio or og:video – to add additional audio or video files to your object
  • fb:app_id – for linking to a Facebook application (e.g., FB Comments) with the object

Check Your OGP Tags

Once you’ve set up your open graph tags, you need to check they’re working okay. To do this, you can use the Sharing Debugger to see how the information displays when you share your website content on Facebook, Messenger, and other places. Also, the Batch Invalidator will let you refresh this information for multiple URLs at the same time.

To use it, simply enter the URL of the page you’re having problems with and click Debug.

Facebook’s debugging tool has two beneficial functionalities.

First, when you type in the link you want to check, it returns any errors and suggestions for OG tags, if there are any. You can also check what the og:image looks like, your description, and so on.

Second, it clears the Facebook cache. Imagine this: you post a link to Facebook, but then you see a mistake in the thumbnail, so you go back to your site and adjust the OGP tags, and you post it again on Facebook.

Probably, nothing will happen. The thumbnail will stay the same. This is because of the cache. The Facebook Sharing Debugger will refresh the cache on your links after any adjustments, so remember to use it each time.

A screenshot of the backend of facebook's debugging tool.
The Facebook Debugging Tool.

Open Graph Tags for Twitter: Twitter Cards

If you’re not familiar with Twitter’s cards, they allow you to attach media files and add extra information to your tweets. This can be useful for increasing the visibility of your tweets and providing additional context for users who click through.

Although they’re not the same thing, Twitter’s cards use the same open graph protocol and it looks similar to OGP tags. Implementing these tags makes it much easier to create Twitter cards without duplication issues.

Like Facebook’s Open Graph tags, Twitter Cards let you stand out from the crowd of tweets. In short, they allow you to generate some additional content from your 140-character tweet.

This doesn’t show up on people’s feeds automatically, but it adds a little “View summary” button below the tweet.

You can use open graph tags to specify your content’s title, description, and image, and to determine your page’s content type and the audience you want to reach.

A screenshot of a tweet with the "view summary" button highlighted.
An example of open graph tags for Twitter.

When you click it:

In example of the different tpyes of open graph tags for twitter and what they look like.
An example of how title, description, and image tags are used on Twitter.

The Twitter card is tempting to click and provides a handy summary of the shared page. However, surprisingly, not many sites take advantage of these tags, giving you a great opportunity to make your tweets stand out from other feeds.

Installing these cards isn’t difficult, and there’s a quick workaround, even if you’re not tech-savvy. Just install a WordPress plugin.

WordPress SEO by Yoast does the job perfectly well.

To activate Twitter cards in Yoast:

A screenshot of WordPress SEO by Yoast.
Showcasing how to activate Twitter cards in Yoast.
  • Log into WordPress
  • Go to your dashboard,
  • Choose the ‘SEO’ option from the list.
  • Click on SEO and choose social. Click.
  • Go to accounts and click on your Twitter username
  • Select the ‘Twitter’ tab by clicking
  • Scroll down to ‘Add Twitter Card Meta Data’
  • Click ‘enabled’
  • Finally, save any changes.

If the above method isn’t an option, ask your web developer and give them the ready-to-implement Twitter Card tags. Here’s how you’ll make them.

twitter: card

This required tag works in a similar way to og:type. It describes the type of content you are sharing. There are seven options: summary, photo, video, product, app, gallery, and “large version” summary.

Depending on the type of content you choose, the link at the bottom of your tweet changes. You can get “View summary” for summaries, “View photo” for photos, etc. If this tag is not set, Twitter reads your link as a “Summary” by default.

Example:

<meta name=”twitter:card” content=”summary” />

twitter:title

This basically does the same thing as its OG counterpart. You specify the title for your article that will show up in bold. It’s smart to avoid repeating the same text you have in your tweet. Make the most of the space provided and let the two pieces of copy play on each other to reinforce the message. Use up to 70 characters.

Example:

<meta name=”twitter:title” content=”Your title here” />

twitter:description

Use this tag to write a descriptive lead to the page you are sharing. As with Open Graph tags, don’t focus on keywords because they won’t matter for your SEO. Create compelling copy that nicely complements your tweet and the title. Twitter limits this part to 200 characters.

Example:

<meta name=”twitter:description” content=”Your 200-character description here” />

twitter:url

This sets the canonical URL for the content you are sharing. (For more information, review the description for the equivalent Facebook Open Graph tag above.)

Example:

<meta name=”twitter:url” content=”http://www.yourdomain.com” />

twitter:image

Yes, you guessed it. This is how you set the picture to go with your tweet. Twitter allows two options, a card with a smaller or a larger image.

You decide which one you want in the type tag. If you go for the large option, make sure it has a resolution of at least 280x150px and that the file size is not more than 1MB. You can consider using the same trick as the Facebook thumbnail: add some text to the image to boost the message.

Example:

<meta name=”twitter:image” content=”http://www.yourdomain.com /image-name.jpg” />

Request Approval from Twitter

Adding cards to your tweets is easy – all you need to do is include some extra code to the end of your tweet. The code tells Twitter which card type you want to use and how you wish the content to look.

There are several types of Twitter Cards, so you can choose the one that best suits your needs.

However, keep in mind that, before you can fully benefit from Twitter Cards, you need to request approval for your page from Twitter.

Fortunately, this only takes about 15 minutes and can be done easily using their Card Validator.

To get started,

  • Select the type of card you wish to use.
  • Add your meta tags
  • Check the URL with Twitter’s validator tool.
  • Test in the validator or get approval for your card, then tweet the URL to see your card displayed. https://developer.twitter.com/en/docs/twitter-for-websites/cards/overview/abouts-cards

Once you get approval, Card Validator serves the same purpose as the Facebook Sharing Debugger, allowing you to check your links before committing.

Twitter Card Plugins

Like with Facebook, plenty of plugins are available for implementing Twitter Cards. Here are a few:

How to Implement Open Graph Tags?

How do you implement OGP tags? Basically, they belong to the <head> part of your page’s HTML. If you don’t manage the code, you’ll need to ask your web developer for help. You can prepare the whole package yourself using the tips above to save their valuable time.

If you are using WordPress, just install one of the plugins that neatly implements the code for you. As I’ve explained, I like to use WordPress SEO by Yoast, but there are some other free tools you can use, including:

A screenshot of Yoast's social tab.
How to implement open graph tags through Yoast.

Here are other OG plugins/extensions/add-ons for:

Like Facebook. Twitter offers a tool to validate your OGP tags, Twitter Card Validator is a tool that allows you to test and preview how your tweets will appear when they are shared on other websites. To use the validator, enter the URL of the website on which you want to share your tweet and click “validate.”

The validator will show you a preview of how your tweet will appear on the website, and display the title, description, and image.

FAQs

What Is Open Graph, and why was it created?

Open Graph Protocol (OGP) is a set of tags used on websites to define the structure of a web page so that it can be more easily shared on social media platforms. OGP tags allow web admins to control how their content appears when it is shared on social media sites like Facebook and LinkedIn.

How do you find Open Graph tags?

You find open graph in the webpage’s <Head> section.

What is SEO OGP?

This is a type of metadata which Facebook introduced back in 2010. It allows semantic integration into Facebook’s HTML, allowing website owners to show Facebook how they would like Facebook to index their sites. https://www.oreilly.com/library/view/facebook-application-development/9780470768730/ch006-sec012.html

How do you check OGP tags?

There are free tools available to check your OGP Tags. Sites like Facebook also offer a validator so that you can check your tags for errors.

Conclusion

The final code for both Facebook and Twitter should look more-or-less like this:

A line of code showing what optimized Twitter and Facebook posts should look like.
Optimized code for both Facebook and Twitter posts.

It might seem a bit confusing, but luckily several tools make the process easier — you don’t need to know how to code.

There are three main types of Open Graph meta tags: og:title, og:image, and og:description, and taking the effort to implement them has distinct advantages, including better click-throughs and engagement, which can all lead to added conversions. The additional measures of adding Open graph also increase visibility.

However, despite these advantages, it’s surprising how few people optimize these tags. It’s worth doing because it helps you stand out and draw more clicks and views, and it can even help improve your SEO —all things that lead to more profit.

Have you implemented open graph meta tags? How has it impacted your site?

How to Create Search Engine Friendly Title Tags

One of the most frustrating things about SEO is getting everything to work together as it should.

If you’ve done SEO, you know exactly what I’m talking about. There are so many little elements in SEO that sometimes it seems impossible for everything to work out perfectly.

Even today! I know I talk a lot about how “smart” the search algorithms are and how it’s virtually impossible to game the system.

However, there are still a lot of elements you need to pay attention to for your SEO to succeed.

Case in point: Page title tags.

Before you yawn and find some more sexy SEO topic to jam on, hear me out.

Title tags are one of the cornerstones of SEO. They always have been, and as far as we can tell, they always will be.

Moz explains, “Title tags are the second most important on-page factor for SEO, after content.”

When it comes to low effort/big results, title tags take the cake. It’s such a small element, but has such a massive impact!

You know it’s important to create eye-catching headlines, but optimizing your titles also matters for SEO.

That’s where page title tags come in. They’re how your titles are relayed to search engines, and they’re an important part of any SEO strategy.

This is one of the few times when you need to write for both people and search engines, and that can be tricky. (Especially with headlines.)

In short, you have to create a clickable headline that also makes search engines happy.

Here’s the challenge: People have to like it. Search engines have to like it. Yikes!

Does that sound difficult?

Yes, it can be if you don’t know what to do. That’s why I’m going to break down my process step-by-step.

We’ll go through that process, but first, let’s look at why title tags are important for SEO.

What are Page Title Tags?

If you’ve ever used a search engine before (and I’m guessing you have), you’ve seen a page title tag whether you’ve realized it or not.

It’s simply the headline on the SERP (search engine results page).

For example, if you Google “kitchen appliances,” you’ll see that one of the top results is from IKEA.

In this case, the page title tag is “Kitchen Appliances – IKEA.”

This is what both people and search engines will see as the title of your page. Often, this is the first thing they’ll see, and that’s a big reason why it’s so crucial to put time and effort into your title tags.

The point you need to remember is this: real people are reading your title tag.

They are going to respond to it. They will judge it. They will be compelled by it. They will be put off by it. They will learn from it.

Basically, the title tag is your page’s message to the world!

Title tags work with the meta description (the text below the title). In the case of the IKEA search result above, this is the meta description — a sentence or phrase that adds more information about the page.

I’ve written about meta descriptions before, but title tags are even more important.

Both the title and the meta description together give a brief idea of what your content is about, but the title tag stands out more.

There are two big reasons why page title tags are so important.

First, if you have a clear title that’s relevant to your page, both humans and search engines will see that as a sign of a good page.

If your title tag isn’t optimized, then people could skip right over your content, and search engines may determine that your page isn’t as good as it could be.

A second reason why title tags are important is they show up in browser tabs:

title tags guide show up in search bars

So when someone wants to find your page out of all their browser tabs, they’ll look for your title tag.

Title tags are often what people will see if your page is shared on social media. For example, here’s an example of a title tag on Facebook:

example of a title tag

Can you see why title tags are so important? A good title tag means maximum visibility, while a bad title tag can sink your page.

There are three important steps to take to optimize your title tags.

  1. make sure your headlines make for good title tags
  2. create the title tag
  3. make sure the title tag is optimized for SEO

Let’s dive into all three.

Step 1: Write Your Title Tag

You might be wondering how writing a title tag is any different from writing a headline.

In some cases, your headline and title tag will be the same exact title. But there are some cases where they won’t be.

Check out this SERP result from Copyblogger:

copyblogger example of a title tag

It seems like the title for the page would be “How Content Marketing Builds Your Business,” right?

But when you go to the page, you’ll see a different title:

copyblogger title tag example

The title shown on the page is longer and more descriptive.

So why would Copyblogger do this? It’s most likely because the shorter title tag looks better on the SERP, and it takes less time to read.

The actual title that you see on the page goes into more detail, and that’s probably why they used it. They get the benefits of having both a streamlined title tag and a descriptive page title.

It’s a sneaky and useful tactic that’s the sort of SEO stuff I love.

With that in mind, here’s how to write a great title tag.

There are a few elements of title tags:

Title Tags Should Be Short

Shorter titles are easier for people to read and for search engines to crawl.

But there’s a better reason for shorter title tags.

If your title tag is too long, search engines will cut off your title with an ellipsis (…):

title tag example

Ideally, your readers and search engines should be able to see the entire title tag so they get the best idea of what the content is about.

Google typically shows no more than 60 characters of the title tag. So if your title tag is 60 characters or less, you can generally expect that the entire title will show.

If you want to make sure, Moz has a handy preview tool:

title tag tool moz

This is a great feature that I recommend you use. Remember, keep it short if possible.

Title Tags Should Contain Your Main Keyword

You probably expected to see something about keywords in an article about SEO.

For best results, try to put your focus keyword as close to the beginning of your title as possible. That’s so search engines (and people) will see the keyword early on.

Here’s a title tag with the keyword right up front:

title tag example

Contrast that with this result that has the keyword closer to the end of the title tag:

title tag example

One tip: Make sure the keyword placement is organic. It’s preferable that the keyword is close to the beginning, but it’s not necessary for great SEO.

Title Tags Should Describe a Benefit

Much like a headline, a title tag needs to communicate a benefit to stand out.

This is one of many reasons Google warns against keyword stuffing and boilerplate titles.

Your title tags are representatives of your pages, and you want people and search engines to know that your pages have unique, valuable content.

Make sure your title tag is related to your content. It should read naturally and grab the reader’s attention.

Keep in mind, you’re not trying to trick people. All you need to do is clearly explain the benefit of clicking on the page.

Often, the “benefit” is nothing more than telling them what the page is about! At this point, you’re not trying to sell anything. You’re simply giving them information.

Here’s an example that clearly expresses a benefit (ignore the jargon-filled, not-so-great meta description).

title tag example laptops

On the other hand, this title tag is plain and doesn’t explicitly state a benefit (they did a nice job with the meta description, though).

title tag for seo example amazon

(Sure, Amazon probably doesn’t need to state a benefit, but your site probably does.)

Stating a benefit probably won’t do anything for search engines, but it goes a long way for human users who come across your site with a search.

Step 2: Create Your Title Tag

Once you have your page title tag written, you need to set it as the title for your page.

The way you’ll do this will depend on what powers your website.

If you have a custom site, you’ll need to edit the HTML directly. (And it’s super easy to do.)

If you use WordPress, it’s also super easy.

If you use another CMS or host, it might look a little bit different for you.

Let’s take a look at each of these three different cases and how to create a title tag for each scenario.

Case 1: You Have a Custom Site Not Hosted on a CMS

If your site isn’t hosted on a CMS, you can edit your HTML to add titles.

First, you access the HTML for your specific page. I recommend checking with your hosting service on how to do this.

Once you’ve found the editable HTML, make sure you’re between the <head> tags.

how to add title tag to custom site example

(Note: This is an example code using Editpad.org. Your code will probably look different, and there might be extra code here. That’s okay––just make sure you’re only between the <head> tags and not any others.)

To create the title, use <title> tags. For example:

how to add title tag to custom site example  HTML

That’s it! Save your code, and your title will now show up correctly.

Case 2: You Use WordPress

If you use WordPress, you’ll be happy to know there’s a super simple solution — it’s actually way easier than editing the HTML.

In fact, this method uses something you’re probably already using: the well-loved Yoast SEO plugin.

This is a powerful plugin that you can get a lot out of. And it’s great for editing your title tags.

First, if you don’t have Yoast installed, go to Plugins > Add New.

add yoast plugin for title tags

Type “Yoast” into the plugin search bar.

type yoast title tag guide

Look for “Yoast SEO.”

add yoast SEO to WordPress - title tag guide

Click “Install Now.”

Next, click “Activate.”

Now the plugin is up and running.

To edit the title tag for a page or post, navigate to that content and open the editor.

Scroll down to the bottom of your post or page, and you’ll see the Yoast box, where you can edit the title tag and meta description.

It’ll also give you a nice preview of both your title and meta description:

where to add title tag in Yoast

If your title tag (or meta description) turns out to display differently on the actual SERPs, you can always go back and edit it in this section.

Case 3: You Don’t Have a Custom Site or a WordPress Site

I know not all of you fall under these categories.

You might use a completely different kind of CMS, or your web host might have a different setup.

In those cases, I recommend contacting your CMS company or web host to find out how to access your HTML to edit your page title tags.

This is really a case-by-case scenario, so it will probably look different for a lot of you. However, you should be able to get an answer with a quick email to your web host’s support email.

So far, you’re two-thirds of the way done! Now you just need to make sure your title tag is the most SEO-friendly it can be.

Step 3: How to Optimize Your Title Tag for SEO

We’ve talked a little bit about this already, but there are a few more steps you can take to make sure your title tag is optimized.

This is the step that most people miss entirely!

They think, “Yay. I’m done with my title tag!” But they forget that one of the primary methods of marketing and promotion is through social sharing!

Here are my best tips for optimizing your title tags for social.

Use Your Brand Wisely

The title tag can be a great place to include your brand, but if you overdo it, you could face some consequences.

Google suggests using your homepage title tag to include the most branding. Their example: “ExampleSocialSite, a place for people to meet and mingle.”

For most of your pages, adding your brand to the end of the title tag will suffice (if there’s room, that is).

Here’s how I do that:

title tag example neil patel

Prevent Search Engines from Rewriting Your Title Tags

You read that right: Sometimes Google will rewrite your title tags.

It’s crazy, I know! But why the heck would this happen?

According to Silkstream, “Google will automatically change how your title is displayed in the SERPs if their algorithm is under the impression that the page title doesn’t accurately represent the content on that page.”

So if your title tags don’t look good to Google, they’ll consider other factors, including:

Take a look at this title tag:

title tag example rewrite

If you go to the homepage and view the source code (right-click and select “View Source” or “View Page Source”), you’ll see the company set the title to be something else:

title tag example source code

Google rewrote it because they felt their revised title tag would help people more than the original.

The good news: If you follow the steps outlined in this article, Google should keep your title tags as they are.

If you do see your title tags showing up differently, revisit them and try to identify how you can further optimize them.

Consider Making Your H1 Page Heading Different From the Title Tag

This is exactly like the Copyblogger example from earlier.

You can use two different sets of keywords in your title tag and H1, which organically enhances your SEO. Search engines will count the title tag as the “heading.” (Just make sure it’s optimized.)

Avoid Duplicate Title Tags

Google explicitly says that “it’s important to have distinct, descriptive titles for each page on your site.” So don’t copy and paste your title tags.

If you’ve done everything so far, you should now have an optimized title tag! Finalize it and send it out into the world.

Title Tag Frequently Asked Questions

What are title tags and why do they matter for SEO?

Title tags are the title of a page users see in the search results. They serve as a first impression and can encourage — or deter– people from clicking on your pages.

What’s the difference between title tags and meta descriptions?

Title tags are shorter and appear first in the SERPs.

How do you write a good title tag?

Pay attention to the length, use the main keyword the page targets, and explain what benefit the user will get by clicking.

How long should title tags be?

Between 50 and 50 characters. Any longer than that and Google may truncate your title.

How many keywords should be in my title tags?

Generally just one. You can add a second if it is closely related and makes sense. Don’t keyword stuff; the goal of the title tag is to explain what users can expect if they click.

Title Tag Conclusion

I know first-hand that SEO can be a headache., but it doesn’t have to be.

I’m all about demystifying SEO because I know it’s something anyone can do. Even if you’re a technophobe, you can do this!

It doesn’t take years of experience in digital marketing to get SEO right. You just have to learn the ropes and get used to it.

For example, creating page title tags is pretty simple. It might seem complicated at first, but once you take a peek behind the scenes, you see how easy it is.

If you’re not currently leveraging the power of optimized title tags, use this article to start doing that. It can be a game-changer and help your visibility on the SERPs.

Best of all, it only takes a few minutes.

What tips do you have for using title tags for maximum SEO power?

What Are Meta Tags?

Let’s talk about meta tags — what they are, why they matter, and how to do them better.

First things first — what made you click on this article to read it?

Maybe the title caught your eye, or perhaps it was the short blurb you saw.

You might have clicked simply because this article comes from a source you trust.

If you found this article via a search engine, though, there’s a good chance you found and clicked this article because of meta tags.

Meta tags are the foundation of SEO, and the first thing you’ll find yourself setting up when building a web page.

Without meta tags, you can’t reach readers organically.

It doesn’t take much time to generate meta tags, but it’s more important than you might think.

That’s because 93% of all online experiences begin with a search engine.

Search Engine Optimization statistics for 2017 why meta tags matter

This is why so many online marketers are so focused on getting SEO right.

Organic search traffic is the holy grail of SEO, so it can’t be ignored.

What Are Meta Tags?

Your content needs to be readable and appealing to users on search engines.

There’s a very specific syntax needed.

It’s similar to how bookstores and libraries organize their archives of books — and that’s what meta tags are, essentially.

What are Meta Tags? 

Meta tags are a type of HTML tag that provides search engines with information about a website page.

Let’s take a look at the basic elements.

Neil Patel Digital Marketing

The title and description tags make up almost the entire entry.

If not for these meta tags, all you’d see in Google SERPs would be my URL.

Neil Patel Digital Marketing Tags

Title and description tags are the two most-used tags for SEO purposes, but SEO isn’t the only part of digital marketing.

Advanced digital marketing requires the use of even more tags that improve page rank and overall user experience.

Just like this search result, you’ll soon find out that these tags control how your entire digital presence is viewed and navigated.

Machines can read URLs just fine. If I wrote for machines, my website would look like this:

Neil Patel Source Code 1 | What Are Meta Tags?

Google prioritizes certain tags because they provide context for people.

I built my website for people as well, so it looks like this:

Neil Patel Website what are meta tags and why do they matter

This polish is what marketing is all about.

In this blog post, we will explore meta tags and see how they affect your overall digital marketing efforts.

While simple, the devil is in the details, and every detail counts.

How Meta Tags Affect Brand Image and Click-Through Rates

You absolutely can judge a book by its cover. It’s what covers are designed for.

Your title and meta description tag create the cover for your web page. They’re your first impression on most visitors.

It’s not just about search engines, but how we view the Internet.

Reddit is a basic link-aggregation site that takes away all the bells and whistles.

Reddit depends on the title and image to entice conversations and clicks.

Reddit | What Are Meta Tags?

Using meta tags correctly is like using the correct format for a business email.

Sure, you can put whatever you like out there, but there’s a level of professionalism that’s expected at some point.

Even Amazon will only give you a picture, title, and short description to make your point.

amazon meta tag example

Think of these tags as your elevator pitch.

You’re given about as much space as a Tweet to sell your entire brand and product.

Which means you need to nail it.

You can’t just call in this detail and polish everything else. If you do, nobody will ever see the rest of what you polished.

We already know how meta tags affect SEO, but that’s not the only element.

Meta tags will make your email marketing and marketing automation efforts easier by providing information for emailed links.

Tags are a crucial element that determines what my automated social media posts look like.

Neil Patel Twitter 2 meta tags exxample

When other bloggers, YouTubers, and social media influencers (and micro-influencers) share your content, tags make it easier.

Think of meta tags as the packaging for your product.

If your packaging isn’t spot-on, nobody will ever buy your product, no matter how great it is!

So what are some best practices to implement for tags?

Meta Tag Best Practices

There are a TON of different HTML tags that can be used on a web page. We’re only going to focus on a handful of significant tags.

We’ll start with the one that might have brought you here today.

1. Title Tags

It’s not technically a meta tag, but it shows up in the header and is used as one.

As of July 2017, the character limits for title tags in Google search results are 78 on mobile devices and 70 on a desktop.

However, that doesn’t necessarily mean you should use all those characters, and 60 is the generally recommended limit.

Long-tail keywords make a difference.

Here are the top meta titles in the SERPs for “How to make content marketing effective.”

Content Marketing meta tag examples

By adding the year, we get an entirely new set of results for “how to make content marketing effective 2017.”

Some users will want basic information, while others will want the most current.

Content Marketing meta tag titles examples

By adjusting our title tag, we can affect which of these searches we rank for.

Ultimately, the goal is to hit both, but that’s not always feasible.

Make sure your keyword is in your title, or you’ll find your articles buried in search results.

For example, when I search for the “best tacos in Tucson,” some restaurants are on page 10 below, even Del Taco.

That’s a wasted opportunity for that taco capital of the country!

Tucson Tacos meta tags title examples

These small businesses could greatly improve their search results, sales, and ROI by simply adding “best tacos in Tucson” to their title tags.

Here’s a sample of the HTML required for a title tag located in your header.

<head>

<title>The Best Title Example I Could Come Up With</title>

</head>

In WordPress, it’s as easy as giving your page a title.

You really can’t miss it.

Wordpress meta tag Title

That’s all there is to it!

2. Image Tags

Like title tags, Image tags aren’t labeled “meta.”

But they’re clearly used by search engines, link aggregators, and other sites to identify your site.

There are two image descriptions actually crammed into one tag.

Here’s what the HTML code looks like.

<img src=“image.jpg” alt=“image description” title=“image tooltip”>

Both the alt and title tags should be defined for the best experience.

The title displays on your screen when you hover your cursor over it.

The alt text displays when the image can’t be rendered (or is spoken to the blind and visually impaired).

When uploading an image to WordPress, you’ll be prompted to enter the title, caption, alt text, and description.

Wordpress Image meta tags

The more fields you fill out (even if you use the same information), the more searchable your images become.

Anywhere from 20-60% of all Google traffic goes to sites with well-optimized graphics.

Why wouldn’t you want to be included?

It’s also a matter of ADA website compliance. 

There are approximately 58,200 people with some level of visual impairment per million in the U.S. alone.

why meta tages matter number of people with blindness chart

That’s a huge segment of the population that wouldn’t have a great user experience without alt image tags.

Optimize your images for search engines and users.

3. Description Meta Tags

A meta description tag gives you a chance to provide an overview of the page’s content.

They’re limited to around 160 characters and aren’t directly tied to Google’s search algorithms at all!

Once again, the reason you need description tags is to improve the user experience.

Description tags encourage click-throughs.

Here’s what the HTML looks like:

<head>
<meta name=”description” content=”This is an example of the text that will show up in search results. Read on to learn more about description tags.”>
</head>

Without a meta description, Google will default to whatever preview sentence it feels best encompasses the content.

This isn’t necessarily a bad thing.

This post doesn’t have a meta description (I rarely use them), and it ranks well.

Neil Patel Social Media Marketing meta tag example

Of course, my blogs are filled with relevant content in short, sweet sentences. Most of them would work as descriptions on their own.

Still, there’s no harm in adding additional information to make your content more searchable.

4.  Robots Noindex and Nofollow Meta Tags

Robot meta tags aren’t always necessary.

By default, all of the pages and links you create on your website are indexed as ‘follow’ by search bots and web crawlers.

Whenever you want to redirect them, you’ll need a robot meta tag.

Here’s the noindex HTML code:

<html><head>
<meta name=”robots” content=”noindex” />
(…)
</head>

This would be within the header and indicate this page doesn’t need to be indexed.

It’s useful for syndicated and duplicate content that your customers/readers could use, but you don’t want credit in search indexes.

Here’s the HTML for a robot nofollow.

<meta name=”robots” content=”nofollow”>

This is used for links you don’t necessarily want to endorse.

For example, readers leaving links in my comments aren’t exactly endorsed by me, so a nofollow tag above the comments section keeps my site clean for bots.

Here’s a great infographic on when and how to use nofollow tags.

no follow meta tags infographic

Now we get to one of the most controversial meta tags.

5. Keyword Meta Tags

Keyword tags aren’t used by search algorithms to determine search ranking.

Here’s what the HTML looks like:

<meta name=”keywords” content=”HTML, CSS, XML, JavaScript”>

I coach my SEO clients to ignore keyword tags because they don’t affect SEO.

That doesn’t necessarily make them useless, however. They’re especially useful in WordPress.

Keyword tags and categories can help Google determine which page on your site should rank for a search.

They also create a page in WordPress that provides one more indexed page.

Wordpress category page meta tags

This means that, while your blog posts are focused on long-tail keywords, your tag and category pages have feeds covering the shorter keywords.

Categories can be used for the URL format, providing one more keyword to the page address.

This is accomplished under Settings – Permalinks in WordPress.

category urls permalinks meta tags

Adding this format provides context to your content.

Google loves context for search results!

Keywords also provide a big-picture overview of how many pages you have for each keyword.

You can use them to help plan your editorial calendar.

6. Viewport tags

You don’t spend much time thinking about viewports, but they’re especially important in today’s mobile-first world of search.

On mobile devices, pages are shown in a popup window called a viewport that extends past the device’s border.

Here’s an illustration of what I’m talking about.

Understanding viewport meta tag width device width

Developers can set the viewport size to increase mobile usability.

WordPress users can check this tag to learn this information for their templates.

But you probably didn’t know that unless you’re already a web developer.

Since Google increasingly focuses on mobile-friendly websites, this meta tag could mean the difference between success and mobile failure.

Now that you have a basic understanding of meta tags and why they’re important, I’ll show you some of my favorite tools for manipulating them.

Free Tools to Add and Check Your Meta Tags

Don’t worry if this all sounds overwhelming — there are tons of tools to make it easy to get meta tags right. Here are two of my favorites.

Yoast SEO Plugin for WordPress

Yoast is a powerful SEO plugin for WordPress and one of the most-downloaded SEO and meta tags tools.

With Yoast, all of the pages and posts you publish have back-end options to increase social sharing, optimize SEO, update tags, and other metadata.

Yoast SEO WordPress | What Are Meta Tags?

With Yoast installed on your WordPress site, a few clicks and a few seconds of your time are all it takes to add meta-tagging to your process.

Yoast also allows you to enter a focus keyword that doesn’t get added to the meta tags, allowing the back-end program to analyze your post.

BuzzStream Meta Tag Extractor

If you need a quick chart of the metadata that’s being used by your competition, BuzzStream’s Meta Tag Extractor is a sleek and simple solution.

Copy and paste a list of URLs, and you’ll be presented with the meta tag information.

Tag Extractor meta tag tool

There’s even an option to download as a CSV file so that you can scrape large lists quickly.

It’s a quick and easy way to organize this data when you need it.

This free online tool does its job without all the bells and whistles.

Less Popular (But Still Useful!) Meta Tags  

So to be fully transparent, here’s a chart of HTML meta tags.

Meta Tags chart

An author meta tag can be used to tell search engines who wrote a piece of content.

Authors have been used in the past for search results, but it’s not a factor anymore. However, you might use author tags if you run a multi-author blog.

WordPress does add this information to blogs when multiple users are contributing content.

It’s more a badge of honor for bloggers than anything else.

Most of the rest define parameters that should already be controlled on a server level.

While I ignored these meta tags, it doesn’t mean you have to. Feel free to add whatever information you’d like.

It doesn’t help search rankings, but it doesn’t hurt them, either.

Conclusion

Meta tags are a basic part of HTML — and can impact SEO.

Back in the early days of the internet, they were a signaling factor for search engines to understand what content is on a page.

The internet (and our relationship with it) has evolved exponentially since then.

Contextual search, AI digital assistants, and mobile devices are changing the way we view content.

Search engines are incentivized to provide the best search results possible, so meta tags are less important.

However, some, such as the titles and meta descriptions, are more important than ever before.

While less metadata is used, it’s still the first impression you’ll make on both robots and people.

What do your website’s meta tags say about you?

The post What Are Meta Tags? appeared first on Neil Patel.