What’s YOUR Business Credit and Funding Blueprint? So it should be obvious – when considering business credit and funding, you need a blueprint. Because traveling without a map won’t get you anywhere. So, where do you see your business in five years or more? Do you double your revenue? Open a new office? Replace your … Continue reading How to Create Your 5 Year Business Credit and Funding Blueprint
Tag: Create
How to Create Your 5 Year Business Credit and Funding Blueprint
What’s YOUR Business Credit and Funding Blueprint?
So it should be obvious – when considering business credit and funding, you need a blueprint. Because traveling without a map won’t get you anywhere.
So, where do you see your business in five years or more?
- Do you double your revenue?
- Open a new office?
- Replace your equipment?
- Hire more people?
- Retire and pass your business along to a family member or sell the company?
- Or something else?
Your Business Plans and Future
All of these scenarios require funding! Even going concerns with stable, steady revenue can experience emergencies, or need to seize a business opportunity quickly and before they have the funds. All businesses can use business credit to achieve their aims – whatever they are
Instead of year by year, let’s go phase by phase since some of these will overlap in time.
But even if you’ve already been there, done that, checking out the earlier phases could help you see if you missed anything. And if you’re just starting out, checking out the later phases could show you your business’s future so you can be ready.
Phase 1: Setup and Launch
You’re at the starting line and the race official has just yelled, “Go!”
Setting up a business is a task with a lot of moving parts. It’s a lot more than just hanging out a shingle. The way your business is set up can directly affect the ability of your business to succeed
This first phase covers your first six to twelve months of existence.
Fundability
Fundability is a business’s ability to get funding. A lot of the power to get business money is in your hands. A business starts with no credit profile. As a result, what’s on an application is all that’s reviewed for approvals. So your application must be very strong. Nearly half of all companies fail in their first 5 years, and about 2/3 in the first 10. As a result, new businesses don’t seem fundable to lenders. You can change that by building for fundability from the very start.
Business Name
Check with your Secretary of State –a business name may have to be unique. Make sure your SOS has all the necessary information for your company, and it’s up to date and correct. Make sure that you are in good standing with them and that your entity is active. You will have to file annual reports and pay an annual fee to stay active. Keep the name of a high-risk or restricted industry out of your business name. Your business can be Rachel’s rather than Rachel’s Gas Station. There is nothing underhanded about this – it is completely above board and honest
A common reason for loan and credit card application denials is the lender can’t easily locate a business offline or online. So make it painfully easy for lenders and credit providers to find your business. Make sure the business name is exactly the same on corporation papers, licenses, utility statements, and bank statements. Also make sure the business name and all other information is the same on every online listing you can find.
Business Address
This must be a real brick and mortar building, a deliverable physical address. This can never be a UPS box or a PO Box. Some lenders will not approve and fund unless this criterion is met
A virtual address can also be a good idea if you need to hold a meeting or an interview, and it’s a lot more professional than doing this at your kitchen table. We like Regus, Davinci, and Alliance Virtual Offices. But keep in mind that there are credit providers that will not accept virtual addresses.
Business Entity and EIN
Get a free EIN for your business and choose your business entity at IRS.gov. Use your EIN to open a bank account and to build a business credit profile. To truly separate business credit from personal credit your business must be a separate legal entity, not a sole proprietor or partnership. Only incorporating creates a new and separate entity which by default will reduce your personal liability. Other entities (like partnerships) don’t. File this with the Secretary of State for your state. Make sure your entity is set up in the same state as your business address.
NAICS Codes
The IRS website is also where you choose NAICS codes. These codes are for the purpose of collecting, analyzing, and publishing statistical data on the US business economy. Some businesses are considered to be risky by their very nature. Often higher risk comes from chances of injury or frequently engaging in cash transactions. Risk matters because there are several industries where lending institutions are hesitant to do business.
If more than one NAICS code can apply, you don’t have to choose the one that’s higher risk
And if only high risk codes apply, there’s nothing at all wrong with changing your business to match a related but lower risk code.
Business Licenses
Contact State, County, and City Government offices to see if there are any required licenses and permits to operate your type of business. Licensing requirements differ depending on state, town, and industry. Always make sure you have the proper licensing for your corporation
Having licensing builds credibility in your business, and that can help you get more customers.
Business Phone and 411 Listing
It’s very easy and inexpensive to set up a virtual local phone number or a toll free 800 number
A cell or home phone number as your main business line could get you flagged as un-established – but VOIP is okay. If you don’t want customers calling you at home all day, do not use a personal cell or residential phone as the business phone number. It also helps with fundability to have a dedicated business phone number. Your number must have a listing with 411 for most credit issuers and lenders to approve you. Check for your record to see if you’re listed and your information is accurate. No record? Then use ListYourself.net to get a listing.
Web Domain and Professional Website
Lenders and credit providers will research your corporation on the internet. It is best if they learned everything directly from your corporate website. Not having a professional website can hurt your chances of getting corporate credit. Buy web hosting from a hosting company like GoDaddy or HostGator. Your domain should be your business name, if possible. Add a company email address for your business on the same domain as your website. This often comes with a website domain provider. This is not just professional; it also greatly helps your chances of getting approval from a credit provider. Do not use Yahoo, AOL, Gmail, Hotmail, or similar kinds of email.
Business Bank Account in the Business’s Name
You must have a bank account devoted strictly to your business. The IRS does not want you commingling funds. Make accounting easier and reduce the risk of audit at tax time
Keep personal and business funds separate. Having a business-only bank account makes that easy.
Business Merchant Account
Getting a business merchant account is a smart way to help out your business. Now your business will be able to accept credit and debit cards. Studies show that customers will spend more if they can pay by card. This also increases your finance options and is generally more secure.
Get Set Up With the Business Credit Reporting Agencies
Go to D&B’s website and look for your business. Can’t find it? Then get a free D-U-N-S number on the D&B site. A D-U-N-S number plus 3 payment experiences leads to a PAYDEX score. You need a D-U-N-S number to start building business credit. Once you are in D&B’s system, search Experian and Equifax’s sites for your business.
Your Business Credit History
Get the most favorable funding by paying all bills on time, to get:
- A PAYDEX score of 80
- Equifax Credit Risk Score of 90 or better
- A good FICO SBSS score, which is driven (in part) by on-time payments and business credit history
- For Experian, historical behavior (payment history) is 5-10% of the total score
Business Credit Building from the Ground Up
Start with vendor accounts, a proven way to start building business credit. Vendor credit is generally not attached to a bank. So under federal law a Social Security number is not required. When not attached to a bank, there is no Social Security requirement for starter vendor credit
This is unlike bank loans and bank cards. You can legitimately leave the SSN field blank, which will force them to pull your business credit under your EIN.
Business Credit Building with Credit Cards with a PG
Every step and every credit provider is designed to help your business
It’s designed to help you qualify for business credit cards that you will actually use. As you continue building, your time in business will help. But to get started, you may need to give a personal guarantee. That’s okay; that’s a part of the strategy.
Good Personal Credit
If you already have good personal credit, then you’re all set. If not, you can work with a credit partner or guarantor. And never stop working on improving your personal credit, no matter what shape it’s in.
Phase 1 Funding Options
In Phase 1, it’s trickiest to get business credit and funding. But it’s not impossible! You will, though, need to think outside the box.
Our Credit Line Hybrid
A credit line hybrid is a form of unsecured funding. Our credit line hybrid has an even better interest rate than a secured loan. Get some of the highest loan amounts and credit lines for businesses. Get 0% business credit cards with stated income. These report to business CRAs so you can build business credit at the same time. This will get you access to even more cash with no personal guarantee. You need a FICO credit score of at least 680 or a guarantor with good credit to get an approval. No financials required.
We also have an option for getting just personal credit cards with our Credit Line Hybrid.
Demolish your funding problems with 27 killer ways to get cash for your business.
401(k) Financing
This is not a loan and you will not have to pay an early withdrawal fee or a tax penalty. You put the money back by contributing, just like with any 401(k) program so you won’t lose your retirement funds. The IRS calls this a Rollover for Business Startups (ROBS), which is a separate entity with its own set of requirements. The plan, through its company stock investments, rather than the individual owns the trade or business. This financing isn’t a loan against, your 401(k), so there’s no interest to pay and does not use the 401(k) or stocks as collateral.
Instead, this is simply a movement or change of custodian. Your 401(k) must have more than $35,000 in it and cannot be from a business where you are currently employed. You can get 401(k) financing even with severely challenged personal credit.
Stocks Financing
Some lenders will make loans using securities as collateral. Securities-based lending provides ready access to capital. The only restrictions to this kind of lending are other securities-based transactions, like buying shares or repaying a margin loan. You continue to earn interest on stocks pledged as collateral. But you will have challenged personal credit.
Sell Part of Your Business’s Equity
Your business and its potential are assets. Talk to people you know about angel investing
Angels buy a smallish stake in your company. They usually don’t expect as big a return as venture capitalists do. VCs might also buy a stake, but they generally just want paradigm-changing businesses. Another way to sell a part of your equity is to take on another founder or partner.
Crowdfunding and Grants
Note: crowdfunding success isn’t guaranteed. Crowdfunding platforms like Kickstarter will take a percentage of any money you raise. But it can still be a way to get a cash infusion without having to give up equity. If you’re very good online and have a compelling product and story, then you’re more likely to succeed than most people. Grants can come from the government or private businesses. Expect a lot of competition, difficult entry requirements, and not a lot of money. But it’s another way to get some cash without having to sell a chunk of your business .
Phase 1 Goals for Business Credit and Funding
Right now, you have minimal Growth Monthly Revenue (GMR). This is a fast paced growth plan, throw it against the wall and take what you can get right now. Look at some short sighted daily and weekly goals for quick cash and growth. During this phase your focus is on the bare essentials to create a viable business. Your goal is to build your consistent revenue to $10,000 per month, and continue to work on improving your personal credit.
Phase 2 Development: $1,000 to $10,000 GMR
In Phase 2, you should start developing marketing. ow you’re at an aggressive sales pace adding nurture and longer sales cycles. Use medium term monthly growth planning (campaign to campaign). It’s time for software implementation and system development. You’re building the blocks of how your business is going to be, now and in the future. This phase should run somewhere between the first six to 24 months from launch.
Business credit and funding starts to get easier.
Phase 2 Credit Options
Your credit options will open up once you get to Phase 2, including:
- Business Credit Cards (No PG)
- Advanced Vendors
- Vehicle Financing
- Cash flow Management with providers like Brex and Divvy
- Business Credit Cards With No Personal Guarantee
As you continue to build exceptional business credit and pay your bills on time, credit providers trust you more and more. You can get higher limits and better terms. And you can start to get business credit cards with no PG.
Advanced Vendors
There are many vendors that do not report to the business credit reporting agencies unless you default. They’re still a good idea, because credit can help you beyond business credit building
Not having to put up 100% of the costs of equipment or a building or anything else can help with budgeting. Credit can sometimes be the only way to take advantage of a limited time opportunity if you don’t have the money right now. And if your business credit cards offer rewards, cash back, or points, then using them is to your advantage.
Vehicle Financing
Vehicle financing is a great way to get a business vehicle without having to wait until you can just pay cash and drive it off the lot. Note: business owners may be required to personally guarantee vehicle loans. If you are a co-borrower the loan will most likely report to your personal credit report.
Some loans have a prepayment penalty and charge you for paying ahead. It is a good idea to have a loan proposal. A loan proposal should detail your business, loan needs, and financial statements.
Cash Flow Management
Managing small business finances can be overwhelming. There are a number of tools that can help streamline the process. Options like Brex, Divvy, Expensify, Lola, and more are growing in popularity. Which one is right for your business?
Brex
Brex is a business money management system that integrates with your accounting software
It allows you to track expenses and, depending on the level of service you choose, it can also help with paying bills and controlling spending. Brex has a partnership with the FDIC and your funds are secure. Everyone who opens a Brex cash account gets a corporate card. Brex reports any payments to Dun & Bradstreet
Divvy
One thing to know: Divvy is very similar to Brex. Divvy reports to the Small Business Finance Exchange, which in turn provides data to all SBFE partners, including business credit bureaus. As of April 2021, they also report to Dun & Bradstreet directly.
Demolish your funding problems with 27 killer ways to get cash for your business.
Phase 2 Funding Options
In Phase 2, your funding options also open up, to:
- Merchant Cash Advances
- Revenue Lending
- Lines of Credit (Fundbox)
- Equipment Financing/Leasing
- Invoice Factoring
Merchant Cash Advances
An MCA technically isn’t a loan; it’s a cash advance based on the credit card sales of a business. A small business can apply for an MCA, and have an advance deposited into its account fairly quickly. So you can offer Net 30 terms but not have to wait a month to get paid. With an MCA you get funding based strictly on cash flow as verifiable per business bank statements. A lender mainly just wants to see consistent deposits.
Business Revenue Lending
You can technically qualify with only one year in business, but the annual revenue requirement is high enough that phase 2 may make more sense. You can raise capital from investors who get a percentage of the enterprise’s ongoing gross revenues in exchange for money invested until a predetermined amount is paid. Often this predetermined amount is between 3 – 5 times the original amount invested. Monthly payments will fluctuate with revenue highs and lows and will continue until you’ve paid back the loan in full.
Fundbox
Fundbox will connect directly to your online accounting software when deciding whether to fund your business. You can get revolving line of credit for up to $100,000. Fundbox will auto debit your weekly payment from your bank account. You don’t need to show a minimum personal credit score or a minimum time in business, but ideally you must have 6 months in business or more.
Equipment Financing
Use a loan or lease to purchase or borrow hard assets for your business. Physical assets can include items such as a restaurant oven or a company car. Pay predictable amounts every month. You can build business credit on a program like this.
Equipment Leasing
Or lease equipment, rather than buy it outright. You will often put down less money than you would if you were buying the equipment. You may be able to negotiate flexible terms with an equipment lease, and it’s easy to upgrade equipment after your lease ends. This is helpful if your equipment is something like a computer which quickly becomes obsolete.
Equipment Sale-Leaseback
If you already own your equipment free and clear you can use that as collateral for financing
Sell equipment to a lender for cash. Then lease it back from them. You can unlock Section 179 tax savings, and depreciate your entire equipment purchase in the first year. You’ll need at least one larger piece of higher value equipment to qualify.
Invoice Factoring
If you have open invoices and are extending credit to customers in some form, then you can get paid faster with factoring. Usually this involves invoices with net terms, like net 30, 60, or 90. To be paid faster, you turn those invoices over to a factoring company. They immediately give you an agreed upon percentage of the total of the invoices, like 80%. When your customer pays, the factoring company keeps their fee, and they send you the rest. But note – factoring only works if your customers pay.
Phase 2 Goals for Business Credit and Funding
Your goals should be:
- Strong Business Credit (10 to 12 Accounts)
- Good personal credit
- Build consistent revenue to $10,000 or more a month
Always develop business connections in your community and with potential lenders.
Phase 3: Growth: $10,000 to $2 Million GMR
Successful growth…it’s working! It’s time to start optimizing systems and operations. You’ll be undergoing massive team and infrastructure development, and long term growth and planning for semi-annual to annual focus lifetime customer value. You’ll need to make some high level strategic hires (Managers, VP’s, Essential C levels). This phase will happen at about 24 months or more from launch.
Business credit and funding gets a lot easier now.
Phase 3 Credit Options
Your Phase 3 credit options put your Phase 1 and Phase 2 options on steroids, with:
- Team access to vendors and cards
- Continuing to grow your vehicle fleet with vehicle financing
- Vendor portfolio growth
Phase 3 Funding Options
Phase 3 opens your funding options up to:
- All Alternative options available
- SBA Loans
- Bank Loans
Alternative Loans (also called private lending)
Private lenders are generally funded by investors or by banks, or both. Private lenders are in the business of taking funds from private investors. They make private business purpose loans with those funds. This often involves real estate. These can be hard money loans with shorter terms.
Alternative Options
Alternative lending also means online lending. But for certain industries, online lending is one of the only ways to get money. So let’s look at the cannabis industry, for example. Medical cannabis is legal is most of the country, yet more traditional lenders are still less likely to approve a loan. But lenders that specialize in cannabis industry lending are out there.
SBA Loans
More time in business will make SBA loans a real possibility for your business. It’ll be easier to get an SBA loan in Phase 3 versus earlier. This is because you can more readily show your business is established and making money. Demonstrated profitability and responsible credit and bank account management will improve your chances of getting an approval for an SBA loan. Also – SBA loans have great terms! So there’s a reason why you should be striving to be eligible for one.
Bank Loans
Banks are often the first place we think of when we thinking of financing. But big banks only sign off on about 25% of the small business loan applications that come their way. Still, term loans often have lower interest rates than many other funding options. They also tend to be for higher loan amounts. But you will most likely have to undergo a personal credit check and/or provide collateral.
Demolish your funding problems with 27 killer ways to get cash for your business.
Phase 3 Goals for Business Credit and Funding
In Phase 3, your mission is to take your business to the next financial level, so your goals are:
- Profitability (so as to calculate loans)
- Maintaining good personal and business credit
- Build up to $2,000,000 in annual gross revenue
- Maximizing leverage of cash flow with vendors and business credit
Grow Your Vendor Portfolio with Retail Credit
Retail credit comes from major retailers like Staples. You can buy everything from office supplies to power tools. Retailers will check whether your business information is uniform everywhere. They will also check whether your business is properly licensed. Terms can be revolving. You will need at least 3 (more would be better) accounts reporting to the business CRAs.
Grow Your Vendor Portfolio with Fleet Credit
Fleet credit is used to:
- Buy fuel
- Maintain vehicles of all sorts
- Repair vehicles
These tend to be gas credit cards. But there may be a minimal time in business requirement.
Grow Your Vendor Portfolio with Business Credit Cards
Business credit cards are more universal-type credit cards, like MasterCard. So they can be used pretty much anywhere. These cards may even have rewards programs. Terms can be revolving. Often you will need to have at least 14 accounts reporting to the business CRAs. Also, there can be longer time in business requirements.
Phase 4: Maturity: $2M to 5M+ Annual Income
 Consistent growth is key. You’re aiming for long term consistent and stable growth, and moving toward market domination (Competitor Buyouts and Acquisitions). Product development and expansion becomes critical for longevity. Because now it’s time for the big hire. You’re going to fill out C Level, Directors, and middle management. This phase will happen at around four to five years from launch.
It should be no problem to get business credit and funding when you’ve hit this stage.
Phase 4 Credit Options
By Phase 4, the sky is pretty much the limit! You should be able to get:
- Most major credit cards with no PG
- All vendors should be accessible
You should be able to leverage reports for specific vendors. This includes asking for a credit line.
Phase 4 Funding Options
In addition to everything we’ve already talked about, your business can take full advantage of:
Private equity
- Investors
- You might even sell shares in your corporation, or go public!
- Phase 4 Goals for Credit and Funding
Now you’re playing the long game. Your mission is to look to the future and help your business for decades to come.
Therefore, you need to:
- Balance your costs vs your cash flow vs your business’s profit
- Leverage funding for expansions and buyouts
And you should be maximizing leverage of cash flow with vendors and business credit.
Phase 5: Exit
By this time, your business should be very well established. At this phase, you want to cash in on all the work you have invested. This is where the funding and credit has the long game return. A Business Credit Portfolio is transferable and increases the value of your business.
Your proven track record with merchant cash advances or revenue lending pays off big time, since it can keep business cash flow moving through the ups and downs. Having a proven track record with the SBA, and a profitable banking relationship, will improve the value of your business as well. People want to buy something they can lend against if they need to.
Phase 5 Business Credit and Funding Options
Selling can mean you’re retiring, or maybe you’re exchanging one form of entrepreneurship for another, and want to change industries yet remain an entrepreneur.
In Phase 5, you can:
- Self-fund the sale in structured buy outs
- Go to the SBA for acquisition money
In essence, you should be prepared to sign for your own buyout. Because a profitable, seasoned business can be an exceptionally valuable legacy.
Your Business Credit and Funding Blueprint: Takeaways
From startup to exit, your business credit and funding options will change. But navigating all the nuances can be tricky. Let’s walk that path together.
The post How to Create Your 5 Year Business Credit and Funding Blueprint appeared first on Credit Suite.
How to Create Search Engine Friendly Title Tags
One of the most frustrating things about SEO is getting everything to work together as it should.
If you’ve done SEO, you know exactly what I’m talking about. There are so many little elements in SEO that sometimes it seems impossible for everything to work out perfectly.
Even today! I know I talk a lot about how “smart” the search algorithms are and how it’s virtually impossible to game the system.
However, there are still a lot of elements you need to pay attention to for your SEO to succeed.
Case in point: Page title tags.
Before you yawn and find some more sexy SEO topic to jam on, hear me out.
Title tags are one of the cornerstones of SEO. They always have been, and as far as we can tell, they always will be.
Moz explains, “Title tags are the second most important on-page factor for SEO, after content.”
When it comes to low effort/big results, title tags take the cake. It’s such a small element, but has such a massive impact!
You know it’s important to create eye-catching headlines, but optimizing your titles also matters for SEO.
That’s where page title tags come in. They’re how your titles are relayed to search engines, and they’re an important part of any SEO strategy.
This is one of the few times when you need to write for both people and search engines, and that can be tricky. (Especially with headlines.)
In short, you have to create a clickable headline that also makes search engines happy.
Here’s the challenge: People have to like it. Search engines have to like it. Yikes!
Does that sound difficult?
Yes, it can be if you don’t know what to do. That’s why I’m going to break down my process step-by-step.
We’ll go through that process, but first, let’s look at why title tags are important for SEO.
What are Page Title Tags?
If you’ve ever used a search engine before (and I’m guessing you have), you’ve seen a page title tag whether you’ve realized it or not.
It’s simply the headline on the SERP (search engine results page).
For example, if you Google “kitchen appliances,” you’ll see that one of the top results is from IKEA.

In this case, the page title tag is “Kitchen Appliances – IKEA.”
This is what both people and search engines will see as the title of your page. Often, this is the first thing they’ll see, and that’s a big reason why it’s so crucial to put time and effort into your title tags.
The point you need to remember is this: real people are reading your title tag.
They are going to respond to it. They will judge it. They will be compelled by it. They will be put off by it. They will learn from it.
Basically, the title tag is your page’s message to the world!
Title tags work with the meta description (the text below the title). In the case of the IKEA search result above, this is the meta description — a sentence or phrase that adds more information about the page.

I’ve written about meta descriptions before, but title tags are even more important.
Both the title and the meta description together give a brief idea of what your content is about, but the title tag stands out more.
There are two big reasons why page title tags are so important.
First, if you have a clear title that’s relevant to your page, both humans and search engines will see that as a sign of a good page.
If your title tag isn’t optimized, then people could skip right over your content, and search engines may determine that your page isn’t as good as it could be.
A second reason why title tags are important is they show up in browser tabs:

So when someone wants to find your page out of all their browser tabs, they’ll look for your title tag.
Title tags are often what people will see if your page is shared on social media. For example, here’s an example of a title tag on Facebook:

Can you see why title tags are so important? A good title tag means maximum visibility, while a bad title tag can sink your page.
There are three important steps to take to optimize your title tags.
- make sure your headlines make for good title tags
- create the title tag
- make sure the title tag is optimized for SEO
Let’s dive into all three.
Step 1: Write Your Title Tag
You might be wondering how writing a title tag is any different from writing a headline.
In some cases, your headline and title tag will be the same exact title. But there are some cases where they won’t be.
Check out this SERP result from Copyblogger:

It seems like the title for the page would be “How Content Marketing Builds Your Business,” right?
But when you go to the page, you’ll see a different title:
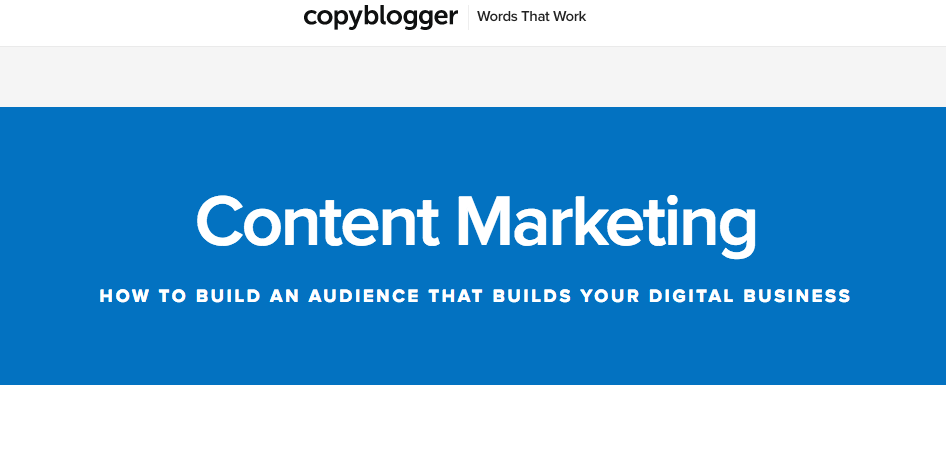
The title shown on the page is longer and more descriptive.
So why would Copyblogger do this? It’s most likely because the shorter title tag looks better on the SERP, and it takes less time to read.
The actual title that you see on the page goes into more detail, and that’s probably why they used it. They get the benefits of having both a streamlined title tag and a descriptive page title.
It’s a sneaky and useful tactic that’s the sort of SEO stuff I love.
With that in mind, here’s how to write a great title tag.
There are a few elements of title tags:
Title Tags Should Be Short
Shorter titles are easier for people to read and for search engines to crawl.
But there’s a better reason for shorter title tags.
If your title tag is too long, search engines will cut off your title with an ellipsis (…):

Ideally, your readers and search engines should be able to see the entire title tag so they get the best idea of what the content is about.
Google typically shows no more than 60 characters of the title tag. So if your title tag is 60 characters or less, you can generally expect that the entire title will show.
If you want to make sure, Moz has a handy preview tool:

This is a great feature that I recommend you use. Remember, keep it short if possible.
Title Tags Should Contain Your Main Keyword
You probably expected to see something about keywords in an article about SEO.
For best results, try to put your focus keyword as close to the beginning of your title as possible. That’s so search engines (and people) will see the keyword early on.
Here’s a title tag with the keyword right up front:

Contrast that with this result that has the keyword closer to the end of the title tag:

One tip: Make sure the keyword placement is organic. It’s preferable that the keyword is close to the beginning, but it’s not necessary for great SEO.
Title Tags Should Describe a Benefit
Much like a headline, a title tag needs to communicate a benefit to stand out.
This is one of many reasons Google warns against keyword stuffing and boilerplate titles.
Your title tags are representatives of your pages, and you want people and search engines to know that your pages have unique, valuable content.
Make sure your title tag is related to your content. It should read naturally and grab the reader’s attention.
Keep in mind, you’re not trying to trick people. All you need to do is clearly explain the benefit of clicking on the page.
Often, the “benefit” is nothing more than telling them what the page is about! At this point, you’re not trying to sell anything. You’re simply giving them information.
Here’s an example that clearly expresses a benefit (ignore the jargon-filled, not-so-great meta description).

On the other hand, this title tag is plain and doesn’t explicitly state a benefit (they did a nice job with the meta description, though).

(Sure, Amazon probably doesn’t need to state a benefit, but your site probably does.)
Stating a benefit probably won’t do anything for search engines, but it goes a long way for human users who come across your site with a search.
Step 2: Create Your Title Tag
Once you have your page title tag written, you need to set it as the title for your page.
The way you’ll do this will depend on what powers your website.
If you have a custom site, you’ll need to edit the HTML directly. (And it’s super easy to do.)
If you use WordPress, it’s also super easy.
If you use another CMS or host, it might look a little bit different for you.
Let’s take a look at each of these three different cases and how to create a title tag for each scenario.
Case 1: You Have a Custom Site Not Hosted on a CMS
If your site isn’t hosted on a CMS, you can edit your HTML to add titles.
First, you access the HTML for your specific page. I recommend checking with your hosting service on how to do this.
Once you’ve found the editable HTML, make sure you’re between the <head> tags.

(Note: This is an example code using Editpad.org. Your code will probably look different, and there might be extra code here. That’s okay––just make sure you’re only between the <head> tags and not any others.)
To create the title, use <title> tags. For example:

That’s it! Save your code, and your title will now show up correctly.
Case 2: You Use WordPress
If you use WordPress, you’ll be happy to know there’s a super simple solution — it’s actually way easier than editing the HTML.
In fact, this method uses something you’re probably already using: the well-loved Yoast SEO plugin.
This is a powerful plugin that you can get a lot out of. And it’s great for editing your title tags.
First, if you don’t have Yoast installed, go to Plugins > Add New.
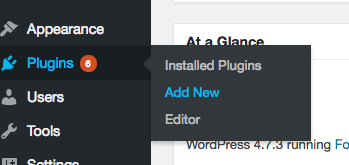
Type “Yoast” into the plugin search bar.

Look for “Yoast SEO.”
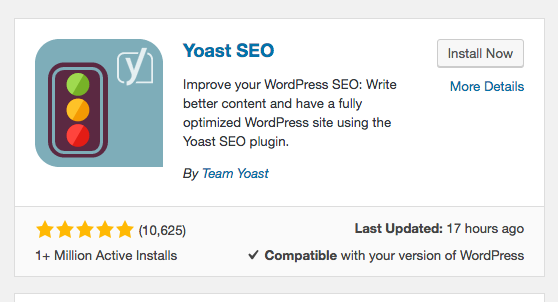
Click “Install Now.”
Next, click “Activate.”
Now the plugin is up and running.
To edit the title tag for a page or post, navigate to that content and open the editor.
Scroll down to the bottom of your post or page, and you’ll see the Yoast box, where you can edit the title tag and meta description.
It’ll also give you a nice preview of both your title and meta description:
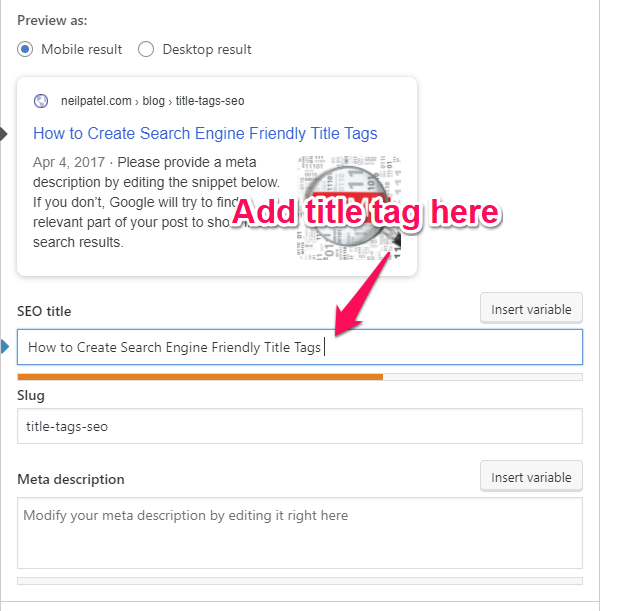
If your title tag (or meta description) turns out to display differently on the actual SERPs, you can always go back and edit it in this section.
Case 3: You Don’t Have a Custom Site or a WordPress Site
I know not all of you fall under these categories.
You might use a completely different kind of CMS, or your web host might have a different setup.
In those cases, I recommend contacting your CMS company or web host to find out how to access your HTML to edit your page title tags.
This is really a case-by-case scenario, so it will probably look different for a lot of you. However, you should be able to get an answer with a quick email to your web host’s support email.
So far, you’re two-thirds of the way done! Now you just need to make sure your title tag is the most SEO-friendly it can be.
Step 3: How to Optimize Your Title Tag for SEO
We’ve talked a little bit about this already, but there are a few more steps you can take to make sure your title tag is optimized.
This is the step that most people miss entirely!
They think, “Yay. I’m done with my title tag!” But they forget that one of the primary methods of marketing and promotion is through social sharing!
Here are my best tips for optimizing your title tags for social.
Use Your Brand Wisely
The title tag can be a great place to include your brand, but if you overdo it, you could face some consequences.
Google suggests using your homepage title tag to include the most branding. Their example: “ExampleSocialSite, a place for people to meet and mingle.”
For most of your pages, adding your brand to the end of the title tag will suffice (if there’s room, that is).
Here’s how I do that:

Prevent Search Engines from Rewriting Your Title Tags
You read that right: Sometimes Google will rewrite your title tags.
It’s crazy, I know! But why the heck would this happen?
According to Silkstream, “Google will automatically change how your title is displayed in the SERPs if their algorithm is under the impression that the page title doesn’t accurately represent the content on that page.”
So if your title tags don’t look good to Google, they’ll consider other factors, including:
- On-page text
- Anchor text
- Structured data markup
Take a look at this title tag:

If you go to the homepage and view the source code (right-click and select “View Source” or “View Page Source”), you’ll see the company set the title to be something else:

Google rewrote it because they felt their revised title tag would help people more than the original.
The good news: If you follow the steps outlined in this article, Google should keep your title tags as they are.
If you do see your title tags showing up differently, revisit them and try to identify how you can further optimize them.
Consider Making Your H1 Page Heading Different From the Title Tag
This is exactly like the Copyblogger example from earlier.
You can use two different sets of keywords in your title tag and H1, which organically enhances your SEO. Search engines will count the title tag as the “heading.” (Just make sure it’s optimized.)
Avoid Duplicate Title Tags
Google explicitly says that “it’s important to have distinct, descriptive titles for each page on your site.” So don’t copy and paste your title tags.
If you’ve done everything so far, you should now have an optimized title tag! Finalize it and send it out into the world.
Title Tag Frequently Asked Questions
Title tags are the title of a page users see in the search results. They serve as a first impression and can encourage — or deter– people from clicking on your pages.
Title tags are shorter and appear first in the SERPs. 
Pay attention to the length, use the main keyword the page targets, and explain what benefit the user will get by clicking.
Between 50 and 50 characters. Any longer than that and Google may truncate your title.
Generally just one. You can add a second if it is closely related and makes sense. Don’t keyword stuff; the goal of the title tag is to explain what users can expect if they click.
Title Tag Conclusion
I know first-hand that SEO can be a headache., but it doesn’t have to be.
I’m all about demystifying SEO because I know it’s something anyone can do. Even if you’re a technophobe, you can do this!
It doesn’t take years of experience in digital marketing to get SEO right. You just have to learn the ropes and get used to it.
For example, creating page title tags is pretty simple. It might seem complicated at first, but once you take a peek behind the scenes, you see how easy it is.
If you’re not currently leveraging the power of optimized title tags, use this article to start doing that. It can be a game-changer and help your visibility on the SERPs.
Best of all, it only takes a few minutes.
What tips do you have for using title tags for maximum SEO power?
How to Create Your Personal Brand’s Visual Identity
Visual branding is the most effective way to create a powerful online presence. If you don’t believe me, check out this article on why visuals are important in marketing: When half of the human brain …
The post How to Create Your Personal Brand’s Visual Identity appeared first on Paper.li blog.
How to Create Ultimate Guides to Drive Leads, Traffic, and Conversions
Ultimate guides are everywhere. You’ve probably read your fair share, and maybe you’ve even written a couple.
They can be a great way to get traffic, build links, and increase your authority, but they’re far from easy to create. The issue most people run into is the sheer amount of content out there nowadays. How do you create an ultimate guide if there are already tons of posts on your chosen subject?
In this post, we’ll look at the steps to creating the ultimate guide on just about anything.
What Is an Ultimate Guide?
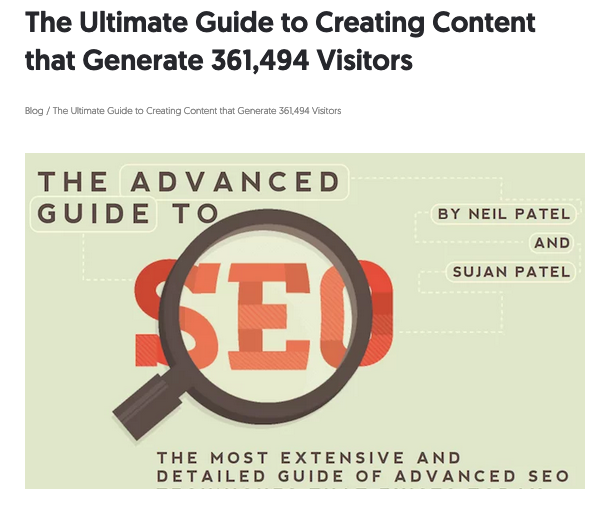
What turns a lengthy blog post into an ultimate guide? Well, there are a few things that almost every in-depth guide has in common:
- It goes very deep into a pretty broad topic.
- It contains several chapters that look at the topic from a variety of angles.
- An industry expert or researcher writes it.
Apart from that, what you put in your ultimate guide and how you design it is up to you.
Why You Should Create an Ultimate Guide
If you didn’t know how powerful ultimate guides are already, here’s why you should start creating them right now.
Rank for Many Keywords
The length, depth, and authority that go into ultimate guides make them a fantastic weapon in your SEO arsenal. The fact that they are so detailed means they should rank for a huge number of keywords. Including internal links to your other blog posts boosts their rankings, too.
Get Backlinks
A big, in-depth resource like an ultimate guide can be a fantastic source of links. Not only can you use it to go out there and request a backlink as part of your link-building process, but other sites naturally start linking to an authoritative resource, too. So much so that your ultimate guide can continue to attract links for years to come.
Build Your Authority
There are few pieces of marketing collateral better at positioning your brand as an authority in your industry than an ultimate guide. This is your opportunity to showcase how much you know about your subject to the world and go above and beyond what has previously been written about your topic.
How to Pick Topics for Your Ultimate Guide
Picking a topic can be a huge stumbling block for many aspiring writers. Don’t get bogged down overthinking it, though. Here’s how you can find the perfect topic quickly.
Choose a Topic You Know About
This first point is obvious, but it needs to be said. You need to know your topic inside and out if you want to write an excellent guide. That doesn’t mean you can’t use a freelance writer to help you out, but you should give them a thorough brief and create the outline of the guide yourself.
Choose a Topic With High Search Traffic
Not every guide needs to be written with the express purpose of ranking in Google, but it can seriously help drive traffic and generate customers. That’s why I recommend you enter your topic ideas into a tool like Ubersuggest to see the keyword volumes of the main topic and the volumes of every other related keyword.
Don’t just pick the topic that has the main keyword with the highest search volume, however. You may find another topic has so many more related keywords that it could actually generate more traffic overall.
Choose a Topic That’s Trending
Ultimate guides are successful when they’re written about trending topics. When people are excited about a topic, they want to consume all the information they can find about it. Your guide should be a part of that, too.
That’s not the only reason you want to focus on what’s trending, though. The newer your post is, the better it might do in search results if someone is searching by posts made within the last week, month, and so on.
How to Create an Ultimate Guide
With your topic picked, it’s time to get to work creating your guide. Here’s how I recommend you go about it.
1. Consume as Much Content as You Can
Even if you’re an expert in your field, you’ll still want to read blog posts on your topic before you start writing. Doing so will help you understand the level of content currently out there, the common threads writers pull, and the things you need to mention.
Pay attention to the results that Google serves up, too. You’ll find that specific formats are more popular than others, and you’ll want to try to mirror these when it comes to writing your content.
2. Identify What’s Missing
While you’re reading other people’s content, make a note of everything that’s missing from the posts. If you’re writing a how-to post, be sure to go through the steps yourself after reading posts by others.
Then, jot down things you notice during the process that others might have missed or not explained thoroughly. It also might help to sit down with someone who is unfamiliar with your topic and see what questions they come up with.
3. Do Research
You can write an ultimate guide off the back of your expertise alone—but you can make it stand head and shoulders above everyone else’s content if you conduct your research.
For some, this is a case of canvassing their colleagues and contacts for their opinion on a certain topic. Others might want to commit to more detailed research and partner with a market research company that’ll carry out a study on their behalf.
The more effort you put into the research, the more valuable and link-worthy your ultimate guide will become.
4. Put It All Together
To create your ultimate guide, simply combine the basics plus the additional details you found were missing from other posts and your research. This way, people coming across your guide as the first piece of content they have read about a topic will get all of the basic information, and people who have read many other guides will be wowed by all of the missing pieces that you included.
5. Promote, Promote, Promote
An ultimate guide is no good if no one reads it. Considering the amount of time and energy you have spent on your ultimate guide, you owe it to yourself and your readers to promote it well. Do so by:
- Sharing it on all of your social networks: Twitter, Facebook, and LinkedIn are the best. Promote it on your personal and business accounts, if possible.
- Sharing it in groups on social networks: LinkedIn, for example, has some great groups on particular topics. Facebook has some as well, although many are full of spammers who are just there for their promotions. This will expand your guide’s exposure from just your network to all of the members of the groups you select.
- Emailing your list: If you have a mailing list, let them know about your latest and greatest piece of content.
- Repurposing your content: If you can turn your ultimate guide into an infographic, video, slide presentation, or PDF document, you can spread it on even more networks.
4 Tips to Create an Awesome Ultimate Guide
If you want to take your ultimate guide to the next level, bear in mind these four tips when writing.
Write Clearly and Format Appropriately
You don’t have to be Hemingway to write a great ultimate guide, but take a lesson from Ernest regarding clarity. Short, clear, punchy sentences win out here, especially when writing thousands of words on your topic. Long, convoluted paragraphs may help you get your message across, but they’ll only cause the reader’s mind to wander.
Formatting will also help in this regard. Clearly labeled titles and subheadings will make your guide much more digestible. Short paragraphs will, too. Don’t forget that most of your audience will be reading your advice on a screen, so consider how they might skim it for the information they’re looking for.
Include Images and Screenshots
One thing I sometimes find missing from other ultimate guides is good screenshots. Take yours using your account of the topic as opposed to generic stock photos. This will make it easier for others to follow along and visualize the process.
Use Real-Life Examples
Once you have the basics and missing pieces down for your ultimate guide, look for some good examples of your tips in action. If you’re talking about creating great timeline cover photos, then include some examples from pages in different industries.
If you’re talking about using Pinterest to drive traffic, then link to top Pinterest users who are doing things right. Think about your target audience and find examples that they can easily relate to so they feel they must follow your advice to be successful.
Don’t Break Up Your Hard Work
There is a lot of advice out there suggesting you should take long posts and break them up into a series, so you can get people to come back to your website over and over again. However, I find that if someone hits a piece of content that says 101 Tips on ___, and the post only includes steps 1–20 with the promise of more to come, they move on to find everything they’re looking for elsewhere.
People want to consume information now, not wait for it. When they read the words ultimate guide, they’re going to expect to get everything in one chunk, so unless you are planning to write 5,000+ words on a topic, keep it in one piece.
Examples of Great Ultimate Guides
There are a lot of great ultimate guides out there, but here are some of my all-time favorites.
The Ultimate Guide to Startup Marketing
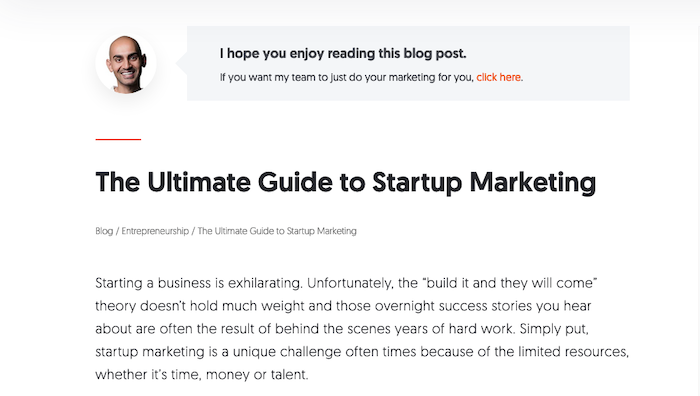
If you’re looking to grow your startup, I’m pretty sure you’ll get a huge amount of value out of my ultimate guide on the topic.
How to Design a Logo: The Ultimate Guide
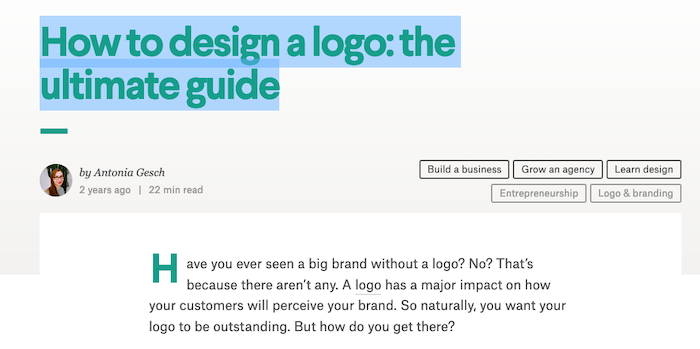
With 12 chapters and virtually every angle covered, there’s no reason to read another guide before creating your logo.
The Ultimate Guide to Cart Abandonment
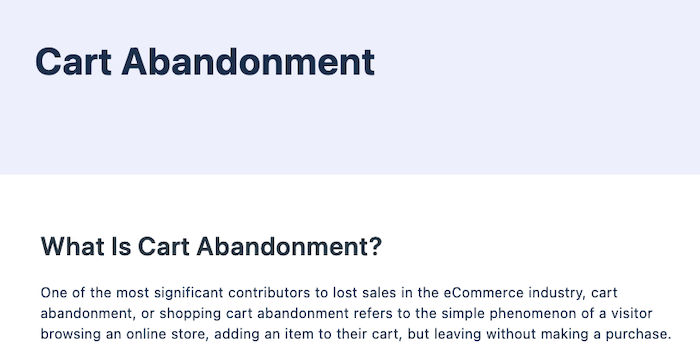
If you’ve ever wondered why shoppers are leaving your website at checkout, this mammoth guide by VWO will answer all your questions.
The Ultimate Guide to Writing & Illustrating Your First Children’s Book

Ultimate guides don’t have to be about marketing, as this guide by Eevi Jones proves.
How to Pick a Career

While Tim Urban hasn’t called this an ultimate guide, you’re unlikely to find a more thoughtful or detailed blog post on picking a career anywhere online.
Further Resources on Ultimate Guides
This blog post isn’t exhaustive by any means. If you want to dive deep into creating high-quality long-form content, then check out these five resources:
- How to Create an Ebook From Start to Finish by HubSpot
- The Ultimate Guide Template by Copyhackers
- Your Ultimate Guide on How to Write an Ultimate Guide (Infographic) by Express Writers
- The Ultimate Guide to Creating a True ‘Ultimate Guide’ by Search Engine Journal
- The Ultimate Guide To Content Promotion by Marketing Insider Group
How to Create Specs for an Ultimate Guide
You don’t have to write your ultimate guide yourself. If you’re hiring a freelance writer to write your guide for you, here’s how you can create a spec they can follow with ease.
- Give an overview.
A top-level overview can help a writer quickly get to grips with the topic and goals of the ultimate guide.
- Create a clear structure.
Take the initiative and write an outline that includes all of the major points you want the writer to talk about. This makes sure all of the gaps you identified in other pieces of content get covered.
- Include keyword research.
If improved rankings are one of your main goals, then highlight the keywords you’re aiming to rank for.
- Note or record your expertise.
Where appropriate, make notes for the writer to help guide them. Alternatively, you can record yourself talking about the topic.
- Provide additional resources.
Highlight a handful of top-quality resources your writer can turn to for inspiration.
- Set a deadline
Expect an ultimate guide to take a fair bit longer to write than a standard blog post.
Ultimate Guide Frequently Asked Questions
How long should my ultimate guide be?
There isn’t a defined length for an ultimate guide, but most are at least 3,000 words in length.
How do I distribute my ultimate guide to my target audience?
You can use social media and email to get your ultimate guide in front of your target audience.
Should I create more than one ultimate guide for my website?
Absolutely. Ultimate guides offer a lot of value in terms of SEO and building your authority, so you should write as many as you can.
At what part of the funnel are ultimate guides most useful?
Ultimate guides can be used at any part of your funnel, but they’ll be most useful towards the top. They are great at attracting users into your funnel and converting them to email subscribers.
{
“@context”: “https://schema.org”,
“@type”: “FAQPage”,
“mainEntity”: [
{
“@type”: “Question”,
“name”: “How long should my ultimate guide be?”,
“acceptedAnswer”: {
“@type”: “Answer”,
“text”: “There isn’t a defined length for an ultimate guide, but most are at least 3,000 words in length.”
}
}
, {
“@type”: “Question”,
“name”: “How do I distribute my ultimate guide to my target audience?”,
“acceptedAnswer”: {
“@type”: “Answer”,
“text”: “You can use social media and email to get your ultimate guide in front of your target audience.”
}
}
, {
“@type”: “Question”,
“name”: “Should I create more than one ultimate guide for my website?”,
“acceptedAnswer”: {
“@type”: “Answer”,
“text”: “Absolutely. Ultimate guides offer a lot of value in terms of SEO and building your authority, so you should write as many as you can.”
}
}
, {
“@type”: “Question”,
“name”: “At what part of the funnel are ultimate guides most useful?”,
“acceptedAnswer”: {
“@type”: “Answer”,
“text”: “Ultimate guides can be used at any part of your funnel, but they’ll be most useful towards the top. They are great at attracting users into your funnel and converting them to email subscribers.”
}
}
]
}
How to Create Ultimate Guides Conclusion
Ultimate guides are an incredibly valuable marketing resource. I’ve used them to generate huge levels of traffic, build my reputation as an authority in the industry, and improve my site’s SEO.
Follow the advice I’ve given above, and you’ll be on your way to achieving your content goals while sharing valuable insights about your chosen topic.
Have you created an ultimate guide on your website or blog? What other tips would you add to making your ultimate guide a success?
How to Create a Facebook Contest that Grows Engagement and Audience
With close to 3 billion active monthly users, Facebook is the biggest social media platform on the planet. That makes it a valuable channel for driving your business goals. After all, the key to successful marketing is to define your target audience and meet them on their favorite platforms.
While not everyone is on Facebook, one thing is certain, it still is the world’s most popular platform. Whether you’re in B2B or B2C, you definitely should leverage Facebook’s multitude of features to market your brand and products. One Facebook marketing feature in particular that yields a good return is the Facebook contest feature.
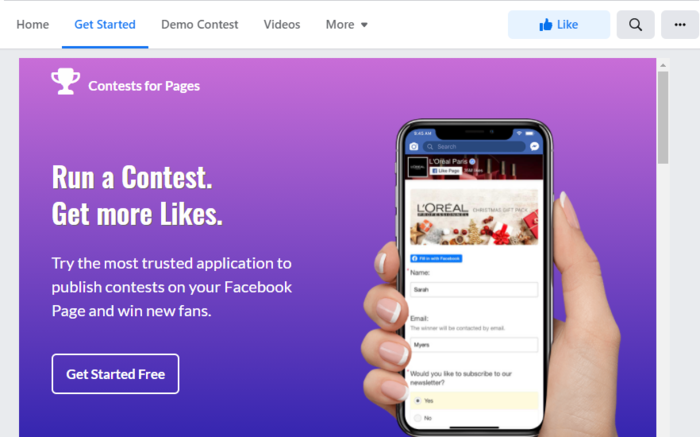
Why Should You Create a Facebook Contest?
Facebook contests have been around for some time, but they’re still one of the best methods to grow an active audience and build meaningful engagement with your brand. Here are a few reasons why you should consider creating a Facebook contest:
1. Extend Your Reach and Increase Followers
One of the most significant benefits you’ll reap from running Facebook contests is that they’re an excellent way of extending your reach. Creating a contest your target audience engages with results in your contest and brand being shown to their networks. With the extended reach comes the added benefit of you gaining more followers.
2. Increase Brand Awareness
Another reason you must incorporate Facebook contests in your social media marketing strategy is that they are a great way to increase brand awareness. Whether you promote your Facebook contest organically, use paid promotion, or both it’s inevitable that you’ll reach people you couldn’t have otherwise reached. As a result, more people will become aware of your brand and product.
3. Get More Engagement
Facebook contests get more engagement than average posts for the simple reason that they’re a much-loved form of interactive content. People prefer interactive content over static content with 66 percent of marketers citing increased engagement rates after employing interactive content in their campaigns.
4. Provides a Data Collection Avenue
Effective marketing campaigns are data-driven. That’s because data enables you to gain a better understanding of your target audience, allowing you to create more personalized campaigns.
Running a Facebook contest is helpful in this regard as it provides an opportunity to collect data about your audience. Whether the contest is in the form of a quiz or simply an engagement-based contest, you still come out with a goldmine of data at the end of the day.
With these and more benefits, there’s no reason why you should ignore Facebook contests. They’re an excellent way to drive engagement and build an active audience for your business. Of course, they’re also an excellent way to raise brand and product awareness and thus drive sales.
How to Create an Effective Facebook Contest
Now that you’ve seen the value of Facebook contests, let’s quickly dive into how to create an effective one. Not all Facebook contests are created equal. Knowing how to create one that your audience will participate in is essential to the success of your campaign. Here are a few pointers to help you:
1. Determine Your Goals and How to Measure Results
The first step to creating an effective Facebook contest is to define your goals for the contest.
What do you want to achieve with your Facebook contest?
You can achieve a lot of business and marketing goals with a contest, a few of which can include:
- market research
- brand awareness
- data collection
- crowdsourcing product development
- launch a new product
- build an email list
- drive sales
- gather user-generated content
Determining the goal of your contest is essential as it will help you design one that’s best suited to help you succeed. It also helps you know which key performance indicators (KPIs) you should use to measure your contest’s success. Examples of KPIs you can use include:
- number of participants
- likes
- shares
- new followers gained
- number of clicks on your contest
- email sign-ups
- reach
With your goals and KPIs determined, you’re ready to start designing your Facebook contest.
2. Select the Type of Contest You Want to Run
You’ve determined the reason for running a Facebook contest. Now the next step is to choose the type of Facebook contest that will help you achieve said goals. There are three main types of contests you can run on Facebook:
Giveaways
These are the simplest Facebook contest type and, as the name suggests, involve giving away a prize to the lucky participant(s) who enter the contest. Most giveaway contests require a participant to engage with a post (like, comment, or share) to enter.
Photo Contests
Photo contests are an excellent way of driving engagement and collecting user-generated content for your other marketing efforts. These usually involve picking a theme for your contest and asking your audience to post photos (preferably while using your product) in line with that theme.
Referral Promotions
Referral promotions require a bit more work to design and manage but they’re one of the best ways to generate leads for your business. Participants have to share (or refer) your contest with a friend or people in their network to enter the contest.
An effective Facebook contest aligns your marketing goals with the right type of content. To aid your decision, you must understand your audience and the type of contests they prefer.
3. Determine the Contest Rules and How You’ll Run It
Every contest needs rules to govern how participants enter. As you design your Facebook contest, you must pay careful attention to how you determine yours.

For example:
- What actions must participants take to enter?
- Will you allow multiple entries?
- Is the contest open to all countries?
- What can constitute grounds for disqualification?
- Are there any age restrictions?
Remember, you’re not running a contest just for the fun of it. You’re running your contest to benefit your business. As such, the rules you set for your contest must help you with that. They must be aligned with your goals.
The rules of your Facebook contest will also determine how you will run it and the kind of data you will collect. Examples of how you could run your contest include:
- Designing a funnel that requires participants to submit their email addresses or other data.
- Using a Facebook messenger bot to lead users to an opt-in page where they perform the required action to enter the contest.
- Using engagement as a means to declare their participation in your contest. This could be anything from tagging friends to following your account and everything in between.
Besides setting rules for entering the contest, you must also determine how the winning participants will redeem their prize.
4. Choose the Right Prize
One of the fundamental pillars of an effective Facebook contest is the prize you’re offering. Hallmarks of the perfect prize include:
- Personalized. Your offer must be something that your target audience is interested in. It must not appeal to people who aren’t your target audience.
- Product-related. To ensure your contest helps boost your business, your prize must be tied to your core business. For example, if you’re a dentist, offering cutlery as a prize won’t help you reach your ideal customer.
- Pain point specific. Understand your ideal customer’s pain points and tailor an offer designed to address one of them. Doing so will help direct participants to your other product offerings.
Choosing the right prize for your contest is crucial to ensuring higher engagement rates. It also ensures most participants fit your ideal customer profile (ICP).
5. Design Your Facebook Contest Page
With so much content being published on Facebook, it can be easy for people to miss your contest as they scroll through their feeds.
To improve the chances of your contest being seen, your design must be optimized for visibility. Here are a few tips to help you do that:
Write an Attention-grabbing Headline
The headline is the first thing users will see. Make it stand out by using descriptive language. Also, ensure it paints a picture of the benefits of winning the prize.
Invest In Professional Images
Invest in professional eye-catching images. Images play a great role in stopping users from scrolling. They’re also helpful in quickly conveying your message.
Write a Brief but Detailed Description
Give users all the information they need to get excited about the contest. Your description must also explain how to enter the contest. The best way to format your description is to use bullet points.
Use a Simple Form
Make it as easy as possible for your interested parties to enter your contest. If you’re using forms, make them simple—don’t ask for too much information. Complicating the sign-up form will negatively impact your conversions. The only exception to this rule is if you’re offering a huge prize that’s worth the effort.
Design a Prominent Call-to-action
Your call-to-action (CTA) must not only be prominent but it must be clear what the next step to be taken is.
Besides these best practices for designing an effective Facebook contest page, you can also consider other optimization options. A typical example would be to use a countdown timer to add urgency.
6. Promote Your Contest
Your Facebook contest’s main goal is to grow your audience and increase engagement with your brand. To do that, it must reach as wide of an audience as possible.
That’s why part of your Facebook contest creation process must include a promotion strategy.
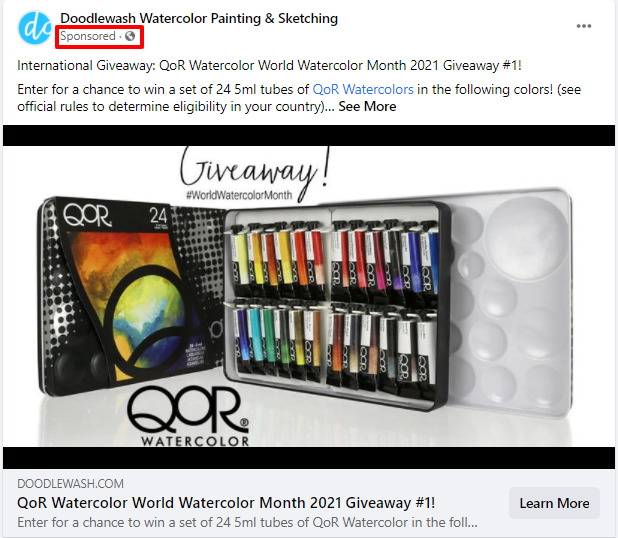
A few Facebook content promotion tips you can employ include:
- Paid ads: Organic reach can only get you so far. To reach a wider audience, leverage Facebook ads to promote your contest. You can also use retargeting to advertise your contest to people who’ve viewed your content.
- Share it with your email list: Promote your Facebook contest to your email list to ensure maximum participation. It also helps you keep your subscribers engaged.
- Spread the word on other social media channels: Leverage your other social media platforms to spread the word about your contest.
With your contest in front of the right audience, you can expect high participation rates.
7. Choose and Announce the Winner
All good things come to an end, including your exciting Facebook contest. You need to wrap it up by picking and announcing the winner. You have two options when it comes to picking a winner:
- Randomly picking a name: Randomly picking a name is the best way as it’s impartial. Use tools like Random Name Picker or Comment Picker to make it easy.
- Selecting the best candidate: This works best if you set specific criteria for your contest. However, make sure to explain how you came up with the winner and why.
Once you’ve picked your winner, you must announce them on your Facebook business page and other channels you promoted the contest on. Bonus points if you can make it a Facebook Live event.
8. Follow Up After the Contest
Picking the winner of your Facebook contest is not the end game. The end game is growing your business. That’s why you must have a follow-up strategy. One of the best ways to do this is to send out an email to participants offering them a discount on your products as an appreciation for participating in your contest. Nurture a relationship with the people who participate in your contest and you’ll be able to turn them into loyal customers.
Facebook Contest: FAQs
People love personalized content. To increase participation, ensure you know your target audience and create a contest tailored to them.
Always set goals for your contests and determine the KPIs you’ll use to gauge the effectiveness of your contests.
Executed well, a Facebook contest is a cost-effective way to achieve many business and marketing goals. Yes, they’re definitely worth it.
Promoting your Facebook contest is a critical part of running a successful contest. Make sure to promote it on all your other channels and platforms.
Facebook Contest Conclusion
Looking for interactive content that will help you grow your audience and drive engagement with your brand?
Then you must consider running a Facebook contest. With added benefits like lead generation, a boost in sales, and much more, including them in your online marketing strategy is a no-brainer.
Executed well, your Facebook contest is an excellent way of getting ahead of your competition.
What has been your experience with Facebook contests as a marketing strategy?
How to Create, Launch, and Grow a Membership Site and Community
If you’ve found yourself reading this blog, you’re probably interested in the idea of a membership site. These sites are not to be confused with paid subscriptions, which refer exclusively to a financial model that binds users to its pages.
Netflix, for example, is the classic example of a subscription website: a platform that users gain access to via a recurring fee. On the other hand, membership sites refer to platforms that offer gated content only accessible through, you guessed it, membership.
These sites can be paid, free, or operate on a tiered basis, depending on the site’s intent as a whole.
In this blog post, we’ll break down the benefits of membership sites, share how to build out gated content for members’ eyes only, and share our top three favorite membership sites.
Why Should You Create a Membership Site
There are many benefits to creating a membership site, including building your community and monetizing your content.
Below, we break down the three biggest benefits of building a membership site structure.
1. Establish Yourself as an Expert
Everyone wants to be considered an expert in their field. At times, however, achieving this can be much easier said than done.
One surefire way to establish yourself as an expert is to offer invaluable content that fills holes in your industry’s general knowledge base. These assets can come in the form of white papers, infographics, blogs, podcasts, and any other form of consumable content.
When these content assets are available via a membership-only relationship, you not only drive demand for your content, but you also firmly establish yourself as an industry expert, given consumers’ willingness to engage with your gated site.
2. Foster Your Community
When you commit to building a membership site, you’re not just building a transactional environment; you’re building a community.
Your audience has agreed to participate in your membership site given their shared interest in your product or topic.
Foster this community by providing them with unique offerings and benefits, as well as giving them a place to interact with one another. Whether your membership site is paid or free, you have a unique group of active members with shared interests ready to engage.
This community-building also serves you in the long run, as you’ve created a base of followers with whom you’ve built trust and goodwill, making them that much more likely to interact with your products and offerings in the future.
3. Increase Your Overall Value
With each new member and content asset, your website becomes increasingly valuable. The more content you create, the more you have to offer to prospective community members.
While traditional digital models will operate on one-off sales of products or services, your membership site has the potential to acquire cumulative value that increases over time.
How to Create a Membership Site
If we’ve convinced you of the benefits of the membership site, the next step is breaking down how to actually build one. This section will discuss the three steps for building a membership site that keeps users coming back for more.
1. Establish Your Membership Model
Before delving into the actual work of building out a membership site, you need to establish your membership model. In this step, you must first decide if you’re charging your members. If you are, you must determine how much and at what frequency.
This assessment of pricing should include researching how much competitors are charging and what they are offering. Sometimes, forgoing the fee may be worth the lost revenue as it provides a slew of qualified leads.
After establishing pricing, look to your buyer personas to establish what would drive value for your consumers. These value drivers don’t necessarily have to fall into the realm of content; they can include offerings like free shipping or points for purchase. Regardless of which route you choose, ensure that your offerings align with what your audience finds valuable.
2. Create Members-Only Content
If you’re offering exclusive content through any model, it better be just that: exclusive. When potential members hand over a fee or offer up their personal information, they better receive something of value in return.
Here, revisit your buyer personas to determine what content assets need to be created to ensure that your members find value in your site.
3. Choose the Right Membership Platform for Your Needs
Now that you’ve established your membership model and built out your members-only content, it’s time to find the right platform to make your site a success. If you’ve built your existing site on WordPress or Squarespace, there are plug-ins that can make this step super easy.
If you’re not using these platforms, you can choose a third-party provider to enable the membership site for you.
Regardless of which platform you use, your membership site should include the following features:
- Membership management: This function allows you to create different tiers of memberships and add and manage members.
- User registration and member profiles: This refers to front-end functionality that allows users to sign up and access their profiles.
- Content restriction: We’ve talked a lot about gated, so you want to be sure that your site has the functionality to hide those valuable assets from non-member audiences.
3 Examples of Successful Membership Sites
While there are a lot of membership sites out there, we’ve broken down a few examples that really hit the mark. These include both recognizable names and lesser-known membership sites that provide value to their respective audiences.
1. Scott’s Cheap Flights
Everyone wants to spend less to go further–and that’s what this membership site lets members do. With curated flight offers, this membership site enables users to score flights on the cheap, opening their horizons and closing their wallets.

Offering members up to 90% off flights, the big takeaway from this membership site is the customizable offerings. By providing each member with flights that align with their respective travel interests, Scott’s Cheap Flights creates a personalized experience for members they can’t help but return to.
2. International Gem Society
If agate doesn’t leave your jaw agape, this site may not be for you. If rocks rock your socks, this membership site should be bookmarked in your browser. Members subscribe to a paid model for certification courses, articles, and a thriving forum.

Here, too, much can be learned about growing a membership site, particularly within a niche market. By offering their members content that speaks specifically toward the needs and interests of a specific group, the International Gem Society keeps their members coming back for more.
3. Food Blogger Pro
This membership site is for all the would-be food bloggers out there, as the name suggests. Powered by the expertise of two successful food bloggers, this membership site offers users a forum, as well as course content.

If you’re considering building a membership site, take notes on this forum. Lively and interactive, a community truly is formed on the discussion page of this membership site.
Membership Site FAQs
Determining whether your membership site should be paid or free depends on your goals. If you aim to monetize your content, you should subscribe to a paid model. However, if you’re simply attempting to gain credibility and establish yourself as an expert and thought leader in your field, a free subscription may be right for you.
The content you build on your membership site should be specific to your audience. Provide content that of value to your target audience, offering them assets they can’t live without.
These offerings can include infographics, white papers, blogs, podcasts, and other assets that fill holes in your industry’s knowledge base or offer utility to your members. Again, constantly return to the question: What will my members truly value?
Building your membership site doesn’t mean you have to be an expert coder. Sites like WordPress and Squarespace offer plug-ins that can help you migrate your existing site to a membership model. If your platform doesn’t offer plug-ins to streamline this process, consider hiring a developer to help you include a members-only section of your site.
The benefits of membership include creating income, building a community, establishing yourself as an expert, and monetizing your content.
Membership Site Conclusion
Whether you’re looking to monetize your content or simply solidify yourself as an expert in your field, creating a membership site can add inherent value to your brand.
For a truly successful membership site, however, you must have a clear understanding of your audience. By establishing who you’re trying to reach, you can better identify what they’re trying to reach by subscribing to your membership site.
From there, build out a reserve of content that you can serve up to members at a predetermined cadence to ensure that your offerings live up to their expectations. By setting a cadence, you establish a reliable exchange, further building trust in your site and ideally growing your base.
What’s the best example of a member site you’ve seen?
How to Create an Editorial Calendar That Will Streamline Your Content Strategy
According to Bill Gates, “Content is King.” That was true in 1996, and it continues to be true today.
As consumers become savvier, content continues to play a vital role in educating and converting consumers.
However, not all marketers understand how to implement a content strategy correctly. When you don’t start with the basics, you could be making content production more complicated than necessary.
To be successful, your content plan must be actionable, and you need to publish content consistently.
That’s where an editorial calendar comes in.
We’re going to cover the basics, including how to create and manage your editorial calendar, and how it can help your content strategy grow
4 Reasons to Use an Editorial Calendar
An editorial calendar enables content publishers to plan, create, publish, and promote their content in an organized manner. Many bloggers and businesses use editorial or content calendars to streamline content production.
In many ways, an editorial calendar is a lifesaver for creatives and business owners. Whether you’re a blogger, freelance writer, business owner, or creative director at a marketing firm, an editorial content calendar can help you stay on track and keep you sane—while ensuring a consistent flow of content.
Others use an editorial calendar to improve focus, because an organized approach can also limit writer’s block and keep content evergreen.
There are other ways you can benefit from an editorial content calendar, including:
1. Better Organization and Delegation
With an editorial calendar, you can see articles that need writing at a glance. From there, you can delegate the articles to your writing team, ready for them to get to work. No more scrambling to send writers topics at the last minute or wondering if you’ll even get around to writing this month.
With a calendar, it’s all right in front of you.
Ultimately, this level of organization saves time, keeps the content coming, and ensures every member of your content creation team knows what they’re doing.
2. Improved Planning
The better you plan your articles, the better the writing tends to be. When you know what you want to write, you don’t waste time with last-minute research or trying to find the sources you need to support your article.
In fact, some consider planning to be more important than the content production itself. Planning content is essential for:
- Creating the kind of content most suited to your audience.
- Writing the in-depth content your audience wants—and needs
- Publishing exactly when and where your customers hang out.
3. Helps Achieve Your Goals
Your editorial calendar is part of your content strategy. Ideally, you’ve developed your content strategy around the goals you’re trying to achieve with your product, your blog, or your company overall.
An editorial content calendar assists in goal achievement by:
- Allowing you to meet critical milestones.
- Helping with promotional activities.
- Reaching new leads and making fresh conversions.
- Getting more newsletter sign-ups.
- Building awareness of your brand.
Whatever your goals are for your business, your editorial calendar has a vital role in allowing you to achieve them.
4. Sticking to Deadlines
According to Mark Twain, “deadlines are the greatest source of inspiration.”
However, that doesn’t mean you want to do a rush job.
To avoid rushing content creation, every team member needs to be clear on their deadlines to keep reaching your goals and your audience engaged.
Further, keeping up with these deadlines is especially important when you’re publishing new content that’s a part of your business strategy. For example, if you are publishing blogs to support a new launch or annual sale.
How to Create an Editorial Calendar
Don’t let the thought of creating an editorial calendar stress you out—I promise it’s not that complicated once you create a plan. This next section takes you through how to create an effective calendar, step-by-step. This is just an outline, so feel free to adjust these steps to meet the needs of your business.
1. Determine Which Tools to Use
Your first step is deciding which tools to use. This varies from team to team, and content managers may need a combination of tools for best results.
If you want free options for getting started, Google Docs, Excel, or Trello are popular choices. For paid tools, there are several worth considering, including:
- Airtable
- Asana
- Monday
- BrightPod
Airtable, Asana, and HubSpot offer free content calendar templates to get you started, and there are plenty of others available, too.
Whichever tool you use, make sure it meets everyone’s needs. As Buffer’s editorial director, Ash Read, told HubSpot:
“[your] editorial calendar should be a resource for your whole team, not just content creators.”
2. Create a Content Backlog
Next, you need to create a content backlog. This is just a list of content ideas for easy viewing and lets you track your ideas for posts.
You could use Google Sheets or Excel for this, or one of the free templates mentioned, like Asana.
Whichever you go with, your chosen tool should allow you to create a clear, organized list. Just remember, it’s OK to stray from your list. Not every idea will end up as an entire post, and sometimes changing your content strategy is essential for keeping up with new trends or thinking of a new angle.
Create your sheet, then start adding a few headings like:
- title
- assigned author
- project status
- publication date
Other headings you could use are:
- Special dates and anniversaries.
- Themes and distribution channels.
- Trending topics/new launches relevant to your niche.
- Seasonal content and key sales dates. For instance, Black Friday, where you may want to ramp up content production.
3. Develop Your Content Strategy
Don’t overthink your content strategy. There’s a simple way of making sure your content strategy covers all the bases, and as long as you keep these parts in mind, you won’t go wrong.
First, outline steps such as how much content you want to produce a month, what topics you want to cover, and your ideal customers.
Then add strategic steps, such as managing your existing content and goal tracking. These might include:
- Define your goals: For example, growing your mailing list or attracting new customers.
- Understand your customers: Which social media sites do your audience use? Which content types do they prefer/respond to? What are their pain points, and how can your products/services solve them?
- Analyze your competition: You can use a tool like Ubersuggest, which has a free and paid version to see which keywords competitors are targeting.
- Positioning: What makes your business unique, and how do you stand out in your marketplace? You could do this in a few ways, like specializing in a targeted niche or telling your brand’s story. Ask yourself how the content you’re creating can achieve this.
- Estimate your budget: How much is your content strategy going to cost you, and how can you maximize your ROI?
- Measure your KPIs so you know your content is getting results: For example, if you’re aiming to build brand awareness, an increase in shares and views will show you’re heading in the right direction.
4. Schedule the First Month
Many of us produce content at the last minute or create it whenever we have spare time. If you’re looking for a less stressful (and more effective) approach, schedule your content in advance.
A month is usually enough, but you could schedule up to six weeks. You can use Google Calendar for this.
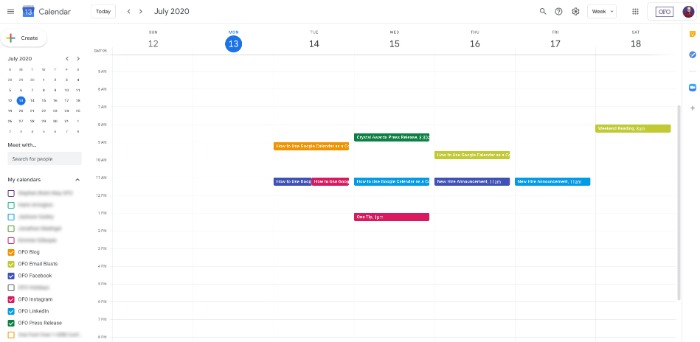
Add each step of your process, and make sure to give yourself plenty of time. So, you might create a due date on the first Monday to write your outlines, then schedule one article a week to be written, two days for editing, set a publish date, then schedule it into your social media sharing calendar.
The process will vary based on how much content you produce and how many people are on your team, but I strongly recommend breaking each piece of content into more manageable steps.
5. Move Articles Into Production
When you’re in the full swing of producing content, it’s easy to let pieces slip through the cracks, especially if you have multiple people working on the project. Creating a Trello account can keep you on track.
The first step in using your Trello account for content production is to decide what stages each article will need to go through.
What you need is up to you, but here are some suggestions for your Trello cards:
- assign to writer
- writing in progress
- ready for edits
- ready for uploading and scheduling
Alternatively, you could make it more complex and add additional steps like:
- final edits
- SEO audits
- published
Then your Trello cards might look something like this:

6. Build Your Content Queue
If you’re just starting with an editorial calendar, you need to get a few articles ready for publication.
Choose a schedule that suits you, but a forward-looking schedule of 4-6 weeks works well for most teams.
That sounds like a lot of work, but you can approach the task in two ways. First, you could spend a few weeks writing content until you have a volume of work to publish. However, this method isn’t suitable for everyone, unless you’ve got a team of writers to help you.
Another way is to spend a few months creating extra content every day, which is doable for most content producers.
7. Continually Optimize Your Process
So far, we’ve covered how to get your content production off the ground. However, you can’t set it and forget it. Over time, you might find there are bottlenecks in your process or that certain tools don’t fit your needs. Make sure to check in with your team regularly to ensure the editorial process you’ve created is working for everyone.
Common areas to review include:
- your schedule and the tools you’re using
- the volume of content you’re storing
- the time between stages
- the metrics you track
Over time, you’ll get a better understanding of whether the tools you’re working at are suitable for your team and whether the amount of articles you’re publishing is helping your business grow.
FAQs About Editorial Calendars
An organized approach to content production reduces time and helps you publish better quality content. From ideation and writing to publishing and promotion, an editorial calendar helps streamline every part of the process.
Not unless you want to. Free tools like Trello and Google Docs are fine, but there are also paid options like Asana available.
Not everyone’s calendar looks the same, but most marketers include titles, publication dates, and the article writer’s name. Once you’ve added in the most obvious headings, write in the titles that work for your specific needs.
These terms are often used interchangeably. However, an editorial calendar generally outlines each step of the process, while a content calendar usually covers one aspect—such as when posts are published or shared to social media.
Summary of Editorial Calendar Guide
An editorial content calendar is a must-have for any content marketer or small business looking to make the most of content production. It helps you stay focused on your goals and produce high-quality content consistently.
Although it sounds like a lot of work, setting up a calendar isn’t difficult and allows you to seamlessly produce evergreen content while making the most of seasonal trends.
How do you use an editorial calendar? Tell us below.
How to Create the Perfect Business Slogan
Have a favorite slogan?
That catchphrase that just sticks in your head like a catchy tune. Sometimes it even has a little jingle or rhyming structure that adds some flair. You know it works because it stays with you. You remember it, and you remember the company it stands for.
Does your brand need a slogan? Probably. Here’s why.
What Is the Purpose of a Business Slogan?
A good slogan is catchy and bounces around your head like an earworm. However, a good business slogan is more than just a catchphrase.
It’s a rallying point for your brand. It envelops everything you stand for and everything you offer to the public.
It’s a battle cry, of sorts.
In fact, the etymology of the word slogan reflects just that. The term comes from a Gaelic Scottish term used as a battle cry. In the early 1700s, the term slogan described catchphrases used by political or other groups.
These days slogans are more important than ever as we are awash in visual and audio media, from TV and radio to the internet and digital media.
A great slogan cleverly sums up what you do, inspires engagement with your audience, and sticks with them until they need your product or service.
Your slogan can be written and spoken after your brand name, to help people remember what you’re about. You might place it just after or under your name or logo on your website, social media, marketing materials, or use it in ads. This helps your slogan become synonymous with your brand name.
Why Should Your Business Have a Slogan?
Is it worth taking the time to create a slogan for your business? In most cases, yes. Getting to the heart of your business and finding a phrase that wraps everything you stand for in an unforgettable way can become a powerful brand asset.
A great slogan ranks up there with your business name, logo, and web design.
In many ways, it can bolster your brand marketing strategy. Here’s why.
- A slogan can give you a memorable identity.
- A slogan provides a foundation for a creative marketing campaign.
- A slogan speaks to values to rally around.
- A slogan helps you take a stand.
- A slogan helps customers remember you.
These are just a few of the many benefits of creating a slogan for your business. If you’re convinced, it’s time to get started on putting your slogan together.
How to Create a Business Slogan
It’s a tall order to create a short and simple slogan that absolutely hits it out of the park. The best slogans are short, unusual, and simple to pronounce.
It’s not easy, but it’s worth the exercise to come up with the right slogan.
Consider What Makes Your Brand Special
Before you can start to create a slogan, you have to think about what your business is offering the world. A few things to ask include:
- What are you selling, and why does it matter?
- What values is your company built on?
- What do you stand for?
- What change do you bring to your customers?
- What change are you trying to bring the world?
A few places you can look for inspiration include your:
- mission statement
- vision and values statements
- company history
- target market and their values
- brand assets like infographics, webinars, or e-books.
Determine Your Goals
When it comes to marketing efforts, you should always start with your sales goals. What are you trying to accomplish? What are your plans for the future, and how do you get there?
It’s easy to get off track here if you don’t stay focused. Don’t just focus on the number of sales you want to make; think about how you want customers to feel about your brand and what solution you really deliver.
Consider this—Goodyear sells tires, right? However, when consumers buy tires, they aren’t concerned with what type of rubber or the years of research the company put into developing the proper tread. Consumers want tires that will keep their families safe; that’s the real purpose of the brand.
Keep your guiding documents at the forefront and let them drive your journey toward your slogan. It’s critical to stay on-brand as you are creating your slogan.
Think about what you need this slogan to do for your brand:
- What do you want people to know about your brand?
- What products or services should be the focus?
- What values and visions do you want to communicate?
- What solution does your company really deliver?
Let those answers guide you to the right business slogan.
Start Writing
Whether you decide to hire an outsourced marketing consultant or keep it in-house and write it for yourself, the first step is to start developing ideas.
Just start writing. How many ideas can you come up with?
Write them all down. Don’t limit yourself or do any editing yet. Now is the time to just let the ideas flow. Let one idea inspire another. Dare to be a little off the wall. Don’t stop until you run out of ideas.
When you start petering out, start thinking about your brand name and try out some of the ideas after it. How do they sound together?
Imagine a radio or television commercial. Describe your services or products and think about how those slogan ideas sound at the end of that description.
As you test the slogans out loud, you may start developing more ideas. Write them down! Don’t stop to edit. Just keep adding to the list.
Dare to Be Original
It may be tempting to go out and listen to other slogans, but you probably already have enough of those rolling around in your head.
We hear so many slogans that our brains are already primed to know what sounds good and what doesn’t.
Listening or reading a bunch of slogans while creating your own could do two things detrimental to the process:
- They could cause you to accidentally steal the structure or concepts of other slogans you love. You definitely don’t want to sound like everyone else.
- Getting into the competition mode can stifle your creativity. As you read others’ slogans, especially ones you consider successful, you might start to judge your ideas. Great ideas develop organically on their own; don’t let competition stifle them.
Make It Timeless
Slogans need to stand the test of time. You want people to associate your brand name with your slogan, which means it has to stick around for a long time so they can hear it many times.
This means avoiding anything too contemporary or trendy. Some things to avoid could include:
- playing off a popular series or song title
- building off a political campaign slogan
- reflecting a current pop culture reference
- using “new” slang
To create a timeless slogan, use words and phrases that are universally understood, at least by most speakers of your language.
Try to keep it shorter and avoid any complex phrases or words.
Keep it simple, and a bit straightforward, to help make sure it stands the test of time.
Appeal to Your Audience
As with everything in marketing, you need to consider your target market when you’re putting together a slogan.
How do they talk? Are you using language and syntax that is natural to your audience?
If your target market uses a certain register of English, you can lean into using that style of language. Remember what we talked about above, though.
You don’t need to stylize your slogan to match a certain trendy or slangy way of talking, but you can ensure you use language your target market can relate to.
Another aspect to keep in mind as you shape your slogan is what is important to your target audience. What do they want from your brand, or your competition? What’s important to them?
Think about what they are actually getting from your brand, but dig a little deeper. What are their aspirations? What do they envision their life to be with your brand?
Speak to those needs, rather than just your benefits.
Pare Down Your Ideas
Time to start paring down your ideas. Don’t be afraid to be a bit brutal. It can be hard to nix your favorites, but use the ideas above to weed out slogans that don’t work.
Which ones are too trendy or contemporary? Let them go.
Which ones are too much about your brand, and not enough about your target audience? Take them out.
How’s your list looking now? Do you still have too many ideas? If your list is still too long, here are a few more filters to take out the ones that won’t work as well.
- Which ones are too long?
- Which ones aren’t very memorable?
- Which ones sound too much like someone else’s?
- Which ones do you just not love?
Pare them down to a few that will really work. It’s okay to still have a few great ones. How do you decide what to do next? Let’s look at the last step.
A/B Test Your Top Ideas
Do you still have two ideas left to consider? If you aren’t sure which is “the one,” it’s time for an A/B test.
How do you do that? Start by asking friends, colleagues, or business associates. You might also consider using a focus group.
Whichever path you choose, make sure you present each slogan in the same format. For example:
- Create a branded logo with each of your slogan ideas.
- Design a newsletter header with each slogan idea.
- Record a demo commercial with the slogan ideas at the end.
Now share with your audience. Which one do they respond best to? Is there a clear winner?
If not, consider the feedback they share. Think about the criteria listed above. Did one not appeal to them? Was one not as timeless? Or was it too confusing? Keep in mind that simple is usually best. You can also use A/B testing in paid ads to see which slogan draws in the most traffic or sales.
Best Business Slogan Examples
Let’s get down to the specifics and look at some slogans that work and analyze why they are so effective.
McDonald’s Slogan

Bah, bah, bah, bah, bum. You’re already singing it.
The “I’m lovin’ it” slogan from McDonald’s comes with its own little jingle, but that’s not the only thing that makes it work. It’s simple, it’s memorable, and it’s aspirational. It speaks to a happy life full of things you love.
Burger King

For decades, Burger King touted a brand that let you live life on your terms. The “Have It Your Way” slogan accomplished speaks about their products and about a greater vision in life. You can have your burger your way, and just maybe, you can have life your way, too.
In-N-Out Slogan
Sometimes simple is best. The In-N-Out slogan is an example of a timeless, simple slogan that speaks directly to what its customers want.
FAQs About Slogans
It’s short, memorable, and speaks to the target audience. Ideally, it should be timeless so it can be used for years to come.
McDonald’s “I’m Lovin’ It” jingle is an example of a catchy slogan.
Burger King’s “Have It Your Way” stood the test of time, by speaking to the burgers and an aspiration. In-N-Out’s “Quality You Can Taste” slogan is simple and holds up over time.
Start with your own business goals in mind, then think about your target audience and what’s important to them.
Creating a Catchy Slogan Conclusion
When it comes to setting yourself apart in the market, branding is crucial. From your visuals to your voice, every component needs to speak to a common goal of who you are and what you’re about.
More importantly, they need to speak to what your target market is looking for. Your slogan is another piece in this puzzle, giving your marketing collateral and campaign another element to work with. Get creative, but stay on course, and create the perfect business slogan for your brand.
What’s your favorite slogan?
How to Create a Free Google Website For Your Business
A web presence is essential for getting found online, especially these days. According to Statista.com, nearly a third of consumers in the United States look online for a local business every day. It’s simple: websites are essential for attracting new customers.
A website proves invaluable in other ways, too, like showcasing your products and increasing leads. However, your website doesn’t need to cost a fortune and include the latest features. If you’re a small business that just wants to let customers know who you are and what you do, a free Google website may be just what you’re looking for.
What is Google’s Free Website Builder?
Google’s free website builder is part of Google My Business and helps customers discover you online.
When creating your website, Google takes the information in your GMB business profile and uses it for the building blocks of your website. Aside from some customization, you’re pretty much good to go from there.
Although there’s no cost, free Google websites are professional-looking and offer a selection of contemporary themes.
Google’s website builder is suitable for everyone, even for beginners. There’s no need for technical expertise with a free Google website and no worries regarding extensive backups.
Additional benefits with a free Google website are:
- You don’t need to rely on social media: Not every potential customer is on social media, and many may not be on the platforms you like best. Having a website of your own, where people can Google your name or what you sell and find your information without signing in to Facebook or Twitter, can bring in those customers.
- Ease of use: One of the main benefits of a free Google website is its simplicity, and it delivers great-looking websites. For instance, even the free version of WordPress can seem overwhelming for the absolute beginner, with menus, pages, sub-menus, etc.
- It provides the essentials: If you’re not looking for the whole e-commerce experience, then a free Google website is all you need for reaching out to a broader audience.
Here are some more reasons why you should use a free Google website for getting online.
Why Should You Build a Website Using Google’s Free Tool?
Only 64 percent of small businesses have websites. Meanwhile, 70 percent of potential customers are more likely to buy from a business with a website.
This means 36 percent of businesses may be missing out on 70 percent of buyers.
Websites make businesses seem more legitimate, particularly if the website looks professional. Google websites, which take almost no time to set up and require minimal maintenance, can look like you spent hours of time and thousands of dollars to make it look great.
If Google’s free website gets you found, why not take advantage of its ease of setup and free features?
Google Website Builder Features
The number one thing that sets Google’s business websites apart from others is that it automatically makes the site for you. You can alter things as you need, but if you have a Google My Business account and select the website option, it automatically populates the information on a site for you using a template you choose.
Don’t let its simplicity fool you. A Google My Business free website offers you plenty in the way of features.
For instance, it provides you with built-in optimization so customers can:
- contact or message you
- place orders
- get quotes for services
- book your services or arrange deliveries
Additionally, a free Google website allows you to “showcase what makes your business special” via:
- images
- stories
- posts
Other features worth mentioning are:
- integration with Google Maps and Calendar
- image carousel and video links
- connection with Google Drive
Besides the above, Google gives you automatic updates, advertising, and it’s mobile-friendly too.
As you can see, a free Google website offers a lot to the new business owner, but how does it compare with others?
Google Website Builder Versus WordPress and Other Similar Tools
The Google website builder one-page format beats many other options in the simplicity stakes.
Additionally, it creates a website with almost no effort on your side, which is where Google’s product stands out from similar tools. It also lets you import images with a few clicks, and you can track analytics, so all in all, it offers you the essentials.
The other main advantage over its rivals is you’re not starting from scratch, and you aren’t making all the decisions yourself.
Although it may seem basic to some, Google gives you a functional, great-looking website, and with some imagination, it delivers impressive results.
For inspiration, look at what Steel Mailbox did with theirs. This Google business website starts with the basics that could be pulled in from their business information (e.g., the directions function).

If you click the “hamburger” in the upper left, you see options the company chose to add, which jump you to different page areas. One cool feature they added was a list of mailbox types with brief definitions of each one. This allows people shopping for mailboxes to understand what type they need without having to dig through Steel Mailbox’s non-Google site.
If a customer clicked on one of those blue links, they would be taken directly to the type of mailbox they’re looking for. If they went through the main site—and you can have both a simple Google business site and a more in-depth one—they would likely have to do more digging to find precisely what they need.
What a great feature for customers on the go.
When it comes to this type of website, perhaps its weakest area is ongoing SEO optimization, but you can use a free or paid-for tool to find keywords and include them in your descriptions and posts.
WordPress
While bloggers, Fortune 500 companies, and small businesses use WordPress to build their websites, it’s actually a content management system.
You’ve two options for getting started. WordPress.com gives you the free version, while WordPress.org offers a paid one.
At the free level, the most significant difference between Google and WordPress is that you can create multiple pages within your site, while Google has a one-page format.
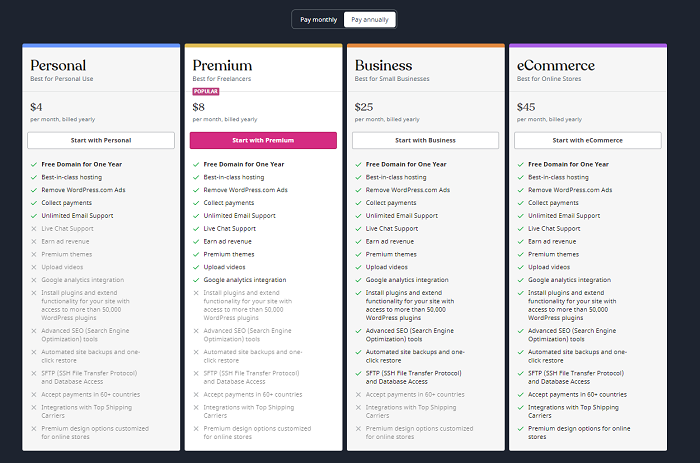
When you get to the paid levels, you can add additional functions.
While WordPress offers many more functions than Google websites, no matter which level you use, you have to start from scratch. Nothing is auto-populated. Nevertheless, there are plenty of tutorials online if you’re just learning, and you won’t need to do any coding.
Wix
Wix is another free website builder, although it also offers premium and e-commerce plans too. Getting started is simple. Just sign up or log in with Facebook or Google to get started.
Like WordPress, the free level is relatively limited in functionality. If you’re willing to pay, though, you can access hundreds of templates, additional types of analytics, and more.
Wix provides 500 different templates, and its drag and drop feature means beginners can use it without needing technical expertise.
Other features include:
- media galleries
- mobile optimization
- unlimited fonts
- a personalized SEO plan
Wix also provides coding for visitor tracking, while its analytics tool shows your sales, traffic, and visitor behavior.
How to Customize Your Free Google Website
After you have set up your Google My Business page (detailed steps are in the next section), you’ll be able to see your site free google website in a standard setup. You can then start customizing from there.
The list nearest your sample site includes things you can do right now, like add photos, text, and themes. The one furthest left includes:
- home
- posts
- reviews
- messages
- products
- insights
Take some time to get to know these options and which each one does.
From the home page, you can also:
- finish your profile by adding opening hours, descriptions, and logos
- update customers on news and events
- create a custom @yourbusiness email address
- launch virtue tours and create adverts
You can see the themes, add pictures with a photo gallery, and edit your site’s categories from the other menu.
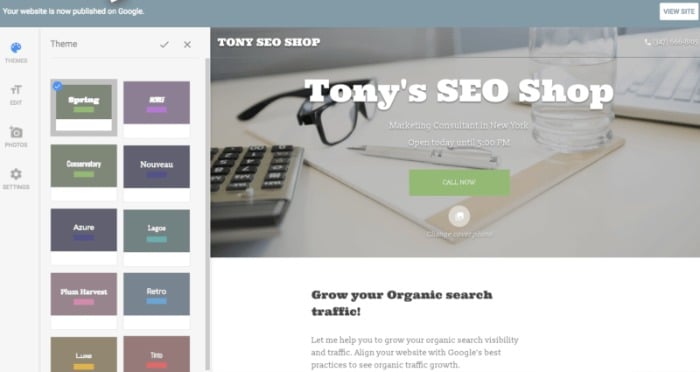
To best set up your site, follow these steps:
- Choose your theme: For customizing, the most obvious starting point is by looking at the themes. There are ten to choose from, all with different colors and styles of text. Click on them one by one to see which theme most closely matches your business’s style and the image you want to convey.
- Add Photos: Click on the top right-hand corner of the header picture, drag your photo, or upload one from your computer. To add other images, click on “photos” on the left-hand side.
- Editing: Edit text by clicking the blue “Edit” button under photos.
- Additional changes: Click “More” to change settings, publish, or for advice on getting customers.
It’s that easy! You’ve finished building your free Google website, and you should be ready to start getting noticed online.
How to Build Your Free Google Website
Before building your website, set up your Google my Business Page, if you haven’t already. Here’s how to do just that.
- Go to Google’s website builder.
You’re looking for the “website” heading. It’s the third one along at the top.
- Add your business name and click the blue arrow.
- Add your business category.
If your service or industry isn’t clear cut, add the class representing your company the best. Click “Next.”
- Select your location preferences.
Now, Google asks if you want your business location to appear on your website. Either select “Yes, I want it to appear on my website” or “No, I prefer not to.” Depending on the type of business, you may need to include an address. Choose the appropriate option and click “Next.”
- Choose if your business provides deliveries or services.
Choose if your business provides deliveries or services. This step is optional.
- Add your region and click “Next.”
- Add your phone number.
- Add your business address details, including country and zip code.
- Verify your accout.
- Do this by clicking on the “Home” page, which you’ll find at the top of the menu on the left, and following the “Verify” link.
You’re ready to start building your free Google website!
Create a Free Google Website FAQs
Unlike its rivals, you’re not starting from scratch, and you aren’t making all the decisions yourself. Although it may seem basic to some, a Google site gives you a functional, great-looking website, and with some imagination, you’ll get impressive results.
Google provides step-by-step instructions.
No, a free Google website creates a professional-looking website with minimal input from you.
While other options offer additional features, Google outshines its competitors regarding simplicity and ease of use.
Conclusion
Having an online presence is a necessity these days. If would-be customers can’t find your website, you’re likely missing out on clients.
However, building a website doesn’t mean spending a lot of money or needing technical expertise. Instead, you can begin by starting with a free Google website and set it up in a few easy steps.
Once you’re online, you can start benefiting from additional leads, more customers, and increased conversions—all the things you need for increasing your business success rate and growing a thriving enterprise.
How has using a free Google Business website affected your business?

